The master's work is afraid
Alim Rizaev is a jack of all trades.
He masters the art of welding and creating useful devices from what others would, in good conscience, scrap. His YouTube channel ARS Pro contains secrets of making a hammer from junk, restoring scrapped axes, and even tips on cleaning frying pans using sandblasting.
We learned from the blogger how to make anything with your own hands - from a vice to a compressor, and why old equipment is a wealth for a homemade worker.
Personal space
Alim Rizaev has a welding diploma, but he has a whole arsenal of professions.
He worked in the energy, gas and water supply industries, was a tiler and plasterer, and was involved in construction and finishing work, but the fire of interest in welding never went out. He maintained passion and interest in various kinds of homemade products.
“For the first time I tried to implement my ideas using welding in the army, I made a simulator,” the blogger recalls. “Upon returning home, I decided to continue this topic.”
Gradually, the master acquired a tool that helped develop the DIY story, but the hero had no personal space for creativity. As soon as Alim’s family acquired a plot of land with a house in Dagestan, work began to boil. I built the workshop with my own hands, from the foundation to the last screw.
Today, Alim Rizaev regularly turns his workspace into a film set. In implementing interesting ideas, the master and blogger are helped not only by experience, but also by equipment - mostly domestically produced.
Kirov grinders, famous since Soviet times, are here side by side with their brothers from Interskol. The famous Russian brand in Alim’s workshop is presented in a variety of ways: drills, jigsaws, hammer drills, screwdrivers.
Circular - with the quality mark: “Made in the USSR”.
The indispensable assistants of the master are SO-7 and ZIL compressors and, of course, a welding machine. “I choose a tool based on the optimal price-quality ratio,” says Alim.
– For now I’m satisfied with Interskol, but in the future I want to work, for example, with Makita. The main selection criteria are sufficient power, durability, low noise and vibration levels.
Even among inexpensive tools you can find something that meets the stated requirements.”
Metal cuts
Alim Rizaev did not plan to conquer the vastness of video hosting, and even today the blogger does not have such a task. “My channel is for my own people: friends, colleagues, like-minded people,” says the hero.
– A little over two years ago I uploaded my first video about a homemade compressor to YouTube and very soon realized that a channel about homemade products was a good idea.
That first video received more than a hundred thousand views, and today YouTube gives me the opportunity to work in the workshop, to do what I really like.”
The geography of Alim Rizaev's interests is very wide. On the ARS Pro channel there is a whole series about all kinds of useful things made of metal - from upgrading old equipment to creating new devices almost from scratch.
According to the blogger, metal provides unlimited possibilities for creativity. Moreover, the best material can be found at city collection points.
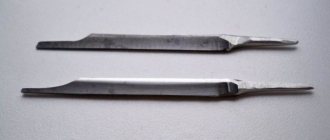
Thus, the collection of DIY works was replenished with restored Soviet axes, a new hammer made of junk metal, and a stand for an angle grinder, assembled from a pedal assembly from a bicycle.
These and many other homemade products of the Dagestan blogger are the author’s. Based on his projects, Alim assembled a vice and clamps, a grinder and a roller barrel for it, a stand for a chain-driven drill and a welding table. “I often watch other channels, something inspires me, I get interesting ideas somewhere.
You can improve, complicate the mechanism or, conversely, make it simpler,” says the master. – If you urgently need a device, but there is nothing on the Internet on this topic, I start experimenting. So, for example, a furnace for melting aluminum appeared - it runs on natural gas, without noise and waste.”
Channel subscribers also liked another author’s idea of replacing the compressor filter with a roller sponge.
Alim admits that not all ideas can be implemented quickly and masterfully. Some projects stretch over several months or even years - for example, creating a metal lathe. “I got excited about this topic, but other ideas appeared and work stopped,” says the blogger. “I hope to get sick with lathe again and still finish what I started.”
A popular blog could become a good source of income for Alim Rizaev, but the possibility of creative freedom for the master is much more important. “Now I only accept orders for metal doors; I refuse other work so as not to leave the workshop for a long time,” the blogger admits. – Time is the most valuable resource; as always, there is not enough of it, but there are a lot of plans.
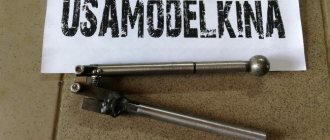
The closest ones are a practical welding holder with a new electrode clamping mechanism and an aluminum roller for the grinder - I will try to create it without the participation of a turner. A powerful clamp and vice are what was promised to subscribers.” By the way, followers often give Alim ideas for new videos.
The master agrees with pleasure: the main thing is that the work is interesting, and the homemade products are useful and in demand.
Sledgehammer training to increase strength
Who would have thought that training with sledgehammers is one of the best ways to increase strength?! But if you have to swing a sledgehammer for any length of time, you will feel pain in your back, shoulders, core, and arms for days, and your forearms will become the size of grapefruits.
However, for training it will be enough for you to devote 5 minutes to the sledgehammer 1-2 times a week. And you will get excellent results. For creating explosive muscle power, nothing compares to this tool.
The benefits of a sledgehammer are that it's fun to swing and hit, it brings out your innate strength and makes you feel like a superhero. In general, no fancy gym with its equipment will give you these sensations.
The impact target is a large tractor tire. The weight of the sledgehammer varies from 2 to 14+ kg.
How to make a handle for a sledgehammer
To understand what a sledgehammer is made of, you just need to see it. This simplest tool has only two main elements: a striker and a handle. Depending on the model, the materials and dimensions of these parts may vary.
Typically, a sledgehammer has a hardened carbon steel head and a straight-grain wood handle (birch, maple, rowan, elm). The weight and dimensions of the tool depend on the area of its application.
For forging metal, 2-4 kg with a length of 50-70 cm is enough, and for dismantling work you can use a 16-kg striker on a handle up to 120 cm in length.
Unlike a hammer, whose handle tapers from the base, a sledgehammer, on the contrary, expands as it approaches the steel part. The best material for making a handle is considered to be one that has high strength and transmits a minimum of vibrations.
Thus, metal or oak handles, although they meet the first requirement, are significantly behind in the second parameter. The least inertial material for the production of handles is currently considered to be composite plastic or fiberglass.
To minimize recoil, the grip area is often rubberized.
How to make a striker
Before moving on to the description of the actions, it should be noted that the process of making a sledgehammer head involves forging, which requires special tools, equipment and experience.
If you do not have an anvil and a high-temperature furnace, this guide will only be theoretical for you. You can look for the firing pin on classifieds websites or in markets. In any case, its cost will be less than that of a ready-made sledgehammer.
Well, for those who are familiar with blacksmithing first-hand, we recommend that you familiarize yourself with the features of the product.
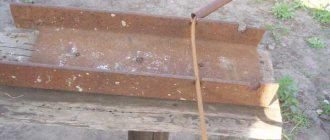
To manufacture the impact element of the sledgehammer, structural carbon steel grades 50, 45, 55, 50G, 50G2 are used. This metal is used in the production of truck axle shafts, so if you don’t have the suitable material, you can look for it at your nearest auto repair shop. To work, you will need a rectangular piece weighing 3 kg, from which you need to forge a parallelepiped.
The next step is to place the handle. To do this, on one side, in the center, we punch a through hole with a diameter of 25 to 30 mm. The sides of the workpiece are deformed. Having freed the hole, it is necessary to forge the side edges so that the object again takes the shape of an even parallelepiped, and the round hole becomes oval.
In order for the attachment point to be most reliable, it must be given a cone shape, tapering from the side edges to the center (in the cross-section of the striker it resembles an hourglass). For this operation, you will need to forge a special calibration rod from cone-shaped steel.
The cross-section of the caliber should be oval, and the length should be 180-200 mm. The lower part of the section should be a couple of millimeters narrower than the hole made in the striker, and the upper part is slightly larger than the handle that you are going to install.
After forging, the gauge must be hardened and ground.
To properly calibrate the hole, drive the steel rod to a depth just below the center of the striker. When the caliber is deepened, the side faces will be deformed.
They need to be straightened by removing the gauge and forging the ends of the workpiece. Next, drive the gauge into the hole again, and without removing it, forge the sides and bead the ends.
When the workpiece has the shape of a regular parallelepiped, we repeat the calibration process on the other side of the hole.
When the striker has the correct shape and a reliable attachment point, you can proceed to the hardening stage. In order for the steel to become truly hard, it must be heated to 850 degrees Celsius until the workpiece takes on a bright red color. Once the required temperature is reached, immerse in cold water until cool.
Now that the steel is hardened, it is necessary to give it ductility so that it does not crack during operation. To do this, heat the product to 250-300 degrees and let it cool slowly. After cooling, we grind the metal surface and read how to attach a sledgehammer to a wooden handle.
DIY sledgehammer handle
A very easy-to-make wooden handle for a sledgehammer is considered the least inertial and durable if you choose the right material. The most suitable types of wood for handles are birch, elm, rowan, maple or ash.
It is desirable that the source material is split, not sawn, and does not have knots. You can take an ordinary block, but the strength will be lower. The length of the handle depends on your requirements, but on average, for a striker weighing 3-4 kg, 600-800 mm is enough.
Sledgehammer - all about the eternal construction tool
Unlike a hammer, a sledgehammer has a very powerful impact due to its heavy striker and long handle. The striker of this impact tool is the main element and is made of impact-resistant steel. Wood is usually used for the handle, since it is this material that can most effectively “dampen” the energy that returns to the hands after an impact. This article will allow you to find out how a broken handle is repaired, and what a sledgehammer is in general, and how to use it.
How to make a sledgehammer with your own hands - Metalworker's Guide
Alim Rizaev is a jack of all trades. He masters the art of welding and creating useful devices from what others would, in good conscience, scrap.
His YouTube channel ARS Pro contains secrets of making a hammer from junk, restoring scrapped axes, and even tips on cleaning frying pans using sandblasting.
We learned from the blogger how to make anything with your own hands - from a vice to a compressor, and why old equipment is a wealth for a homemade worker.
Exercises with a sledgehammer
CrossFit is notable for the fact that for training in this sport you can use almost any available equipment, very often even non-sports equipment. Perhaps only in CrossFit can you watch athletes perform very spectacular exercises with a sledgehammer and a tire.
Initially, these exercises were a mandatory part of the functional training of mixed martial arts fighters, as they very well developed strength endurance and the power of punches. However, over time, they became firmly established in CrossFit, as all athletes liked them.
To train in this unusual way, you only need two equipment: a sledgehammer and a heavy, thick tire. Despite such simple equipment, such exercises make it possible to develop a lot of useful qualities that will provide you with invaluable help. Which ones exactly – read in our article today.
The benefits of training with a sledgehammer
By hitting a tire with a sledgehammer, you develop core strength endurance, coordination, and explosiveness. There is also a complex load on almost all large muscle groups of the body, due to which your muscles will gradually grow.
The calorie consumption while hitting the tire is sky-high. It is several times higher than the consumption when performing a classic cardio exercise, such as jogging or an exercise bike, which leads to more intense fat burning, excess weight loss and improved relief.
After a few weeks of regular training with a sledgehammer, you will notice that the impact force has increased significantly, and any throws from the rack are much sharper and faster. This occurs due to the coordinated work of the muscles of the back, arms, shoulders and legs, which is what fighting skills are made of.
What is a sledgehammer (photo and video work)
The hammer is considered to be almost the very first tool invented by man. The closest analogue of this device is a massive and powerful sledgehammer, widely used in installation and dismantling work, as well as for forging metal. The undoubted benefits of this tool have made it incredibly popular in industry and everyday life. Today, the name “sledgehammer” combines many similar devices with their own characteristics for certain types of work. Let's figure out what a sledgehammer is and what types of this tool exist today.
How to make a sledgehammer with your own hands - how to choose the right sledgehammer
It's hard to imagine crushing stones or hammering fasteners without using a tool such as a metal sledgehammer. Using a sledgehammer, various buildings can be dismantled much faster.
But due to the increase in the cost of this tool, not every person is able to buy it, and even more so, the quality of the purchased tool raises significant doubts, which is why creating a sledgehammer with your own hands has become very popular.
Design
The sledgehammer is characterized by having a rather simple design, which can be seen in the photo. It is created from two parts: a handle and a striker. Externally, the tool is almost similar to a hammer, but the weight of the striker is over 5 kilograms, and the shape resembles a parallelepiped.
The handle of the instrument is elongated, and its average thickness varies from 70 to 90 centimeters. Taking into account the specifics of using a sledgehammer, its weight can be about 16 kilograms, and the length of the handle reaches 120 centimeters. The handle of the tool thickens slightly towards the striker and performs wedging in it.
Creating a striker
The best sledgehammer is one that is made of high-carbon or alloy steel; these materials are excellent for shock loads and can withstand high temperatures. This material contains from 0.6 to 2% carbon.
Nickel particles are present, which helps to increase the strength of the sledgehammer, chromium increases wear resistance and hardness.
steel grade
When creating a sledgehammer at home, it is best to opt for steel grades such as 40.45 and 50X. For example, grade 50X indicates that the material contains about 0.5% carbon.
If you are unable to find steel from one of the brands presented, then it is recommended to contact any of the truck dealerships and purchase an axle shaft from a truck there.
Even several tools can be made from this material.
Process of creation
Since the sledgehammer is included in the forged tools section, you need to take a metal blank weighing about 2 kilograms and forge a parallelepiped from it. People who have their own summer cottage or live in a private house should consider taking a workpiece weighing 5-10 kilograms; such a sledgehammer is suitable for large-scale construction work.
A through hole with a diameter of 20-25 millimeters is sewn in the middle of one of the sides located on the side. After completing these steps, you can notice how the planes on the sides have changed. They need to be forged so that the metal blank becomes an absolute parallelepiped, and the circle-shaped hole becomes an oval.
Next, the armhole is changed taking into account the shape and size suitable for the handle made of wood. This procedure is carried out using a caliber, which is a special oval-shaped rod made of metal and 15-20 centimeters long.
As a result, a metal blank should come out with a conical hole on both sides in order to create a high-quality connection with the handle. Using a special machine, the striker is sanded with sandpaper.
The forged striker is subjected to hardening. To do this, it must be heated in a forge until a bright red glow appears, after which the firing pin is cooled in cold water.
Making a pen
To create a handle for a sledgehammer you will need the following elements:
- striker;
- plane;
- a block 5*5 centimeters thick and about 70 cm long (the block must be long, since the sledgehammer is a rather heavy tool and must be taken with both hands).
Using a plane, a rounded blank is made from a block, one of the ends of which, using an ax, is adjusted to the hole in the striker and hammered into it. Next, the workpiece is wedged inside the striker using a metal plate.
This is a variant of a wooden sledgehammer, but at home, if you have a welding machine, you often weld a metal pipe to the striker, which acts as a handle.
If you don’t want to make a tool yourself, then you can go to any online store and look at the sledgehammer catalog. In the same catalog you can borrow ideas about creating an instrument at home.
Photo of a sledgehammer with your own hands
What is a sledgehammer
The sledgehammer tool is a simple but very effective device for delivering blows of enormous force. In appearance it resembles a hammer, but has more impressive dimensions. The head of a standard blunt-nosed sledgehammer, according to GOST, must be made of steel grades 40, 45, 50 or U7 with a minimum hardening depth of 30 mm and can weigh from 2 to 16 kilograms. The handle of modern models can be made of wood, metal, plastic or fiberglass, and can be rubberized to reduce vibration.
To firmly connect the striker to the handle, cone-shaped holes are made in the former on both sides, tapering towards the center of the part. The wooden handle is lubricated and hammered into the striker, after which the remaining space on top is filled with epoxy resin. The technology for fastening handles made of metal and artificial materials has its own characteristics, based on the same jamming in the hole of the striker. That's actually all that a sledgehammer consists of, where it is used and how it is made.
How to make a sledgehammer with your own hands
Oddly enough, the force of the blow depends not so much on the strength of the muscles, but on their well-coordinated work.
Punching is a very complex movement in itself, in which many muscles work side by side.
Therefore, if you have trained your body to turn on the right muscles at the right moment, with the right effort, then your blow will be strong, but if you haven’t learned to do this, blame yourself.
You've probably seen, and maybe even felt, how amateurs box.
Ugly! They cannot invest themselves in a blow, and therefore waste a lot of energy in unnecessary movements, and not only do the blows not harm the enemy, but they also exhaust the attacker.
The reason is that they have no hitting technique. That's why they hit weakly. But how to teach yourself fighting techniques?
The best answer to this question would be training with a trainer.
A person with experience, sufficiently qualified in such matters, in a fairly short time will be able to make you, if not Rocky Balboa, then a good boxer, that’s for sure.
But today’s conversation will be about the muscles, and how to make them work harmoniously, forming a killer blow. We will need a simple tool - a hammer and a tire.
With the help of our recommendations and these fairly easy-to-use tools, you can make your shot even more powerful. You need to do the following:
- Get a car tire (don’t even look in the direction of your car) that you don’t mind damaging, and bury it securely halfway into the ground. She will receive many blows, and therefore must be static.
- Get a sledgehammer. You determine the weight yourself - strikers use light sledgehammers (8-10 kg), to develop a punch, wrestlers use heavy sledgehammers (10-32 kg) to improve functionality in throws.
Working with a sledgehammer develops crazy-powerful blows for boxers, and powerful throws for wrestlers. At the same time, the overall endurance of the body develops, which is not neglected in any sport.
But why exactly does a sledgehammer develop a strong blow so well? Because it is so heavy that it forces you to make your work easier by sequentially connecting large muscles. You begin to “help” yourself with large muscles, and gradually get closer to mastering the technique. In this exercise, it is easier to follow the technique than to strain yourself.
If you work only with your hands, soon you won’t even be able to swing them. And it’s inconvenient to work exclusively with them - the muscles of the arms are much weaker than the muscles of the legs and torso.
To remove some of the load from your arms, you will resort to using your legs and body.
What does this mean for you? These are exactly the factors that will help you achieve a strong punch! You are starting to develop your striking technique! The impulse goes from the leg, through the back, arms, and straight to the tire! This is the whole secret of working with a sledgehammer and a tire.
Oh once, and again, and many, many times!
Again, it all depends on your individual training. For beginners, a 10 kg sledgehammer for 10 repetitions may seem like hellish torture.
And an experienced athlete will swing a sledgehammer with a weight of 20 kg 200 times, and will not even get tired. So judge for yourself. But in our opinion, you should aim for a hundred repetitions in one approach.
A workout can contain from two to four such approaches.
The main thing is to follow the technique!
It would seem - what kind of technology? You swing a sledgehammer and that’s it! But let's not make mistakes.
As mentioned above, the training movement should be as similar as possible to a strike.
This option will allow you to use a more powerful punch at the subconscious level, and in a critical situation you will not have to think about anything - the body will do everything for you.
Starting hand position:
- Boxers keep their hands away from each other
- Wrestlers hold onto the end of the handle with their hands
This position of the hands is due to the fact that in boxing punches are delivered with one hand, and not with two. Therefore, a wide grip creates conditions as similar as possible to a real blow.
Therefore, the main thing in training is to learn how to use a hammer correctly. This will be the foundation for developing the correct technique. This means the blow will be stronger. So:
Frontal
Stance: frontal (feet parallel to each other), static (do not move).
Hand position: hitting hand in the middle of the handle, the other hand at the edge.
We hit with legs, body, hand. The back is only straight.
This is the initial level, and therefore acquaintance with training of this type begins from there.
It is necessary to be able to work with your legs and body both when striking and when returning the sledgehammer. We put our hands to work last.
Don't chase records - your goal is to understand the essence of the exercise. To start, you can try doing the exercise without weights.
From a fighting stance
Stance: combat, slightly sideways.
Hand position: far hand closer to the middle of the handle.
You can take a small step forward during the impact and back after. The task is to learn to turn the body behind the hand.
This is the next level of difficulty. Now we are learning a powerful direct strike with the far hand.
Therefore, strive to complicate the movement, try to bring it to a similar blow in boxing.
Jab
Stance: combat, slightly sideways.
Hand position: front hand near the middle of the handle, back hand at the edge.
You can take a small step forward during the impact and back after.
We develop a strong jab. This option is much more complicated, and therefore we move on to it only after thoroughly studying the previous stance.
Interception from the front pillar
Stance: frontal (feet parallel to each other), static (do not move).
Hand position: The hands are constantly intercepted after each blow.
You can rotate your pelvis during the impact for better insertion into the impact.
The whole point is in the interception - it adds complexity to the exercise, but it also helps develop continuous movement with the left and right hands.
This will save you a lot of time in the future. Try to transfer the inertia of one blow into another. This should be one continuous, long cycle.
Tools and Tips
To make the blow stronger you need to follow the recommendations below and use the tools:
- Tire. It is better to use one that does not need to be spared, so the option with a tire from your own car is not suitable. Since she will subsequently have to withstand many blows, it is necessary to ensure her static (motionless) position. To do this, the tire is half buried in the ground.
- Hammer. Strikers use 8-10 kg sledgehammers to develop their punch. Wrestlers train with 10-32 kg hammers to increase functionality in throws.
As for the position of the hands, they differ between boxers and wrestlers: the former have their hands at a distance, the latter hold the end of the handle with both hands. This is due to the specifics of boxing - striking with one hand. Due to the wide grip, conditions are provided that are as similar as possible to a real blow.
Forging hammers
Blacksmith hammer with wooden handle. Photo ForgingPRO
In blacksmithing, when performing hand forging, forging hammers are an indispensable tool . They act as an impact factor when forming blanks using the free hot forging method. In the article we will consider their different types depending on the specific application.
Differences between a sledgehammer and a handbrake (hammer) for forging
There are two main groups of forging hammers: sledge hammers and hand hammers. Under the influence of a sledgehammer, the workpiece is deformed using blows . It takes the required form.
The hand hammer plays a specific role in free forging. When working in tandem with a hammer, using a handbrake, the blacksmith indicates the direction of the blow with a sledgehammer.
In addition, the hammer hammer’s partner sets the rhythm of work, which best distributes his physical load.
The hand hammer is also used
for forging small workpieces as a forming tool .
It is important to note : the differences between hammers and sledgehammers are very arbitrary. A blacksmith may well call a small sledgehammer a large hammer. Therefore, we will not focus too much on this terminology further.
Sledgehammers and hammer. Photo Firm Utica
Due to the different functions when performing work, the main differences between sledgehammers and handbrake handles are their weight and dimensions directly related to it . The handbrake hammer weighs from 0.8 kg to 2 kg.
The weight of the sledgehammer is correspondingly greater - from 2 kg to 8 kg. To estimate the overall dimensions of the working part of a 6 kg sledgehammer. Let us give the following data: the size of the side of the base in the form of a square is 70 mm.
, the length of the working part is 175 mm.
What types of hand hammers are there: heavy and light, according to the shape of the head
In addition to differences in mass, hammers are divided according to the shape of the striking part . Sledgehammers have the following shapes, differing in the design of the rear part:
- blunt-nosed;
- sharp-nosed longitudinal;
- pointed transverse.
The blunt-nosed ones are the heaviest, the main task of which is to perform basic forging.
Blacksmith's sledgehammer, blunt-nosed, galvanized steel. Photo ForgingPRO
Handbrake hammers are made with the following shapes:
- spherical;
- longitudinal;
- transverse.
With a wedge-shaped striker, single-sided and double-sided, longitudinal and transverse
Hammers with this type of striker are used in blacksmithing to accelerate the metal of a workpiece , depending on the direction of the wedge - longitudinal or transverse.
Hammers: 1 - with a round back; 2 - sledgehammer; 3 (a) - with a one-sided wedge-shaped back; 3(b) and 4 - with double-sided wedge-shaped tail
With spherical striker
Handbrake hammers with a spherical back are used to obtain rounded shapes like cups. Upon impact, the metal accelerates simultaneously in all directions, and not just in a certain direction, as when processing with wedge-shaped strikers.
With a shifted center of gravity
For work with special control of the amount of hammer rebound during impact, as well as reducing the cost of physical effort , it is recommended to use such a tool with a shifted center of gravity.
Forging hammer with offset center. Photo ForgingPRO
By reducing the moment arm, which deflects the hammer away from the main direction of movement when it comes into contact with an object, the impact load is concentrated at one point.
Ironers
After processing workpieces with a hammer or sledgehammers, unevenness remains at the transition of one processed surface to another. To smooth out such irregularities, a blacksmith's smoothing tool is used. Its working surface is made in the form of a square with a polished working surface.
Blacksmith hammer-smoother. Photo ForgingPRO
Another type of surface, depending on the shape of the workpiece, is a half-cylinder with a radius of 500 mm. Since this type of tool works as a shock absorber, it fits onto the handle without wedging.
Crimping hammers
Crimping hammers are a forging tool for obtaining cylindrical or polyhedral shapes during hot forging . One of the two parts of the crimp is installed on the anvil. The other part, in the shape of a blank, is mounted on a wooden handle, with gradual movements of which it is modified to the required size.
Top round crimp PICARD. Photo ForgingPRO
Failsafe, inertialess
do not cause recoil when struck , and the tool does not rebound from the surface being processed.
The design feature of such a hammer is a hollow head , partially filled with metal balls.
During an impact, the resulting inertial force from the moving mass of balls dampens the elastic vibrations of the interacting metals.
JONNESWAY hammerless forging hammer. Photo ForgingPRO
This eliminates the reason for the hammer to bounce. The proportion of the kinetic energy of the hammer spent on the action being performed increases, and the possibility of injury decreases.
Brass
Hammers with brass heads are used for work that requires minimal deformation of the workpiece processed by impact. Brass is a soft alloy that allows you to carry out work such as shaping sheet metal without affecting its appearance.
Blacksmith hammer made of brass. Photo ForgingPRO
In explosive industries, where sparking is excluded, impact processing is carried out with hammers with a brass head.
With soft strikers
straighten thin sheet metal on an anvil , use hammers with soft strikers. They can be made of polymer or rubber materials . The surface of the sheet after such straightening will remain smooth.
Hammer with soft strikers JONNESWAY. Photo ForgingPRO
Wooden
Wooden hammers (mallets) are more profitable to use when straightening sheet material than rubber ones. They produce a clearer blow , which ultimately affects the quality of work.
Slag removal welding
Removal of the slag crust after welding with coated electrodes or submerged arcs is carried out by impact. A welding hammer is used for this purpose. Its design includes a bump stop with sharp edges and a recoil-absorbing handle. The tool is made from the lightest possible materials.
Slag welding hammer. Photo 220Volt
Regular and reverse entry
To ensure safe operation of the hammer, it must be securely seated on the handle. There are two methods of fastening - the usual one, which is performed by wedging the handle, and the reverse, in which this operation is not performed.
The usual fastening method is more labor-intensive and is used to fasten handles for light hammers. With this method, the instrument retains a more aesthetic appearance.
Small blacksmith hammer without using a wedge. Photo ForgingPRO
The reverse thrust is used for mounting sledgehammers . The head of the sledgehammer fits through the entire handle, which has a reverse cone. It is driven all the way into the extended part of the handle.
The excess part of the handle is cut off, leaving 10...15 mm. for additional tension generated during impact. This type of fastening is more reliable than wedging.
However, when gripping, there is no supporting surface due to the presence of a reverse angle, thereby making it difficult to hold the sledgehammer.
How to calculate the length of the handle for yourself
Each worker in the forge selects hand hammers and sledgehammers individually for himself. For this, the elbow length of an individual worker is used .
The smallest loads, while maintaining optimal impact force, are tested when the grip of the handle is located in the middle between the head of the hammer and the elbow joint.
Therefore, when choosing the length of the hammer handle, the head is squeezed into the palm of one hand and the free end of the handle should touch the inner surface of the elbow. This type of hammer will be the most ergonomic to use.
Below is a video where the master shares practical details about hammers.
Sledgehammer GOST
Current sledgehammer production standards go back to 1988, when they were last changed. Today, there are 2 documents establishing standards for the manufacture of sledgehammers with a blunt-nosed striker (GOST 11401-75) and a sharp-nosed one (GOST 11402-75). Both standards include 7 points: design, firing pin material, hardness, handle material, technical specifications, marking and requirements for stamping.
The weight of a sharp-nosed striker can be 3-8 kg, and a blunt-nosed one 2-16 kg. The dimensions of the sledgehammer directly depend on the weight of the steel tip. Below are scanned copies of documents for a more detailed understanding of the standards.
Tools and Tips
To make the blow stronger you need to follow the recommendations below and use the tools:
- Tire. It is better to use one that does not need to be spared, so the option with a tire from your own car is not suitable. Since she will subsequently have to withstand many blows, it is necessary to ensure her static (motionless) position. To do this, the tire is half buried in the ground.
- Hammer. Strikers use 8-10 kg sledgehammers to develop their punch. Wrestlers train with 10-32 kg hammers to increase functionality in throws.
Sledgehammer training. Advanced level
Once you become comfortable with a sledgehammer and hitting and other exercises become easy for you, you can try juggling with hammers. This skill takes time to develop, so start using very light weights and gradually increase it.
By juggling sledgehammers, you begin to develop a whole new level of strength and reflexivity along with hand-eye coordination. It's fun to start practicing this exercise on sand, grass, or some other soft surface so the sledgehammer won't bounce if you drop it.
Example of advanced exercises (hammer in each hand):
- Tomahawks (right hand) - 15 times
- Tomahawks (right hand) - 15 times
- Strikes with both hands at the same time - 15 times
After this, rest for 15 seconds and continue the series, decreasing the repetitions until you have completed only one repetition per exercise.
On the subject: Protein window after training time
Source