Mankind knows many metals and alloys based on them. One of the most famous is brass. This is a copper-based compound to which third-party non-ferrous metals are added. Various parts and elements for electrical equipment are made from this material. Casting brass allows you to make workpieces of various shapes and sizes from it. It can be carried out at the enterprise or at home.
Brass casting
Characteristics and applications of brass
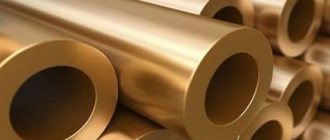
Brass is an alloy whose main components are copper and zinc. The traditional compound is a mixture of 70% of the first metal, 30% of the second. However, there are materials where the zinc content reaches 50%.
To understand how to work correctly with this connection, you need to understand its characteristics:
- Melting point - up to 950 degrees.
- Density - about 8.7 tons per m3.
- Electrical resistance - 0.08 microns per meter.
- Heat capacity - 0.377 kJ/(kg K)
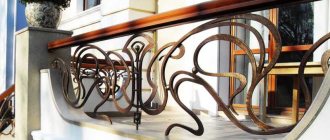
Brass products can be a mixture of copper and zinc, or these two components and additional alloying additives. The alloy is used in various industries:
- production of components for watches;
- creation of figurines, jewelry, interior elements;
- production of parts used in mechanical engineering;
- creation of components for electrical equipment.
Brass has good weldability. In addition, it has a high corrosion protection rate. Due to these characteristics, the alloy is used as a protective coating for other metals in the manufacture of metal structures.
Making accessories for jewelry with your own hands: etching copper and brass
Monday, August 18, 2014 11:59 + to quote book
For work we will need:
copper or brass plate
flat board or anvil
containers for water, citric acid and ferric chloride solution
pliers or other similar tool.
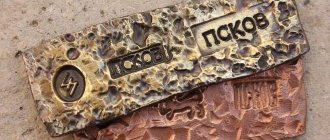
I took plates of both copper and brass. The process is the same for both metals. I poison everything in one container
As you can see in the photo, the metal is initially uneven, bent, dirty and scuffed. Because our metal sellers' trailers are usually no less dirty and shabby. But in our work, the curved surface will interfere with us when gluing pictures. And the etching solution will not be able to spread evenly over the surface of the plates.
Therefore, the plates need to be more or less aligned. The most convenient way, in my opinion, is to use a rubber mallet or a wooden hammer, beating the metal on a flat, hard surface. I use an anvil, but you can take a flat board or stool if you don’t mind.
A metal hammer will not work; it is harder than soft copper and relatively soft brass. Therefore, marks and dents from a regular hammer will remain on the records.
We place relatively even plates in a container with hot water, in which we generously dissolve citric acid.
Or put a container with water and acid on the fire. I like it better, because the purification of metals from oxides occurs almost instantly. Do not bring to a boil. It is believed that citric acid loses its properties in boiling water.
The records became noticeably cleaner. The brass I have is of such a brand that the zinc is easily washed out of its top layer. Therefore, pure copper shows through.
From this moment on, you cannot touch the records with your hands. Only with a clean cloth or tools. A layer of finger oil will create a protective layer on the metal and disrupt the design. In short, your fingerprints will be etched.
Next I seal the inside with tape. Can be painted over with nail polish or acrylic paint. But tape is the most convenient and easiest option.
It is better to leave small margins of tape around the edges. They are convenient for holding records without fear of getting them dirty.
Sometimes you need double-sided elements in decoration that can turn over when moved. Then the design can be applied on both sides. Only the thickness of the metal should be at least 0.6 mm or even 0.7 mm. Otherwise, etch the plate right through where the pattern is applied.
History of technology
Historians say that brass appeared simultaneously with bronze. Alloys were used to make jewelry, tips for tools, weapons, dishes, and cutlery.
To make any item, you had to know the technology of brass casting. Over time, the method developed and improved. Today, the material can be made at home or in production. To do this, you need to accurately carry out the technological process, follow the rules, choose the right tools and raw materials.
Product made of brass
Bronze casting: artistic bronze casting technology
Bronze casting allows us to produce products that have exceptional decorative appeal. The technology of casting from this alloy, which is based on copper, has been known for many centuries, but even in our time it continues to be improved.
The appearance of bronze products speaks of the painstaking work of the master, turning faceless metal into a work of art
Subtleties of technology
The technology of artistic brass casting is similar to the production of bronze products. It has some subtleties that should be discussed before starting to work with materials:
- Before making a casting, it is necessary to select consumable metals and melt them. For this, different types of ovens are used. Due to the low melting point, you can make a structure for melting yourself. It will consist of a gas burner and a heat-resistant container.
- An important stage during the manufacture of products is pouring the molten raw materials into a mold prepared in advance. The duration of the procedure is no more than 2 minutes. If pouring is done incorrectly, the product may end up with slag pits, burns, depressions, and joints. The finished part will be damaged or require additional processing.
- The alloy must be cooled evenly, without the use of coolants.
- The part requires additional processing after removal from the mold. After casting, sprues, fills, vents, and profits remain on it. They need to be removed.
We must not forget that forms are reusable and disposable. From the first, the workpieces are removed using pliers. The second ones are broken with a hammer.
We take a sheet and make it out of it. All
A little more about technology. What can be made from sheet copper, brass, etc. What is clear and understandable for experienced people is often a revelation for beginners. I think they will complement me and it will be a useful selection. It is clear that one cannot know everything.
Shaping methods may be different. Not the easiest, but very effective - pressure on a lathe. You can press as if enveloping the punch, or you can push the sheet into the matrix. Based on the task, we sharpen the mandrel; the material of the mandrel is wood, plastic, metal. Not very deep copper extraction can be done on wood. It is better to do deep and precise work on a polished steel mandrel.
Simple work can be done with hardwood by lubricating it with thick grease or soap. Preference should be given to wood with not pronounced layers of beech, maple, hornbeam. We clamp a rod with protrusions-stops for a push stick into the tool holder and work with the stick as an oar in a rowlock. More critical work is best done with rollers that match the shape and size of the future product. Often, ball bearings of suitable diameter are used as rollers, which can be mounted both in the fork and on the side, and simply by placing it on a suitable bolt. The holder is attached to the place of the cutter, we clamp any suitable rod on the other side of the tool holder, relax the tool holder and press on the workpiece with a lever - with a rod. You can simultaneously use the calipers to select the point of application of force.
In addition, it is useful to have a iron; you can make several different ones from old files or needle files. The pobedit irons are especially good; they are hard to make, but the work will pay off later. The beauty of Pobeditovs is that they never catch material, neither soft copper, nor silver, nor especially brass, even when dry. Steel tools need to be lubricated, well with natural wax or modern model wax. In addition to shaping, Pobedit irons are good for polishing both when rotating the product on a machine, and simply by applying mirror strokes back to back with your hand. You can repeat the movements in the transverse direction. With a little experience, everything will be clear. You will no longer have unpolished areas due to the inability to reach the polishing wheel. The following photos show items that required precision and repeatability. The mandrels in this case were made of steel, the surface was polished, cylindrical-looking surfaces have a taper, otherwise it can be very problematic to remove the finished work from the mandrel, this must be remembered.
Separately, it is worth dwelling on the production of ring clips. the workpiece is a ring, we press it to a mandrel in the form of the end of a thick pipe with an auxiliary cylinder (can be made of hard wood) and roll the outer part of the workpiece onto the mandrel. If you need precise corners, use a bearing roller. Before rolling the inner cylindrical surface, we fix the finished outer surface with tape or a clamp. Scotch tape is less reliable, but much safer. First, we gently push the material into the sleeve, then we form a clear edge with a bearing sitting cantilevered on the mandrel. The glasses are made of three parts and soldered with POS-45 solder. After finishing - galvanic coating. In the following photos there are castes for round stones with a diameter of 15 mm and 40 mm.
A cylindrical saucepan on a rigid frame is first rolled out. Then we sharpen an accurate mandrel from hard wood, put the pan on, and press the tailstock with the center through the spacer. We start with a roller and end with small presses and irons. To remove the finished part, we bore the wood inside the part and, separating it with a cutting tool, break out the remaining barrel. There were multiple attempts to make such a barrel from a soldered tube, but it only worked from a sheet. The seam does not hold up, apparently the problem is the difference in the hardness of the seam and the rest of the metal. You can also roll gears in much the same way as regular knurling. To do this, you need to find a steel gear that is not large and has the required tooth. You can also roll the gear rack.
To do this, a narrow groove is sharpened in the rod, a blank strip is inserted vertically into it, pressed with a gear roller, and the teeth are rolled by hand by rotating the chuck. Gradually pressing, repeat until a complete tooth profile is obtained. If necessary, you can roll the toothed rack into a ring - you will get an end gear. If it’s a little expensive to order, you won’t suddenly find someone who can cut one, especially in our time.
What is required for casting?
To melt brass, you must initially prepare equipment and tools for the work. This includes:
- Molding compositions. Made from fireproof materials. The shape is selected depending on the required finished product.
- Special tongs used to make it are removed from the molds after hardening.
- Heating equipment. You can use a purchased model or make a stove yourself. For assembly you will need fireclay bricks and fireproof mastic. For heating, you can use a gas burner or nichrome wire.
- A crucible is a container that is filled with consumables. They melt when heated. Then the master pours the molten metals into a mold prepared in advance. The crucible is made of clay or graphite. Additionally, heat-resistant coating is used, which increases the durability of the container.
In order to remove the crucible from the furnace, semicircular tongs are used.
Molding
After work on the model is completed and it is approved by the Customer, the next stage occurs - the production of a casting mold
, using a product model and various tools and devices, as well as sand (molding) mixture.
The process of making a casting mold ( molding
) is the most labor-intensive and time-consuming.
Molten metal is poured into the casting mold, which fills the cavity, cools in it and forms a casting, its outline repeating the shape of the model [photo 3 >>]
.
Alloys such as bronze, brass, etc. are used to cast the product.
Casting molds are divided into disposable and reusable. The main component of molding sands in the manufacture of one-time molds is quartz sand; Clay is used as a binding additive. After the casting is ready, the one-time mold is destroyed.
The casting mold is made up of two halves - flasks
.
They serve to hold the molding sand while compacting it. As a rule, flasks are filled with a mixture of organic and inorganic materials [photo 4 >>]
. In the manual molding method, small-sized flasks are used.
Preparatory work
Before you start making a casting, you need to prepare for the main work. Initially, you need to develop a sketch of the future product and sketch it on paper. Using the finished drawing, make a mold for pouring the molten alloy. It is made from clay and quartz sand. There are reusable and disposable forms. The former are more difficult to produce, but they can be used in the serial production of products from metal alloys.
After the brass part is manufactured, additional processing will be required to eliminate defects that occur during casting. For this purpose, the casting surface is subjected to chemical treatment. Using active solutions, defects are removed from the surface of workpieces.
Casting surface
Features of brass casting
Mankind knows many metals and alloys based on them. One of the most famous is brass. This is a copper-based compound to which third-party non-ferrous metals are added. Various parts and elements for electrical equipment are made from this material. Casting brass allows you to make workpieces of various shapes and sizes from it. It can be carried out at the enterprise or at home.
Advantages and disadvantages of injection molding
Castings made on injection molding machines are parts with low roughness, high precision, which do not require mechanical processing or it is minimal. After casting, the parts are sent to cutting presses, where the sprues and washers are removed from them.
A process consisting of a small number of operations can be fully automated. Due to the simplicity of operations, rapid solidification of the metal and automatic removal of products, this process is highly productive.
The disadvantage of the technology is the complexity and high cost of technological equipment. It is not economically rational to use injection molding in medium-scale and small-scale production. The method is not suitable for casting refractory metals that melt at a temperature higher than steel.
This technology is not used for the production of large castings, since the advantages of the method disappear due to uneven solidification, and due to the high price of large-scale high-precision equipment, the use of this method is not economically feasible.