Last Updated on 10/19/2017 by
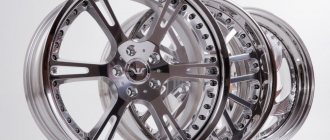
Gathering with friends and family to cook over an open fire - what could be better for nature lovers? Shish kebab, for example, can be cooked all year round, because almost everyone has a barbecue. But a variety of dishes made in a cauldron cannot be cooked without a special stove. The purchase of such a stove is usually postponed until later, since it is not cheap and takes up a lot of space. However, you can make it yourself from wheel rims. Firstly, you can make exactly the stove you want, and secondly, it will cost much less.
Why are rims ideal?
Stoves for cauldrons are made not only from disks. For production, you can use a metal barrel. But it is too thin, so a strong fire can simply burn through its walls.
Drawing of a potbelly stove made from a metal barrel
Another option is to use a steel sheet, choosing the desired thickness. This design will be reliable, but will also come at a store price.
The best option remains car wheels, which you may have lying around somewhere in the garage. In addition to its low cost, such a stove for a cauldron has many other advantages:
- materials for production are always available;
- the car disk is made of durable steel of sufficient thickness, so the stove will last for many years;
- car rims are resistant to high temperatures and open fire;
- the steel from which the disc is made heats up quickly;
- since there are disks of different diameters, the structure can be made to the desired size;
- From car wheels you can make a stove not only for cooking, but also for heating small rooms or for lighting a bathhouse.
Another significant advantage is that a homemade stove can be made without experience. The only tools you will need are a welding machine and a grinder.
Furnace made from wheel rims
Wood-burning heat generator welded from disks
The author of the stove shown in the photo below was inspired by the design of the famous Buleryan type heaters. Only the original costs a lot of money, but such a handmade product costs ten times less, provided that the household has 3 wheels from a UAZ or GAZelle. In addition, you will need some sheet metal and a pipe with a diameter of 100-150 mm, and also a short pipe Ø76 mm.
The most difficult thing is to cut out the inner part of the wheel rims. The grinder is not very convenient, and the metal is thick. A gas cutter is preferable, but if you don’t have one, then a grinder will do. Then, using a welding machine, the disks are hermetically joined to form a housing. The rear part is covered with a metal sheet with a chimney pipe Ø100-150 mm welded to it. If desired, a draft control valve is installed on this pipe, as shown in the photo:
It is not necessary to make a draft control damper if you make a stove from wheel rims with an adjustable air supply. To do this, a pipe with an air damper with a spring-loaded axle is built into the front door. In addition, an additional plate is installed inside the firebox, dividing the space into 2 parts, as in the Buleryan. At the top there is a secondary chamber, into which the chimney pipe pipe is welded.
The furnace can take any diameter, length and orientation in space. It all depends on the number and size of disks, and also on your imagination.
Step-by-step guide to making a stove
Inspired by the fact that you will independently make a necessary thing in the household, and having taken the necessary tools and materials, you can begin to make a stove for a cauldron.
We weld the disks together
It is worth noting that a design made of aluminum wheels will not work; you need to take two steel wheels.
First we make the upper part of the furnace. Turning the disc with the mounting pad up, use a grinder to cut a circle through the bolt holes and pull out the middle. As a result, you will get a stable surface on which to place the cauldron.
The second stage of work will be making the bottom of the stove. We turn the disk so that the mounting platform is at the bottom, and place the upper part of the stove on top, which we made in the previous step. Weld two disks together in a circle.
Assembled furnace from disks
In order for the stove to be lit, you need to cut a hole about 20 by 12 cm in the lower part. To make the structure durable, make a hole two centimeters higher from the bottom edge. The cut out part will serve as a good door for the combustion chamber.
To ensure stability of the structure, you need to weld three footrests to it, the length of which is about 20–30 cm. Steel corners can be used as a material.
To make the stove easy to carry, weld handles to the sides.
Use a metal plate to cover the hole in the disc hub at the bottom of the stove.
This is how in a few hours you will get an excellent oven made from car wheels, which is well suited for preparing your favorite dishes.
Barbecue oven
This wonderful device is made from two rims from passenger car wheels. Although, if someone wants a bigger stove, then there are no restrictions: you can use wheels from a UAZ or GAZ-53. One of them has the bottom carefully cut out and then the rims are welded together.
In order for the unit to be securely installed on any surface, the legs are welded to the lower section, as shown in the photo. By the way, the hole for the hub must also be plugged, but the side holes can be left, air will flow through them into the firebox. To make it easier to carry, handles are welded to the outside of the body, and an opening for the door is cut in the side.
The latter is made from the same piece, mounted on hinges. That's it, the oven made from car rims for barbecuing and cooking is ready. As practice shows, it can accommodate 5 skewers with meat.
Advice. There is no need to throw away the cut-off bottom of the upper disk; it can serve as a stand for a small saucepan, kettle or frying pan.
On the other side of the door, a pipe for the chimney should be welded; a diameter of 50-70 mm is sufficient. The tiles can be modernized a little, since when working, ash spills out through the lower holes, this is not very pleasant. The holes must be plugged, and the air flow must be regulated by the firebox door. Details about the stove are shown in the video:
Potbelly stove made from wheel rims
Old car wheels can be used not only for making a stove for a cauldron. They will make an excellent potbelly stove, which will not differ at all from those sold in stores.
Stove-stove made from wheel rims
Preparatory work
In order not to be distracted while working, you need to immediately prepare everything you need. For a potbelly stove you should stock up on:
- four car wheels;
- metal sheet, chimney pipe;
- bricks and cement for the base of the furnace;
- door canopies for doors;
- welding machine;
- grinder;
- a hacksaw for metal, for small work where it would be difficult to cut a disc with a grinder;
- metalworking tools: file, sledgehammer, hammer, pliers, measuring tool;
- paint brush and paints that can withstand high temperatures.
It is worth noting that the work will be dirty and noisy, so choose the right place to make a stove from car wheels. For example, it will be convenient to work on the street, in a garage or workshop.
What kind of stoves can be made from car rims?
At the moment, home craftsmen have invented several types of iron stoves assembled from wheel rims. They can be divided by areas of application:
- heating;
- baths;
- for cooking, including barbecue.
These car parts are attractive primarily due to the thickness of the metal. The body of a wood-burning stove made of a steel disk will not burn out very quickly, especially if you take a wheel from a truck. The latter, as a rule, are used for the manufacture of sauna stoves, since they are large in size and metal thick. For a sauna stove, which often operates in extreme conditions, this is an important factor.
Discs from cars and commercial vehicles can make either a good wood-burning heater for the garage or a small barbecue stove. Let's look at them all in order.
Stages of work
After the preparatory part, you can safely begin manufacturing the structure.
First stage
We take three disks and cut out the middle using a grinder. The process can take a long time because the discs have an uneven shape, making it difficult to reach the middle.
Cutting out the core of the disc is quite difficult, but it is necessary
Second phase
The next step will be welding. We weld a square metal sheet to the lower wheel rim. It must extend beyond the walls of the disk so that burning coal or a spark from the furnace falls onto it. This is a guarantee of fire safety.
We weld the disks together in a circle. You need to be careful not to leave unwelded holes through which smoke from the potbelly stove will escape. We also weld all the holes for the valve for the camera.
We weld the seams
Third stage
Next, we cut out the doors for the firebox and ash pan. We recommend cutting a hole for the ash pan in the lowest disk, and for the firebox in the second one from the bottom. The metal pieces that remain can be used as doors. There is no hole for the ash pan, so that the draft goes well, you can open the doors of the ash pan or firebox.
Installation of a chimney pipe. We weld the pipe into the center of the uppermost disk or onto a sheet of iron that can be welded to the upper disk. In the second case, your potbelly stove will be more fireproof and reliable.
Fourth stage
Coating the oven with special paint
The last step is to install the stove on the base. Its height can be equal to the height of one brick, since the entire stove does not weigh very much. First you need to make a square formwork from bricks and fill it with cement mortar. After the solution has dried, you can safely install the potbelly stove.
To ensure that the stove lasts longer and the metal does not corrode, we recommend covering the potbelly stove with a special paint that can withstand constant high temperatures. It is especially important to paint the upper part of the structure: it is there that moisture constantly evaporates, so the metal becomes more vulnerable to losing its properties.
As a result, from the maintained materials you will get an excellent, reliable potbelly stove that will heat the room no worse than a new one.
Why wheels are the most suitable option for making a furnace body
There are many materials and improvised means from which you can build a device with your own hands.
A metal barrel is often used for these purposes, but the disadvantage of this design is that its thin walls can burn out from a strong flame. A more reliable and durable option is a stove made of steel sheet of sufficient thickness, but the price, accordingly, will be rather high.
The best option is a stove made from car wheels , which has the following advantages :
- availability of necessary materials;
- strength and durability due to the thickness of the steel from which the discs are made;
- resistance to frequent and prolonged exposure to high temperatures and open fire;
- fast heating regardless of the type of fuel;
- the ability to choose the most convenient design dimensions due to the variety of disc models;
- high heat transfer when heating rooms.
The advantages of wheeled ovens also include ease of manufacture. The main tools that you can’t do without in this matter are a welding machine and an angle grinder.
In the center of the cauldron stove design there are two steel wheels .
It is important to note that aluminum wheels are not suitable for these purposes. You can take car wheels, for example, from a ZIL-130 car. The diameter of such a wheel is 50 cm and the height is 25 cm.
How to make a stove from wheel rims with your own hands:
- Take one of the ring parts and turn it over so that the mounting pad is on top. Use a grinder to cut a circle through the bolt holes and pull out the middle. The result was a stable platform for installing the cauldron.
- Turn the disk for the lower part of the oven over with the mounting pad facing down, and place the pre-prepared upper disk on top. At the top of the structure there should be a hole for installing a cauldron. Boil the junction of the two elements in a circle.
- For the combustion chamber in the lower wheel, you need to cut a hole measuring approximately 20x12 cm. This must be done 2 cm from the bottom edge to maintain strength. Do not throw away the cut out part of the metal, but process it and attach it to the resulting window as a door using a bolt and nut.
- At the end of the work, you must weld the footrests to the stove, which can be made from steel corners. Usually three supports are made 25-30 cm long.
- For ease of transportation, the oven is equipped with handles.
- The hole in the hub at the bottom of the structure is closed with a metal plate.
So, after spending a couple of hours, you can make a convenient and practical stove for a cauldron. In addition, due to its low weight and compactness, it can be transported even in the trunk of a car.
DIY barbecue made from wheel rims
Car wheels can serve as an excellent material for another device - a barbecue. It will be light, making it easy to move. There will also be free access of air into such an oven from the wheel rims, so you will quickly achieve the desired temperature.
There are several ways to make a grill yourself. The simplest is to place the disc on a steel sheet. Here's an ordinary grill for you. But this design has its drawbacks:
- the plane is set too low;
- if the grill stands on the ground, there will be weak draft, which may cause the fire to go out;
- small combustion chamber.
For infrequent use, such a homemade grill is suitable. It is lightweight, so you can take it with you outdoors. However, you can make a more reliable and convenient grill with your own hands.
The working process
For the barbecue you will need:
- two car rims;
- welding machine;
- Bulgarian;
- profile pipe 1 meter;
- bolts and nuts;
- wire.
Now you can start manufacturing.
From the first disk, using a grinder or a gas cutter, you need to cut out the mounting pad.
Next, we weld two disks in a circle so that the remaining partition from the first disk is at the very bottom of the grill.
Door
The next stage is the door. It is needed to make it convenient to add new fuel without removing food from the grill. It will also make it easier to maintain the fire.
First you need to roughly decide where the door will be located. Typically, the fuel hole is made 2–3 cm above the bottom. Sketch the side of the structure, then cut a hole and sand the edges of the cutout. Using bolts, we make hinges on one side of the rectangular hole so that the door opens and closes easily. You need to weld nuts to the door itself so that you can then hang it on the bolts. The final touch is a handle that you can weld on to make the door easier to use.
Legs
What's a barbecue without legs? Typically the length of the legs is about 60–80 cm. This is both a convenient option for cooking and fireproof. But you can choose a different length that is more suitable for you. To make the legs you will need a profile pipe. Cut it into three equal parts and weld it to the grill body. In order for a homemade stove to stand stable, the legs must be placed at the same distance from each other with emphasis on the side and partition.
Pens
Handles for easy movement of the structure, which can be made using thick wire about 8 mm. Determine their approximate location, preferably on the sides of the door, then weld the nuts through which you thread the handles.
Comfortable handles
Unlike other stoves made from wheel rims, there is no need to weld a metal sheet to the bottom of the barbecue; it can interfere with good draft. It is better to cover the bottom with a metal mesh or make a wire grid to create something like a non-standard grate.
As you can see, rims that were just lying around idle can be very useful on the farm. Treat yourself and your loved ones with dishes over an open fire, which will turn out delicious and properly cooked in ovens made from car wheels.
Materials
Our stove for a cauldron made from car wheels will consist of 3 disks with large-sized dishes placed on the back side of the disk. To remove smoke, we provide for the installation of a pipe. This design will cause slight heat loss, but will help the cook not to choke on smoke while cooking. The cauldron will be immersed in the oven at 2/3 of the height, so you will need to make the oven out of 3 sections.
To work you need:
| Name | Quantity |
| Wheel disks | 3 pcs |
| For door handle | Rod, diameter 8-10 mm, length 200 mm |
| Handles for carrying the stove | 2 parts from a rod 250 mm long |
| For hinge and latch | Rod: 2 parts, 100 mm each. Profile 20 mm – 4 parts 50 mm each |
| Steel pipe for chimney | Branch from a pipe with a diameter of 50 mm. A piece of pipe with a canopy, 1.5-2 m long. |
These discs will fit
If the oven needs to be raised for ease of cooking, you can prepare 4 legs from a corner or profile pipe of the same size.
