Sawing out of plywood with a hand jigsaw is a technology that makes it possible to make the most bizarre shapes. Moreover, it can be used both in the production of designer furniture, making fairly large elements, and in decoration.
The basics of sawing are quite easy to master, and practically no equipment is required. Well, to do a really difficult thing, you have to work hard - however, this statement is true for almost any hobby.
With a jigsaw and skillful hands you can do almost anything!
Basic shape cutting skills
The main tool for sawing wood is a hand jigsaw, consisting of an arc-shaped or U-shaped holder, a metal file stretched between its ends and a handle. Most files are flat and equipped with teeth on one side, but thread-like blades coated with diamond are also used.
Sawing with a jigsaw does not seem from the outside to be as complex and mysterious as, for example, welding. This is how it really is: the basic skills of figure cutting can be acquired in a few hours by ruining several plywood and saws.
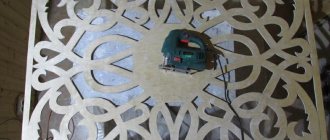
Openwork cutting with a jigsaw
But to master the nuances of cutting wood with a jigsaw and start creating, it will take long evenings of honing the skill. Openwork sawing requires its craftsmen to have a precise eye, a steady hand and great patience.
Video of wood milling with a hand router
If you have just decided to try your hand at curly slotted carving, it would be a good idea to watch a video with a master class. It will help you better understand how drawings are created and how such home beauty appears.
The dominance of gadgets in the everyday life of a modern person has not destroyed the desire of many to work with wood and plywood with their hands. An activity accessible to everyone - sawing with a jigsaw - relieves nervous tension and allows you to make useful and beautiful things.
A lot can be done when ready-made drawing samples are available. Stencils for cutting out plywood with a jigsaw allow you to choose the item that is most accessible for novice craftsmen or the most interesting and useful item.
Read also: Main products of ferrous metallurgy
Features of working with a jigsaw
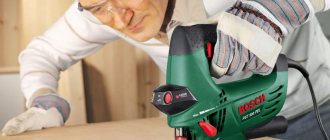
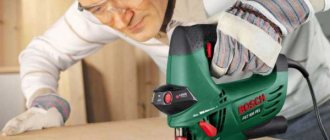
The design of a jigsaw is very different from its manual relative. The file is fixed only on one side, so it is several times thicker than a manual one; instead of a thin arc holder, there is a massive body with an electric motor and gearbox.
A jigsaw provides many times more productivity than a manual jigsaw for cutting, but you have to pay for it with more weight, strong vibration and reduced cutting accuracy when making curved cuts.
The unit allows you to quickly make cuts along a straight line or along a curved line with large radii.
The best result for artistic cutting with a jigsaw is obtained by combining a manual and electric document. Particularly fine details of the design and small radius roundings should, of course, be entrusted to a hand jigsaw.
An ordinary household or professional jigsaw is not very suitable for cutting. Its purpose is construction work, and cutting out complex designs with a jigsaw will lead to rapid fatigue due to the heavy weight and damage to the material.
Band jigsaw
However, there are also band jigsaws - in them the blade is clamped on both sides, the material rests on a massive wide work table and the arc of the holder from a manual jigsaw is visible in the design. With such a semi-professional device, you can achieve even greater cutting accuracy than with a hand tool. But this miracle unit costs accordingly.
Features of the sawing process
Doing the job requires good lighting. It is advisable to prepare the tools in one convenient place under the right hand, without cluttering the space with unnecessary details.
Sawing should begin with the internal elements of the design applied from the stencil. To perform slotting work on plywood, holes are first made in some places on the contour.
When cutting with a regular hand jigsaw, hold a piece of plywood with your hands. When working with an electrical apparatus, the workpiece is fixed on a workbench or table using a vice. If you have experience working with an electric jigsaw, cutting is easy and quick; As a result, the lines are smooth, neat, requiring minimal subsequent sanding.
Read also: Hydrometer instructions for use
Successful carving is only possible if the nail file is properly and firmly secured, which is subject to mandatory inspection. Carelessness leads to distortion of the drawing, which will turn out to be completely different from the stencil. Inattention can provoke traumatic situations.
The presence of stencils, a good jigsaw and the desire to start cutting - all this together can bring pleasure to the work process and the result both to the master himself and to loved ones or customers.
Today, many people strive to decorate their interiors with pleasant little things, for example, carved elements. Wood products with beautiful ornaments and patterns are very popular. Wood always decorates a home, creates comfort, and most importantly, it is a natural material. Wood carving is a very pleasant and interesting activity that anyone can master if they carefully study the process and prepare for work.
Body positioning
In every profession, for every typical operation, there is an optimal pose or set of poses from an ergonomic point of view. The working area is clearly visible in it, you don’t have to make unnecessary movements, sawing is convenient, and fatigue is minimal.
When cutting with a jigsaw, it is recommended to sit at a work table on a chair high enough so that your back does not bend. To unload the working hand, it is often rested with the elbow on the knee. This way your hand will be lighter and less tired. You just need to make sure that your knee doesn’t go numb. The work space should not be cluttered with scraps of material, tools and equipment not currently in use. A sketch of a drawing or an assembly drawing should be fixed in a vertical tablet at eye level.
Where to start
First, the workplace is properly organized. Fulfilling this condition is especially important for high-quality cutting. If the space is arranged correctly, work will be convenient and comfortable. This condition is necessary to create a quality product.
The thrust structure is a special machine. People call it “swallowtail”. This table is made from rectangular boards. It has a wedge-shaped incision that extends into the working area. The dovetail is attached to the edge of the table.
An electric jigsaw can be used while standing or sitting. The workpiece should be located at a distance of 40 cm from the eyes. It is necessary that the lighting lamp be installed in front of the master. It is placed at an angle to the surface.
Material for cutting - plywood
It is difficult to create a beautiful product from waste. The choice of material must be treated very carefully.
A plywood sheet for artistic cutting with a jigsaw must satisfy a number of conditions:
- The thickness of the sheet must correspond to the purpose. For artistic creativity, it is better to take a thin sheet (up to five millimeters), and for the production of figured furniture parts, a thickness of 1-2 centimeters is more suitable.
- The color of the plywood veneer is important if you are going to clear coat the piece. In the case of opaque paint or varnish, and stain treatment, the color is not important.
- Humidity can lead to frequent “bogging” and breakage of files. The material must be dried to 40-65%.
- Overall quality. If the plan is not to build a chicken coop, but to create artistic creativity, then the grade should be the highest or first.
- No knots or spots of a different color.
- No blisters, hollow or filled with resin.
- No veneer delamination.
Sufficient plywood thickness
As a test to determine the quality of plywood sizing, a narrow strip 1-2 cm wide is usually sawed off with a hand hacksaw. If it has not delaminated or crumbled, the plywood is suitable for sawing.
Figure cutting from plywood
Shaped cutting of plywood is a fairly popular activity among decorators and furniture makers. Using a plywood sheet and special tools, you can make not just a craft, but a real work of art.
The choice of tool for this procedure depends on the complexity of the pattern and the thickness of the plywood sheet. If the bend radius does not exceed 1 cm, then you can use a hand jigsaw. A round hole is made using a drill. When the bending radius exceeds 3 cm, you should use an electric jigsaw. Which saw is suitable for plywood? Remember that the finer the teeth of the saw, the smoother and more complete the cut edges will be. For this purpose, for very small and complex figures it is better to buy a metal canvas.
It is better to apply the sketch on the back side of the sheet. In this case, if the chips rise, it will not be noticeable. At the same time, you should not rush, because the quality of the future product depends on the drawing. Drawings for cutting out plywood are available in large quantities on the Internet. Here you can find everything: from children's crafts to the most complex patterns.
You can create a craft from plywood using the following tools:
- hand jigsaw
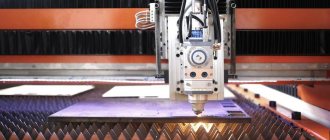
- laser machine
- electric jigsaw
- CNC milling machine.
Tool for the job
You will need the following tools and consumables:
- Hand jigsaw. This is the artist's main tool
- An awl or drill with a 2-3 mm drill - for making initial holes when making closed contours.
- A set of files and needle files from pucker to velvet and sandpaper for smoothing edges.
- Electric jigsaw for preliminary cutting of material and making long cuts with slight curvature.
- Hand tools - pliers, hammer, mallet.
- Work table with vice, clamps. The table should be equipped with a cutting platform 20x30 cm, rectangular in shape with a cutout converging at an acute angle to a hole with a diameter of 3-5 cm.
- A pencil and a thin awl for transferring the sketch onto the material.
- A set of replacement files for jigsaws, for straight, curved and high-speed cutting.
- Many, many replacement files for a hand jigsaw.
Tools required for work
You will probably need twice as many files for a manual jigsaw - at the initial stage of training this will be the most consumable material.
How to use the tool
A jigsaw is used for a variety of tasks. Its main function is to cut curved shapes in wood products. Getting smooth curves using this tool is quite easy. The base of the tool should be kept level on the workpiece. When the preparation is completed, you can begin the main work. Then the engine is turned on and the device is slowly moved along a pre-marked line, at a distance of 2 mm from it. Fine sanding is done later.
The saw should be moved at such a pace that the blade cuts the material easily without any deflection. A jigsaw works great when cutting boards crosswise. A stop must be used if a perfect cut is required. Bevel cuts are fairly easy to make using a jigsaw. Before work, it is necessary to firmly secure the workpiece.
If an oblique or vertical cut is being made, the distance between the blade and the stop is set to the same as on a circular table. If you need to make a precise and long cut, it is difficult to work with a jigsaw. In this case, first use a circular saw. The final cutting of the element is performed with a jigsaw. It must be pressed firmly against the inside of the marked line.
Sawing technology
The cutting technology itself is not complicated, but in each operation you will need to acquire sufficient skill.
The process is divided into preparatory operations, main operations and final operations.
Preparation
The thoroughness of preparation largely determines the convenience of work and the quality of the final result.
So at this stage you should:
- Carefully inspect the selected piece of plywood and make sure there are no stains, knots, blisters or peeling veneer.
- Check the dryness of the material by making a test cut 1 centimeter from the edge
- Attach a sketch of the design to the plywood with tape or thumbtacks.
- At key points in the drawing, the beginnings and ends of lines, places of their intersections, etc. make punctures with a thin sharp awl.
- If the ornament is complex, then you can get confused in the jumble of dots. In this case, place carbon paper under the sketch and trace the outline of the drawing with a hard or medium pencil, transferring its lines onto the plywood.
- The areas to be removed after cutting should be immediately shaded on the plywood with a pencil to avoid confusion later.
Important! The pattern on the plywood sheet should be oriented so that most of the cuts are perpendicular to the direction of the grain of the face veneer sheet - this will make sawing easier.
Basic Operations
Upon completion of the preparatory operations, you can begin the actual cutting.
If you don’t have enough experience yet, then it’s better to start with simple drawings and outlines—for example, cut out a house with a window and a pipe from a child’s drawing. The battle of Chinese dragons is unlikely to succeed the first time.
Sawing on a jigsaw
First, you should cut out the outline of the future product, then you need to drill starting holes for the internal contours.
Important! It is better to drill all the holes in advance, since as you cut out part by part, the workpiece will lose strength and may break during drilling.
It is better to start mastering the skill with a simple operation - a straight cut. To do this you should:
- Insert a jigsaw file into the drilled starting hole. The teeth should be directed from the holder arc and towards the handle.
- Secure the blade with a screw from the side of the handle, tighten it so that it does not rattle when cutting, and tighten the second screw. The degree of tension is determined by bending the holder arc.
- Place the plywood on the platform, press it against it with your left hand and, moving the jigsaw up and down by the handle, begin cutting. As you move along the cutting line, feed the workpiece under the saw so that the jigsaw remains in place.
- To avoid straying from a straight line, you can place a guide bar on the workbench.
Cut out a few squares and rectangles to practice straight cutting.
The next operation that you need to master is a curved cut, or actually figured cutting:
- Secure the blade in the same way as in the case of a straight cut.
- Lay plywood with a clearly drawn outline on the work site.
- Start cutting with slow movements, feeding and turning the workpiece with your left hand so that the blade does not go beyond the boundaries of the contour line.
- If the cut deviates from the line, you should stop turning and lateral feeding and return the blade to the line with a short straight cut.
The first circle will most likely resemble a gear. Do not despair, only the genius of the Renaissance, the Florentine Giotto, could draw a perfect circle with one movement of his hand, and even Leonardo Da Vinci himself used a compass for this. On the fifth or sixth circle, your hand will become firmer, and the teeth on your gear will become completely invisible.
All elements of the drawing are performed in a similar way, including obtuse angles. Sharp corners are cut out with two cuts converging to the top, otherwise, most likely, the tip of the plywood at the top of the corner will break off and everything will have to start all over again.
Final operations
After all the elements of the design have been cut out, all edges should be processed first with a file, then with a needle file and, finally, with fine sandpaper. Even the most experienced craftsman cannot make the edges of all cuts perfectly smooth. During training, you will most likely have to wave a file and rustle with sandpaper quite a bit.
Next, in accordance with the type of finish you choose, the plywood is stained, painted or varnished. Varnishing is also a rather labor-intensive process; it makes sense to resort to it when your works leave the range of student crafts and begin to acquire aesthetic value.
Characteristics of plywood
Plywood is a multi-layer, sheet building material made from veneer of deciduous or softwood by gluing several layers into a single sheet. Due to the peculiarities of the arrangement of the fibers (at one angle), the sheet usually has an odd number of layers - three, five or more. If coniferous varieties are represented in several plywood (fir, spruce, pine), then deciduous ones are mainly made of birch. There is also a combination - a coniferous “filling” and birch cladding, in which case the plywood will still be birch. The best is entirely birch plywood, but it is also the most expensive.
The material is divided into varieties and brands, depending on the decorative effect and the chemicals used in production. There are five grades, differing in the quality of veneer and the appearance of the sheets:
- Elite grade (E) - no defects on the surface of the material, uniform, monochromatic, smooth texture without knots, cracks, wormholes or repair inserts.
- First grade (I) – there may be microcracks (up to 20 mm) and knots of small diameter on the sheets.
- Second grade (II) - even fused knots are acceptable if their number does not exceed ten pieces per 1 m² of sheet and their diameter does not exceed 25 mm. There may also be some wormholes and veneer repair inserts.
- Third grade (III) – fused knots without quantitative restrictions, voids in place of fallen knots, up to a dozen wormholes (up to 6 mm) per 1 m² of sheet.
- Fourth grade (IV) - the sheet must have a strong adhesive connection, peeling is unacceptable. The entire spectrum of appearance defects - in almost any quantity, but the diameter of wormholes, knots and voids - no more than 40 mm.
The grade concerns only the outer layers of the sheet and is indicated by two numbers, and the grade can be either common to both sides or vary, more often within the same grade - I/II/II E/I and so on. Except for the fourth, lowest grade, all other grades of plywood are sanded on both sides, and the elite grade can be additionally varnished.
Naturally, the higher the grade and decorativeness of the material, the more beautiful the finished product will be. But considering that the cost of the elite, and even the first grade, is decent, and the parts cut out are most often small in size, you can use a lower grade if you actually cut a high-quality blank from the sheet. The plywood from which the workpiece will be cut should not have knots - they may fall out and other defects. They also pay attention to the ribs - you cannot cut out masterpieces using fragments with voids in the middle layers.
The grade of plywood and its main characteristics are determined by the chemical compositions used:
- FB – impregnation of veneer with bakelite varnish, which provides resistance to high humidity.
- BS – bakelite glue (alcohol-soluble), provides high performance characteristics, such plywood is stronger and more durable.
- BV – water-soluble bakelite mixtures; plywood is resistant to high humidity.
- FC – phenol-urea resin bonding, relative water resistance, for indoor use.
- FSF – gluing with phenol-formaldehyde resin, moisture-resistant material for external use.
Safety precautions
To preserve people's health and material assets, it is necessary to follow safety rules when working.
- Use only proper tools. Before starting work, it is imperative to inspect it for mechanical damage and insulation damage.
- Do not try to saw with a broken blade, especially on a jigsaw. A cheap blade is not worth your injury and treatment.
- Personal protective equipment should be used: goggles or transparent face shield, gloves, respirator.
- When using a jigsaw, secure the workpiece with a clamp and hold the jigsaw firmly with both hands. If you can’t secure it, call an assistant, also providing him with personal protective equipment.
- When working with flammable liquids, the use of open flames and open electric heating devices within 5 meters of the work site is prohibited.
- The workplace should provide good ventilation and removal of dust and fumes from stains and paints.
Safety glasses are required even when sawing with a hand jigsaw, despite the low cutting speed and the absence of an electric drive. When a taut file breaks—as it inevitably does, even for an experienced craftsman—pieces can fly far enough to hit the eye.
Peculiarities
The jigsaw for figured cutting on plywood is equipped with a support that allows you to control the process and direct the movement in the desired direction. The cutting itself is carried out using a special file with small teeth. This part is replaceable, which allows you to perform various types of work. In addition, the jigsaw has a motor, which is responsible for carrying out the process itself. The power of the device ranges from 200 to 900 watts.
Which device to choose will largely depend on what material is to be processed. Ease of use is ensured by a special handle. The electric jigsaw is also equipped with guide jaws or rollers that correct the movement of the saw. Many advanced variations additionally have backlighting, a garbage collection system, and sound protection. The jigsaw always starts working after pressing the “Start” button.
By the way, it is absolutely not necessary to keep it pressed all the time.
Manual
A hand jigsaw is the simplest version of this device. It looks like a metal structure in the shape of the letter U, at the ends of which a cutting blade is secured with clamps. On the other side of the frame is the jigsaw handle. Clamps are used to not only hold the slab, but also to regulate its tension and vary the working planes. A hand jigsaw is a rather fragile device that does not have a long service life, so experts always recommend immediately purchasing spare cutting blades for it.
Electric
The jigsaw is the most popular type, offering maximum ease of use. The thin saw moves exactly along the markings up and down, and the working stroke is carried out only when moving up. This mechanism ensures that the jigsaw adheres to the surface instead of tearing it away. The resulting lines are very neat and smooth, requiring no additional sanding.
The electrical device is powered by a motor in a tensioned position.
It does not require additional adjustment - it is enough to carry out the initial setup correctly. Immediately before use, the cutting blade is tightened, and this is enough. A jigsaw can be equipped with different files to create different cuts on different metals. For example, these can be straight or curved lines, circles and rectangles made on wood, plastic, ceramic tiles, brick and even steel. Saws change very quickly.
Laser
A laser jigsaw is an electrical device that has a laser, which allows you to perform a wider range of work. In addition to the usual straight line cut, a laser jigsaw is capable of performing other types, such as angled cutting. The main part of the device is a motor in a plastic case, which is also equipped with a waste collection system. The cutting blade is fixed on the running shaft, which is also hidden under a plastic surface that prevents sawdust from flying directly into the worker’s face.
The metal tire acts as a support, and the laser pointer helps to cut exactly along the intended lines.
Which jigsaw to choose
In order for the hobby to bring joy and not to have to adjust and tighten something every five minutes, you should approach the choice of tool with all the attention and responsibility.
Despite the apparent simplicity of the design, a manual jigsaw has many nuances that must be taken into account when purchasing.
- Frame material. It is better to put aside the strip metal jigsaws. They are prone to twisting and distort the blade during cutting. A frame made of a metal tube does not have this drawback; it holds its shape perfectly and is also noticeably lighter.
- Lever. Be sure to check how firmly the handle is attached to the frame. If she constantly jumps off, the process will turn from pleasure into torture. Over time, sawing masters replace the cylindrical handle, turned on a lathe, with an individual one, carved from soft wood, taking into account the anatomical features of their hand.
- Clamps. Holding the saw securely during the cutting process is not only a matter of convenience, but also of safety. Good clamping areas are equipped with notch systems perpendicular to each other to ensure secure retention of the blade shanks.
- The wings of the clamps should have wide, high and comfortable ears. Avoid wing nuts stamped from sheet metal or replace them with tall wing nuts with the same threads.
How to cut with a jigsaw
To obtain an accurate cut, a number of conditions must be met:
- The hand holding the jigsaw should only move vertically.
- All movements must be made as smoothly as possible, without jerking. In addition, they must be performed with maximum amplitude. This is necessary to use the entire canvas.
- With the second hand, the workpiece turns smoothly during operation.
- Do not put too much pressure on the workpiece with the saw. No lateral pressure on the blade is allowed.
- Artistic sawing is carried out only when the file moves from top to bottom. For this reason, the reverse movement must be performed without pressure.
When working with a hand jigsaw, it must not be guided along the marked line. The canvas should be drawn along the inside of the contour. This is due to the presence of a kerf after sawing. After completing the work, one of the clamps should be loosened. The frame of the device should not lose its elasticity.
How to properly prepare a tool for use
The file in the frame should be clamped without distortions, strictly perpendicular to its ends, resting its back against the screws of the clamps. The saw teeth should be directed away from the frame. The blade should be stretched tightly so as to prevent vibration during operation. Craftsmen with sufficiently long and strong fingers squeeze the frame with their hand to do this. If this does not work, you can rest one end of the frame on the table, after which the lambs are tightened. To secure the fixation, you can slightly tighten the wings with pliers. At this moment you need to be careful not to damage the thread.
Securing the file in the jigsaw
The straightened frame ensures proper tension of the canvas. It is also unacceptable to overtighten the file. Increased voltage leads to rapid wear and failure. The ends of the blade should not protrude from the clamps by more than a couple of millimeters.
To make small parts, complex curved elements and sharp turns, thin files with fine teeth and a small pitch are used. They take turns better, leave a neat cut, and do not chip the plywood. For long straight cuts, take a wider blade with larger teeth. The accuracy and quality of the cut surface will be worse, but the speed will increase several times.
Tool preparation
The saw blade in a jigsaw must be fixed in a strictly vertical position. The teeth should point down. Before work, you need to stretch the fabric well. The degree of tension must be adjusted by compressing the frame. The device must be rested against the edge of the table. Then you should tighten the lambs with pliers. When straightening the frame, the canvas will stretch.
To cut small parts or shapes with sharp contours with a jigsaw, you need to choose small files. This requires using fabrics with a large number of patterns per inch. When using them, the jigsaw does not jam when making turns. The cut is created neat and thin. If large-sized plywood products are made, it is necessary to use blades with large teeth.
What to do if the file gets stuck
A file jam sometimes happens even to an experienced craftsman. Unfortunately, this is a common occurrence for beginners.
Wood file
We list the main causes of jamming and ways to eliminate them:
- Overheating of the canvas. It occurs during prolonged intensive work due to the friction of metal on wood (sometimes it can even produce smoke). You need to let the blade cool, reduce the sawing intensity, or select a file more suitable for the type and length of the cut. You can also wipe the file frequently with a damp cloth.
- Workpiece defects - foreign inclusions, knots, glue clots. Reduce speed or replace workpiece.
- Frame distortion. Occurs among beginners. Straighten the frame and carefully monitor its position.
- Clamping with almost separated strips of plywood for long cuts. The ends can be secured with a clamp or just a clothespin.
Operating rules
Using a jigsaw, you can perform both ordinary construction tasks and cut out a variety of decorative shapes and patterns. For beginners, there are the following simple tips to help you get the job done as efficiently as possible:
- starting to cut, you will have to create support in the lower back; this position makes it possible to hold the canvas, work while sitting, and even do it while standing;
- when you need to cut a small fragment, first a small hole is made in the workpiece with another tool, and then a jigsaw file is inserted there; By the way, to make a hole in plywood, an awl is enough;
- It is correct to work with a jigsaw slowly and measuredly, without rushing anywhere; This is especially true for complex elegant designs, so for beginners, by the way, it is better to start with geometric shapes and simple contours on a cutting board;
- When changing the cutting angle, you need to unfold the working panel and the unused file;
- the work ends with the mandatory processing of all irregularities and roughness;
- using a jigsaw, you can not only cut out various patterns on a straight surface, but also, for example, make a medallion, casket or photo frame; diagrams for all these items and images are widely available on the Internet.
Carving with a jigsaw is carried out with such specifications as:
- when working, do not put pressure on the saw blade - it will heat up faster and stronger and, as a result, even break;
- a wide file will allow you to create a long, straight cut, since the width of the cutting blade will balance the position of the jigsaw;
- When working with the device, it is important to periodically change the saw;
- cutting with a dull blade will only spoil the material, and, in addition, will increase the load on the motor, and will also worsen the quantity and quality of work;
- cutting on metals and plexiglass requires pre-treatment of the material being processed with water or liquid car oil; such an action will not only ensure a clean cut, but will also keep the cutting blade itself in satisfactory condition;
- if you need to cut metal with a thickness of less than 1 millimeter, you will additionally have to place a piece of plywood under it, and also reduce the feed so as not to create vibration;
- it is important to allow the device to rest periodically, especially in the case of a minimum stroke frequency;
- The jigsaw should be periodically cleaned and oiled with a special product.
How to deal with chips
The frequency of occurrence and size of chips are determined by:
- quality of material;
- saw quality;
- correspondence of blade parameters to the material and type of cut;
- individual sawing technique.
There are several techniques to reduce the number and size of chips:
- If the plywood is of poor quality, you should take a saw with smaller teeth and cut faster.
- Use a file with a reverse or reverse arrangement of teeth.
- Cover the cutting line with masking tape or tape.
- Wet the back side of the plywood.
How to choose?
In addition, the choice of cutting blade is, of course, important. Jigsaw blades are made from different materials with different shapes, sizes and sharpening. If materials with low density are processed, files with a length of 75, 85 or 100 millimeters are sufficient. The saw pitch varies from 2.5 to 4 millimeters in the case of wooden materials, and also from 1 to 2 millimeters when cutting metal. The abrasive coating on cutting blades is mainly diamond, which is indispensable for tiles, ceramics and glass.
Non-ferrous metal can be cut with a wave-shaped file. When purchasing a cutting blade, you should definitely check whether it will fit your existing jigsaw. And also the choice is often made between professional and amateur jigsaws. The latter have less power, but are still suitable for typical household work.
It is believed that such a device is capable of making a cut up to 50 millimeters deep in wood, and from 2 to 3 millimeters in metal.
Transferring the diagram to a wooden piece
There are various ways to transfer sketches of designs for cutting with a jigsaw onto plywood:
- Prick the key points of the design with an awl and connect the holes on the plywood with a pencil. Suitable for the simplest drawings.
- Translate via carbon copy.
- Glue the sketch onto the plywood with double-sided tape or glue. After cutting, the remaining paper and glue are removed with sandpaper.
Scheme for cutting out a toy motorcycle
Transferring the template to a plywood sheet
Before starting sawing, you should transfer the prepared drawing to a plywood blank. First you will have to print the drawing on paper. To transfer, you must have tracing paper and a pen. First, the template is attached to the workpiece with tape. Having a blank in front of you, you should think about how to cut out the different elements of the box, saving the available material as much as possible.
What kind of plywood is needed for cutting with a jigsaw?
Practice shows that the best material for working with a hand jigsaw is birch plywood with a thickness of 2 to 8 mm. It is affordable, easy to use and highly durable.
To create small details or a “dense” openwork pattern, it is more appropriate to use three-layer plywood up to 3 mm thick. It is easy to saw and at the same time quite durable. The likelihood that you will spoil the sawn curl when the blade jams again is significantly lower.
When choosing material for crafts, pay attention to the fact that the plywood is smooth and without a large number of knots. Examine the end for the presence of air chambers; their presence indicates uneven application of the glue. It is better to refuse such low-grade plywood, otherwise you will not avoid a large number of chips that will spoil the appearance of the product.
What if you use wooden blanks?
For all its practicality, plywood does not have such an expressive texture as board. By sawing projects from planks, you can take advantage of these advantages: play on the difference in colors and shades, the orientation of wood fibers (as in intarsia), etc. Crafts made from wood have a more attractive end (without a layered structure like plywood) and are much easier to treat with a finishing compound.
For sawing with a hand jigsaw, workpieces from soft and hard rocks up to 10 mm thick are used. When choosing a material, give preference to tangential cut boards. It is not recommended to use radial cut workpieces, because... they have parallel annual rings, which, due to their hardness, will lead the jigsaw away when sawing.
