The design of a car gas injector is inherently quite simple and consists of an electromagnetic valve. The purpose of this GBO element is to ensure the supply of gas to the intake manifold of the car engine. However, despite the simplicity of the design, the correct operation of this important component has a very large impact on the efficiency of the internal combustion engine, the quality of its operation and, ultimately, on its service life.
The quality of engine operation means its responsiveness to changes in the amount of fuel mixture and the ability to deliver maximum power. Even optimally calibrated injection mechanisms, if they are incorrectly selected for power, can negatively affect the quality of engine operation:
excessive performance will lead to the supply of excess gas to the cylinders, which will inevitably provoke problems in idle mode. In addition, when the fuel mixture is excessively rich, pressing the accelerator pedal, especially after engine braking, often leads to the engine stopping;
insufficient performance, on the contrary, creates the preconditions for a lean mixture and, as a consequence, a significant loss of power. Another danger of running an engine on a lean fuel mixture is the increased temperature load on the valves of the gas distribution mechanism and on the pistons of the CPG.
Another significant disadvantage of the gas injector is the lack of necessary accuracy in calibrating the jets. Differently calibrated holes of the jets installed on the same ramp allow a fuel mixture of varying degrees of enrichment to pass into the intake manifold. This in turn leads to inconsistent operation of the internal combustion engine cylinders and, as a consequence, to a significant decrease in its efficiency.
All of the above proves the importance of using injectors of proper quality in the LPG kit, carefully calibrated and balanced with the engine in terms of power. It is better if the injectors are not selected from the most inexpensive segment.
Choice depending on the generation of HBO
Injection mechanisms have significant design differences, depending on the generation of gas equipment. When choosing a model, this must certainly be taken into account in order to avoid unpleasant moments during operation.
“Generation HBO” is largely conditional compliance of the installation package with the Euro standard and the type of injection of the internal combustion engine:
the second generation complies with the Euro-2 standard and engines with carburetor engines (single injection);
third and fourth - injection internal combustion engines, Euro-3 and Euro-4 standards (separate injection);
fifth and sixth - units stuffed with electronic control and diagnostic systems. Complies with Euro 3 and higher standards (direct injection).
Errors in choosing components for different generations of equipment can lead to unjustified expenses when dismantling and purchasing suitable nozzles. So, when installing gas equipment of the fourth and later generation, it is safer to purchase a ready-made installation package. Early versions of the equipment may be equipped with nozzles produced by preferred manufacturers.
Valtek TYPE 30 (Italy)
A characteristic feature of the inexpensive Valtek TYPE 30 kits is the presence of replaceable jets. If necessary, the injector nozzle can be drilled to the required diameter. This allows Valtek TYPE 30 to be integrated into engines of varying power and cylinder capacity. A definite plus is compatibility with most well-known electronic gas control units. The functions of the valve in this type are performed by a tip made of MBS rubber, combined with a metal stem. The rod stroke is adjusted using a special screw.
Valtek TYPE 30 injectors have proven themselves well when used on power units whose idle injection time is equal to or exceeds 3 milliseconds. It is possible to install it on a single injection. The average service life of the device is 20 thousand km. Suitable for repair, purchasing repair kits is easy.
Ignition type
All burners can be divided according to the type of ignition:
- Electronic type . They do not have a constantly working igniter. Requires electricity to operate. Electric ignition is one of the most convenient inventions for modern heating units. Thanks to him, the operation of the stoves has become as comfortable as possible. Electric ignition makes it possible to light the burner flame safely, without using available wicks or lighters.
- Burners with piezo ignition . No electricity needed.
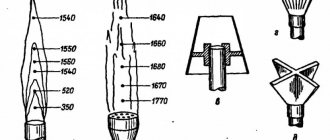
Sometimes special working conditions are required, for example, burners are placed in a sauna stove, which must distribute the flame well. These are dividers or ordinary distribution tubes. This is how kitchen gas ovens work.
The fuel consumption passing through the burner can vary widely and depend on its design.
Gas burners for your furnace should be safe and energy efficient. This can be achieved if all technical requirements are met. Self-indulgence in this matter can only do harm. Therefore, the installation of gas burners must be carried out by specialists.
Rail (Italy)
Rail SPA injectors are a world-famous Italian company producing components, replacement and consumable parts for gas equipment, in particular gas valves that can operate on both a mixture of propane and butane and methane.
Rail IG1, without exaggeration, is the most common brand in Russia. The operating pressure ranges from 0.5 to 2 bar, the maximum is 3 bar. Until 2010, they were produced with a valve seat diameter of 4 mm; after modernization carried out in 2010, its diameter is 3 mm. The operating temperature range declared by the manufacturer is from -20 CO to +120 CO.
The Rail IG1 fire rate at idle is 3.3 milliseconds with an accuracy of +3%. Experts recommend setting such a gas pressure and selecting the diameter of the nozzle opening so that the response speed when lifting the armature 0.6 mm is within 4 - 4.5 ms.
The massive aluminum body ensures quiet operation of the valves; they are not demanding on the quality of the gas mixture. The average service life before repair or replacement is about 50,000 km.
RailIG3 Horizon
This type of injector is widely used due to the possibility of being assembled into a structure, increased productivity, high response speed, and the ability to be installed on a single injection. Greater performance of the Rail IG3 Horizon is ensured by the valve seat diameter increased to 3.5 mm. Increased performance and speed of response to an electrical signal make it possible to integrate this brand of valves into gas equipment for engines equipped with turbocharging and a turbocharger, with high power per cylinder.
Flaws:
- very noisy work;
- low mean time between failures;
- susceptibility of plastic elements to temperature deformation;
- fear of pollution;
- high cost of the kit.
Rail IG5
Rail IG5 injectors are manufactured with a minimum amount of metal. The design has a large number of moving parts and joints sealed with rubber rings. The result is a fear of mechanical stress. The anchor, in relation to the IG1 brand, is lightweight. The saddle has a diameter of 3 mm.
Advantages:
- effective heating of the plastic body from the internal combustion engine;
- increased response speed;
- low price.
The undoubted disadvantages of Rail IG5 include: the possibility of deformation of the housing, the passage of gas in numerous rubber seals, the impossibility of installing heating due to the lack of flat surfaces.
Principle of operation
There are 2 types of such devices on the gas burner market:
Atmospheric nozzles draw air from the room where the stove is located. In addition, the operation does not require the use of complex automation. Thanks to this, the product has a simpler and more uncomplicated design. The main drawback is the requirement for good air circulation. Therefore, atmospheric burners should be installed in well-ventilated areas. However, some models have special sensors that monitor the oxygen level and, if its content is low, turn off the gas supply.
Supercharged products are equipped with complex automation , due to which they have a more complex design. Such products operate on the principle of forced air injection. Fans are responsible for this, regulating the pressure and volume of supplied oxygen. The main requirement for use is that air must be taken from the street.
OMVL (Italy)
OMVL gas injectors differ from analogues primarily in their body made of composite plastic and the possibility of two-way gas connection. The unused socket is either plugged or used to install a temperature sensor. The versatility of the injectors is ensured by the ability to install jets with different hole diameters and installation on a single injection.
Valve stems are made of ferroalloy, which has a positive effect on response speed, noise level and durability. OMVL mechanisms are suitable for repair, have sufficient service life, and are low in cost.
HANA (Korea)
The body of HANA 2000/2001 is made of metal alloys, which is much better for increasing the structural strength. High accuracy of dosing of the mixture is ensured by the needle valve introduced into the design. The design allows for installation both individually and on a ramp. There is no possibility of replacing the jet - a certain cylinder power requires the use of a certain type of valve for the horsepower ranges:
from 20 to 30 are marked in black;
from 26 to 39 – red;
from 33 to 50 – green;
from 40 to 60 – in blue.
HANA 2000/2001 are one of the fastest valves: the armature response time has been increased to 2 milliseconds. Other advantages include low noise level and increased resource.
Maintenance consists only of thorough bench washing. Solenoid failure or mechanical failure automatically leads to replacement. Hence the increased demands on what types of fuel are used, frequent replacement and the use of expensive filter elements.
Principle of operation
There are 2 types of such devices on the gas burner market:
Atmospheric nozzles draw air from the room where the stove is located. In addition, the operation does not require the use of complex automation. Thanks to this, the product has a simpler and more uncomplicated design. The main drawback is the requirement for good air circulation. Therefore, atmospheric burners should be installed in well-ventilated areas. However, some models have special sensors that monitor the oxygen level and, if its content is low, turn off the gas supply.
Supercharged products are equipped with complex automation , due to which they have a more complex design. Such products operate on the principle of forced air injection. Fans are responsible for this, regulating the pressure and volume of supplied oxygen. The main requirement for use is that air must be taken from the street.
Barracuda (Poland)
The design of the Barracuda injection mechanism is of a needle type, which is superior to other designs. Gas flowing through the solenoid prevents the mechanism from clogging. A plunger pair lined with fluoroplastic works much better; it has a low coefficient of friction and is not subject to contamination and burning.
The response speed of 1.9 milliseconds, high quality manufacturing, original design solutions and long service life make Barracuda products one of the leaders when completing gas equipment installation packages.
Malfunctions in the gas injection system
Gas equipment of any generation, no matter how carefully it is installed and adjusted, is susceptible to breakdowns. At the most inopportune moment, the emulator may fail and the gas supply may be interrupted. Failures of fuel injection mechanisms also occur.
The main indicators that the injectors require repair or replacement are:
- uneven engine operation, unstable speed;
- the engine does not develop the required power;
- there is no automatic gas-gasoline switching;
- increased gas fuel consumption;
- There are failures in the operation of the internal combustion engine when the speed is suddenly increased or decreased.
It is best to contact the station where the gas equipment was installed or serviced if these types of symptoms occur. The same should be done if the injection mechanisms knock and there is a noticeable gas leak in the seals.
What can cause malfunctions and breakdowns in LPG systems? There are not many reasons, and in most of them the car owner himself is to blame. Lack of proper maintenance and care of injectors, the use of gas mixtures of improper quality or composition, gross violations of operating rules are the main prerequisites for the fact that the service life of even expensive injectors will be significantly reduced.
The occurrence of injector malfunctions has nothing to do with the type of power system and does not depend on the generation of gas equipment. Whether it is single injection, distributed or direct injection, second generation or fourth generation equipment is installed - compliance with the rules is necessary.
Instructions for replacing stove and oven jets
Next, we will consider detailed instructions on replacing nozzles on the stove and oven.
Read more about what to do and how to replace nozzles on a gas stove. Since gas stove designs vary, let's look at a few of the most typical options. In the designs of new modifications, access to the nozzles is easier (just remove the burners). Other common models are of interest.
In terms of burner design, some models of Hephaestus and Darina stoves are similar. To replace the nozzles of the cooking part of the Hephaestus stove, a series of steps are performed sequentially.
Step 1. Remove the grate from the stove and dismantle all the burners.
To get to the gas distribution system of the Darin stove, insert stops on both sides between the top panel and the body, press them in with your fingers.
Step 2. After unscrewing the fastening screws, remove (raise) the top panel. “Darina” has latches that are released with special stops from the stove set.
Step 3. To release the burner, use a Phillips screwdriver to unscrew the two screws securing its structure.
The gas tube clamp to the gas tap is a plate bracket that is removed to disconnect the tube when replacing the nozzle
Step 4. Using a flat-head screwdriver, remove the retainer (bent plate) from the side of the faucet handle, freeing the tube supplying gas to the burner. Take the tube to the side.
Step 5. Detach the second end of the tube from the seat by removing the fixing plate with your fingers or using pliers (in Hephaestus) / screwdrivers (in Darin).
Removing the fixing plate in the Hephaestus gas stove (top row), location of the distant nozzles (bottom left). The numbers indicate: 1 – traverse; 2 – seat; 3 – nozzle; 4 – sealing ring; 5 – fixing plate; 6 – aluminum gas tube
Step 6. In the Hephaestus stove, the end of the gas tube is connected to the nozzle through a transition cone (a sealing ring is installed on the tube under the cone). Place a key (14) on the hexagonal pad of the cone, in order to hold it and not damage the tube when unscrewing, with a second key ( unscrew the nozzle.
Step 7. Having unscrewed the old nozzle, replace it with a new one, lubricating the threads with graphite lubricant. The sealing ring is also replaced, which is convenient to do with a match. Use a 7 key to tighten.
The jets are easily detected at the end of the gas-conducting tubes. Use a flat-head screwdriver to pry up the fasteners from the square brackets. After snapping off the fastening plate, the tube with the nozzle is moved to the side and the nozzle is replaced
Injector gasket sealing ring. It is better to install a new ring from the repair kit into the new jet, covering it with appropriate lubricant
Step 8. Reassemble the entire assembly in reverse order.
A similar operation is performed for the remaining burners of the cooking table.
Taking advantage of the fact that the upper part of the unit is opened, it is cleaned of debris and dirt. In addition to replacing nozzles, screws in the plates can also be replaced to regulate low gas flow (or low flame). They regulate the reduced gas supply, sufficient to ensure that the flame on the burner does not go out with a minimum gas supply.
The low flame adjustment screws are installed on the gas supply valve. You can get to them by removing the front panel (the panel location is on the right in the photo). To adjust, use a screwdriver with a suitable slot
Having replaced the jets, check their operation; if necessary, adjust the small flame combustion process with screws.
After replacing the nozzles, adjusting the low flame and air supply, as well as cleaning the insides of the stove, reassemble the cooking part in the reverse order.
In the designs of different stove models, the number of burners and their location vary. So ovens can have one (bottom) or two (top for grilling and bottom) burners. In modern ovens, the burners are often oriented along the stove (lengthwise), and the jets are mounted on the back wall. On older stoves, the gas supply is on the left (side orientation), and the jets are also located on the left side of the oven.
In order to get to the nozzle of the upper burners, remove the door, unscrew and remove the grate covering the burner, and unscrew the screw securing the burner to the frame. By pulling the burner towards you, it is carefully removed from the oven, after which the nozzle becomes visible. On some models, the thermocouple tip must be disconnected to remove the burner.
In an Indesit gas stove, gas is supplied to the oven burner from the rear panel. The jet is also installed there
The location of the burner nozzle is revealed after removing it. The jet often “sticks”, so it must be turned out especially carefully so as not to break the structure of the gas system
The nozzle is unscrewed using a socket wrench. After installing the new part, reassemble the oven equipment in the reverse order. If the nozzle cannot be unscrewed from this position without applying great force, then access it from the back side of the plate.
In some models, access to the lower burners is provided from the lower technical drawer. In others - from the oven chamber, such as in the MORA stove, the replacement of the nozzle of which is given as an illustration.
Access to the longitudinally located lower burner of the MORA cooker is possible from the oven chamber. To dismantle, remove the bottom grille
An unscrewed burner cannot be removed by the thermocouple tip fixed to the same bracket. To disconnect it you need to unscrew the nut
The burner is installed in a longitudinal position. Attached to the plate using a curved iron strip with two screws. A thermocouple is attached to the same strip.
The burner can only be removed after disconnecting the thermocouple tip. It is removed along with the iron strip.
After unscrewing the nut, the thermocouple is moved away. By pulling the disconnected burner towards you, you remove it from the oven chamber and gain direct access to the nozzle
The sequence for replacing the jet when the burner is positioned on the side may be more difficult.
We suggest you familiarize yourself with what kind of wood is best to burn the stove with
Step 1. Open the bottom door of the stove drawer all the way, allowing you to fully open the oven door.
Step 2. Open the oven door all the way. To remove the burner, remove the floor of the oven chamber by pulling it towards you through the slot.
Step 3. Unscrew the two screws securing the burner. We remove the burner.
Step 4. Now we can see the nozzle on the left in the wall. It’s good if it’s not stuck and you don’t need to use a lot of force to unscrew it. If so, remove the jet and replace it at this stage.
Having freed the burner from being “attached” to the bottom of the chamber, it is removed from the stove. At the bottom left there is access to the jet socket
Step 5. If the jet is stuck, then leave it. We dismantle the left wall of the slab. To do this, you will need to unscrew the fixing screws.
Step 6. Having removed the wall, we expose the gas line going to the burner. At the very bottom of the gas pipe there is a 17 nut, which can be unscrewed with a wrench without much difficulty.
Step 7. Move the gas pipe with the nut aside and disconnect the nozzle holder body from the stove.
Step 8. Lubricate the stuck nozzle with WD-40 or another suitable product, wait until it takes effect, and unscrew the nozzle.
By removing the side wall of the stove, you gain access to the oven burner nozzle body, which is fixed to the frame with two screws
The nozzle body is fixed to the frame of the gas stoves with two screws. The other end of the housing is connected by a union nut to the gas pipe
Step 9. We install a new jet into the body and assemble all previously removed parts, not forgetting to install a new sealing ring.
Injector emulator for single injection
An injector emulator is an electronic device that sends a signal to the computer that simulates the operation of gasoline injection mechanisms while the internal combustion engine is running on a gas mixture. Other names are injector shutdown emulator or injector shutdown emulator.
An emulator is used if second-generation gas equipment is installed on a car with a mono-injection system. In equipment of the third and fourth generations, emulation of gasoline injectors is carried out by an electronic control unit. According to experts, it is better to install the simplest gas cylinder equipment systems for single injection.
Author: A. Kopylov
Choosing a burner
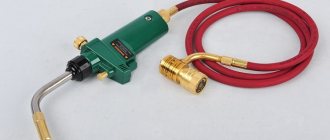
Stove gas burners, which are installed in the stove of a household or a country house, are similar to each other. Like a gas burner for a boiler, it has a combustion chamber (heat exchanger), a housing, a smoke exhaust system, channels for heated air and an automatic unit.
However, there is one obligatory part that has its own characteristics in each case - a gas burner for the stove. It is she who is responsible for the efficiency of the heating unit, power characteristics, economical fuel consumption, safe operation and other important parameters.
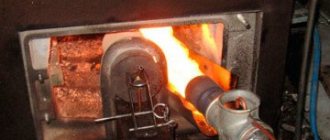
In a gas burner, the process of mixing gas with oxygen occurs; it contains a control unit for the fuel combustion process. With its help, you can set a specific mode, adjusted to the temperature level required for heating. Boilers and stoves often have the same burner models.
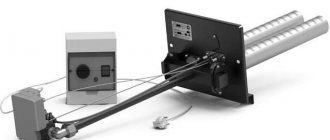
Single-stage atmospheric gas burners for a home stove are not difficult to use, they are easy to install in a heating unit. They don't need electrical power. This burner is placed on the front side, where the combustion door is located.
Important. To select a burner, you need to know its power; it lies in the ability of this model to process a certain amount of fuel in a given period of time.
