Knives for wood carving are a joint, a hatchet, a universal cutter, chisels, and rivets. For a beginning craftsman, such a set is enough; for an “advanced” one, you can also buy a flag, gravers, spoon cutters, Bogorodsky, goat legs, cranberries, and marking tools.
All products of this type have blades 2-12 cm long and handles 10-12 cm. High-quality tools are produced by Flexcut, Frost, Dem-Bart, Narex Bystrice, Pfeil. They are made from carbon steel with a hardness of 59-61 HRC and wood. The cost of the tools is 350-2000 rubles, and the kit will cost 2500-26000 rubles. You can make a knife yourself from an old saw or kitchen tool, oak or birch dies.
What wood carving knives should be included in a beginner's kit?
A set for a beginning craftsman should consist of several knives for wood carving:
- jamb,
- cutter,
- hatchet,
- corner and semicircular chisels,
- a couple of rivets.
It can be assembled from individual copies or purchased as a ready-made kit. More precisely, the choice is determined by the type of work with wood: large sculptures or small models with small details, etc.
High-quality tools for woodcarvers are produced by the following companies:
- "Tatyanka." They have individual knives: jambs, spoon cutters, hatchets, gravers, chisels, but also sets of tools made of tool steel. The handles are made of beech or other types of wood. The tools are designed to work with linden, aspen, spruce, alder, and poplar. More durable rocks also lend themselves to Tatyanka knives, but can break due to the thinness of the blades.
“Tatyanka”
The price of a single model is 600-1000 rubles. For sets they pay from 2500 rubles. up to 26,000 rub. (46 items).
- Flexcut. The American company produces more expensive cutters, chisels, and utility knives from carbon steel with a hardness of up to 61 HRC. The handles are also wooden and ergonomic. The price of the products is 1300-2500 rubles. for single models.
- Frost. The Swedish company produces universal straight and curved knives, chisels, and cranberries made of multilayer steel. The handles are made of birch. One tool costs 1500-2000 rubles.
- Dem-Bart. The American company has many models of gravers and knives for geometric carving, single notches, checkering, that is, performing mesh notches. There are also sets of chisels. Single copies cost from 900 rubles, sets - from 8000 rubles.
- Narex Bystrice. The Czech company offers a huge selection of chisels, spoon cutters, cutters, and cranberries. They are made from chromium-manganese steel with a hardness of 59 HRC. The handles are made of wood and varnished. The cost of tools is from 1500 to 2000 rubles. per copy.
- Pfeil. These are Swiss knives, the blades of which are made of steel with the addition of vanadium and chromium, and therefore are particularly durable. The handles are made of hard wood, straight or curved, well polished. There are all possible types of tools for carvers at prices ranging from 1500-2000 rubles. up to 8000 rub. per copy.
"Flexcut"
Selection rules
You should choose a set of tools depending on the type of work you intend to do:
- if a carver is going to create large garden sculptures, he will need various types of chisels, mainly impact chisels, hacksaws, and large cutters;
- to make relief images you need straight and curved chisels and rivets;
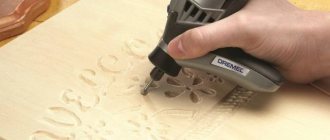
- creating three-dimensional figures cannot be done without power tools.
It is important to pay attention to the following nuances:
- devices for working with wood should have comfortable, non-slip handles;
- good blades are made from at least tool steel grades 13X or 8HF;
- the hardness of the material must be at least 59 HRC, otherwise the tool will have to be sharpened frequently;
- the optimal length of the knife is 10-15 cm; if it is longer, the tool may break due to the load;
- the handle is preferably made of wood, but plastic is also acceptable if it does not slip;
- The product must be marked with the name of the manufacturer.
Sharpening features
Sharpening tools is an important selection criterion, and in the case of woodworking tools it is done like this:
- the surface of the blade is leveled using a coarse abrasive, while maintaining the shape and sharpening angle;
- further processing is done with medium-grain sandpaper designed to soften the burr;
- the next stage is sharpening with fine-grained abrasive;
- Finally, the blade is polished with soft sandpaper (1000, 1200 grit), as well as using a leather belt and a special paste.
It's time to sharpen the weapon if the blade does not make an even cut on the tree, but leaves fragments and nicks. A dull knife forces you to put more effort when working with the material.
Carving tools
General principles
Wood carving is a fairly popular technique for decorating various products.
As a rule, the process itself follows this scheme:
The most important tools in this process are the wood carving cutters. In addition to the skill of the carver himself, it is the quality and correct selection of the cutter that determines how clean the ornament or plot image on the wood will be.
That is why below we will look at the main types of such tools and describe where and how they are used.
Main types of incisors
To create three-dimensional images, craftsmen use a variety of types of wood cutters. In principle, if you have the skill, you can do without some of the products listed below, but to achieve the best result, it is better to collect as extensive a set as possible and use each device for its intended purpose.
The main types of cutters are presented in the table below:
Depending on the shape of the chisel edge, there are:
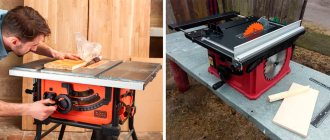
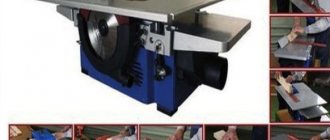
A wood lathe is considered an indispensable assistant during the careful processing of wood. Using such a tool, you can turn a baluster for a porch, as well as construct a staircase for the attic. A lathe helps real craftsmen produce turned parts for a variety of trims, create original elements for the interior and exterior decoration of a house, parts for assembling furniture, as well as many other designs.
The basis of a wood lathe is a single-phase electric motor, the power of which is about one kilowatt. Some manufacturers used three-phase motors during the production process, which have a rated power of about 1.5 kilowatts. It is worth noting that the latter unit operates exclusively using a capacitor circuit. Experts recommend that craftsmen opt for electric motors that have a reduced number of revolutions per minute. But this value should not exceed 1500.
What is a marking tool?
A marking knife for wood is necessary for drawing lines along which the cut will be made with another tool, including an electric one. And therefore it is a tool with the following parameters:
- long straight handle;
- a beveled or arrow-shaped blade measuring 3.2-3.5 cm, width 1.4-1.5 cm;
- total size about 20 cm;
- double-sided or single-sided blade sharpening;
- tip at 40-45 degrees.
The tools are more precise than pencils in marking due to the thinness of the blades and narrow point. The cost of this is 800-1100 rubles.
Why do most artists choose "Red Pencil"?
Under the “Red Pencil” trademark there are five retail stores and an online store with delivery throughout Russia, each of which is a partner-licensee of the retail chain. They choose us to do more, to see, to draw, to evaluate new materials. We constantly deal with creative individuals and know what a real artist needs:
- Want to find everything you need in one place? We offer more than 40,000 items of goods from domestic and foreign manufacturers. Moreover, we offer products not only for artists, but also for sculptors, woodcarvers, decoupage artists, etc. We are sure that in our store you will definitely find what you need.
- Hoping to save money? Here you will find the best prices for goods for artists in Moscow. Most of the products in our store are sold at the manufacturer's recommended price. We give discounts to birthday people, TS members, pupils and students of art institutions, as well as their parents and teachers. And our regular and wholesale customers also receive discount cards as a gift.
- Need professional advice? The sellers of our online store for artists will tell you in detail about the product and even give recommendations on its use. After all, most of our employees have professional art education and are constantly developing in this direction.
- Are you immersed in the creative process and don’t want to waste time shopping? We will deliver art supplies ourselves to any address in Moscow and the Moscow region. Moreover, if you ordered products for an amount of 5,000 rubles or more, then we will provide FREE delivery within the Moscow Ring Road.
All photos from the article
In the arsenal of any craftsman engaged in the manufacture of decorative objects, there will definitely be wood cutters for handmade work. These devices can be very different, and therefore it is advisable for beginners to become familiar with their main types, as well as study the features of choosing and caring for such an instrument.
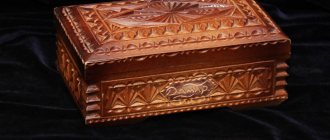
Bogorodsk knife for wood carving and its features
The Bogorodsk knife for wood carving, or “Tatyanka,” is a universal tool used for working with small amounts of wood. They cut out toys, and not only gave the shape of the future product, but also made small details. They are also used now - at the same time at the initial stage of work and for cutting out ornaments, recesses, protuberances, etc. The tools are distinguished by small blades of the “goat’s leg” type; they come in different sizes:
- with a blade length of 6-6.5 cm, width of 1.3 cm;
- blade size 9-9.5 cm, width 1.6 cm;
- the handle is slightly thicker than the main metal part.
The stalk can be straight and flat, barrel-shaped, curved.
The cost of the gun is 800-2000 rubles. Sometimes for this price you can buy a set of 2 Bogorodsk knives - large and small. But a forged weapon, sold in a single copy, is more expensive than others.
Features of using wood turning tools
Today, the construction market offers a large and wide range of wood turning tools. Anyone can make such a purchase. But many experts argue that such devices can be made with your own hands and without spending a lot of money. Also, the presented wood cutters can be adapted for your own needs.
The incisors consist of a posterior, pointed and anterior angle. It is worth noting that the sharpening angle primarily depends on the material that needs to be processed. Craftsmen use sharp angles to work with wood. The shape of the chip depends on the rake angle.
Other types of carver tools
A carver's tool is any of the following:
- hatchet,
- shtikhel,
- chisels,
- flag knife,
- jamb,
- universal,
- for geometric carving.
Hatchet
The hatchet is named so because its blade is shaped similar to the main part of an ax and at the same time a construction spatula. This tool can do any job using:
- a point for cleaning out recesses;
- the middle part of the blade for cutting convex parts;
- “heel” for cutting in any direction.
Despite the versatility of the tool, it is rarely found in sets. After all, to own it and use it for different types of work you need experience.
The cost of hatchet knives varies from 600 to 1100 rubles. and depends to a large extent on the size of the gun (smaller is cheaper).
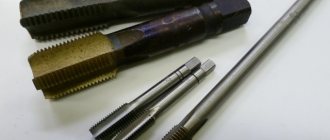
Stichel
As the hero of the famous film said, “there is a difference between a graver,” because the tools for working with wood of this type differ from each other:
- Dimensions of the working part. The length varies from 4 to 12 cm.
- Form. There are flat beveled rods, flat straight rods, semicircular rods, curved rods, oval rods, and with different angles.
The weapon is a metal rod with a sharply sharpened tip. Its handle has the shape of a mushroom, and during use its pommel rests on the palm. Stichels are used to perform jewelry work on wood - openwork patterns, thin lines of various configurations.
The cost of a single copy is 350-600 rubles. But more often, gravers are sold in sets of 3-12 pieces. And their price is 2000-7500 rubles.
Chisels
Chisels are a bit like chisels, but they are larger and are used for other types of work:
- gouging out grooves;
- chamfer formation;
- carving along pre-drawn lines;
- cutting out voluminous rounded parts.
There are several types of tools, differing in blade shape:
- at the corner ones it forms the letter V, so the chisel is used to make recesses in the wood of the corresponding shape;
- flat ones are thick and thin, they are also used to create simple grooves of different depths and cut out small parts;
- semicircular ones are necessary for making ornaments and cuts;
- staples have a flat base to which sides are attached; they are needed for cutting rectangular grooves;
- the reverse ones are a curved metal sheet; they are used to make a convex pattern on a plane.
The cost of a set of chisels ranges from 300 to 13,500 rubles. There are from 3 to 23 pieces in a set, but the price also depends on the quality of the instrument.
Flag knife
The flag knife has a small, wide blade shaped like a triangle. It is attached to the handle at an angle, and the base is at the top, this is the blade.
The flag is used for geometric carving, when it is necessary to make small patterns, thin lines and indentations. Blade tips are used in this work. And the main blade makes even cuts and cuts.
The flag can be slotted or threaded. The first has one edge of the main blade noticeably higher than the other. Therefore, it is better suited for making through holes. And a rifled one is needed to draw grooves and recesses on a plane.
The price of a flag knife is 600-900 rubles. Sometimes you can buy a set of products of this type in different sizes for 5000-6000 rubles. (7 pieces).
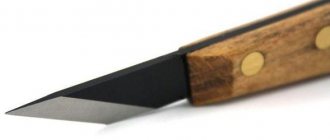
Jamb
The jamb comes not only of the traditional type - with a fairly wide blade consisting of straight lines. This part is also made narrower, with a reverse bevel, a radius notch at the base of the blade for trimming rods.
Since the tool is intended for different jobs (best suited for removing large volumes of wood), it must be sharp. That's why a good blade is made of carbon steel. And it can cost from 800 to 1200 rubles.
Universal
A universal knife for wood carving is a cutter that:
- butt, curved in such a way that its line rises upward;
- The blade sharpening angle is 35 degrees;
- its line from the base goes down, and then also goes up;
- extended handle.
The parameters allow the tool to be used equally successfully for fairly rough work and for cutting out and honing details of a sculpture, panel or figurine. Cutters are also available with double-sided sharpening. The cost, regardless of the number of blades, is 600-1000 rubles. for 1 copy.
Criterias of choice
Currently, we offer the widest range of knives for wood carving, which is represented by products of domestic and foreign production of very different prices. To select the appropriate tools, you need to decide on future tasks - what type of thread will be used, what material will be used.
To begin with, you can purchase a minimal set - several knives with straight and semicircular cutting edges, then, as you progress, specific tasks will arise, and you can select a tool for them.
Before purchasing, you also need to consider the main manufacturers, select the size of the knife for wood carving, the grade of steel, the material of the handle, which should be ergonomic, comfortable, and not slip in the hand.
Among the manufacturers on the market are the following:
- “Tatyanka” is a domestic supplier of high-quality knives with a comfortable beech handle and a blade made of 65G tool steel;
- Flexcut – produces sets of cutters and chisels;
- Frost – produces knives and spoon cutters;
- Dem-Bart – manufactures tools for finishing stocks;
- Narex is a manufacturer of quality kits;
- “Petrov and Son” – produces several types of knives;
- Pfeil - a variety of knives made of the highest quality steel.
Among the variety of products, the final choice can be made by comparing the purpose, quality and cost of the tool.
Which one is suitable for geometric carving
For geometric carving, in addition to those mentioned earlier, the following tools are suitable:
- Klukarzy. Their working parts resemble a scoop with a sharp front edge. Cranberries are used to make ornaments when you need to make indentations or convex parts. Sizes and shapes vary, so knives can be used to make round or angular, flat, deep grooves. But this is one of the few types of wood carving tools with handles shorter than blades or equal in length.
- Goat legs. This is a tool similar to a chisel, but with a curved blade. Thanks to this shape, they can make complex patterns in hard-to-reach parts of a panel, box, or other product.
- Klepiki. Just by the name it is easy to guess that these are instruments with small blades. The latter come with symmetrical blades, arrow-shaped or in the form of a sword, a leaf of wood, or a claw. Rivets are intended for performing delicate work and for use in hard-to-reach areas of the manufactured wooden product. Or for finishing parts made with larger tools.
How to make wood cutters yourself?
Each person will be able to make homemade cutters, which will become an indispensable assistant for surface treatment. To complete this you must complete the following steps:
To process wood on a lathe, it is necessary to use cutting cutters, sharpened on both sides for rough and initial alignment of the workpiece, and semicircular cutters through passage. They will be useful for treating the surface after rough cleaning.
Using such a tool, you can remove existing nicks and also make a semicircular recess. To work with the machine, you need to use an oblique flat cutter, which will help round off all edges, trim the base or end parts of the part.
In order to modify or perfect wooden parts, you need to use small semicircular turning and flat straight cutters.
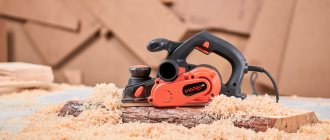
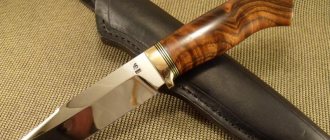
Kitchen hatchet made from a saw blade
Hello everyone, today we will make such a useful thing for the kitchen as a kitchen hatchet. Using this homemade product, you can chop or cut vegetables, meat, bones and other products. The author used an old saw blade made of thick steel as the material. As a result, the hatchet became weighty, which makes it convenient. The product was also quenched and tempered, which made the steel durable. The handle covers are made of wood, which is impregnated with epoxy resin; as a result, such a handle will not be afraid of water. The only drawback of the chosen steel is that it rusts, but if the ax is used often, over time the steel will become covered with a patina. You can make the patina yourself, using etching and so on. If the homemade product interests you, I suggest you study the project in more detail!
Materials and tools used by the author:
List of materials:
- old saw blade (made of good steel); - wood for linings; — brass rods for pins; — epoxy resin and dye; - wood oil.
List of tools:
— belt grinder; - drilling machine; - Bulgarian; - files; - sandpaper; - stove, oil, oven (for heat treatment); - marker; — orbital sander.
The process of making a hatchet:
Step one. Ax profile
Before cutting an axe, it is advisable to check the steel for hardening.
Otherwise, it can be very disappointing later when the product suddenly refuses to harden. To save steel, some modern saw blades are made from poor metal; such “steel” cannot be hardened. The author uses an old thick saw blade as the starting material. First, draw the desired profile of the hatchet on it with a pencil, and then draw it with a marker. That's all, you can start cutting, the author works with a grinder. Our metal is quite thick, so cutting will take quite a long time. As for problem areas that cannot be cut out with a grinder, we cut them out in pieces. As a result, we will get a primary ax profile with uneven edges after cutting with a grinder.
We eliminate all these sins by grinding, here we need a belt sander. The workpiece will heat up quite strongly, cool it periodically in water. The author makes the final modification of the profile manually, using files. Step two. Descents
We draw out the slopes on the axe; there will be quite a lot of grinding required here, so we again turn to the help of a belt sander. To make the bevels symmetrical, draw a centering line along the blade. When grinding, steel should not be overheated; under no circumstances should it turn blue.
We also drill all the necessary holes in the axe, since hardening is required next.
Step three. Heat treatment
Let's start hardening the axe; to do this, the steel needs to be heated to a temperature of just over 800 degrees. The ax should warm up evenly; it will glow in all places with the same red hue. Next, immerse the ax in oil and check whether the hardening was successful. If everything is done correctly and the ax is made of quality steel, it should not be scratched by a file.
Then be sure to temper, otherwise the steel will be very brittle and the blade may chip. For holidays we use the oven, the temperature is classically set at around 200 degrees Celsius. If the steel has been pre-ground, it will turn straw-colored after tempering.
Step four. Grinding
After hardening, the steel will be covered in soot and scale; the whole thing needs to be cleaned off. We arm ourselves with an orbital sander and polish the hatchet well until it shines.
As for the slopes, the author decided to polish them by hand. We use fine sandpaper and WD-40. If desired, the slopes can also be polished.
Step five. Overlays
We make linings for the handle, here we need wood, a block or a thick board will do. As a decoration, we drill holes in the workpiece and fill it with epoxy resin and dye. The author used a silicone mold to pour the resin.
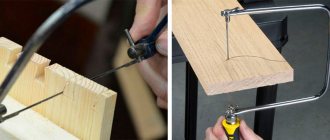
When the epoxy resin dries, we need to cut the workpiece lengthwise to create two halves, which will become the overlays. For cutting, the author uses a band saw, but you can also do it with a hacksaw. We grind the workpieces well and you can cut out the primary profile.
Step six. Installation of overlays and completion
We cut brass rods that will be pins, and also mix epoxy glue. We glue the handle, not forgetting to thoroughly coat the pins with glue. We tighten everything well with clamps and let the glue dry.
Well, when the glue dries, we set the desired handle profile; the author carries out this work manually, so as not to remove excess. First we work with files, and then we switch to sandpaper and grind the handle until it is perfectly smooth. Finally, we coat the handle with oil or varnish, this will return the epoxy resin to its former transparency, and the handle will look like a masterpiece.
The hatchet is ready, all that remains is to sharpen it and, if desired, polish it. The author's ax is so sharp that it easily cuts thin paper. At this point the project can be considered successfully completed, I hope you liked it. Good luck and creative inspiration if you decide to do this again. Don't forget to share your ideas and crafts with us!
This post may contain affiliate links. This means I earn a small commission from links used at no additional cost to you. See my privacy policy for more information.
hatchet, disc
How to make it yourself
Craftsmen who have worked with ready-made cutting tools see their shortcomings in relation to the technology used. It could be the length of the blade or its shape, someone doesn't trust the hardening of finished products, or they don't like the configuration and material of the handle. In such cases, you can make a wood carving cutter with your own hands. To do this, you will need a little experience in handling metal and a fairly simple set of tools:
- blade from a hacksaw or circular saw (2.0 mm thick);
- a piece of wood;
- electric sharpener.
- A diagram of a knife for wood carving is drawn on the workpiece, then the excess metal is removed with a sharpener.
- The handle is cut out; the parameters can be determined by squeezing a piece of plasticine in your hand.
- After shaping, the wood must be carefully sanded.
- A hole is drilled in the handle where the knife sits, then it is placed on the blade. To increase service life, the wood is impregnated with linseed oil and then varnished.
- Now you need to properly sharpen the cutter, maintaining the recommended angle. After this, the tool is ready for use.
During processing, the workpiece must be periodically immersed in water, avoiding overheating and, accordingly, tempering of the hardened metal.
Tool sharpening
For wood carving to be enjoyable and the created masterpieces to be pleasing to the eye, the tool must be sharp. If during work you feel an increase in the resistance of the material, you need to take a break and sharpen the tool. This will allow you to avoid using unnecessary effort when carving and guarantee the excellent quality of every stroke, every groove.
Sharpening should begin by leveling the working surface of the tool. To do this, use a coarse abrasive. It quickly and efficiently removes burrs and creates an ideal cutting edge.
Note! When working, it is important not to spoil the sharpening angle of the wood chisel and the geometry of the knife blade.
When working with emery, you need to be careful, you must not allow the metal to overheat; sudden temperature changes can “release” the cutting edge.
After large irregularities have been removed, they move on to fine-grained abrasives. During grinding, roughness that arose during rough sharpening of the carving tool is removed. The last ones to use are sanding mixtures applied to a felt base. They create a perfectly flat surface, reducing friction between the tool and the material to a minimum.