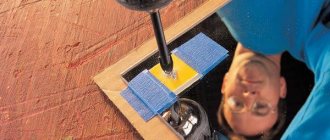
How to sharpen a perk without a machine: using available tools
Don't have the funds or desire to purchase a special machine to sharpen your steel? Use available tools:
- stone;
- grinder;
- thick sandpaper.
With their help, you can perform the procedure in various ways:
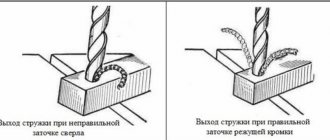
- simple. The cutter is placed strictly parallel to sharpen, not at an angle. Do not move the sharpening during the process. Used for instruments with a diameter of 1-3 millimeters. Using this method risks the fact that the product soon begins to crumble;
- conical Used for equipment with a diameter of more than 3 millimeters. The tool is pressed to the sharpening point at an angle. The product is rocked from side to side to ensure uniform treatment of the entire surface.
Determine the required sharpening angle using the table:
| What material is the drill designed for cutting? | Sharpening angle in degrees |
| Steel, bronze | 118 |
| Brass | 120 |
| Copper | 125 |
| Aluminum | 140 |
| Magnesium alloy | 90 |
| Electron | 100 |
| Concrete | 140 |
| Tree | 140 |
You can calculate the sharpening angle of a drill for metal from the table using a conventional conveyor. This will be the fastest and most reliable way.
In order to sharpen your metal sharpener accurately, use a template. You can do it yourself:
- take a sheet of aluminum or steel no more than 2 millimeters thick;
- prepare a new gimlet;
- make a cone from a steel or aluminum sheet. Its dimensions and angle must correspond to the new product;
- Using the template, you can easily understand whether a used product needs treatment.
When is it necessary to sharpen drills?
Drills for metal work have to be sharpened more often than analogues intended for processing wooden workpieces. It is necessary to monitor the condition of such drills to prevent serious wear and tear.
If the drill is dull, you will know about it by the following signs:
- a worn instrument makes strange sounds;
- the drill gets very hot during operation;
- the resulting holes have uneven edges;
- drilling time increases;
- the cutting edge becomes rounded;
- Chips and burrs appear on the cutting surfaces.
How to sharpen?
Strong creaking and heat generation indicates that the cutting tool is worn out. It is worth noting that an increase in temperature leads to an acceleration of the wear process. When considering Pobedit drills for metal, the cutting edge is made of hard alloy, you can sharpen it with your own hands only when using special equipment.
To sharpen pobedit drills with your own hands, you will need the following:
- Grinder. Without such equipment, turning will not be possible.
- When looking for a sharpening machine, it is worth considering that it must have a cooling bath for the stone used. You can create it yourself. The process of processing carbide involves a strong increase in temperature.
- Diamond stone.
We advise you to study - Porcelain stoneware - technical characteristics, properties, types and areas of application.
A distinctive feature of sharpening carbide material with your own hands is the need to use a diamond stone, since a regular one will not work.
Before sharpening, you should check the possibility of sharpening. If the soldering is less than 10 millimeters, then sharpening with your own hands is basically impossible. Also, large defects do not allow sharpening.
Drill sharpening geometry for various materials
After checking the condition of the tool and if you have the necessary equipment, you can sharpen it yourself. Its features include the following:
- The higher the hardness of the material being processed, the lower the rotation speed of the stone should be. This is due to the fact that increasing the speed of rotation of the stone will lead to rapid heating of its surface.
- The work needs to be done with small touches. It is worth remembering that removing the soldered alloy layer when using a diamond stone takes place quite quickly. Therefore, the master must carefully monitor the process in order not to remove an extra layer of the working surface. The work is carried out overhead, without emphasis.
- When doing the work with your own hands, without using a template, it is recommended to sharpen the surface in the same way as in the case of small drills for metal, when the rear plane is changed.
- It is also recommended to sharpen the front surface. It is recommended to perform this work if the soldering is completely worn out. Such a change should be made so that the thickness of the central part of the soldering is significantly smaller.
The back and front surfaces form an edge that removes metal at the time of hole formation.
When doing the work with your own hands, you need to be careful, since all cutting sides must be the same size. Achieving this is quite difficult, but still possible. If you break this rule, the resulting hole will become large and irregular in shape. Regardless of the type of equipment used, you should also control the ratio of the front and rear cutting angles in the direction of rotation of the tool.
A rather important rule that applies to all tools is the following statement: the greater the surface hardness, the greater the sharpening angle. In this case, it should be 170 degrees.
Particular attention is paid to overheating. Carbide brazing becomes very hot during processing
Overheating of any material leads to a change in its structure. Therefore, the cutting tool may become deformed and there is a possibility of cracks appearing. A stone bath will eliminate the possibility of such a situation occurring.
In conclusion, we note that the work in question can be carried out independently. To do this, you need to know the geometry of the tool, the principle of its operation and other nuances. You should also have certain skills in operating the equipment used. However, without special equipment it is almost impossible to maintain the sharpening angle.
Important points
When resolving the issue, strictly adhere to the following requirements:
- Keep the rod motionless, under no circumstances allowing it to rotate around its axis; a change in position even by a degree will entail a re-alignment.
- Use only those disks and circles whose surface is perfectly flat; restore it regularly using CBN nozzles.
- Allow the tool to cool after completing the sharpening operations, and only when it has cooled naturally, place it in the template and check.
These rules for sharpening metal drills help to achieve maximum quality of processing and are dictated by practice, so apply them.
Sharpening twist drills
The drill is sharpened along the rear edges of the tool.
It is extremely important to comply with the requirements for equal sharpening of both teeth (feathers) of the drill. Achieving this by manually sharpening the drill is quite difficult and requires skill.
It is equally difficult to manually create the desired shape for the back face, as well as the specified back angle.
Enterprises use special equipment designed for proper sharpening of drills. In a home workshop, sharpening is forced to be done on an ordinary sharpener.
The types of sharpening depend on the shape that is given to the back surface. There are the following types of sharpening drills for metal:
- conical;
- single-lane;
- two-way;
- screw;
- cylindrical.
In home workshops, single-strip and conical sharpening are most often used.
Single lane. This method is the easiest, therefore it is most often used for manual sharpening. It is recommended for drills of small diameter (up to 3 millimeters). With this sharpening, the back angle is made in the range of 28˚-30˚. The disadvantages of such sharpening include the danger of chipping the trailing edge.
This type of sharpening has a rather complex geometry. It can be represented as follows. To do this, you need to imagine a cone with a generatrix directed along the plane of the grinding wheel and the cutting edge, and the top of the cone is located at a distance from the top of the drill, 1.9 times the size of its diameter. In this case, the apex angle will be 26˚. In this case, the angle of intersection of the axis of the drill itself c on the rear edge of the drill being sharpened will form a conical surface.
If the axis of the drill and the axis of the virtual cone are located in the same plane, then in numerical terms the back angle will coincide in value with zero. To form a back angle, the drill axis must be shifted relative to the main axis of the virtual cone. Rocking the drill along the axis of the virtual cone with simultaneous displacement ensures that a conical rear edge is obtained, as well as a rear angle of 12˚-14˚. By increasing the offset amount, the clearance angle increases.
Naturally, it is quite difficult to comply with all these requirements when sharpening manually. In practice, the drill being sharpened is taken by the shank with one hand, and by the working part with the other at a minimum distance from the intake cone.
The drill is pressed against the plane of the sharpening tool with its back surface and cutting edge, then with smooth movements, starting from the cutting edge, slowly, without lifting it from the sharpening wheel, the drill is rocked, creating a conical surface of the back edge of the pen. Then the operation is repeated for the second pen.
At home, craftsmen make cone sharpening using a simple device made from a special sleeve fixed at a certain angle to the plane of the sharpening element with a drill inserted into it. The drill inserted into the sleeve is placed with the cutting edge against the plane of the sharpener and, without removing the sharpened part from it, the drill is slowly and evenly rotated around its axis.
In order for the drill to serve for a longer time, so that the diameters of the holes being drilled are as accurate as possible, fine-tuning is performed after sharpening. This process smoothes the surface. Small nicks left by grindstone particles disappear. As a result of finishing, the cutting properties of the drill increase, it heats up less and becomes dull more slowly.
To perform finishing, we recommend grinding wheels coated with a layer of green silicon carbide or CBN wheels.
- using special devices;
- sharpening by hand;
- sharpening through a sleeve;
- point;
- obtaining hole sizes that do not correspond to the diameter of the drill when using an incorrectly sharpened drill.
Instructions for operating the machine
Naturally, sharpening twist drills for metal should be carried out in compliance with safety precautions, according to which:
- a mask or goggles for eye protection and gloves with hand guards are required;
- while the equipment is turned on, you must not touch its working parts;
- Even after switching off, it is forbidden to touch the abrasive wheel until it stops rotating and stops.
Now let's move on to the nuances of the procedure:
- Level the back surfaces - this will make it easier for you to maintain the desired degree; You can adjust the corners using a drawn line.
- Place the tool on the index finger of your right hand, fixing it with your thumb and holding it by the shank with your left hand, and then controlling it - this is most convenient.
- Keep the rod strictly horizontal during the process, otherwise you risk removing the jumper and edges; lower only the back part and then smoothly, without rushing.
- Control the pressure and remember that all movements should be short and quick to avoid overheating; Cool the cutter regularly in salted water.
- Continue until you have removed even the smallest defects - it is important to achieve a perfectly smooth surface.
Restoring a pobedite drill
A drill bit with a pobedite tip may become dull over time and will require a diamond wheel to sharpen it. Before starting the sharpening process, you need to make sure that the height of the remaining cutting part is at least 10 mm in order for sharpening to be possible. Work should be carried out at low grinding wheel speeds.
We advise you to study - Condensing gas boilers - operating principle, advantages and disadvantages
A tipped drill is sharpened in the same way as a conventional drill of small diameter - sharpening the back surface. In this case, the surface should be ground down to the soldering. It is also advisable to sharpen the front surface, especially if the plate has worn down to the drill. The front surface is processed in such a way that the soldering thickness in the center becomes thinner. You should work carefully to avoid unnecessary cutting of the working surface.
Care must be taken to ensure that the drill does not overheat during processing, as this can cause the plate to crack or even break at the soldering site. To cool an overheated tip, any coolant, such as plain water, will do. However, if the metal is red-hot, then under no circumstances should you dip it in water - the drill will instantly crack.
The process of restoring the geometric surface of drilling tools for metal and concrete is necessary, since these materials quickly kill the factory sharpening of the tool. Theoretical material on the question of how to properly sharpen drills for metal is not enough, but everything is not so complicated and comes with experience.
Using a special attachment for a drill allows you to preserve all the geometric surfaces of the tool and is ideal for those who do not have experience in manual sharpening and are afraid of damaging the drilling tool.
The type of metal that will be drilled affects the angle of sharpening required, and for working with stone and durable alloys, a drilling tool with pobedite bits is suitable.
We should not forget that in addition to correct and timely sharpening, its proper storage in special cases and stands will help extend the life of the tool.
Originally posted 2018-03-28 15:14:38.
How to tell if a drill is dull
You should not let the tool become too dull, because... A dull drill heats up faster; excessive heating can lead to its breakage. If a tool breaks, it is not always possible to remove the parts remaining in the hole, which leads to damage to the part. In addition, the fragments fly in different directions and can injure the worker.
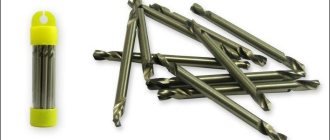
Dull metal drills
Set drills for metal
Bag of dull drills
Signs of wear on cutting edges:
- rapid heating of the drill;
- the appearance of a creaking sound during drilling;
- operating time increases;
- to the touch the cutting edge becomes smooth and rounded;
- the appearance of burrs, chips, and irregularities on cutting surfaces;
- The degree of wear is clearly visible when viewed through a magnifying glass.
Dull drill bits under a magnifying glass
Dull drill bits under a magnifying glass
Sharpening process
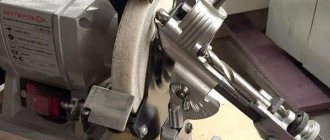
It is advisable to properly sharpen a drill for metal using special devices and machines. Unfortunately, in a home workshop, such equipment is not always available, and usually sharpening metal drills with your own hands is done on an electric sharpening machine with abrasive materials, for example, on stone wheels. Sharpening is carried out along the rear edges, and all teeth should be sharpened absolutely identically. At the same time, it is difficult to manually maintain a given angle and the desired shape, and the easiest way to sharpen at home is only spiral and crown tools.
Work surface angles
In order to know how to sharpen a drill for metal on a sharpener, you should remember a number of important parameters applied to the cutting part, the implementation of which guarantees a high-quality result:
- The angle of the rear part of the tool relative to the drilling plane = 10°,
- Front sharpening angle = 20°
- Cutting tool tip angle = 118°
In this case, the angle at the apex may vary, depending on the material to be worked with:
- For stainless steel, cast iron and hard bronze - 115−118°;
- For aluminum - 130−140°;
- For copper - 125°;
- For soft bronze - 130°.
There are several types of sharpening used for different purposes. the most common are:
- Single-plane. With this type of processing, the back surface of the feather is made in the form of a single plane. The rear angle lies in the range of 28−30°. The drill is placed with the cutting part parallel to the grinding wheel and its position is not changed. It is considered the simplest type of sharpening of drills with a diameter of up to 3 mm, but the disadvantage is that the cutting edges may crumble during the drilling process.
- Conical sharpening. Typically used for relatively large diameter drills. It is difficult to carry out without special equipment and without the appropriate skills. The drill should be taken with your left hand by the working part closer to the cone, and with your right hand hold the tail. The tool is then pressed against the end of the whetstone with the back surface and the cutting edge. During the sharpening process, the drill is slightly rocked by the tail with the right hand, this allows you to create a cone-shaped surface on the feather edge.
Finishing the material after sharpening
Finishing is carried out on special finishing wheels. They differ from conventional grinding wheels in that they combine aggressive processing of the material to produce a good surface finish.
Due to the softness of the material and high-quality abrasive, such wheels are ideal for removing scratches and other surface defects; their removal is carried out without changing the geometry of the working part of the material. As a rule, such wheels are mounted on a grinder or drill, which makes it possible to more conveniently and accurately process a drill clamped, for example, in a vice.
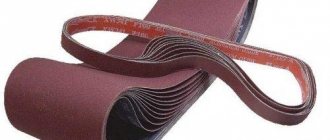
In addition to finishing wheels, you can fill the working surface using emery found on the disk of the same grinder.
Surface pointing
Correctly sharpening a metal drill with your own hands on a tool with a diameter of up to 10 mm is quite enough for the job; for wider ones, it is recommended to additionally sharpen the front surface.
The meaning of this treatment is that by increasing the cutting edge angle and decreasing the rake angle, the resistance to crumbling increases, which leads to an increase in drill life. In addition, the width of the transverse edge is reduced, so that the material in the central part of the hole is not drilled, but scraped, which facilitates the process of drilling metal. For a drill with a small clearance angle, you can sharpen the flank to reduce friction inside the hole.
Tools to check for proper sharpening
It can be:
- calipers;
- protractor;
- ruler;
- goniometer.
and others - all together or separately. But for maximum accuracy and convenience, it is better to use a universal template - with length scales and angles already applied. The easiest way is to buy a ready-made one, but since it is not always found on sale, it makes sense to make it yourself, it’s not difficult.
You can implement one of two configurations:
- a thin plate made of sheet stainless steel, steel or even tin with markings applied with a diamond pencil;
- 2-3 nuts, welded together or fastened with hot glue - the angle at the junction of their faces will definitely be equal to 120 0, so the tip of the cutter can easily be checked by it.
Basic Workflow
Tools and materials:
- drill;
- clamp;
- corundum circle.
Each person has his own methods of artisanal sharpening, and they are often distinguished by great originality. Some people sharpen using a grinder with a diamond cutter, while others prefer a rasp, but both of these options are suitable only for surface sharpening, because they do not provide much accuracy and quality. Such moves are permissible only in cases where it is necessary to correct the ends of the tool for working with a hammer drill, but no more.
Drill sharpening diagram.
At home, tools are used many times less frequently than in industry, and therefore need to be produced much less frequently. Many even purchase new ones to replace the old ones, because... The process is labor-intensive, but buying is much easier.
The easiest way to sharpen is with a corundum wheel, by analogy with all other metal products. During work, breaks should be taken every 10 seconds to cool the metal, because otherwise, there is a good chance that the carbide plastic may fall off.
We advise you to study - How to disinfect an acrylic bathtub
If overheating occurs very quickly, then you can use water, but you should not be too zealous, because this also has a destructive effect (if you managed to miss the moment when the metal became hot, you need to wait for it to cool in the air, because the water will simply split it).
During the working process, you need to carefully monitor the uniformity of sharpening so that in the end everything turns out perfectly symmetrical. Even if the sharpening itself is not successful, it can still be straightened out later, whereas if it is bent, the drill will most likely burst during the first approach. If the tungsten-titanium alloy turns out to be very reliable, then the edge will become dull only on one side, which significantly accelerates the heating of the metal, and at the same time reduces the speed of work.
Another important factor is the location of the cutting edges. They should be perfectly straight, and their intersection point should be exactly in the center. The uniformity of work depends on the intersection point, so you need to treat this step no less carefully than any other.
There are 3 main types of sharpening:
Cylindrical section of the drill.
- Conical. The most common option, because simplest. You need to fix the drill on the platform, then bring it to the grinding wheel for 5-10 seconds, then move it away and turn it. This procedure is quite fast, so experienced professionals can achieve an ideal result in 1-2 minutes.
- Screw. Much more difficult, but also much more interesting, because... requires more skill at the initial stage. Sharpening is carried out using a diamond wheel, and after completion, you need to make cuts with a needle file.
- Flat. The work is average in complexity, but requires its share of concentration. Usually, it is carbide materials that are sharpened at an angle of 60 degrees, and there is no need to be particularly clever here, as when creating a conical shape. Ideal for correcting previously made deficiencies.
Dependence of sharpening angle on material
We already mentioned above that the number of degrees changes in one direction or another, based on what kind of part is being processed. The smaller it is, the longer the edge, better heat dissipation, and longer service life. The more, the more difficult it is to center the tool at the initial stage of the technological operation.
There is a universal value - 118 0 (with a tolerance of 2 0) and 7-12 0, respectively. It is chosen when no details are specified. If you know what the workpiece is made of, you should give preference to the recommended values, which we have summarized in a table for clarity.
| Material | Angle, 0 | |
| rear | at the top | |
| soft wood, plastic, fiber structures | 12-15 | 60 |
| hardwood, elastic rubber, bakelite, malleable rubber | 90 | |
| stainless steel, alloys of corrosion and heat-resistant steels | 12-14 | 127 |
| tool steel | 7-15 | 118-150 |
| copper | 12-15 | 100-118 |
| hard bronze, structural steel, cast iron (when working with casting, it should be double sharpened, making the transition edge angle 70-75 0) | 7-12 | 118 +/- 2 |
| alloys | ||
| titanium | 12 | 70-118 |
| magnesium | 135-140 | |
| aluminum | 12-17 | 90-140 |
| copper | 12-15 | 118-150 |
Working part
The working part is formed by 2 cutting edges, which are obtained as a result of the intersection of the helical surfaces of the grooves intended for chip removal, as well as a transverse cutting edge, resulting from the intersection of the rear surfaces.
The guide part consists of two auxiliary cutting edges, which are obtained as a result of the intersection of the front surfaces with the surface of the strip.
Elements of a twist drill, as well as the geometry of its angles.
The names of the elements are shown in the figure.
- with single sharpening
- with double sharpening
- D – outer diameter of the drill.
Almost the decisive influence on the quality of the resulting holes is exerted by the angle, denoted on the diagrams and drawings of drills by the Greek letter ϕ (2ϕ) or the apex angle. If it is made too small, then the lower edge of the chip will be inhibited by the wall of the hole. Difficulties in the process of removing chips will lead to overheating of the drill metal and, as a result, to rapid wear.
It is also important to maintain the exact values of this angle when sharpening because when it increases, there is a proportional increase in the load on the cutting edges, which means that the resistance of the metal being processed to penetration of the drill into the part during feeding increases. If the apex angle turns out to be less than optimal, then the force required to ensure rotation of the drill at the optimal speed increases, chip formation deteriorates, and friction increases
As a rule, the 2ϕ angle for universal drills, which are made from high-speed, or chromium, or carbon steel, should be 116˚-118˚. It is changed during sharpening depending on the metal in which the hole needs to be drilled:
- hard bronze, cast iron, steel - 116˚-118˚;
- soft bronze, brass - 120˚-130˚;
- red copper - 125˚;
- magnesium alloys - 90˚;
- silumin, electron - 90˚-100˚;
- aluminum - 140˚;
- ebonite, marble, fragile materials - 140˚;
- various plastics - from 90˚ to 100˚;
- wood - 140˚.
How to extend the life of a drill
It is not difficult to “plant” a drill; it will be more difficult to return it to functionality. To extend its service life, you need to remember the following operating rules:
- Do not allow drill bits to overheat . Overheating of the working part of the drill causes the metal to soften and quickly become dull.
- Select rotation speed . The rotation speed of the drill is selected depending on its type and diameter. For different materials, the required number of revolutions with the same drill diameter will also differ.
- Lubricate the drill . When drilling holes in metal, strong friction occurs between the drill and the workpiece, which leads to its overheating and rapid wear. To reduce friction, machine oil is added to the place where the drill comes into contact with the part.
- Remove the chips . When working with wood, you need to frequently remove the drill and clear it of accumulated chips. Excess of it can lead to overheating, and the drill can also get stuck in the part and break. Let the drill cool down between dives.
- Make holes in the metal in several passes . If you need to drill a hole with a diameter of more than 6 mm, it is advisable to do this in several passes with drills of different diameters, gradually increasing the diameter by 5-6 mm. This will also allow you to drill the marked holes more accurately.
- When sharpening, sharpen the bridge and ribbon . This will increase durability, the drill will cut into the material better, drilling performance increases, and the feed force decreases.
Below is a table with approximate values of the number of revolutions per minute depending on the diameter of the drill and the material being processed.
| Ø, mm | Softwood | Hardwood | Steel | Copper | Aluminum |
| Twist drills for metal | |||||
| until 6 | 3000 | 3000 | 3000 | 3000 | 3000 |
| 6-10 | 3000 | 1500 | 1000 | 1200 | 2500 |
| 10-16 | 1500 | 750 | 600 | 750 | 1500 |
| 16-25 | 750 | 500 | 350 | 400 | 1000 |
| Twist drills with wood scorer | |||||
| until 3 | 1800 | 1200 | — | — | — |
| 6 | 1800 | 1000 | — | — | — |
| 9 | 1800 | 750 | — | — | — |
| 12 | 1800 | 750 | — | — | — |
| 16 | 1800 | 500 | — | — | — |
| 19 | 1400 | 250 | — | — | — |
| 22 | 1200 | 250 | — | — | — |
| 25 | 100 | 250 | — | — | — |
| Feather (feather) drill bit for wood | |||||
| up to 12 | 2000 | 1500 | — | — | — |
| 12-25 | 1750 | 1500 | — | — | — |
| 25-39 | 1500 | 1000 | — | — | — |
How to properly sharpen a drill for metal: methods and videos
I depicted it in the picture (simplified). This is what lack of practice means. I had to bring old supplies of drill bits from the garage.
When I was hacking before, I had an ordinary Konakovo electric drill without a hammer drill, and sometimes I had to drill while standing on the balcony railing. I always took a bunch of drills with me and for two or three holes I had
one drill went away. Drilled a little, tapped a little with a hammer and repeated again. When you have the skill
It’s easy to drill concrete without a hammer drill, I’ve drilled thousands of holes this way. I then sharpened the “dull” drills
at the main job. Only the stone must be special for hard alloys. There are such “emery”
for machine operators, for sharpening cutters.
Tip for drilling concrete:
Use one drill for two or three holes, then sharpen. The working edge of the drill must be clear and without roundness, otherwise the drill will simply slide. If you drill without a hammer drill, you need to periodically
Insert a spare drill into the hole and tap it with a hammer.
Tip for drilling tiles:
The drill must be sharp and sharp on one side for concrete.
Drill without turning on the hammer drill (so that the tile does not crack). It is easy to drill. As soon as you pass
tiles, you can turn on the hammer drill......
ORIGINAL REPLACEMENT SHAVING CASSETTES AT GOOD PRICES CAN BE BUYED FROM OUR
WAREHOUSE STORE » SHAVING EVERYTHING » OPPOSITE METRO CHERTANOVSKAYA (30 METERS)
FIRST CAR FROM THE CENTER.TRADE HOUSE » Vault » PAVILION No. 1. ASSORTMENT AND PRICES ON OUR SITE WWW.OLDWAY.DS77.RU
Sharpening methods according to the number of bevels on the cutting edge
They differ in the number of cutting edges formed. The angle at the apex changes in steps from greater at the central apex to smaller at the side apexes. This method of sharpening reduces the heating of the tool as the diameter increases, since the cutting edge in the center heats up less than at the edges.
There are single and double sharpening. Since the first one is used more often, we will only talk about it. During normal sharpening, the geometry of the cutting edge remains smooth throughout.
Types of sharpening according to the number of angles at the tip
Use of special devices
The sharpening process according to the above method is suitable for tools with a diameter of no more than 10 mm. In order to efficiently sharpen larger drills, especially if they have a complex shape or are supplemented with special carbide tips, it is better to use a machine with a special device.
The use of this equipment allows you to control the sharpening angle, and the work will be performed as safely as possible for the master. The use of such sharpening machines is recommended for sharpening tools that:
- They are used for drilling blind holes; they are characterized by a reduction in the cutting force along the axis.
- Characterized by increased strength and quality of the alloy.
- Used for making very deep holes.
- They differ in the small size of the point.
These devices differ from a conventional machine in the correct orientation of the cutting part of the drill in relation to the grinding wheel. To perform this task, the design of the device has a special base plate on which a machine with a circle and a rotary column that fixes the tool are installed. The use of this column allows you to position the cutting part of the drill in any position at any angle to the surface of the abrasive wheel.
The movement of the tool being processed is carried out by a drive connected to the motor. After fixing the drill in the column, it is automatically brought to the circle and all the angles that need to be formed will be maintained automatically. The disadvantage of such a machine is that it is large in size and high in cost, so purchasing it is not practical for home use.
Sharpening at home
When sharpening drills with your own hands, the user is advised to adhere to safety rules. When working on sanding wheels, safety glasses must be worn. This will protect your eyes from abrasives and pieces of scale. Glasses must be used even if there is a protective screen on the sandpaper.
It is strictly forbidden to carry out work wearing gloves. The drill may get caught in the thread, causing hand injury. It is recommended to carry out work in tight-fitting clothing, the buttons of which are pre-fastened. It is recommended to adjust the support so that the gap between it and the stone is small.
Sharpening drills can be carried out in various ways, which allows a person to choose the most suitable option for himself. To avoid injury, you must adhere to safety precautions during work.
Jumper point
In parallel with the main sharpening of the metal drill, you can sharpen the jumper at home. This measure has a beneficial effect on the quality of drilling, since the processed bridge does not create resistance to the drill when moving deeper into the material. The jumper is undermined on both sides, but not completely. Complete grinding is unacceptable.
There are several ways to sharpen the jumper edge:
- with a groove for chip removal;
- with increasing rake angles at the edge of the bridge;
- with an increase in the front angles on the edge of the bridge and trimming the back of the tooth;
- with grinding down part of the lintel;
- with grinding off part of the lintel and sharpening the cutting edges;
- with a cutting lintel.