Installing utility networks in a private home is a complex process fraught with many pitfalls. In particular, not everyone is familiar with such a phenomenon as a drain riser, but it can absolutely rightly claim to be one of the most important components of the internal sewer system. What is this unusual type of riser and why is it so needed in the house? Next, we will look into this in detail, paying attention to the following points: reasons for using a fan riser, recommendations and requirements for design with video, installation features and common installation errors.
What does it consist of?
The sewer riser is a structure consisting of several elements. Regardless of whether it is located in a private or apartment building, it contains the following parts:
- main vertical pipe - relatively recently, only cast iron pipes were used for its formation, however, modern systems are created using high-quality and reliable plastic pipes. They are characterized by high strength and low weight. Therefore, even independent installation of such a pipe will not cause difficulties for the owner of a residential premises;
- crosspiece intended for subsequent installation of the toilet. It is mounted at the very bottom of the structure, and one of the very first. Below it it is not allowed to install any pipelines or other elements of the sewer system. If you do this, then during the process of flushing water from the toilet, the hydraulic valves will fail;
- compensator - used for a sewer riser when a transition is made from one type of pipe to another. Most often you have to deal with the fact that an old apartment has a cast iron riser, and its replacement is carried out using plastic pipes. Therefore, without a compensator it will not be possible to complete the work, since otherwise an unreliable and short-lived connection will be obtained;
- revision - represented by a small section of pipe with an optimal diameter. There is a hatch on it, and it can be easily unscrewed if the need arises. This process is usually carried out when the sewer system is clogged. Often people who carry out installation with their own hands without work experience forget about the inspection, so even during the operation of the system, if blockages occur, they have to destroy the integrity of the riser;
- tee - used if only one sink and bathtub are connected to the drain, and if there are additional plumbing fixtures in the apartment or house, then a tee is used to increase the number of outlets. Its diameter cannot be less than 10 cm.
Difficulties may arise in the process of determining the optimal diameter of the riser, and during this process it is taken into account that if there is a toilet in the apartment, then the diameter of its outlet cannot be less than 10 cm, and if there is no toilet, then it is allowed to choose a pipe with a diameter of 5 cm.
Sewage riser diagram
Main pipe
Audit
Compensator
Cross
Tee
Design Features
There are sewer risers in every house to which this system is connected. They are considered reliable and durable, however, situations may arise when they require replacement. In this case, you should understand the design features:
- when dismantling old cast iron pipes, you must act carefully so that fragments do not get into the system, as this will lead to its clogging;
- Particular attention is paid to the junctions of different pipes, as they must be reliable and durable;
- if the work is carried out in an apartment building, then to replace the riser you will have to obtain permission from the management company, and also negotiate with the neighbors, since during the repair the system in the entire entrance is completely shut down.
Before the actual work, you should decide which pipes will be used to create a new sewer riser. It is important to take into account the characteristics of each type.
Design Features
Errors in arranging a riser
Experts, based on their practical experience, have come up with a lot of rules, recommendations and useful tips, but even they do not protect some novice craftsmen from mistakes, for which they ultimately have to pay with their own comfort. For your attention, the most common mistakes that should never be repeated.
- The first mistake is cutting off the vent riser directly in the attic. The reason for this phenomenon is simple laziness: the owners of the house simply do not want to bother with pipes on the roof. The result of the mistake is that stench will continually accumulate in the attic, which sooner or later will penetrate into the house itself.
- The second mistake is installing a riser on an external wall. This cannot be done because the risk of condensation seriously increases.
- The third mistake is installing a weather vane to increase draft. Such amateurish activity will not only not justify itself in terms of efficiency, but will also result in a deterioration in the outflow of sewer gases.
Typical mistakes when installing a vent riser
As you can see, the vent riser plays a very important role in the sewerage system of a private house, so it is highly not recommended to abandon it. Don’t want your home to “smell” of sewage and waste? Then carefully study the theory and, getting down to business, do not neglect the above norms and rules for the design and installation of a vent pipe.
Types by material of manufacture
Since the riser is considered the most important element of the sewer system, it is important that it is made of high-quality and durable materials. You can choose from several options:
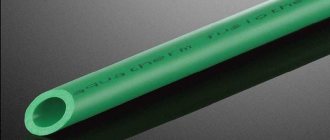
- plastic or polypropylene pipes are considered the most popular, as they are characterized by excellent ergonomics and low weight, and are also easy to install, which is especially important for people doing this work with their own hands for the first time. The connections of individual elements are made with special joints equipped with rubber gaskets, so there is no need to use any sealing agents or other additional materials to increase the tightness of the connection;
- ceramic pipes are used only by experienced craftsmen, since beginners may not be able to cope with the work on their own. However, the resulting riser will be resistant to the corrosion process and the appearance of various deposits on the inner sides of the pipes;
- metal risers are usually used in private houses, since there is no possibility of damage to the pipeline by neighbors. Cast iron is rarely chosen, so steel structures are usually purchased. The disadvantages of this material include low resistance to rust.
Ceramic
Plastic
Cast iron
In the process of selecting pipes based on the material of manufacture, the ease and characteristics of their connection are taken into account, and fittings, couplings or gaskets can be used for this.
Selection of section and dimensions
When choosing a pipe that will be used to create a riser for a sewerage system, its dimensions and cross-section are correctly determined. This is due to the fact that when using sewerage for its intended purpose, it is necessary to create a significant water flow. If the pipes are too narrow, household waste can cause stubborn blockages.
However, it is not recommended to choose pipes with a cross-section that is too large, since different plumbing fixtures usually have small outlet openings, so the connection will be complicated. Also, large pipes will significantly spoil the appearance of any room.
When choosing the optimal cross-section and dimensions of the pipe, the recommendations of experts are taken into account:
- for city apartments or private houses in which there are a small number of rooms with installed plumbing fixtures, the optimal choice would be pipes with a diameter of 10 cm;
- for bathrooms, kitchens or bidets, pipes of even smaller diameter are chosen, since household waste of significant size is not washed away here;
- it is taken into account that during operation the internal diameter of all pipes constantly decreases due to the accumulation of numerous deposits on the walls;
- if an apartment building has a large number of floors, then risers with a diameter of 15 cm or more are considered optimal;
- Plastic pipes are ideal for sewer risers, and if you connect them hermetically, and also correctly select different angles of inclination in the horizontal parts of the system, then there will be almost no deposits inside the pipes.
Thus, different pipes with different diameters can be used in one sewer system, since the correct choice of size and cross-section depends on the characteristics of each section of the system.
Dimensions of PVC sewer pipes
Dimensions of sewer riser elements
Riser design
In order to properly organize the so-called fan ventilation, you should first draw up a project for the riser, working out all the most important details regarding its location and dimensions.
Requirements for the location of the fan riser:
- the outlet pipe must rise above the roof level by at least 30 cm;
- the distance from the pitched roof should be 50 cm or more;
- if the house has a usable attic, the pipe should rise 3 m above the roof level;
- the riser must be at least 4 m away from windows and balcony buildings;
- the exhaust pipe must not come out of the chimney.
Advice. The fan riser must be routed through a heated room, and if this is not possible, the pipe must be insulated - this should also be indicated in the project.
As for the requirements in terms of dimensions, there is one fundamentally important condition: the drain pipe must be exactly the same diameter as the pipe of the main sewer riser from which evaporation is planned to be removed.
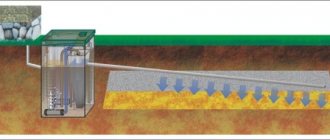
Sewerage diagram of a private house
An equally important design point is that if there are several sewer risers in a home, then in order to optimize air circulation, it is advisable to route them all into one drain pipe. In this case, the pipes should be joined above all plumbing fixtures.
Procedure for replacing a sewer riser
Water supply and sewerage are important parts of any house or apartment, so if any problems arise with their performance, you should definitely start repair work as quickly as possible. Replacing risers is rarely required, since they are made from truly durable and reliable materials. However, after a long period of use, even the highest quality structures need to be replaced.
Replacing the riser can be done by yourself if permission for this process is obtained from the building management company, and the procedure is agreed upon with other residents of the apartment building. If the process is performed in a private building, then no permits are required.
Required Tools
The entire replacement process is divided into successive stages:
- preparatory work - they consist of preparing various keys, grinders and other tools for the replacement process. Also, all unnecessary items in the room are removed and plumbing is covered so that it is not damaged or contaminated during the process of replacing equipment;
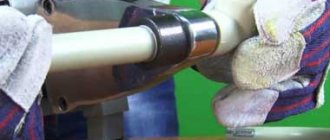
- dismantling the old riser - this process is complicated in an apartment, since you will have to come to an agreement with the neighbors, since during the work the sewage system in the entire entrance is completely turned off. Using a grinder, the riser is cut off from above and below at the optimal angle, and the cut out section is carefully removed. This leaves small sections of pipe at the top and bottom. They should also be cut off, and the optimal solution is to contact your neighbors to have new plastic pipes installed in their apartments. If this cannot be done, then the couplings are inserted into the sections in the apartment where the repairs are being carried out;
- installation of a new riser - the required amount of material for the work is calculated. Pipes are selected, with modern and high-quality plastic products most often used. Rubber cuffs are inserted into the sockets located at the top and bottom of the room, ensuring high tightness of the planned connections. An adapter is formed that is used to connect sewer pipes from various plumbing fixtures to the riser. The required section of the new pipe is cut off, after which it is inserted into the sockets. If the diameter of the new pipe is smaller than the old one, then rubber cuffs are added, which will ensure the strength of the connection;
- The strength and tightness of the resulting structure and all connections are checked. If there are leaks or other problems, they are promptly corrected.
Dismantling old cast iron pipes
Installation of a new riser
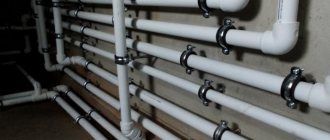
Fastening
Thus, the risers of the sewer system are its most important parts, found in every apartment or house. They can be made from various pipes, and must also be reliable and have a suitable cross-section and size. The riser is quite easy to replace yourself if you understand this process well and also choose high-quality materials. The result is a design that will serve for many years and also have the necessary parameters. During the work process, especially much attention should be paid to the connection points, since no leaks or other problems are allowed. If errors are made during installation, they must be corrected immediately.
Preparation of communications
Before starting landscaping work, you should check the serviceability of the sewerage and water supply.
Requirements for sewer pipes:
- They must be without the slightest cracks, otherwise replace them immediately;
- No specific sewer smell. If there is one, then additionally treat the joints and service hatches along their perimeter with silicone sealant;
- The places where the sewerage passes through the upper and lower ceilings must be tightly sealed with cement mortar.
Note!
In the place where the sewage system is diverted from the main pipe to the plumbing or other premises, it is advisable to install a bypass valve.
It operates on a simple principle: it does not interfere with the drainage of wastewater, but if the communications are clogged, it blocks the internal cavity of the pipe under the pressure of the reverse flow of wastewater.
Five minutes of installation and nothing will flow through your toilet from your neighbors.
It is recommended to install a valve in each sewer outlet to the sides
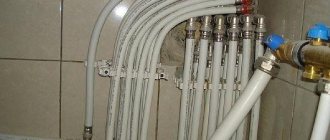
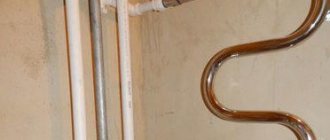
Requirements for the water supply system:
- Water pipes must be free of corrosion. If necessary, remove it and coat the pipeline with moisture-resistant paint. Additionally, you can put a casing made of foamed polypropylene on top - this will eliminate sudden temperature changes on the surface of the pipe and partially prevent condensation;
- Check the functionality of the water supply taps and the integrity of the threaded connections. To prevent taps from rusting or corroding when exposed to moisture, treat the moving joints with the anti-corrosion compound Nanoprotek.