17.03.2020
- Signs that a tool is dull
- Features of drills and what the sharpening angle depends on
- Basic equipment elements
- Features: at what angle are different types of drills sharpened?
- How to choose the correct sharpening angle for a drill for steel or other metal
- Tools and equipment for sharpening
- Sharpening rules
- Performing an operation
- Security measures
- Quality control
- General recommendations on video
During metalworking, regardless of the machine and the skill of the turner, any tool begins to become dull. Dulling of cutting edges can lead to heating of the workpieces, as well as sloppy workmanship. But it is not necessary to buy new, sharp equipment every time; you can correct the situation yourself, at home. In the article we will tell you what the correct sharpening angle for a metal drill corresponds to GOST, and we will provide a table of values.
Signs that a tool is dull
First, let's explain why it is necessary to monitor the condition of the equipment. If it is poorly sharpened, then over time, due to constant mechanical and thermal effects, it can break directly during the metalworking process. Where it leads:
- to damage to the workpiece, because a piece of debris remains inside the hole, which is then difficult to remove;
- to damage to the hands or other unprotected part of the turner’s body if the fragments fly to the sides.
But here’s what continuing processing with a cutter that has already served its useful life can lead to:
- to a sharp decrease in work productivity - the same procedure will take several times longer, as a result the final effect will not be achieved, and the metalworking accuracy class will decrease;
- to increased overheating - during friction, both the workpiece and the cutter begin to heat up, and any metal has a temperature at which it deforms;
- to work “idle”, that is, rotational movements of the tool will not lead to anything - this can only be achieved in the case of final dullness, most often happens with short products;
- to jamming of the entire machine - it is difficult to remove the workpiece, sometimes it is simply impossible to pull the fragment out of the hole, since it begins to melt there - this outcome most often awaits long drills;
- Some metal is strongly hardened after burning (the friction reaction leads to a change in physical properties due to transformations in the internal crystal lattice) - it is then very difficult to process it with other tools; in fact, it undergoes a partial, local hardening process.
To prevent such unpleasant consequences, before each new drilling cycle it is necessary to inspect all equipment for suitability. Regular checks and monitoring the condition of the sharpening angle at the tip of the drill will help to avoid such consequences. It is not necessary to conduct instrumental analysis to understand that the cutter has become unusable. Here are some signs you can use to determine “by eye” that it needs sharpening:
- a clearly visible shine of the sharpening edges has appeared - when rounded, the material shines, which makes its head more noticeable, it differs from the other parts (from the shank and the main cylinder);
- the appearance of a tarnished color on the cutting tool - it can become, for example, black and blue, this effect is obtained due to a strong change in temperature, you can notice a similar process with a metallic tint in the coming off metal shavings when cutting;
- heating during operation - of course, it will occur even with the sharpest drill, but during operation of the interceding one it will be several times more noticeable;
- an increase in effort when used for a similar procedure is especially important when drilling with a hand tool (electric drill), because the feed is carried out not by a mechanism, but directly by the person himself, that is, the master will simply put more pressure on the device;
- a creaking sound already indicates that sharpening will not help - such a cutter should simply be thrown away, it has been ground down to a faulty state;
- a rough assessment can be considered palpation with a finger; a round edge will be felt under the pad - the sharpness of the edge is very easy to determine, but a person who is little familiar with turning will not always draw the correct conclusion the first time;
- Various defects may appear on the cutting surface - chips, burrs, etc., despite the fact that previously everything was fine with the same components (machine, metal, drill, master);
- You can see the wear if you use a magnifying glass.
We'll give you advice on what to pay particular attention to. The very first thing in any drill that becomes unusable is the central part and the outer corner edges, because they experience the greatest thermal impact. After heating, the steel becomes softer and deforms more easily. In addition, the wider the radius, the greater the cutting material, that is, the maximum load on them. The central part does not participate in the cutting function, but rather pushes the material apart. So that the center does not experience heavy loads and does not wear out at an accelerated rate, it is recommended to drill a preparation hole (roughing) with a cutter of a smaller diameter, and then during the second pass, be sure to use soap emulsions for cooling or, in the most primitive version, water.
Technology and methodology for drilling stainless steel
The first and most important thing to remember: drill stainless steel only using cooling lubricant and special drills. As for the thickness of the material being processed, the technology provides the following:
- Stainless steel, the thickness of which is within 1–2 millimeters, can be drilled with ordinary metal drills. In this case, the sharpening angle of the tool should correspond to 120 degrees, and the revolutions of the electric drill should not exceed 100 per minute.
- It is better to drill a millimeter-thick or thinner layer of stainless steel using step-type equipment. It provides a smooth channel with no burrs or burrs on the edge.
- It is best to produce holes in stainless steel with a thickness of more than 6 mm using specialized cutters in two stages. First, you need to drill the metal with thin equipment with a diameter of 2–3 mm, and then bring it to the desired diameter with a finishing drill.
If stainless steel shavings begin to acquire dark shades and become small, this indicates that the cutting edges are dull and overheating. It is impossible to work in this mode.
Features of drills and what the sharpening angle depends on
Of course, when choosing a cutting tool, a master must take into account many factors, because there are a large number of design options and standard sizes. Based on the features, not only the cutter is selected, but also the type of metalworking. Each process has its own special characteristics.
They depend on:
- The material you are working on. Some steels have increased hardness, others can be brittle, and others can be malleable and soft.
- The qualities of the drill itself - similar rules apply here.
- The turner’s task is what size, as well as the accuracy class, must be ensured.
Based on this and some other factors, the drilling mode is selected - when the optimal pressure and speed are selected, in other words, the feed and rotation speed of the tool. If we are talking about drilling with an electric drill, then such indicators are quite difficult to calculate. But in the case of working with machines (drilling, turning), this indicator is very important. It is most convenient to work with CNC equipment, since the control panel automates many processes, including the calculation and setting of the above parameters. You can buy devices for CNC milling and turning of metal on the company’s website.
At what angle to sharpen the drill also depends on what purpose the turner is pursuing, as well as what material he is working with. Let's give an example. If the workpiece being processed is made of a very hard alloy, and the cutter has an excessively sharp edge, then there is a high probability that it will simply break when pressed. There are two ways to get out of this situation:
- change the sharpening angle to a more blunt one;
- do preliminary roughing - drill a small hole in this place.
Below we will tell you in more detail about the selection recommendations.
Features of different types of drill sharpening
The correctness of the chosen method depends on an accurate assessment of the wear of individual elements. The ones that suffer the most wear are:
- back or front surface;
- jumper;
- set angles;
- chamfered.
Depending on the degree of wear of one of the parameters or several simultaneously, a type of sharpening is selected that can eliminate these shortcomings.
To achieve a high-quality drilling result, it is necessary to correctly select the diameter of the drill and the shape of the cutting edge. To maintain it in working condition and give it the required shape, you should choose the right method (type) of sharpening.
- NP - involves consistent grinding of the transverse edge. This allows you to reduce its length, thereby reducing the magnitude of external loads and increasing the period of normal operation of the drill.
- NPL - this type involves processing the transverse edge and ribbon. Which leads to a decrease in the transverse size of the ribbon. This processing helps to obtain the required clearance angle. This reduces the friction force of the cutting edge on the metal surface;
- DP - belongs to the category of double sharpening. Correct application allows you to get one transverse and four additional cutting edges.
- DPL - this processing of metal drills involves sequential sharpening of the ribbon. As a result, better conditions are created for heat removal, reliability and durability are increased.
All types of processing are aimed at creating optimal conditions during drilling. Descriptions of the rules and characteristics of sharpening are established by the relevant standards. All parameters for sharpening a drill for metal are summarized in a single table. It shows the geometry of the cutting edge shapes used for various cutting conditions. The listed types of sharpening allow for high-quality restoration of the parameters of the cutting part of a tool with a diameter of up to 100 mm.
When applying the listed methods, it is very important to take into account the parameters of the metal from which the tool is made. This is necessary for the correct selection of a sharpening tool (grinding wheel). For example, for high-quality restoration of drills made of high-speed steel, experts advise using an electrocorundum grinding wheel. If the drill is made of carbide materials, it is advisable to process it with a diamond-coated wheel. The operation of restoring parameters leads to significant heating of the part, especially its cutting edge. Therefore, this process must be carried out in stages using coolant.
Particular attention should be paid to restoring the basic parameters of the drill in a home workshop. It is necessary to ensure high quality of the following indicators:
- the same length of edges and ribbon (measurement can be made with an existing measuring tool);
- sharpness of both edges (check is carried out visually);
- values of both angles (front and back).
To simplify the latter task, many craftsmen make their own templates that provide the required sharpening angle. Exact observance of these parameters and correct pointing of the jumper significantly increases the service life of the drill.
However, there are certain types of drills, the specifics of which significantly complicate the sharpening process. Problems with sharpening a twist or step drill are associated with the complex geometry of their design. Therefore, sharpening of such tools is carried out on special machines using developed equipment.
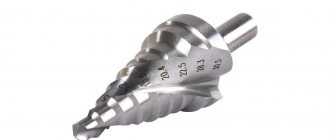
Sharpening step drills for metal is particularly difficult. Such sharpening can only be carried out using special tools and extensive experience. However, it should be noted that the majority of such tools cannot be re-sharpened at all.
Neither method is applicable to diamond-coated drills or other hard bits.
Basic equipment elements
The tool consists of the following parts:
- Working. This is a screw cylinder with several turns (approaches). They form grooves and teeth and are also called feathers. Their task is to ensure the cutting process itself.
- Calibrating. She is responsible for removing metal shavings from the metalworking area. It is formed by a tape, which is directed along the main stroke of the drill.
- Connective. It is also called the neck. It is used for two purposes - to exit the grinding zone, and also to mark a fragment that is not erased or covered by a vice.
- Tail. This part is briefly called the “shank”. It can be made in the form of a smooth cylinder or a Morse cone type. It is completed with a leash or paw. The task is to fix the equipment in special clamps.
What is a drill and how to sharpen it
To perform drilling work, special tools are produced, the most common of which is a drill.
Attention! To work with different materials, special drills with different sharpening angles are produced. In addition, the sharpening angles are affected by the structure of the material.
But first things first
In addition, the sharpening angles are affected by the structure of the material. But first things first.
Various sharpening methods
A drill is a cutting tool that performs the cutting process due to a rotational movement with an axial feed.
Drills are used not only for making through holes of various diameters, but also for drilling out existing holes. Using a drill, you can drill a through hole, make a recess of the required diameter, and drill to the required depth.
But to perform the above work you will need a drill of the required diameter.
In addition, the drill must be properly sharpened.
Various sharpening methods for specific materials
And in order to find out how to sharpen a drill, you need to clarify what material the tool will be used for.
Structurally, drills are produced in spiral, flat or feathered, annular, center, for deep or one-sided cutting. Twist drills are available in various diameters. Range 0.1…80 mm with working part length up to 275 mm. Flat drills are used to make large diameter holes to great depths. Structurally, the cutting part is made in the form of a blade and is attached to the holder. Annular drills are made in the form of a hollow pipe, which has a narrow annular cutting part. Center drills are used to center parts during turning. But all of the tools listed above become dull during operation. And if the drills become dull, they need to be sharpened. And to find out how to sharpen a drill correctly, you need to imagine what material the tool will be used for and then change the sharpening angle. Drills are less likely to become dull when working on wood. If you use drills for drilling only in wood, then such drills do not require sharpening for several months or years
You just need to be careful with their storage and use. It’s important for us to learn how to sharpen drills when working on metal and concrete.
Features: at what angle are different types of drills sharpened?
The goal of the procedure is to restore the previous shape of the incisor. There is the most standard geometry. It is called normal or single, marked as N. During it, one or two cutting edges are formed with a slope of 118-120 degrees. This type of sharpening is typical for equipment that does not exceed 1.2 cm in diameter.
Options such as NP, NPL, DP and DPL can be used on even narrower drills - up to 0.8 cm in cross-section. During them, the transverse edge is sharpened to reduce the load on it. And also the width of the ribbon is reduced, this solves two problems:
- the friction force decreases, which means heating;
- gives greater drilling efficiency.
Checking the correct sharpening of the drill
- the angle between the jumper and the cutting edge;
- apex angle;
- lengths of working edges.
A similar protractor can be made from an ordinary metal protractor. The excess part should be cut off, because when turning drills for metal, angles up to 30° are not used.
Control of the clearance angle is carried out indirectly through determination of the point angle.
To make a template yourself, just transfer the required angles to a sheet of metal. A new, unused product can be used as a standard.
To check the correctness of the factory sharpening, a workpiece made of any soft metal is drilled to a depth of 1 cm, after which the diameter of the resulting hole is measured. It must exactly match the declared standard drill size.
Incorrect restoration of the working edges, if their wedges are disproportionate to each other or they are sharpened at different angles relative to the tool axis, will cause the drill to run out. As a result, the hole diameter will be large.
Also, the correct sharpening can be easily determined by the type of chips that come out when drilling metal. When moving around corners, the tool will fit tightly, and you will have to make much more effort to immerse it in the metal.
How to choose the correct sharpening angle for a drill for steel or other metal
The main criterion for slope is the material of the workpiece. It is assessed according to the following characteristics:
- hardness - so as not to break the tip;
- fragility - the formation of chips or cracks should not be allowed;
- viscosity or density.
The second criterion is what the cutter itself is made of. Let's give an example. It is advisable to sharpen a tool made of a durable alloy at 120 degrees. And depending on what you have to work with, it can be varied. For example, for wood, plastic, as well as aluminum and other softwoods, it is necessary to take the most acute angle possible, while durable and very porous structures require a more obtuse slope.
If the tool has a special design, for example, a spiral, then the approach is somewhat different. They have wide grooves that are designed to drain chips. The sharpening angles of twist drills are 45 degrees, but at the tip it should be no less than 120-140.
We conclude: it is necessary to focus on the design features of the original cutter, which includes:
- Amount of forward tilt. Measured between the tangent line to the outer surface of the cutting edge.
- A similar parameter for the rear plane.
- Ribbon width. The distance between two sharpened edges.
If you choose these three options correctly, you guarantee:
- ease of operation - minimum effort and time;
- increased accuracy and cleanliness - no chips or burrs;
- long wear period.
Table of drill sharpening angles for different materials: we work on copper, aluminum, plastic
General recommendations:
- If you are dealing with steel, you need to look at its composition. Regular and low alloy alloys require a range of 116 to 118 degrees. It is worth sharpening equipment for cast iron in the same way. If these are stronger steel blanks, then they require 130-140°.
- Titanium can be cut in a wide range - from 90° to 120°, this depends on the specific brand and the amount of additives.
- Aluminum, brass alloys and other soft metals should be processed in the angle range of 120-130°. A deviation of 2 units in one direction or the other is acceptable.
- Wood or some thin sheets of plastic do not like such large values; 90-100° is quite enough for them, or even less.
- And only 50 to 70 degrees are needed for plexiglass or ebonite.
Let's look at the summary table, but note in advance that a more precise parameter is selected depending on the specific brand:
| Material | Recommended angle, ° |
| Cast iron and low alloy steel billets | 116 – 118 |
| Forgings and hardened steel | 125 |
| Brass, soft bronze | 130 – 140 |
| Copper | 125 |
| Aluminum, babbitt | 130 – 140 |
| Silumin | 90 – 100 |
| Alloys with magnesium as the leading component | 110 – 120 |
| Ebonite, celluloid | 80 – 90 |
| Marble and other rocks of increased fragility | 90 – 100 |
| Organic glass | 70 |
| Plastics | 50 – 70 |
| Concrete | 118 – 130 |
How to sharpen drills?
Once we have determined that the drill can no longer be used, we need to get down to business.
2.1. How to hold a drill in your hands when sharpening
The drill is sharpened manually in the following way: with your left hand you hold the drill by the working part as close as possible to the cutting part (cone), and with your right hand you grab the shank, lightly pressing the cutting edge to the surface of the abrasive wheel so that it takes a horizontal position, adjacent to the back surface of the wheel.
Sharpening is carried out with cooling with a water-soda solution.
With a smooth movement of the right hand, without removing the drill from the circle, turn the drill around its axis and, maintaining the correct tilt, sharpen the back surface. At the same time, make sure that the cutting edges are straight, have the same length and are sharpened at the same angles.
2.2. Types and angles of sharpening
The sharpening angle significantly affects the cutting mode, drill life and, consequently, productivity.
Drills with cutting edges of different lengths or with different angles will drill holes larger than their diameter.
When sharpening a twist drill for drilling steel, it is necessary to obtain a point angle of 116-118°.
The machine has a holder for fastening drills, located at an angle of 58-60° to the axis of the circle (Fig. 269), which makes it possible to maintain an angle of 116-118° at the tip of the drill. In addition, the holder is tilted in another plane by 13°, which allows you to sharpen the back angle of the cutting edge.
To improve the working conditions of drills, there are 5 main types of sharpening, depending on the material being processed and the specifics of the work performed:
- single (normal);
- single with lintel point;
- single with a point of the jumper and ribbon;
- double with lintel point;
- double with a pointed lintel and ribbon.
2.3. Checking the quality of sharpening
The quality of drill sharpening is checked using special templates with cutouts.
The most advanced design for measuring elements of cutting tools is V. A. Slepnin’s device, consisting of two disks rotating on an axis.
Tools and equipment for sharpening
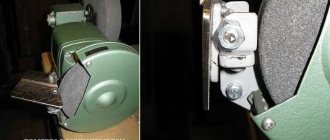
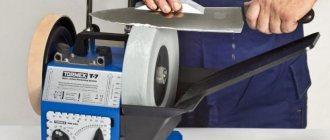
The most common option is to use a whetstone. It is made in the form of a disk and is mounted on the machine. When rotating, you need to bring the tool to it and grind its edges. It is necessary to carry out the procedure carefully due to the sheaf of sparks.
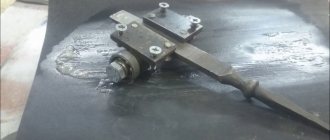
The second way is to make a device at home. It consists of a sleeve that exactly matches the diameter of the drill, as well as a pressure beam and, of course, a sharpening stone. You need to make a tool rest; it can be made from a wooden block. Drill several holes in it (they must correspond to the cross-section of the equipment). Next, manually, by rotating the handle, you need to achieve movement of the abrasive wheel. And you need to adjust the direction of the cutter with your second free hand.
Drill sharpening procedure
To ensure a high-quality mandrel for a dull drill, it is recommended to use additional devices.
At its simplest, a bushing can be used, the inner diameter of which corresponds to the transverse size of the cutting tool, rigidly fixed at the required angle. When selecting such a bushing, special attention is paid to the accuracy and tightness of the drill entry into the template, since a deviation of even a few degrees will significantly reduce the quality of edge restoration.
The device can be equipped with a set of aluminum or copper tubes corresponding to standard drill diameters. Craftsmen often complement the product with a wooden block in which holes of various diameters are made.
- ensuring the exact position of the tool and its movement relative to the sharpener;
- acting as a stop that prevents the workpiece from moving backwards.
Sharpening drills using an oak block tool allows you to accurately set the required angle.
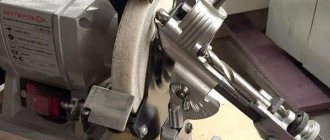
Also, the cutting tool can be easily restored using a homemade sharpening machine.
Correct angle
There is a dependence on the workpiece material of the sharpening angle of a metal drill, the table of which is given below.
Thus, the softer the metal of the workpiece in which the hole needs to be made, the blunter the angle.
Finishing after sharpening
The work is carried out on special finishing wheels, combining rough metal processing with finishing.
The discs are made of a relatively soft material that allows you to remove scratches, sagging and other minor surface defects. They are eliminated without changing the geometric parameters of the cutting edges. Typically, such wheels are placed on a hammer drill or grinder, fixed and clamped securely, making it possible to process a drill clamped in a vice or other device.
In addition to finishing discs, cutting surfaces can be brought to perfection using an emery machine mounted on a drill or grinder.
Checking the sharpness
- lengths of working edges;
- position of the corner vertices;
- helical groove inclination angle;
- angle of the longitudinal edge.
Drill point
For metal drills with a diameter of 10 mm or more, additional sharpening of the leading edge is required.
The meaning of this operation is to increase the angle of the cutting edge and reduce the inclination of the leading edge. The goal is to give the metal resistance to crumbling and increase the working life of the cutting tool.
In addition, the point allows you to narrow the transverse edge, which is why the workpiece material is scraped off in the center of the hole, which makes drilling easier. Additional processing of drills with a small clearance angle reduces the friction force inside the hole.
Performing an operation
Let's consider the process on an emery machine with a grinding wheel. Sharpening algorithm:
- We process the back surface at the correct slope.
- We move on to the front plane, controlling the size of the resulting jumper.
- If there are several passes, it is very important to collect turns of the same width and sharpness.
- Check sharpening using a template - you can purchase it or make it yourself.
Tools for facilitating sharpening
Here we will no longer talk about machines, but about useful and convenient devices that simplify work and help maintain the correct angle.
These can be purchased products, for example, this conductor comes from AliExpress. The sharpening disk is very small; rotation is transmitted to it from a drill chuck connected using a special adapter. The user only needs to insert the drill into the groove and turn on the drill. An overview of the use of such a conductor is described in this video.
For those who do not respect Chinese products, there are these racks.
There are also a number of homemade conductor devices designed for convenient sharpening. For example, here are two of them.
There is also an original door hinge fixture.
Quality control
You can analyze the compliance of geometric parameters in two ways:
- using a template - this is a small die with a certain inclination of the sides to each other;
- The Slepnina device is two rotating disks that are at an adjustable slope.
Which drill is better to use
List of drills for stainless steel that are definitely suitable for drilling metal:
- Any tool that contains cobalt in its alloy. The higher the percentage of this component, the better. Cobalt products differ from ordinary ones in a yellowish tint. Do not confuse the cobalt alloy with the application of this metal only to the outer part of the drill by electroplating. In the latter case, it will not be possible to drill through stainless steel.
- Expensive specialized tool. Such pobedit drills can drill through stainless steel, not just concrete. They have a certain sharpening angle.
- For thin stainless steel, you can use a feather-shaped drill bit for ceramic tiles. This is not the best option, but it will help to drill the workpiece once.
Application of cobalt drill
Of the old Soviet drills for stainless steel, the most suitable tool would be the one with the brand R6M5K5. This type of equipment contains up to 5% cobalt in the alloy. Due to this element, the tool acquires high strength, and the heating temperature can reach 135 degrees Celsius, which does not entail destruction of the material. Products of this quality can only be found in markets where old Soviet equipment is sold, and even then not always. An alternative to a domestically produced cobalt drill is a foreign analogue under the HSS-Co brand.
To drill stainless steel with a cobalt drill, you should also use lubricants and do not use high speed power tools.
Tricks for drilling stainless steel
As can be seen from the article, the process of drilling stainless steel is quite labor-intensive and requires certain skills and training.
We have prepared some useful tips on how to drill through stainless steel:
- When drilling, metal shavings should be long and come out in uniform sections; small, dark-colored shavings indicate that the rotation speed is incorrectly selected, and that the cutting edges of the drill are excessively heated.
- If you don’t have a prepared lubricant on hand, you can use regular vegetable or olive oil; pork fat or lard are also excellent.
- To work with thin sheet stainless steel, you can use a special drill bit for porcelain tiles.
- It is advisable to carry out the drilling process at a low speed of rotation of the cutting tool, and if the drill does not have a speed control function, drill by briefly turning it on and off for 2-3 seconds.
- If a cobalt drill is not available, you can use a pobedit tool with sharpening the cutting edges at 135 degrees.
- Before starting the drilling process, the workpiece should be punched, which will facilitate centering the drill.
- When drilling a workpiece of increased thickness, you can preheat the treatment area using a gas burner; when cooling, the heating can be repeated periodically.
- When processing thin stainless steel parts (up to 1 millimeter), you can use a high-quality wood drill bit; experience shows that the holes are smooth and of precise dimensions.
