Sand casting technology
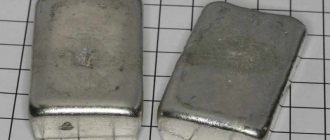
The technology of sand casting is not complicated. This casting method is used for the manufacture of castings and parts from gray cast iron and low-carbon steel alloys. Sometimes, sand casting is used for processing non-ferrous metals - aluminum, copper, etc.
When choosing such sand casting, a technologist must understand that the quality of the finished parts will be quite low. This is primarily due to the fact that the use of such technology cannot guarantee that foreign inclusions will not get into the liquid alloy. When casting in sand molds, gas formation occurs very rapidly, especially this process manifests itself when casting in wet molds. It is acceptable to use this form of casting to produce parts with complex geometry. But a number of restrictions on obtaining such blanks are imposed by the fact that the removal of the finished casting is associated with certain difficulties.
Sand casting makes it possible to produce workpieces weighing up to hundreds of tons. Thus, they produce frames for metal-cutting equipment, body parts, etc. Meanwhile, the accuracy of the resulting workpieces is below 14th grade; in addition, cavities and foreign inclusions can be found on the surface of cast parts. That is why those surfaces that will come into contact with other parts are always machined.
Casting an aluminum sword in sand
Attention!!!
This homemade product is posted for informational purposes only.
The creation and use as a bladed weapon is prohibited; according to Article 223.4 of the Criminal Code of the Russian Federation, it is punishable by imprisonment for up to two years!
Materials and tools used by the author:
List of materials:
— river sand (it is better to take quartz); — source of aluminum; - wooden boards; - self-tapping screws; — copper sulfate, battery electrolyte, distilled water and copper wire (for copper plating); - talc; - carbon dioxide; - sulfur ointment (to make the handle black).
List of tools:
- hacksaw; — forge furnace; - screwdriver; - Bulgarian; - vice; — power supply (for copper plating); - gas-burner.
Homemade manufacturing process:
Step one. Casting mold
Let's start making the casting mold. It is made from boards and consists of two halves. We assemble two forms using self-tapping screws. You should end up with two identical frames. They must connect to each other and be centered. For this purpose, the author equipped a special wedge-shaped mechanism made of wood.
When the forms are ready, you need to fill them with sand. The part being manufactured will be located in the middle, that is, between two parts of the mold. We take our sand and mix it with water. The mass should be wet, but not flowing, it should mold. If you blow carbon dioxide onto the correct solution, it should solidify.
Next we need carbon dioxide, it needs to blow the sand from all sides, it will turn to stone. The author blows it directly from the balloon.
Step three. Separating the halves
The author was unable to separate the two halves the first time, since the sand was not what was required. As a result, the top part had to be refilled, and after that the author left it to dry for 15 hours. Then, after blowing everything with carbon dioxide again, the halves were carefully disassembled.
Step four. Pouring aluminum
Let's start melting aluminum, for this we will need a furnace. Such stoves are made of gypsum, but such structures do not last long. It is best to make such a stove from oven refractory clay; such a design will last for years.
Step five. Mechanical restoration
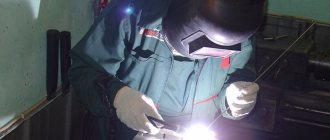
After casting, the product will have many defects; they need to be cut off. First of all, we cut off the sprues; this can be easily done using a grinder. Well, then we cut off all other casting defects in the same way. Once this is completed, we carry out finer processing with a grinding disc. You can use a petal disc attachment on an angle grinder. If desired, the blade itself can be polished to a shine, but we will coat the handle with copper.
To copper coat the handle, we need a DC power supply; some craftsmen even use phone chargers, but with such a power source the coating will grow very slowly. Before immersing the sword in the solution, we clean it with “Mole” or caustic soda, as the author did.
That's all, all that remains is to connect the power source. We connect the minus to the product, and the plus to the copper. All that remains is to wait until the copper coating grows on the sword.
Step seven. Finishing touches
When everything is ready, we use a drill to remove the copper from those areas where it is not needed, and also wash the product. You need to wash it well, under running water.
As planned, the pen should be dark in color; to make it dark, you will need sulfur ointment, which can be bought at a pharmacy. After applying it to a copper coating, the copper will immediately begin to darken. To speed up this process, the author warms up the handle using a gas burner; there is no need to heat it too much.
Attention!!!
This homemade product is posted for informational purposes only.
The creation and use as a bladed weapon is prohibited; according to Article 223.4 of the Criminal Code of the Russian Federation, it is punishable by imprisonment for up to two years!
Source
Become the author of the site, publish your own articles, descriptions of homemade products and pay for the text. Read more here.
Foundry products
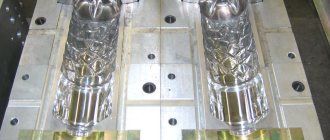
Sand or earth casting is used to produce many parts. For the convenience of consumers, they can be systematized into several groups. Group A - this group includes castings of simple shapes - rings, wheels, flywheels, etc. Group B - this group includes reinforcement elements, bearing housings, complex surfaces with an obtuse or acute angle. Group B - it includes blanks for gears, frames, casings, etc. Group D - these are castings for the production of machine beds, complex body parts. Group D are castings that are produced by molding according to a model.
Thus, we can conclude that sand molds can be used to cast sewer manholes and parts with complex geometric shapes, for example, compressor stage casings, etc. When designing a sand mold, the designer must take into account what is in the direction where the finished casting will be removed and must not have any obstacles in the form of protruding rods, etc.
Foundry models
Models for this form of sand casting must withstand quite a lot of pressure that occurs when filling the flask with casting soil. That is why metal and hard wood are used to make injection molds. All materials that can be used to make injection molds can be combined. That is, they can be assembled on threaded connections, glued, etc. To eliminate pores on the wooden parts of the models, they are carefully treated with abrasive sandpaper. Then it is varnished. When making casting molds, it is necessary to take into account the fact that it is necessary to maintain the angles of inclination of the vertical planes. The presence of these corners will subsequently make it easier to remove the finished casting from the mold.
Basic elements of casting in sand-clay molds
One of the key factors determining the quality of casting is the properties of the sand (earth) used to obtain casting equipment. Practice shows that the finer and purer the sand, the higher the quality of the resulting casting will be. We must not forget about the rods, which can be multi- or disposable.
General classification of sand molding sands
Depending on the application, the mixtures can be divided into the following subtypes:
- facing them are used to create the working surface of the mold;
- single (filler), they are used directly to create the mold.
General classification of sand molding sands
Facing materials have a thickness that is determined by the thickness of the future casting; it can be 20 – 100 mm. A filler mixture can be poured on top of the mixture used for cladding. A filler or single mixture is used to fill the entire mold and is used for the production of equipment for all types of production, from single products to mass production.
Making sand casting mold
Sand casting begins with its creation. A distinctive feature of sand tooling is that they can only be used once and to obtain a new part it is necessary to make a new one.
The equipment is produced with a model of the future part in hand. It is installed in a flask (a wooden or metal box for molding sand) and covered with earth. Then it is necessary to compact the filled sand mixture. To do this, use manual or mechanized impact tools and devices. Once the mixture reaches the required condition, that is, the required density, the model is removed and the foundry workers will have ready-made technological equipment at their disposal.
To obtain cavities located inside the future casting, rods are used. They are usually made from the same material as the equipment itself. The process of producing a sand casting mold includes the following main steps.
- installation of the model in the flask;
- compaction of the sand mixture;
- removing the model from the flask.
The complexity and technology of production of foundry equipment largely depends on the following parameters:
- the size of the future casting;
- number of cavities;
- type of equipment.
If the mold being manufactured requires additional heating or baking, the time required for its production will increase sharply. To facilitate the removal of the finished casting, various lubricants, for example, grease, are applied to the working surfaces.
Sand casting mold assembly
After the casting tooling has been produced, it is prepared for pouring the melt. The working surfaces must be lubricated with a special compound that facilitates the free removal of the finished casting. After preparing the working surfaces, the injection molding rods are installed.
Mold making process
At the final stage, the half-forms are connected to each other and securely fastened. The reliability of the assembly will not allow the melt to flow out of the mold.
Types of sand molds
The variety of sand molds for casting has allowed them to be divided into several groups designed to produce castings with different characteristics.
Sand casting molds
In total, we can name 7 groups of foundry technological equipment or model kits.
- A model kit made of metal, which includes additional devices for machine molding.
- The set is made of metal and includes additional devices that are designed for machine and manual molding.
- Model kit used for machine and hand molding. The models themselves are made of metal, and some parts, for example, rods for forming cavities, are made of wood of different species.
- Set for the production of manual and machine molding. Models and rods subject to heavy wear are made of metal.
- Set for molding castings from hardwood.
- Set for forming castings, made of soft wood.
- Kits for performing manual molding of castings.
Characteristics of foundry sand
When performing sand casting, you must understand that the quality of the casting directly depends on the composition and properties of the foundry sand. Foundry practice has identified five key parameters that determine the quality of foundry sand.
Physical characteristics of sand
- strength;
- gas permeability;
- stability when exposed to temperature;
- subsidence ability;
- possibility of repeated use.
Strength
Strength is the ability of the mixture to maintain specified parameters during the casting operation and transportation of the flask inside the production facility.
Gas permeability
Gas permeability is the ability of sand to pass through gases formed during the solidification of the melt. If the mixture has high permeability, the porosity of the casting will be reduced. If the permeability is low, the surface quality will be much better. Gas permeability directly depends on the composition and fraction of the sand mixture.
Thermal stability
The ability of equipment to maintain a given shape when exposed to temperature, resist cracking and the appearance of other defects that appear when exposed to high temperatures of molten metal is called thermal stability.
Drawdown capacity
The ability of the molding sand to compress tightly during the solidification of the cast part. If sand did not have this property, then the cast workpiece would not have the ability to change dimensions inside the mold. And this would ultimately lead to cracking of the workpiece and the appearance of other defects that arise when molten metal spills.
Reuse
This means the possibility of using molding sand for the production of equipment intended for the formation of a new batch of castings.
Metallurgical products
Definitions of earth casting Let us define the terms used to describe the foundry technology of pouring metal into sand-based molds. The following formulations are considered similar: - Sand casting, mixtures; — Casting in sand-clay molds, mixtures; — Casting into the ground. All these terms refer to the same casting technology. Further use of any of the names will be considered analogues.
Foundry products
Sand casting is a method of casting metals and alloys in which molten metal is poured into a mold made of tightly compacted sand. To bind sand grains together, sand is mixed with clay, water and other binding materials. More than 70% of all metal castings are produced using the sand casting process. Main stages
There are six steps in this process: -Place the model in a mold with sand to create the mold. -The gating system and piers are attached in the required places. -Remove the model from the flask and connect the half-forms. -Fill the mold cavity with molten metal. - Maintain the solidifying metal in the molds according to the technology. -Knock out the casting and free it from the sprues and vents.
Casting process
Casting in sand-clay molds includes several successive stages:
- Development of a casting mold, calculation of its manufacturing technology, execution of drawings.
- Making a full-scale model of a part in accordance with the drawings. Manufacturing of related equipment.
- Manufacturing of mold components and cores using appropriate mixtures.
- Assembling the structure and installing rods, gating system, making profits.
- Pouring molten metal, waiting time for the metal to solidify and cool.
- Freeing the workpiece, cleaning the surface from molding sand residues.
- Removing the sprues, cleaning the flash, processing the necessary surfaces.
Foundry models
Based on drawings and casting technologies developed by a technologist or designer, an experienced modeler makes a model of a part from wood, metal or plastic or polystyrene foam. The metal shrinks during the cooling process, and crystallization may be heterogeneous due to uneven cooling. Thus, the model should be slightly larger than the finished casting, using the so-called metal shrinkage factor. Different shrinkage rates are used for different metals. During the molding process, models leave imprint cavities in the sand, into which a sand core is placed. Such rods are sometimes reinforced with wire reinforcements, which are used to create cavities that cannot be formed by the main model, such as internal valve passages or cooling spots in engine blocks. The gating system for the entry of metal into the mold cavities is a guide and includes a funnel and sprues that maintain a good pressure of liquid metal for more uniform filling of the mold cavity. The gas and steam generated during casting escape through permeable sands or through risers, which are made either in the model itself or in the form of separate parts.
Flasks for molding materials Two or more flasks are used for molding. The flasks are made in the form of boxes that can be connected to each other and fastened together. The model is recessed into the lower part of the flask up to its widest cross section. Then the upper part of the model is mounted. The upper part is attached to the lower part of the flask with clamps and the molding mixture is added there and compacted so that it completely covers the model. Sprues and thrusts are installed in the required places. Then the flask is halved and the model, wooden sprues and stops are removed from it.
Metal cooling To control the crystallization of the metal structure, metal plates and refrigerators can be placed in the mold. Accordingly, rapid local cooling forms a more detailed metal structure in these places. In black casting, the effect is similar to hardening the metal in a forge. In other metals, condensers can be used to control the directional solidification of the casting. By controlling the cooling method of the casting, internal voids or porosity within the casting can be prevented.
Manufacturing Rods are used to create cavities in castings, such as for coolant in engine blocks and cylinder heads. Typically, casting cores are placed in the mold after the model is removed. After drying, the flask with the mold is placed on the foundry platform to be filled with molten metal, usually steel, bronze, brass, aluminum, magnesium and zinc. After filling with liquid metal, the flasks are not touched until the casting has cooled. After knocking out the casting, the cores are removed from the casting. The metal of the sprues and profits must be separated from the casting by any means. Various heat treatments can be used to relieve stress from initial cooling and add hardness in the case of water or oil quenching. The casting surface can be further hardened by shot peening, which adds resistance to cracking and stretches and smoothes out rough surfaces.
2.2. Foundry equipment for making sand-clay molds
The first casting molds were made from stone and clay, and only at the end of the 18th century. they began to be made from a specially prepared moistened mixture of sand and clay, the so-called sand-clay molds (SCF). Currently, about 80% of castings are made in PGF.
The main type of PGF is a closed casting mold, in which the casting is limited on all sides by the mold cavity. This mold is suitable for making only one casting. When removing (knocking out) the finished part, the mold is destroyed, the part is removed, the elements of the gating system are cut off, the surface is cleaned of the remnants of the molding material and sent for machining.
For the manufacture of PGF, foundry equipment is used. Foundry equipment
- a set of devices used for making molds.
The set of technological equipment and devices necessary for the manufacture of a cavity in a PGF is called a model kit
.
The model kit includes: models of the casting and elements of the gating system, model and drying plates, core boxes, molding, control and assembly templates for a specific casting. There is also the concept of “molding kit
,” which means a complete set of equipment used to produce PGF.
It additionally includes (along with the accessories of the model kit) the flasks, additional frames, pins, staples, etc. necessary for the manufacture of molds. Casting model is
a device (Fig. 1.12) designed to obtain cavities in the casting mold corresponding to the outer configuration of the casting .
Rice.
1.12. Casting model
:
1 - rod signs
The model has a number of differences
from casting
.
1. The dimensions of the model are larger than the corresponding dimensions of the casting, taking into account the linear shrinkage of the alloy (for carbon steels it is 2.0...2.5%, for cast iron - 0.8...1.2%, for copper alloys - 1.0... 1.5% and for aluminum - 0.9...1.2%) and allowances for subsequent machining. The allowance depends on the size of the casting and the type of alloy. So, for small iron castings the allowance is 0.7...5 mm per side.
2. The model is made with rod signs 1
. The signs on the model form additional cavities in the mold into which the sign parts of the rod are placed.
3. Vertical walls of the model are made with slopes of 0.5...3.0°
so that when removing the model the form does not collapse.
4. The connections of the walls in the model should be smooth and without sharp corners. The rounding of internal corners is called fillet, external corners are called rounding ( R
= 1/5…1/3 of the arithmetic average wall thickness).
Models are made of wood, metal or plastic. The choice of model material and the degree of accuracy of its manufacture depends on the serial production. Castings in individual production, as a rule, are made from wooden models, and in serial and mass production - from metal ones.
Core box
(Fig. 1.13) - a device that has a working cavity for obtaining rods of the required sizes and shapes.
Rice.
1.13. Core box
Fig.
1.14. Rod
Fig.
1.15. Opoki
Rod
- a device (Fig. 1.14) used to form holes and cavities inside castings. Core boxes also have casting slopes. When choosing their sizes, the amount of shrinkage of the alloy and, if required, allowances for machining are taken into account, and the configuration provides for the formation of rod marks. Core boxes are made from the same materials as the models. By design, core boxes can be one-piece (shaken out) or detachable, which are divided into boxes with vertical and horizontal connectors.
The production of molds according to the model is carried out using special frames called flasks
(Fig. 1.15).
The flasks (upper 1
and lower
5
) are a kind of frame of the mold, protecting it from destruction during manufacturing, assembly, transportation and pouring.
Centering of the flasks during the manufacture and assembly of the mold is done using pins 4
fixed in the ears
3
.
Each half of the model is molded in a separate mold. After removing the models, rods 2
, and then the upper flask is installed on it. Depending on the size and weight of the flasks, they are divided into manual and crane. Manual flasks include those whose weight together with the compacted molding sand does not exceed 50 kg.
Model plate
- a plate that forms the connector of the casting mold and carries various parts of the model, including the gating system, and also serves as a stand for filling one of the paired flasks during the manufacture of the mold.
The mold is filled with molten metal through a gating system. Gating system -
a set of channels and reservoirs through which molten metal flows from the ladle into the cavity of the casting mold.
The model kit includes models of gating system elements
. The main elements of the gating system are the gating bowl, riser, slag catcher, and feeders (Fig. 1.16).
Rice.
1.16. Casting with gating system elements
:
1 - gating bowl;
2 - riser; 3 - slag catcher; 4 - feeder; 5 — blows Bowl 1
reduces the erosive effect of a jet of molten metal and retains floating slag.
Boner 2
- a vertical, round tapering channel into which liquid metal is directed from the sprue bowl.
Slag catcher 3
— a horizontal channel of trapezoidal cross-section, which serves to retain slag and connects the riser to the feeder.
Feeder 4
— horizontal channels (there may be one or more) in the lower half of the mold, connecting the slag trap to the cavity of the casting mold.
To allow air and floating non-metallic inclusions to escape from the mold, vents are made on the upper parts of the mold for medium and large castings 5
(vertical channels widening towards the top).
To obtain castings without shrinkage cavities, which can form due to a decrease in the volume of the metal during its solidification, special additional cavities are provided for the massive parts of the casting, where shrinkage is most active, which are filled with liquid metal during the pouring process and are called profits
. The profits provide constant additional replenishment of liquid metal to the mold cavity. In them, the metal crystallizes last.
Gating systems, depending on the shape and size of the casting, the composition and properties of the casting alloy, have a different design (metal can be supplied into the cavity of the casting mold from above, from the side or from below). Thus, the types of gating systems can be the following: upper, lower (siphon), tiered (side).
To better retain slag inclusions, additional filters can be installed in the sprue bowls.
Casting in sand-clay molds
One of the first methods of metal smelting mastered by mankind was casting into sand-clay mixtures, “earth”. In this type of casting, a mold is formed in a given mixture consisting of sand, clay and water.
Sand tends to compact , and clay gives a uniform structure , thereby preserving the shape of the product model given to the mixture. The model of the product is made from the material from which it is easiest to prepare the model, but is usually made of wood ; in mass production , when the model is used frequently, in order to maintain the dimensions and surface of the model, it is made of durable materials, usually aluminum alloys .
Sand casting
Several technologies are used to produce casting parts. The simplest is sand casting:
- If you need to make an aluminum part of a simple shape, then open casting can be done directly into the soil - silica. A small model is made from any material: wood, foam. Install in the flask. The soil is laid around in small layers and compacted thoroughly. Once the sample is removed, the silica holds its shape well and the casting is done directly into it.
- As a forming mixture, you can use sand combined with silicate glue, or cement mixed with brake fluid. The ratio of materials should be such that if the mixture is compressed, it retains its shape.
Video “Casting aluminum into an earthen (sand) mold at home”
For parts with complex shapes, a different technology is used.
Lost wax casting
This long-known method for making aluminum products at home can be slightly modified. The casting principle is as follows:
The model is made from low-melting material. It is placed in a certain shape and filled with plaster. One sprue or several are installed. After the plaster has hardened, it is dried well. At high temperatures, the low-melting material turns into a liquid state and flows out through the sprue. An aluminum billet is poured into the resulting mold.
The recommended material is wax, but it has one very big drawback. This is a high price for the material. But for small parts it will not cause much harm to the family budget.
Details of the process can be clarified in the video.
Video "High Pressure Aluminum Casting"
Thus, even the most ordinary amateur craftsman can make the necessary part from aluminum of various shapes.