Metal grinding
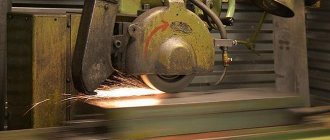
The processing of metal and various alloys using an abrasive material is usually called grinding. This technology allows you to change the roughness and other parameters of the outer or inner cylindrical, as well as flat surface. Metal grinding can be carried out using various special equipment. When considering the features of such mechanical processing, you need to pay attention to the following points:
- The grinding process is the final stage of processing, which is carried out to obtain a certain roughness.
- This technology is not used to change sizes over a large range.
- Using modern equipment, the surface can be brought to the required roughness after heat treatment of the metal.
When carrying out the operation in question, a fairly large number of features are taken into account:
- Wheel speed is a parameter that depends on the outer diameter of the abrasive and the capabilities of the machine.
- Speed of movement of the part.
- Depth of cut.
- Possibility of cross feeding.
It is worth noting that today such technology is gradually being replaced by fine turning of metal at high speeds and minimal feed.
Cylindrical grinding
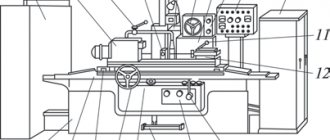
Cylindrical grinding is used mainly for grinding the outer surfaces of rotating bodies (cylindrical, conical and shaped). It is carried out on cylindrical grinding machines .
There are four methods of cylindrical grinding , which are widely used in practice, namely:
- grinding with longitudinal feed
- creep grinding
- plunge grinding and shoulder grinding ( Fig. 381
).
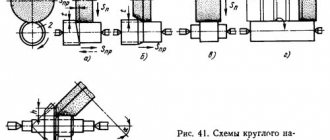
With the grinding method with longitudinal feed ( Fig. 381, a
) the workpiece being processed is installed on the machine in the centers. If the workpiece is insufficiently rigid, steady rests are used as intermediate supports, installed on the machine table at intervals equal to 6 to 10 diameters of the workpiece being ground. The rotational motion imparted to the circle provides a cutting speed Vк = 30 ÷ 40 m/sec. The workpiece rotates at a speed of 4 - 20 m/min (circular feed) and moves back and forth along its axis. This movement is a longitudinal feed, which is assigned in fractions of the circle width per revolution of the workpiece. For rough grinding Spp = (0.3 - 0.9) V and for finishing grinding - Spp = (0.2 - 0.3) V, where B is the wheel width in mm.
Rice. 381.
Methods for circular grinding of surfaces: a - with longitudinal feed; b - deep; c - by cutting; g - ledges.
At the end of each stroke (or double) of the workpiece, the grinding wheel moves by Sp mm/stroke perpendicular to the axis of rotation to a cutting depth of t = 0.005 - 0.07 mm.
When grinding long shafts, this method is the most common.
With the deep-feed grinding method ( Fig. 381, b
) the entire allowance on the workpiece (0.1 - 0.4 mm) is cut off in one pass. For this purpose, a grinding wheel with a length of 8 - 12 mm is threaded onto a cone, which is the grinding part, and the cylindrical section of the wheel is only the cleaning part.
The grinding process occurs with a combination of movements Vк, Vз and Spp. The longitudinal feed with this grinding method is assigned on the order of Spr = 1÷ 6 mm/rev depending on the diameter of the workpiece.
The plunge grinding method (Fig. 381, c) is used when processing short surfaces that can be covered by the width of wheel B. It is also used when grinding shaped surfaces. In this case, the generatrix of the grinding wheel is given a shape that matches the profile being sanded. The workpiece receives rotational motion, and the grinding wheel receives rotation and transverse movement (feed Sp = 0.02 - 0.07 mm/rev. zag). This grinding method is very productive. It is widely used in grinding hard rollers.
Method of grinding with ledges ( Fig. 381, d
) is a combination of transverse and longitudinal feeds during grinding. First, the workpiece is grinded using ledges with a transverse feed of the wheel manually. After each ledge, the wheel is moved along the axis of rotation by a step equal to (0.8 - 0.9) V. Then two or three grinding passes are made with longitudinal feed to clean out the marks of step grinding on the surface being processed.
To grind the outer conical surfaces of rotating bodies, it is necessary to install parallel to the generatrix of the peripheral surface of the grinding wheel relative to the generatrix of the conical surface or, conversely, to the generatrix of the conical surface relative to the generatrix of the circle. This is done in one of the following ways: by turning the table at a cone angle ( Fig. 382, a
), turning the headstock of the machine together with the workpiece to be ground to a cone angle (
Fig. 382, b
), turning the grinding headstock (
Fig. 382, c
) and transverse feed of the grinding wheel tucked onto the cone in combination with its rotational movement (
Fig. 382, c) G
).
Rice. 382.
Methods for grinding conical surfaces: a - by turning the table; b - turning the headstock; c - by turning the grinding head; g - conical grinding wheel.
Main types of grinding
Grinding of parts can take place using a variety of technologies. The most widespread are the following:
- Circular grinding of metal.
- Changes in the roughness of internal surfaces.
- Gear grinding.
- Centerless technology.
- Sanding flat surfaces.
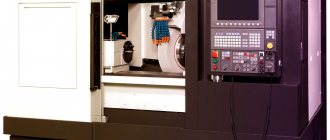
In addition, classification can be carried out according to the type of material used during processing. To automate the process and reduce labor costs, specialized machines are used. There are also models with a built-in CNC unit, which automates the process and ensures high quality of the resulting surface.
Cylindrical external grinding
Metal grinding when using this technology involves the use of special equipment. Among the features of cylindrical grinding, we note the following points:
- An abrasive wheel is used as a consumable. It rotates around its axis.
- Simultaneously with the circle, the workpiece rotates in the opposite direction. Due to this, the efficiency of the operation is significantly increased.
- Longitudinal and transverse feeds can be carried out, due to which the depth of penetration of the tool changes and processing is ensured along the entire length.
Principle of cylindrical grinding
Cylindrical external grinding
This technology is often used for grinding cylindrical workpieces. This is due to the fact that when the grinding wheel comes into contact with a cylindrical workpiece, the entire surface is processed at the moment of rotation.
Cylindrical grinding of shafts.
Section: LIBRARY OF TECHNICAL LITERATURE Short path https://bibt.ru <<Previous page Table of contents of the book Next page>>The finishing of parts such as shafts is carried out using one of the following grinding methods: conventional precision cylindrical grinding and fine grinding.
Grinding on cylindrical grinding machines can be carried out with longitudinal or transverse feed. The first method is used in cases where for some reason (for example, with a significant length of the surface to be ground) it is inappropriate to carry out more productive processing with transverse feed, in which the width of the grinding wheel should be no less than the length of the surface to be ground. Therefore, grinding with transverse feed (plunge) is used for processing relatively short surfaces. Shaped surfaces are ground by plunging using profiled grinding wheels.
For significant production programs, simultaneous grinding of several surfaces with two or more grinding wheels is used, using appropriate high-performance machines for this.
Rice. 199. Various shaft grinding schemes
In Fig. 199 shows various methods of grinding surfaces simultaneously with several wheels.
By means of conventional precision cylindrical grinding, the achievement of class 2 accuracy and finishing class 8-9 is achieved economically.
To achieve the required accuracy and class of processing cleanliness during finishing grinding, the so-called “nursing” of the surface is performed. In this case, the workpiece being processed is allowed to rotate for some time, stopping the transverse feed of the circle. At the same time, the tension in the machine-tool-workpiece system is gradually reduced and errors in the shape of the part caused by the pressing of the elements of this system under the influence of cutting forces are eliminated.
The duration of the curing process depends on the required processing accuracy and in production shops of machine-building plants it is 0.2-0.5 times the time spent on grinding.
Fine grinding has the following features:
1) small depth of cut;
2) high rotation speed of the grinding wheel (more than 40 m/sec);
3) low rotation speed of the workpiece being processed (up to 10 m/min);
4) soft fine-grained grinding wheels;
5) intensive cooling;
6) long nursing process. Fine grinding economically provides class 1 accuracy and class 10 finish.
For large production programs, small parts such as shafts are also ground on centerless grinding machines.
If the workpiece can be passed between the leading and working wheels, it is ground with a through feed.
Otherwise, plunge grinding is used.
Features of grinding on centerless grinding machines are as follows:
1) high processing productivity due to the high rigidity of the machine-part system and the ability to carry out processing at significant cutting depths and feeds, and also (with through feed) to carry out continuous processing of workpieces, passing them one after another;
2) the ability to carry out processing without preliminary formation of center holes in the workpiece;
3) relatively low qualifications of the machine operator.
However, centerless grinders are less versatile than cylindrical grinders. In addition, with centerless grinding it is difficult to ensure the correct position of the ground surfaces relative to other surfaces of the workpiece. Such grinding can be carried out on both cylindrical grinding and centerless grinding machines.
Skip to navigation
Gear grinding
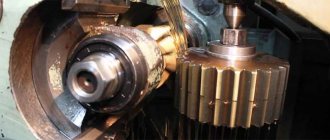
Gears are part of a wide variety of mechanisms. The complexity of the shape of the working part determines that special grinding equipment has to be used. Among the features of this technology, we note the following points:
- The profile of the ring gear is processed.
- The circle changes to the size of the tooth involute.
- Special machines are suitable for working with gears.
Gear grinding
Often the tooth surface is hardened, which makes the machining process significantly more complicated.
Centerless grinding
This technology is characterized by the fact that the workpiece is not fixed in the centers. In this case, grinding of metal parts takes place by applying rotation to only two grinding wheels, between which the workpiece is placed. In the central part there is a knife made of stainless steel. It eliminates the possibility that the product will fail due to displacement or become slightly jammed.
The use of such equipment can significantly speed up the grinding process. This is due to the fact that two abrasive wheels are used at once. There are simply a huge number of machines on sale that operate on the principle of centerless grinding.
Centerless grinding
Centerless shaft grinding
Centerless grinding is carried out on special machines in two ways - plunge-in and longitudinal feed. The latter is used for processing smooth shafts.
The plunge method is suitable for grinding shafts with flanges. To do this, before starting work, the circle is taken a short distance, the part is placed on a support either from above or from the side. Next, the wheel is brought to the workpiece to begin grinding. Conical parts are processed in a similar way.
Of course, in any type and method of grinding, the wheel can become unusable: become greasy, become smooth. In such cases it should be corrected. This is done with special diamonds, pencils, rollers, etc. For example, a diamond pencil is an abrasive tool consisting of natural and synthetic diamonds fixed in a bond (hardened polymer material). In a pencil, the mass of individual diamonds ranges from 0.03 to 0.5 carats (one carat equals 0.2 grams).
Diamonds enclosed in a frame can also be either natural or artificial. They are also larger and larger than those found in pencils. Their weight reaches two carats. Diamond editing is carried out as follows: move the editing tool along the copier. The downside is the need to stop to pause the machine. If you use diamond rollers, they will reduce the time of breaks by 2-3 times.
Sanding flat surfaces
Flat body blanks made of various metals are often processed. The operation to change the surface roughness is characterized by the following features:
- The workpiece is placed on a special table, which ensures reliable fastening. Fixation can be mechanical or magnetic.
- The main rotation is transmitted to the abrasive wheel, reciprocating the workpiece or tool.
Sanding flat surfaces
By selecting a wheel with the most suitable profile, it is possible to process the most complex shapes. During operation, coolant can be supplied to the contact area between the tool and the workpiece.
Processing parts before grinding
As previously noted, sanding is the finishing step. Before it is carried out:
- Rough turning of metal. Due to this operation, the workpieces are given the required shape and dimensions, taking into account the allowance.
- Finish turning is carried out to give the required dimensions.
- Milling is another technological operation that involves mechanical removal of metal. Most often, housing parts and gears are milled.
- Heat treatment. In order to significantly increase the surface hardness and strength of the product, hardening is carried out. The fragility of the structure can be reduced by tempering and annealing. In some cases, thermochemical treatment is carried out, which involves introducing certain chemicals into the surface layer.
Processing parts before grinding
When developing processing modes, allowance for all technological operations is taken into account.
Characteristics and marking of abrasive tools
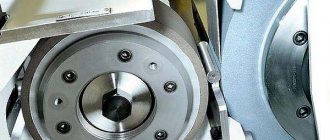
In most cases, when grinding metal, an abrasive tool is used. It is represented by a combination of a large number of grains, which are interconnected by a special lubricant. The circle is characterized by the following properties:
- Form. The working part may vary depending on what type of surface will be processed.
- Dimensions. The abrasive wheel is also selected by size depending on the dimensions of the surface being treated.
- Type of material used in manufacturing. The crumb can be made from crumbs of different hardness. Diamond chips are characterized by greater resistance to abrasion.
- Grain size. For fine grinding of metal, a wheel with the smallest grain size is selected. However, as the grit size decreases, the required time to complete processing increases.
- Surface hardness. This parameter is one of the main ones, indicated during labeling.
- Mounting hole size. It is taken into account when selecting a wheel for the characteristics of the machine.
The production of abrasive materials is carried out in accordance with established standards and technical conditions.
Circle markings are used to indicate the type of material used in manufacturing. Electrocorundum is artificial corundum based on aluminum oxide. There are several varieties of circles available for sale:
- Normal 14A and 15A, 16A.
- White 22A, 23A and 24A.
- Chrome 32A and 33A.
- Spherocorundum ES.
Silicon carbide can also be used. There are two types of stamps on sale: black and green. Boron carbide is marked with the letters KB. Recently, the most popular options are made from synthetic diamond; they are marked ACP and ASO, ARV and ARC.
Abrasive materials
Grinding on cylindrical grinding machines
When processing parts on cylindrical and face cylindrical grinding machines, the workpieces are installed in centers, a collet, a chuck or a special device.
The workpiece is rotated at a peripheral speed of 10...50 m/min , and the peripheral speed of the grinding wheel (cutting speed) is about 30 m/s. When using stronger wheels, the cutting speed is set to 60 m/sec (high-speed grinding).
Processing modes (longitudinal feed, depth of cut) are selected depending on
grinding method,
processed material,
state of the treated surface (hardened, unhardened),
part stiffness
and other factors.
There are two methods of cylindrical grinding:
with longitudinal feed (per pass)
and with cross feed (mortise).
Processing schemes - Fig. 35.
Grinding with longitudinal feed (Fig. 35a) is used when processing cylindrical workpieces of considerable length. When grinding with longitudinal feed, the workpiece makes longitudinal movements alternately in both directions
.
The longitudinal feed is assigned depending on the type of grinding, namely: for preliminary grinding 0.5...0.8 , and for finishing (final) 0.2...0.5 of the wheel height per revolution of the part, i.e.
Spr = Sd * In kr, mm/rev.det., where
Sд - longitudinal feed of the table (workpiece) in fractions of the circle height per revolution of the part;
— Vkr — grinding wheel height, mm.
The transverse feed of the grinding wheel is carried out at the end of each stroke or double stroke of the table and is 0.005...0.02 mm (depth of cut).
At the end of processing, the last longitudinal passes are performed without cross feed ( nursing process ).
The main time when grinding with longitudinal feed is determined by the formula:
Where:
— table stroke length, mm;
— allowance per side, mm;
— rotation speed of the part, rpm;
— longitudinal feed in mm per revolution of the part;
— transverse feed of the circle per pass (double table stroke), equal to the cutting depth, mm;
— coefficient that takes into account grinding accuracy (for example: for size accuracy δ=0.1...0.15, k=1.1; for size accuracy δ=0.02...0.03, k=1.7);
The table stroke length is determined by the formula:
— during pass grinding
— when grinding at point-blank range
, Where
— length of the grinding surface, mm.
When grinding with transverse feed (Fig. 35b ), the entire surface of the part is processed at once. The height of the circle in this case should be slightly greater than the length of the workpiece surface.
The grinding wheel has only a transverse feed towards the workpiece. The advantage of this processing method is greater productivity and ease of setup, however, this method is inferior to longitudinal grinding in terms of the achieved surface quality . Plunge grinding is widely used in mass and large-scale production.
Radial (transverse) feed during final grinding S = 0.001…0.005 mm/rev .
Basic time for plunge grinding
Currently, in order to increase the productivity of the grinding process, cylindrical grinding machines with two, three or more grinding wheels have become widely used (Fig. 58).
If it is necessary to grind the shoulder and the adjacent narrow journal of the stepped shaft, machines with a rotary grinding head are used. The angle of rotation depends on the allowance removed from the end and the diameter of the shaft journal and the size of the end and can be set from 8 to 45 degrees, more often 25 degrees. Such machines are called face cylindrical grinding machines (Fig. 36).
Simultaneous grinding of several surfaces using the plunge method can be carried out using a shaped wheel (Fig. 37).
Rice. 37. Scheme for grinding surfaces with a shaped wheel
A type of shaft grinding with longitudinal feed is creep-feed grinding, which is characterized by a large cutting depth (0.1...0.3 mm ) and low cutting speed.
With this grinding method, errors in the shape of the original workpiece and fluctuations in the allowance have a lesser impact on the processing accuracy compared to conventional grinding.
Therefore, deep-feed grinding is used to process workpieces without preliminary blade processing and, as a rule, the allowance is removed in one working stroke. Labor productivity increases by 1.2–1.3 times compared to longitudinal grinding.
Dimensional control during processing on grinding machines is carried out both when the machine is stopped and during operation. In the latter case, mechanical, electrical contact, electro-inductive, pneumatic, electro-pneumatic, photoelectric and other devices are widely used. The greatest effect is the use of active control, when sensors give a command to turn off the machine when a certain size is reached.
