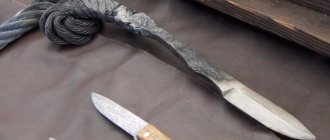
Russian knife craftsmen never look for easy ways. Because this is a hobby and passion for many. It happens that a simple activity turns into a real small business. But for the most part, for people it’s still a relaxation and distraction from everyday life. Each person determines his own leisure time. Forging enthusiasts quite often make their products from unusual things, for example: a knife from a bearing. A very interesting and difficult process.
Homemade knife from a bearing.
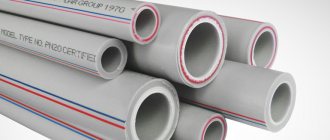
Pros and cons of a bearing knife
Many ordinary people will say that why do this when you can go to the store and buy yourself a couple of wonderful blades. But we don’t tell them how to spend their time. So if you’re not interested, go to another resource, and here there will be an article containing a lot of useful information, especially for beginners. Because the presentation is planned in a step-by-step perspective.
We have already written that there is no “ideal knife” for all occasions. And this is true, but you must always strive for the ideal. Therefore, let's try to highlight the positive and negative aspects of the blade from the bearing. To know what will happen as a result of proper metal processing.
Bearing steel is originally designed for high loads, for this reason it is characterized by ductility and uniformity when heated. The end result is a product with a hardness of 61 to 64 units on the Rockwell scale. And most importantly - the highest wear resistance of the blade.
The only downside is the fragility during processing. It is very important to perform the hardening correctly, and to exclude “cold” forging altogether.
Results
Having studied in detail steel grade ШХ 15, we can clearly indicate its advantages and disadvantages.
- Uniformity.
- High contact endurance.
- Easily processed.
- Fairly high hardness.
- High wear resistance.
- Thin edge when sharpened.
- Resistance to crushing.
- Plasticity and viscosity.
- Relatively high susceptibility to corrosion.
- Difficult to sharpen.
There are many different grades of steel. Each of them has its own advantages and disadvantages. ShKh 15, in turn, is a very versatile steel, suitable for almost any type of knife. At the moment it is one of the most popular brands with low cost and is used mainly in private forging of blades. A product made from such steel can give the desired result from the work, while significantly saving the budget due to its low cost.
How to make a knife from a bearing with your own hands
It is clear that in this case there is no way to do without forging. It is necessary to straighten the clip of the product. Experts in such things are divided into two camps, which part is better to choose for work: internal or external. There is no clear answer, but many argue that the inner ring is made of the best steel. Reinforcing my words by the fact that this part carries a large load.
But, be that as it may, it definitely doesn’t matter to a beginner. First, you need at least something to work out and not crack during hardening. For normal operation you will need your own specific set of tools. Well, and most importantly – the forge.
Required materials and tools
A completely “green” beginner is unlikely to have the necessary tools, so he needs to acquire them. Some things you can make yourself, others you can only buy. But again, a purchased tool can be replaced with a similar, simpler one, but the manufacturing time will increase. If you don’t have any plans, it’s pointless to engage in blacksmithing and knife making, or buying anything, of course, if it’s just small things. The following materials will be required:
- bearing, preferably in a disassembled state;
- wooden block for making a handle;
- rods for rivets, preferably made of brass;
- epoxy glue or a substitute with similar properties;
- oil or wax for impregnating the handle;
- masking tape, piece of paper, pencil, marker.
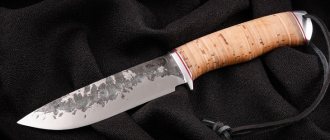
Kitchen knife made of bearing.
The materials are not very difficult and everything is accessible. But with regards to the tool, please note, as mentioned above, if you don’t find a professional one, try replacing it with more affordable options. We will also indicate them for clarity:
- metal vices, clamps, clamps;
- Angle grinder (grinder) with a set of different discs;
- a forge or muffle furnace, which you can make yourself;
- drilling machine or drill with a set of drills;
- sandpaper of different grain sizes;
- polishing machine, maybe an angle grinder with a polishing wheel;
- gas stove oven, for tempering metal;
- an anvil and two hammers of different weights, one – 6 kg, the second – 1.5-2 kg;
- a belt grinder or again an angle grinder with an abrasive wheel;
- a jigsaw or just a hacksaw with fine teeth;
- welding machine;
- etching kit or engraver (optional).
Most of these items can be replaced with analogues. As for the muffle furnace and forge, these clever designs can be made with your own hands (read the article “Hardening a knife at home”).
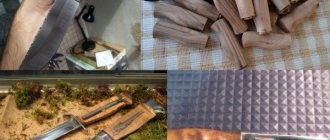
Preparing the part for forging and processing the bearing
All specimens from working machines and engines are acceptable for making a knife from a bearing. If you received it in an assembled state, the best way to get a workpiece from it would be to cut it with a grinder. To do this, we clamp the product in a vice and use an angle grinder to make a cut at an angle.
This is done for one simple purpose; in the future it will be easier to forge the tip and nose of the blade. Then, using metalwork tools, you need to bend the upper clip as far as possible. Attention! Do not hit with a hammer under any circumstances, otherwise you will ruin the part without starting to work with it. Remove all unnecessary parts and you can proceed to the next step.
For proper work, especially for beginners, it is necessary to make a sketch on paper of the future blade. Take into account the thickness of the workpiece and its length, or rather, what should be the result. The drawing must contain all the information on dimensions, including the handle.
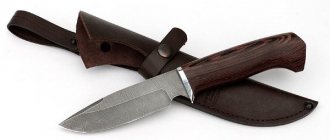
For blades made of this material, it is better to use the overhead method of mounting a handle made of two halves of wood, secured with rivets. The drawing will simplify the task many times.
Annealing and forging of the bearing race
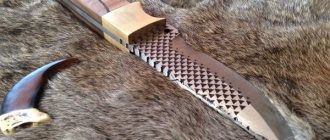
ShKh15 steel is most often used in the upper bearing race, but for exact specifications, you can use reference books. Metal markings are sometimes present on the products themselves. Accordingly, each grade of steel behaves differently during forging and hardening. Our experiment included the exact specimen listed above.
Bearing for making a knife.
Such steel must be subjected to mandatory annealing, the process occurs in this way. In accordance with the reference book, the letters “ШХ” indicate bearing steel with chromium alloying. It is annealed at a temperature of 800 °C, decreasing at a rate of 10-20 degrees/hour. All this information is freely available on the Internet, be sure to use it.
Many people new to forging will find it difficult to work with forging tongs. To simplify this task, a rod is welded to the workpiece. The part is placed in the oven and heated to 900-1100 ° C, it will look dark yellow. But it is better to use a laser thermometer. If it is not there, we try the steel with a magnet, the workpiece does not magnetize, which means that the heating has reached a certain Curie point.
Once this value is reached, forging can gradually begin. First, use a small hammer to carefully straighten the part. Always control the temperature; it’s better to play it safe and heat it up than to simply destroy it when it’s cold. The big hammer gets to work next. Forging must be performed according to all the rules:
- With gentle blows of the hammer, we “drive” the metal to the side from the middle of the part, thus forming slopes;
- working on the tip is slightly different from the general principle; we carefully adjust the tip of the blade to the tip;
- it is necessary to draw the workpiece along the length for the shank;
- Having done everything correctly, the butt will be no more than 2 mm.
Suddenly you don’t want to forge at all, just straighten the part and the rest can be ground off on a grinder. But keep in mind that the loss in width and length of the blade, and the forging process itself gives the metal additional rigidity.
At the end of the forging process, it is necessary to “normalize” the steel. We heat the workpiece to 900 °C, remove it from the oven and leave it to cool in the air.
Roughing and grinding work with workpieces
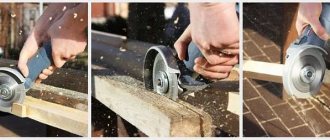
Everything that was done during the forging process can be called “rough” work. Now we have to bring the part into the appropriate form. Cut the rod using an angle grinder. Using a grinding machine or belt machine, without pressing too hard, you need to carefully remove all carbon deposits from the metal.
Thus, all irregularities will disappear and the surface will become shiny. Do not get carried away with this process, so as not to remove excess from the workpiece. Although after this procedure, you will practically have a blade in your hands.
Transferring contours from template to blade
It came down to the sketch that we were doing at the very beginning. It may happen that the drawing does not coincide with reality. There is no point in being sad, because this is a draft version. It needs to be cut out and applied to the blade, but it makes sense to even glue it temporarily with any paper glue.
Drawing of a knife for making from a bearing.
Now the part can be secured in a vice, and with the help of a grinder, we use an abrasive wheel to bring the blade to the look you want, simultaneously cutting off all the burrs and irregularities. The only downside may be that the metal will heat up and the paper will burn. Therefore, before gluing it, you need to scratch out all the contours from the sketch. The task is not easy, but it is simply necessary.
When cutting out the image of the blade, the part must not be allowed to overheat, even in small areas. Water the workpiece with water. Once the work is completed, you can move on to the next stage.
Sharpening and grinding
At the very beginning of making a knife, you should have thought about what purpose it was created for. Since sharpening for each type of product is completely different. But first of all you need to remove the descents.
We won’t focus on them, but remember: the main thing in descents is symmetry. Only after they have been removed can you start sharpening the blade, but first, grinding. It can be done on a grinder or using an angle grinder with a special wheel. Then two or three blind holes are drilled in the shank for attaching the handle. During hardening, trouble can occur if the holes are drilled completely.
Blade hardening and tempering
A very important point, especially for beginners. According to the reference book, the hardening temperature of steel is 830 °C. A thermometer will help you preheat the oven to the specified level. If it is not available, you should use one of the following methods:
- the simplest and most common is to check with a magnet, as soon as the blade does not “stick” to it, the goal has been achieved;
- the next one is very interesting, sprinkle the part with salt, its melting mark is 800 ° C, which means there is still a little left;
- and a method for “hardened” professionals - the color of the workpiece becomes light red.
All methods are effective, but nothing is more accurate than a thermometer. And in this case, accuracy is very important. Having heated to the desired point, the blade is removed and lowered into oil for 1 minute per 1 mm of product thickness. Almost any oil can be used: vegetable, mineral, waste machine or transformer.
Hardening the knife blade.
It must first be heated to 50 °C, this is necessary for good enveloping of the immersed product. When performing such work, be careful, wear safety glasses and gloves, there is a possibility of oil splashing. There is no need to move the blade when it is immersed.
After the workpiece has cooled, the time has come to temper the steel. The procedure will ease the stress in the structure of the metal crystal lattice that arose during forging and hardening. The reference book indicates a temperature of 150 °C and a time of 1.5 hours. After preheating the oven of the kitchen gas stove, place the wedge there for the required time.
Blade cleaning
After all the manipulations carried out, rough cleaning on the grinder, thin, small scratches will remain on the blade. They must be removed manually using sandpaper. It is necessary to process starting from grit 400 perpendicular to the scratches. Then we move on to 600 grit and finish with 800 grit.
You can achieve a mirror shine by using GOI paste or special grinding mixtures.