If there is a need to install or replace a toilet, most inexperienced craftsmen prefer to call a professional. However, this work is not that difficult. By approaching this issue correctly, even a beginner will be able to carry out the installation absolutely independently. In addition, this will save a lot of money, since the work of professional craftsmen costs quite a lot.
Toilet installation options
First you need to figure out how to install a toilet. Usually only four types are used:
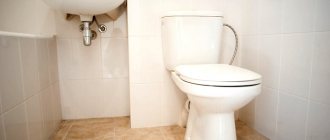
- Floor-standing. This installation method is the most common, as it is quite simple, does not require a large amount of investment, and further maintenance occurs without problems.
- Attached. This method involves installation on the floor, but all communications are hidden in the wall. It looks quite aesthetically pleasing, but in the event of a malfunction, maintenance becomes much more complicated, and the installation process itself is more complex and more costly than the first method.
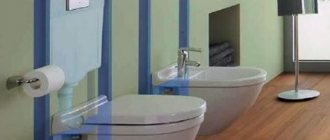
- Mounted (wall-mounted). By installing the toilet in this way, you can achieve the most attractive appearance, since the structure is not mounted on the floor, but on a durable installation into which the flush cistern is also mounted. As a result, all pipes and other elements are hidden, which makes this method the neatest in appearance, but the most difficult and expensive.
- In-floor. As a rule, this type of installation is used only in public places. This is due to the fact that this method cannot exactly be called aesthetic, since it is a simple hole in the floor, which is completely inconvenient to use.
Popular models
Diagram of the “West Standard” model
The manufacturer produces toilets in different sizes: from compact small options to regular standard ones. Some versions are available in several colors.
West Standard
Santeri West toilets are universal floor products.
The kit includes:
- tank volume 6 liters;
- plastic seat.
This version is available to any buyer due to its budget price.
Santeri Ultra Standard
A classic floor product. It features a laconic design and a snow-white body color. A fairly compact option that does not take up much space.
The disadvantages include:
- round bowl;
- small space;
- weak drain.
The model is suitable for children or small people.
Vorotynsky Standard
Toilet-compact Vorotynsky
Snow-white toilet bowl with a smooth surface, compact size. Convenient drainage hole eliminates blockages. The anti-splash system eliminates inconvenience.
The disadvantages include a tight button, which is difficult to press even for adults, as well as the formation of condensation on the tank.
Victoria Standard
It has a laconic appearance.
The kit includes:
- fittings for installation;
- comfortable seat;
- fasteners.
A guarantee of up to 2 years is provided even on the seat.
It is difficult to find components if replacement is required. The drain sometimes fails. Problems arise after several years of service.
Model differs:
- pleasant appearance;
- suitable for any size bathroom;
- ease of care.
The seat is equipped with rubber inserts, this softens the impact of the cover. The bowl is completely washed with water, which ensures perfect cleanliness. There is a shelf inside the seat that prevents water from splashing.
Keep in mind that condensation forms on the tank, and sometimes chips appear if used incorrectly. No double flush.
3. Preparatory stage for installing the toilet
Before directly installing a new toilet, it is necessary to dismantle the old one, if any. This is done in several stages:
- The first step is to turn off the water to completely drain the tank.
- After this, you should disconnect all hoses that supply water.
- The next step is to remove the tank. You may need a screwdriver and an adjustable wrench for this.
- Next, you should loosen the drain, but often cement coating is used to secure it, which prevents this from being done just like that. As a result, two options for further action appear. The first, more complex one, makes it possible to further repair and use the toilet, since it remains intact. To do this, you need to carefully remove the cement using a hammer and chisel, and then simply loosen the drain. The second method is much simpler, but you will no longer be able to use the toilet, since the drain will be broken. To do this, you just need to hit it hard under its bowl with a hammer, as a result of which the pipe will be broken and it will be much easier to get rid of its remains.
- After this, it is recommended to drain the remaining water by tilting the toilet bowl towards the side of the sewer hole, and then remove the toilet itself.
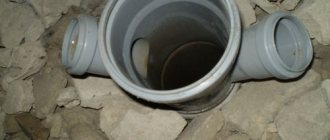
- The opened sewer hole must be cleaned of all contaminants and plugged either with some rag or a suitable size wooden plug.
After this, the preparatory stage is completed and you can move on to the main stage.
Materials and tools
Everything you need for work can be found in almost every home:
- wrenches and screwdrivers;
- pliers;
- knife;
- marker;
- electric drill with a hammer drill and a drill for drilling concrete.
You also need to prepare some materials:
- silicone sealant;
- thin sheet of technical rubber;
- sealant for pipe threaded connections - tow, flax, fluoroplastic tape (FUM) or Tanget Unilock thread.
If the sewer pipe to which the toilet is supposed to be connected is made of cast iron, you will additionally need tarred tow, red lead diluted with drying oil and cement mortar.
Toilet installation
First you need to mark the location of the toilet and its mounting points. To do this, you need to place the bowl in the intended place and make notes with a marker or a simple pencil. After this, having removed the toilet, you can begin making holes to secure it. However, if the floor is covered with tiles, then you first need to drill through this coating with a special drill slightly larger than necessary. Then you can drill the holes themselves and hammer the dowels into them.
The next step is installing the toilet bowl. Having put it in place, you need to insert fasteners through the special holes and then tighten them. This must be done very carefully, as it is very easy to damage both the fastenings and the toilet itself. It is best to tighten them not all the way, but only until the moment when the toilet completely stops wobbling and stands level on the surface. The fastenings are covered with special caps on top.
The tank, which is attached in the next step, is usually sold assembled. If this is not the case, then the kit should be accompanied by detailed instructions on how to assemble it.
The toilet seat and lid are attached separately. Usually the instructions describe in detail the process of assembling them, so doing it yourself will be quite easy.
In this way, the toilet is installed in a standard way, however, depending on its type of installation and the type of connection to the sewerage system, the steps may vary significantly.
Product Features
Compact toilet Santeri
The company has been producing plumbing fixtures since 1991. In production it uses advanced technologies and imported equipment.
The Santeri toilet differs from other products and has some features:
- the surface is covered with glaze, which gives a special shine and smooth appearance;
- withstands various chemical influences;
- products of compact sizes;
- models with antibacterial seat;
- Products are sold with accessories.
The company produces toilets designed for different consumers. The equipment is suitable for any bathroom.
The structures are completely washed with water, this guarantees perfect cleanliness. Antibacterial seat coating prevents the growth of bacteria.
Among the disadvantages is the difficulty of selecting replacement components in the event of a breakdown.
Connecting the toilet to the sewer
There are several ways to connect a toilet to a sewer system, namely vertical, horizontal and oblique. Moreover, each of them includes its own installation features, as well as various other nuances.
Vertical connection
This method is quite convenient and widespread, especially in European countries. Its essence lies in the fact that the pipe and siphon, which is located in the toilet bowl, are directed downwards. This makes it possible to install the structure at any angle relative to the wall. And the installation itself takes place in several simple steps:
- First, markings are made on the floor.
- After this, a screw flange with a lock must be installed in place of the drain pipe.
- There is a round hole in the center of the flange. It is into this that you will need to insert the sewer pipe.
- Then the toilet is installed on the flange, fixed, and the outlet pipe must be pressed against the end of the sewer pipe.
Horizontal connection
Horizontal connection is the most common type of toilet connection in Russia, as it is suitable for installation in apartment buildings. However, in this case, you need to connect the toilet to a certain wall, connecting it to the sewer outlet. The principle of operation for a horizontal connection is approximately the same as for a vertical connection.
Installation of a wall-mounted toilet
Wall-mounted toilets are installed using a durable installation. As a result, only the bowl and the drain button remain visible. This looks the neatest, but is much more complicated compared to other types. However, even the most complex installation method is completely within the capabilities of the average person.
First of all, a steel installation is attached to the main wall. In this case, dowels are used for fastening. After this, you should check the evenness of the installation using a level. Water pipes and sewer pipes are removed at the installation site. Water can be supplied to the barrel using a rigid or flexible line. The first option is a little more complicated, but much better quality than the second.
At the next stage, the toilet is connected to the sewer hole using corrugation. At this stage, it is recommended to completely screw the bowl to the installation and check the entire structure with a test drain. The final stage will be covering the section of the wall on which the toilet is attached. However, during this process, its bowl is usually removed and finally secured after all the finishing work.
Unboxing
When accepting goods from store or delivery workers, pay attention to its appearance:
- The toilet bowl should not have pronounced asymmetry, sagging on the outer and inner surface of the bowl and unevenness. The same goes for the tank.
- It is worth carefully inspecting the tank and toilet bodies for cracks and chips
. Alas, anything can happen during transportation; By signing the papers stating that you have accepted the goods, you will relieve the seller of any responsibility for the external condition of the kit. If defects are revealed later, the seller can certainly accommodate you. But he has every right to refuse.
- The fittings kit for the tank must be packed in a sealed plastic bag
. If it has clearly been opened, it is better to ask for a replacement or at least double-check the package, using the fittings assembly diagram as a source of information. However, there is not always time for this... - Toilets are usually supplied with kits for attaching them to the floor. They consist of two or four (according to the number of holes in the base of the toilet) screws with plastic dowels, washers and decorative caps.
Please note: such kits are also sold separately, and are more than inexpensive. Plastic washers for screws are required: the screws should not pull the toilet to the floor, resting their steel heads directly on the earthenware.
