The properties and characteristics of a high-quality knife directly depend on the level of its final grinding and polishing. They have a great influence not only on the ability to maintain the integrity of the cutting edge and sharpening for a long period of time, but also on the productivity of operation - minimum effort, maximum result. Also, of course, all this is imprinted on the appearance of the entire knife and guarantees additional resistance to corrosion. It is precisely the precise adherence to technical subtleties and the quality of these processes that allows us to answer a simple question, which is why some knives cut better than others and do not become dull an order of magnitude longer.
Handmade knife polishing.
Manual polishing
In the past, craftsmen from all over the world did not have specialized equipment, but they performed their work efficiently. But how to polish a knife without special equipment? After heat treatment, craftsmen used natural abrasive materials (such as stone or a metal device).
Polishing by hand helps achieve a perfectly smooth surface. In this way you can get the correct shape of the blade. Even using a special polishing and grinding device, it is not always possible to achieve a similar effect. It is believed that hand polishing is the final finishing of a knife.
How to polish a knife at home correctly using the manual method? Before proceeding to manual processing, it is necessary to polish the knife on a tape, the grit of which should not be less than 320. Using sandpaper, scratches are first removed. They may appear on the surface of the product after machine processing.
Polishing process
“How to polish a knife” is a question that arises for many beginners or home fans of this business. After all, this is the most intensive and complex work process in knife production. When polishing metal surfaces, experience plays a key role. Only the basics of this process can be outlined on paper, but even here the main rule remains: theory is theory, and experience is acquired with practice.
Using these instructions, you can polish an ax or any other steel product.
Many polishers believe that the only way to achieve an optimal result and a “real” smooth surface is to forget about the existence of power machines and abrasive wheels. They consider their hands to be their machine, their tools to be a large number of all kinds of blocks with different grain sizes and hardness, and the key to success is hellish patience and at least 20 hours of work.
Mirror polished knife.
Below is one of the many ways to polish knives; for convenience, it will be divided into several stages.
It is worth considering that not every steel lends itself equally well to polishing.
Preparation
It is advisable to separate the blade and the handle; if this is not possible, you can simply wrap the handle in cloth to avoid damage. It is also worth making sure that the last stage of grinding was completed correctly: the metal should have a completely smooth, lunar, matte shine without marks or stains.
Start processing
It is necessary to begin processing with a well-salted tape with a grain size of 240-300 units, using a polishing mixture. The initial stage can be continued by using a polishing disc, but the speed must be adjusted to 1750 rpm.
Reducing grain size
Next, you need to change the entire polishing kit to a medium type compound, reducing the grain size. The main thing is not to overdo it too much. It is enough to walk several times on each side of the blade from butt to blade.
Final polishing
If you polished the product using the above technology, then the last stage will be carried out using a grinding machine with a circle made of stitched gauze, the speed of revolutions is 1750 per minute. You must first apply a small layer of polishing paste to the circle, repeat the last step several times until the entire surface of the knife is completely covered with a thin layer of the frozen compound.
Features of sanding
How to polish a knife to a shine using sandpaper? The first step is to polish at an angle of 90 degrees. In this case, irregularities may appear on the surface of the knife. This may occur due to the accumulation of grit on the abrasive material. Sometimes the unevenness cannot be removed with slightly abrasive paper. In this case, you need to move on to coarser material again.
To carry out the work as efficiently and carefully as possible, it is necessary to provide high-quality lighting, and the entire process must be carried out under a magnifying glass. When all the shortcomings have been eliminated, you can move on to standard processing again.
During the polishing process, you can use different types of sandpaper. The main thing is that the transition between grain sizes is insignificant. First, the polishing is carried out with a material of 600 grit, then it is increased to 800. You can stop, or you can continue polishing with a material with a grit of 2000.
Feeling the steel of a knife blade
You need to have a keen sense of what's happening between the tape and the part to avoid small, flat, uneven or edged areas. Therefore, when bringing this part of the edge to zero thickness, work carefully. After completing the work, the primary bevel is uniform and goes directly to the edge of the knife.
I now spend a few minutes leveling both sides of the piece on the 120 grit tape. The accompanying photo shows me pressing down on the back of the blade with the middle finger of my left hand to prevent the moving belt from tearing it out of my hands.
RJ Martin's Manta Ray knife has a double recessed blade (recessed grinding on both sides).
If you're wondering how I got the blade into that position on the tape, I slid it off the end of the sandpaper while holding the point with my right index finger and thumb. With my left hand in place, I relax my left wrist, release the finger pressure, let the tape pull the blade out of my right hand, and then it lands on the flat rest. I then move my right hand back into position so that I can apply even, light pressure to the piece. To remove the part from the tape, the process is repeated in reverse order. This is much harder to explain than to do!
After tracing the outline of the knife onto the finely ground steel, the author uses the rounded side of the sanding belt, which extends beyond the edge of the wheel, to create recesses for the fingers and contoured areas of the handle.
Now I switch to a new 240-grit ZM 967 belt, repeat sanding both sides of the blade blank, and then sand the primary bevel again, making passes at a slightly different angle so that I can see the scratches left by the 120-grit belt. After three or four light passes, these scratches disappear, and the blade takes on a nice appearance. This concludes the work on 6x48 sandpaper.
Now on the 10″ wheel I create a relief or secondary sanding on the top or back of the knife by holding the back of the knife at a 45 degree angle to the wheel and trying to sand on the part of the wheel that is below the center of the knife. I carry out rough sanding on a 60-grit belt, and then finish it on a sharp 120-grit belt. This relief is aesthetic and practical. It removes enough unnecessary weight from the blade and improves its penetration ability.
Abrasive stones
How to polish a knife blade using a stone? Abrasive materials of this type have different grain sizes. The most popular indicators are 320, 400 and 600. To properly level the knife, experts recommend using Indian bench stones.
This simple device is still used today, although it was first used in the Stone Age to remove excess material from weapons. At that time, not only stones were used, but also sand and soil.
For polishing, only those stones were used that were harder in structure than a knife. Some craftsmen prefer a square shape, while others like a round one. The most popular stone for polishing is sandstone.
How to use stones correctly?
When polishing, rough and thin stones are used. The coarse material has a grain size of 80, and the fine one - 15. You can examine the structure of the stone in detail under a microscope. How to polish a knife this way? A rough stone is used to remove scratches that most often appear on a knife after a file. Another type of stone is usually applied before heat treatment. To prevent the surface of the stone from clogging, it must be periodically moistened with water.
To understand how to polish a knife to a mirror shine, you need to pay attention to Arkansas stones. Their grain size can reach 1000. This material is ideal for finishing. If polishing is just beginning, it is better not to use such stones, as they work slowly. You can achieve a mirror shine using Japanese wet stones. In addition, you can find on sale not only natural, but also fairly high-quality artificial stones.
Difference between grinding and polishing
Many people do not understand the difference between grinding and polishing. To see that very difference, you need to delve into the definitions themselves.
- grinding is an action that makes it possible to make the surface of a solid material smooth using abrasives;
- polishing is an action that is the final stage in the manufacture of a tool, which involves extreme smoothing of the surface until a specific shine appears.
These two operations are interconnected and follow one another.
| Grinding | Polishing |
| Done before polishing | Produced after grinding |
| The goal is to remove unnecessary | The goal is final leveling, adding shine. |
| Grinding machines are used | Polishing machines are used |
| Exclusively mechanical impact | Different types of influence |
Quick polishing by hand
You can also polish a knife by hand. Movements must be made along the blade. It is this tactic that helps get the job done as quickly as possible. Often a double-sided grinding machine is used for these purposes.
The blade of a knife can be polished thanks to rapid friction. This method has many disadvantages. The surface of the knife is imperfect; rough undulations and scratches can be seen on it.
Such defects can be eliminated, but to do this, all scratches must be in the same direction. After rough processing, it is necessary to prepare a small piece of leather and a special polishing compound, with the help of which the finishing process is carried out.
Application of dry and wet paper
Polishing work is carried out with both dry and wet paper. The material should be slightly damp so that it does not deteriorate or become greasy during the polishing process. For a certain type of work, you need to use only dry paper.
How to polish a knife at home using paper? To do this, it is recommended to purchase a whole set, which usually consists of fifty sheets. This option is considered the most economical. It should be borne in mind that waterproof material is more durable than non-waterproof material. Paper treated with crushed silicon carbide is ideal for polishing metal products.
To make it convenient to work with the material, you must proceed as follows:
- fold the paper in half lengthwise;
- the material is secured with clamps to a small steel plate;
- If you fold the paper in half and place it on the plate, it will not slide off while you work.
Experts recommend making small templates and blanks first. If the master needs to treat the area near the handle, small strips are not folded, but applied across the entire width. To prevent the tape from tearing during the polishing process, the back side of the material is covered with masking tape.
Mirror processing
Knives of any type look amazing when they have a perfect mirror surface. But how to polish a knife blade at home so that it has such an excellent surface? Each master uses his own polishing methods. Whatever method is used, the ideal surface of the knife indicates a high level of skill.
Often, to achieve an ideal surface, the product is first polished by hand to 800 grit, and then a special grinding wheel is used. Such processing is necessary in order to remove all irregularities and prepare the knife for final mirror polishing.
You need to work with grinding wheels carefully. Too high a speed may damage the product. In most cases, the grinding wheel should have a soft surface. For some types of work, hard is used. It is also dangerous to work with loose polishing wheels. They have one unpleasant feature - they often grab blades and some other parts of the product.
Disturbing flat grinding of a knife blade
For the master, flat sharpening is more difficult than recessed sharpening. The tape is supported by a steel stop, which does not spring back, like a rubber-rimmed pulley. This makes it more difficult to rely on your feelings when doing flat sanding. In addition, the area of contact between the blade and the tape is larger, which leads to much less pressure on the tape with the same pressure on the part (pressure = force / area).
| Pay attention to how the author holds the end of the blade with the middle finger of his left hand, preventing it from being pulled out from under his fingers on the moving belt. | After three or four light passes on 240-grit tape, the scratches from 120-grit tape are removed and the blade looks nice. |
Increasing the contact area means that more force must be applied to obtain the same pressure. Therefore, at this stage of sanding, be careful to maintain the desired thickness of the edge and achieve a smooth and smooth surface sharpening that approximates the line you have drawn.
The corresponding photograph shows how the descent section on the smoothed edge of the belt is processed. Grinding the bevel area is difficult even for experienced craftsmen. If your first results are worse than mine, don't worry. Just keep practicing. After three or four passes, I created the geometry necessary for subsequent heat treatment. The edge thickness is approximately .02 inches and the sanding line looks good. The shape of the tip will be finalized after heat treatment.
The author does a secondary grind along the back of the blade. To do this, he uses a 10-inch wheel and holds the back of the blade at a 45-degree angle to it, trying to grind on the part of the belt that is below the center of the wheel.
After the heat treatment, it was time to re-sand the Kwaiken blade. From this point on, I have to remember that the workpiece has been heat treated and tempered and is easily ruined if overheated. Although I sand with my bare hands, I try to keep them away from the edge of the knife where heat begins to accumulate. I force myself to dip the blade in water after each sanding pass.
I re-grind the blade using a new ZM 967 120-grit belt. This is a good belt for grinding on a flat stop, since ZM removes the allowance in the joint area, making the grinding smoother. Trying to sand evenly, I make the edge extremely thin. The sanding line is now reaching its final height. The only way to master zero grinding is practice!
My only advice: have patience and a fresh tape. When flat grinding, the belts wear out quickly. Because the surface is flat, the sharp abrasive grit makes less contact with the workpiece, plus you're now cutting hardened steel, which, combined with the impact effect of the belt running over a hard fence, means the belt is working hard.
Standing next to the sanding machine and leaning his face close to the belt, the author applies the tip of the knife to the belt, raising the handle high enough so that the main sanding occurs on the edge
So plan to burn a few strips at this stage, especially if your edge is still thick. For this final process I use a completely new belt which improves the quality of the flat sanding.
Looking at the photo of the completed Kwaiken, you'll notice that the edge of the knife is straight for the first few inches before the drop portion, and then slopes upward smoothly. Because the edge of the Kwaiken is somewhat curved, the handle of the knife should be lifted slightly as you sand toward the tip to keep the bevel in constant contact with the belt.
The artist's Kwaiken knife features a beautiful edge that meets the primary cutting edge gracefully
As you sand the tip area, you will notice that the material is removed faster. The contact area is reduced to approximately 1 inch wide compared to the 2 inch area located just before the descent line.
I usually need a few more passes to get the edge down to zero thickness in the bevel section. This is a very difficult sanding step. If you don't go all the way, you'll end up with an ugly, unsharpened section of the blade. If you grind too far and at the wrong angle, you will end up with a discrepancy just before the trigger area, ruining the aesthetic appearance of the knife.
Security measures
Many people think about how to polish a knife at home safely. The most important condition is not to install the polishing machine directly on the workbench. The fact is that during work, the polishing wheel often catches the blade, which can bounce off and harm the master.
Experienced craftsmen who often polish and grind knives additionally install special protections on polishing wheels. In this case, residual material in the form of polishing compound and dust will fly onto the floor and not onto the master.
Polishing a knife to a mirror shine at home - tips and tricks | X-Gear Blog
The new knife has a perfectly smooth and shiny blade surface. You can see your reflection in it, like in a mirror. Over time, the blade becomes scratched and loses its original beauty.
The surface of the blade becomes matte even for those tools that are used very carefully. It's not easy to restore a knife's mirror shine. The key to success is hellish patience and perseverance.
Polishing and grinding the knife can take several days.
How to grind a knife
For the Japanese, the smoothness of the blade surface is as important as the sharpness of the cutting edge. Therefore, for centuries, Japanese gunsmiths have been looking for methods of polishing blades that would allow them to achieve a mirror shine.
Unlike the Europeans, the inhabitants of the Land of the Rising Sun made blades only from very hard metal (60-62HRc). This made the grinding task much more difficult. However, Japanese masters managed to achieve success. Japanese blades are famous for their shiny, mirror-like shine. Japanese gunsmiths achieve the ideal smoothness of the blade exclusively with the help of natural stones.
The grinding technology created by the Japanese is considered one of the most effective, therefore it is used everywhere.
To achieve a perfectly smooth blade surface, you need to forget about grinding equipment. It can only help at the initial stage of processing, when you need to remove deep scratches and level the surface. After this, you need to switch to manual labor.
Grinding a knife at home is done using sanding blocks or sandpaper of different grain sizes. It is better to wrap sandpaper on a wooden block.
This will increase labor efficiency. Movements must be carried out in a plane parallel to the plane of the blade.
It is necessary to constantly change the direction of movement of the block within the plane, without fixating on one, more convenient direction.
First, use bars or strips of coarse-grit sandpaper (240-320). They eliminate all existing defects. It is imperative to ensure that when removing scratches the entire surface of the blade is treated. If you grind the blade only in the area of the defect, a depression will appear on its surface. After this, they move on to using bars with a smaller grain size.
It is very important to follow the sequence of actions. You can move on to the next stage of grinding only when the polishing capabilities of a higher-grit stone are completely exhausted. The slower the grain size decreases, the better the polishing of the knife will be.
For grinding stainless steel blades, it is better to use hard stones that grind down more slowly. Orange and white products are considered one of the best. The abrasive material must be moistened periodically. Therefore, you need to place a container of water next to your workplace.
To ensure that the abrasive does not lose its properties, its surface must be renewed. To do this, prepare a mixture of broken thick glass and pobedit powder. Add a little water and shampoo to the mixture.
Then the block is immersed in it. The abrasive material is moved with force through the mixture until its surface is clean. The shampoo makes the abrasive soft.
A bar treated with a shampoo solution does not cause unnecessary deep scratches.
Primary grinding should be carried out until the surface becomes visually smooth. Frequently used kitchen knives are particularly affected.
Therefore, they have to be processed especially persistently. After the first stages of grinding, they switch to abrasive material with fine grit (600-800).
It will eliminate scratches left after using coarse-grained bars.
Polishing the knife
Polishing a knife at home is done in the same way as grinding. Only during work use abrasives with very small grains. First, processing is carried out with material with a grain size of 40-80 microns.
At the last stages, polishing pastes, powders and suspensions are used, the grain size of which is 20-40 microns. These products should completely remove the marks left by the sanding material. After proper polishing, the surface of the blade becomes matte with a moonlit sheen.
There should not be even a hint of a scratch or stain on it. If at least one scratch is noticed, polishing must be repeated.
The fine-grained material used in the final stages of polishing is treated with kerosene or liquid machine oil. Oil and kerosene are applied in small quantities to the surface of the blade. These products improve glide and introduce new portions of grains into the work, increasing polishing efficiency. Glycerin-based pastes are moistened with water.
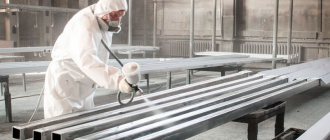
To achieve a perfectly smooth surface, the final stage of processing uses a polishing machine with cloth or felt grinding wheels. Goya paste is applied to the circles.
After polishing, you need to wipe the blade with a piece of soft rag and inspect its surface. If traces of exposure to abrasive material are found on it, processing is continued.
Polishing a knife to a shine can take a very long time.
It is best to process the blade surface at speeds up to 1750 rpm. The blade must be held with a secure clamp or pliers. Higher speeds can be dangerous. At high polishing speeds, the risk of losing control of the blade increases many times over. If the blade escapes from your hands, it may fly along an unexpected trajectory and cause injury.
To minimize the risk of injury, you need to polish the blade while holding it with the cutting edge down.
Under the polishing machine you need to lay a soft material that will not allow the blade to bounce towards the operator if it accidentally falls. Protective strips must be installed over the grinding wheels.
They will protect not only from a rebound blade, but also from metal dust. It is imperative to work in protective glasses and gloves.
Using a polishing machine you can achieve a bright shine on the blade. However, such shine is cold. It is called "herring". The “herring” shine appears due to the scattering of light by microscopic surface irregularities that appear as a result of polishing.
To polish expensive and exclusive knives with high quality, you need to continue working manually. Polishing a knife to a mirror shine is done with diamond pastes, which are applied to blocks made of hard wood - apple, pear or boxwood.
Reciprocating movements process the entire surface of the blade, eliminating microscopic relief. The smaller the block, the stronger its impact on the metal surface. However, you should not use very small bars.
If the block is uncomfortable to hold in your hands, it will be difficult to apply the necessary pressure.
As a result of many hours of hard work, you can give the blade a deep mirror-like shine, giving it transparency. This effect is achieved due to the fact that the rays falling on the blade are reflected, almost without scattering. Although polishing a knife to a mirror finish takes a long time, it is worth the effort.
Using GOI paste
This method is well known to craftsmen who make knives. How to polish a knife with GOI paste? To do this, you need to choose the appropriate type of polishing material, which depends on the type of metal. In addition, you need to remember several polishing rules.
GOI paste has been used for more than a hundred years. It is used to polish metal, plastic, ceramic and even glass products. Previously, the paste was presented in green color and was made from chromium oxide. However, this substance was found to be toxic, and at the moment the paste is made from aluminum oxide. The paste is available in red and white.
Types of pasta
Previously, there was only one type on sale. But now specialists have much more choice. The paste is produced with different abrasiveness:
- No. 4 – used specifically for rough work, which is carried out at the initial stage of polishing;
- No. 3 – helps to achieve a matte surface;
- No. 2 and No. 1 are used for finishing.
Green paste is sometimes found on sale, but it is difficult to find. Previously, such polish was produced both in liquid form and in the form of bars. The two types of paste are identical in effectiveness. Green has one advantage - low cost.
Knife grinding
The magical transformation of a rectangular blank into the required blade shape is often done using grinding machines. It takes less time, but requires a precise eye and a sense of proportion.
During the process, the master does not see the result between the knife and the tape. In this case, he relies on his feelings.
Sanding on a belt machine.
The master needs to literally feel the process taking place. You should tune yourself to each product. It is advisable to mentally imagine and feel each pass of the tape or circle.
Taking things seriously, over time, muscle memory will appear. And this is already experience. You can't do without it.
Beginners should master four basic operations:
- profiling;
- flat grinding;
- deep grinding;
- bringing the shank into a cone.
Having learned how to do flat grinding, you will master deep and curved grinding with ease. Plus, bringing the blade together and making a solid product is not difficult.
There are a few tips you should follow when grinding; they are a must for a beginner:
- You should start with simple shapes and a short blade length . Don't forget to use a template to apply the outline to the workpiece.
- For convenience, it is advisable to choose a carbon grade of steel; it is easier to process. It is advisable to purchase or make a blank that is strictly rectangular in shape .
- Muscle memory is the basis for such work. You need to take several workpieces and perform the same operation on them one by one. The start-to-finish manufacturing method is not desirable.
- Providing the workplace with good lighting is simply necessary. An interesting point - wear comfortable shoes , they will help your body balance freely.
Finishing and final grinding are carried out by longitudinal movements along the machine belt. At the initial stage, an abrasive grain size of 60-80 units is used. Then they move on to a little finer ones at 160 and 240. Each grain needs to be processed on the entire blade.
Blade after polishing.
At the end of the grinding process, the product is subjected to hardening. After this stage, the wedge becomes rigid. And further manipulations are carried out with fine abrasives, which is what polishing the knife is.
Preparation for polishing
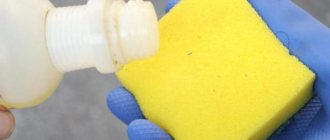
Before you understand how to polish a knife, you need to familiarize yourself with the preparation for this process. It must be remembered that the paste has many particles, thanks to which polishing is carried out. Sometimes they can accumulate and damage the product. To prevent this from happening, you need to take a small amount of the substance and rub it on an old piece of metal. In this way, large pieces of grain can be broken, otherwise the surface of the knife will not be polished, but will be scratched.
First you need to take a soft cloth and lightly moisten it in gasoline. In this case, the fabric should be as soft as possible. Flannel is perfect for these purposes. Often the paste is applied directly to the polishing wheel. It cannot be applied to the product itself. The knife should be lightly lubricated with special oil.
How to use the paste?
So how to polish a knife using GOI? When the fabric and paste are ready, you can move on to the main steps. You just need to rub the product with this composition. Do not press too hard on the surface of the knife. Otherwise, there will be small scratches on it.
For the same reasons, it is not recommended to make very sudden movements. The work is completed when the surface of the product is perfectly smooth. While working, you need to stop from time to time and apply a little industrial oil to the knife.
If the surface of the knife has many flaws, in this case you will need to purchase several types of paste. First, the treatment is carried out with paste No. 4, thanks to which deep scratches are removed. After this, move on to number 3, and then to paste No. 2 and 1. The last type of paste helps to carry out finishing grinding and achieve a mirror surface.
At the end of the work, you need to rinse the knife in running water. Experts recommend using kerosene, which can be purchased at a pharmacy, for this purpose rather than water. The knife must be thoroughly dried. Some craftsmen additionally coat the surface of the knife with tsapon varnish. This substance helps prevent oxidation of the material. The last stage is polishing the product with genuine leather.
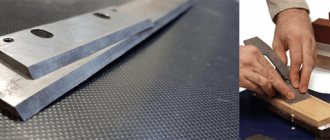
How to sharpen a knife
The basic principle of sharpening a knife is to grind both sides of the blade until the desired cutting edge angle is achieved. During the sharpening process, of course, some of the metal is ground off, although many knife owners do not think about it - but there is no other, more economical way to sharpen knives.
It is clear that the smaller the cutting edge angle, the sharper your knife will be. However, it is worth noting that a sharp knife with excellent cutting properties will not have an excellent sharpening for so long. Ideally, the rougher the work performed by the knife (from fine cutting of meat to chopping bones and wood), the wider the sharpening angle of the blade should be. The sharpest angle used for everyday classic knife sharpening is 30 degrees. There is no point in sharpening the knife sharper (unless you need a knife with the properties of a scalpel), but you shouldn’t stick to these values very precisely - a couple of degrees of error will be unnoticeable.
When you have chosen the angle of the cutting edge (do not forget that to sharpen the blade at 30 degrees, you need to sharpen each of the surfaces at 15 degrees to the longitudinal line of the blade), this angle must be maintained throughout the entire sharpening process, otherwise you will grind off excess metal or sharpen the knife blade from a completely different angle, insufficient. There are several methods to maintain a constant sharpening angle even without special tools - one of them is shown in the picture next to it.
It is also worth understanding the geometry of the knife, for example, for large and massive hunting knives, sharpening the blade at 30 degrees will mean that the width of the cutting edge should be approximately 3 mm. It may not be pretty, but the sharpness of a weapon is more important than beauty. For regular, most common knives, the edge width is usually about 1 mm.
The most effective tools for sharpening a knife are belt grinders, which quickly and accurately grind the blade, have attachments for setting the desired constant sharpening angle, are quite compact and easy to use even for a beginner. In addition, there are devices that allow you to accurately maintain the selected angle of the cutting edge, for example, a Lansky sharpener. If you are afraid of accidentally scratching the polished golomen of the blade, you can seal them with tape while sharpening.
So how do you sharpen a knife?
Both sides of the blade should be sanded until a burr appears, this will happen when you reach the middle. A burr is a small burr, a bend in the cutting edge that occurs during sharpening. It can be detected by touch as a small unevenness by running your thumb from the butt to the edge of the blade on the side opposite to the one being sharpened. This sharpening feature applies to sharpening restored knives a little differently - since when restoring a blade after removing chips, it is necessary to maintain its symmetry - it is better to first grind the blade halfway on both sides and only then grind it until a burr appears.
To sharpen a knife sharply at home, the blade should be ground on one side, maintaining a constant angle, until the burr appears along the entire length of the blade. As soon as this burr appears, it means that all the necessary excess metal has been removed, and further grinding will not make the blade sharper. Only after this proceed to sharpening the opposite side of the blade.
Regularly changing the sharpening stone after seven movements with the knife on one side, then on the other, and other nonsense - these are popular beliefs that have nothing to do with the reality of high-quality sharpening of knives and other tools. Using these methods, you will only disrupt the normal sharpening angle and erase the burr earlier than is required for high-quality sharpening.
After the second side of the blade has been sharpened (also until the burr appears), you need to polish the blade with fine grain, simultaneously removing all the notches and the burr itself - also first on one side, then on the other.
Polishing the knife
You can polish the knife using a polishing wheel and wax, moving the knife from the heel to the tip. Remember that the polishing wheel is very dangerous and can rip the knife out of your hands and throw it across the room, so be careful when working and be sure to wear safety glasses. In the field, you can polish the knife with a special fleecy cloth.
Sharpening a knife by grinding first on a coarse-grained stone, and then on a fine-grained stone, to remove traces of grinding, also has the right to life. In this case, it is important to maintain the correct sharpening angle of the cutting edge. Often, during secondary grinding, you can set a slightly more obtuse angle - this will make the blade less sharp, but the cutting edge will be stronger.
After polishing the knife, carefully run your finger from the butt to the blade to check if there is any burr remaining anywhere, re-polishing if necessary. As soon as the burr has disappeared, the knife is sharpened. Further polishing of the cutting edge will only lead to rounding of the blade and deterioration of the sharpening of the knife. Remains of wax from the knife after polishing are removed with a cloth soaked in acetone or gasoline. Knife sharpening experts are not born; they become one through training. The only useful advice we can give to beginners is to practice sharp and high-quality sharpening not on expensive hunting knives, but on kitchen knives, and over time you will become an expert in this.
This is also interesting:
- How to sharpen an ax
- How to determine the quality of a knife
- Knife repair
Processing the knife handle
If everything is clear with the blade, then how to polish the knife handle? In this case, you need to act extremely carefully. For these purposes, use the finest grit sandpaper. You need to act carefully so as not to damage the handle. This is a rather fragile element.
Now about the material. Which one is better to choose to perform this operation? GOI paste will be an excellent polishing agent. But which type should you choose for processing the knife handle? In this case, you need to use paste numbers 1 and 2. To make the handle shiny, it needs to be polished with a small piece of leather.
If the handle is made of wood, additional impregnation is necessary. This will help preserve its original appearance for a long time. Typically, impregnation is carried out using regular or special oil, which is sold in an artist store. In addition, you can simply coat the handle with a protective varnish.