How to make a spring?
Moderator: shadow
Posted by Prim2005 » 26 Jan 2013, 16:19.
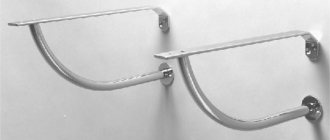
The priest had it. In short, there was a tricky spring, but along the way I fell in love with it. It’s impossible to find another one, you have to do it. I tried to bend it out of an ordinary twisted spring, but it didn’t work out very well. After annealing the workpiece, bending is more fun, but you need to heat it up. Here’s the question: how to properly harden a spring at home with a minimum of heating equipment. The diameter of the rod is 1.5 mm, the overall size of the spring is 40 mm X 15 mm (in one plane). Help whoever can
Like this
Posted by forests spirit » Jan 26, 2013, 4:26 pm.
Posted by Trident8 » Jan 26, 2013 4:27 pm.
Post by Romario_omsk » 26 Jan 2013, 16:36.
Posted by Prim2005 » Jan 26, 2013 4:36 pm.
Posted by alex-wolff » Jan 26, 2013 4:38 pm.
Springs require a different temperature regime, even I know that.
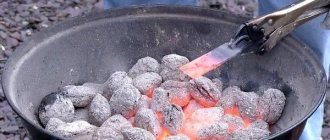
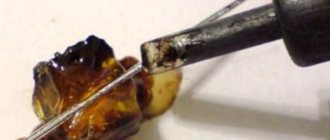
Here it is available, for understanding and by the color of the tarnish, you can try to temper the spring with a torch. this is about 300-500 degrees on vacation
Posted by Shalim » Jan 26, 2013, 05:29 pm.
Posted by Prim2005 » Jan 26, 2013, 5:40 pm.
Post by dru029 » Jan 26, 2013, 05:56 pm.
Posted by TEA737 » Jan 26, 2013 6:13 pm.
Post by Va-78 » January 26, 2013, 6:51 pm.
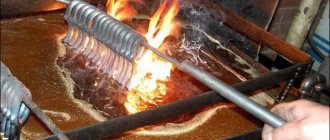
Considering that the question is surprisingly often repeated, I’ll quote myself - from what I communicated in the PM: %username% hello! Ordinary fastening pins are very well suited for making all sorts of small knife-type springs. Due to the fact that they are available in different sizes and with different bar thicknesses, you can almost always choose what you need. Plus, if you rivet them a little, you can get flat springs - also sometimes useful. The bottom line: take a pin, heat it on a gas stove until it turns red (even a little orange) and carefully straighten it with pliers. Let the pin cool down by itself - then it will groan softly. You will get a more or less straight twig. Next, when the piece of iron is soft, we bite off the unnecessary ear and point with pliers. We heat it again (to the same color) and on some anvil (for example, the flat part of a dumbbell plate) carefully straighten the rod with a hammer. When heated, it deforms very easily, so we bale it little by little. When we have completely straightened the piece of iron, we measure and bend the desired shape of the spring using pliers. Before bending, it would be good to heat it up again and cool it naturally - there the spring will last longer, since this will protect us from the possible appearance of microcracks. Now that the twig has been given the desired shape, we need to return its spring properties. To do this, we warm it up again to the already familiar color and cool it sharply. You can simply cool it in water. After this, our workpiece will be very hard, but fragile. Therefore, we take fine sandpaper (approx. #300-400) and clean the part from scale - so that you can see the shiny metal. Let's bring it to the fire again - this time not directly into the flame, but slightly from the side. The task is to catch the moment when a color wave rolls along the spring, the so-called. “taste”. We are interested in the yellow color. As soon as the piece of iron has turned slightly yellow (not from “incandescence”, but “from heating”), immediately put it aside and let it cool naturally. That's it, the steel has regained its spring properties. If you want to get a stainless spring, then after heating we lower the part into any machine oil so that it cools down completely (the rod is thin and it literally takes a minute). Then you need to hold it above the flame, at a height where the oil ignites. It is important not to overheat, otherwise the spring will be too weak. Those. place it high above the fire, and then lower it little by little (at first the oil begins to smoke - this is a good sign, it means it’s already nearby) - as soon as it flares up - hold it for a couple of seconds and the piece of iron is away from the fire. When the oil burns, it forms a strong film on the metal that will prevent it from oxidizing. To further enhance this effect, we dilute a couple of drops of epoxy, and after moistening a piece of cloth or leather in it, we wipe our finished spring. The epoxy will cling to the layer of burnt masa to death, and due to the thin, very thin layer, it will not crack. This will enhance the anti-corrosion properties. That's all. Longer to describe than to do. Yes, - if the diameters of the pins are not enough, then you can process any other thin springy goodies in the same way - for example, springs from Soviet folding beds give excellent results. One straightened spring from there is approx. 40cm. rod You probably won’t succeed the first time, but a couple of tries (so that your eye gets used to catching the color and heating time) and everything will be OK. Devilishly yours.