In order to save money when building a house, many craftsmen are interested in how to properly install a sewer system for a private home so that they can do it on their own. Contrary to skeptical citizens, such a task is quite feasible for someone who has basic skills in handling tools, as well as the equipment itself for such work. Let's figure out together how everything needs to be done correctly so that the sewage system of a country house functions correctly, is durable and reliable.
Primary requirements
Schemes for laying sewerage in a private country house need to be worked out at the stage when it will be carried out at the stage of residential construction. It would be best to decide in advance on the location of all the pipes and plumbing in the cottage. Direct installation of the sewer pipeline with your own hands or with the involvement of plumbers will be done after the walls have been erected, but before the finishing work begins.
In order for the sewage system inside the house to function properly and to avoid blockages, the following is required:
- Observe the required degree of slope of drain pipes from plumbing fixtures to the riser.
- Minimize the number of bends and turns in the sewer line.
- Choose the dimensions wisely, as well as the material of manufacture for the pipe components.
- Provide for the possibility of removing gases from the sewer system (waste drain).
- Install siphons to form water seals.
- Be sure to install hatches for cleaning and inspection in the required places.
- Insulate the sewer pipe in the basement and outside (if necessary).
Please note that there are two main documents that regulate the installation of a sewerage pipeline in a country private house and the discharge of wastewater into the village sewerage network or septic tank - these are SNiPs 2.04.01-85 (that is, SP 30.13330.2012) and 2.04.03-85 ( that is, SP 32.13330.2012). It is in them that all the features of the design and installation of a system for discharging wastewater from a house are described.
How to properly connect a regular sink?
First you need to calculate the installation height of the sink. In most cases, it is no more than 80 cm. However, if there are small children in the house, the washbasin can be lowered a little. Once the height is determined, we place a mark on the wall.
Focusing on it, we mark a horizontal line on the surface of the wall. After this, you need to measure the width of the back wall of the washbasin and set this distance down from the mark.
Detailed diagram of the installation of a washbasin in the bathroom, indicating all dimensions. Usually instructions and drawings are included with new plumbing fixtures
Before attaching brackets to the wall, you need to accurately calculate the distance between them. This is not difficult to do: turn the washbasin over and place the brackets on top so that they fit into the special grooves. Next, measure the distance between the brackets and transfer it to the wall.
Now you can make holes, beat dowels, tighten bolts. Next, you need to install the faucet on the sink, then secure it with bolts and washers, check the level of the sink and secure it with nuts.
We install a rubber gasket on the drain hole and mount the drain, connecting it to the siphon. Using an adapter, we connect the siphon outlet pipe to the sewer. Using flexible hoses, we connect hot and cold water to the mixer.
Details
Principles of sewerage installation
Regardless of the number of floors of a country house, the layout of pipes for the sewerage system in it is built around the main, that is, vertical riser. Horizontal drains are already connected to it, that is, outlets from plumbing fixtures. From below, such a central pipe needs to be connected to an outlet to the street, from a septic tank or the village network for water drainage. And on top it is important to equip a ventilation outlet for the roof. If we are talking about a one-story house, and the only plumbing it has is a sink, a bathtub and a toilet, then you can completely abandon the riser. But keep in mind that you will still need to make a vertical pipe for ventilation, since otherwise all the unpleasant odors from the sewer will somehow end up in the cottage, and even siphons will not save you here. Sudden changes in pressure when draining water can cause the water seal to fail, causing sewer amber to begin to leak out of the pipes into the sanitary unit and kitchen area.
To install a sewer system in your home yourself, you need:
Fastening elements (clamps).- Siphons for bathtubs, sinks and shower stalls.
- Inspection hatches.
- Plugs.
- Elbows and tees.
- Pipe diameters are 5 cm (for bends) and 11 cm for the riser.
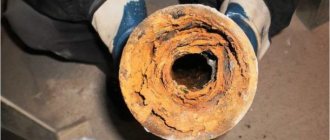
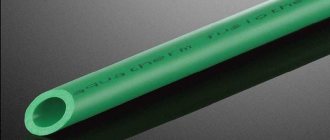
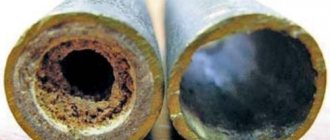
It is recommended to choose pipes for the sewerage system in a private house from polypropylene or plastic, that is, PVC. The latter are cheaper, but polypropylene is more resistant to household chemicals and high temperatures. In addition, for the country house you can purchase cast iron analogues.
They are durable, however, and much more difficult to work with. If you cut plastic with a simple hacksaw, then for cast iron you need to use a gas autogen or an angle grinder. In addition, the pressure system requires a sewage pump (installation with a small storage tank in the basement).
Schemes (real examples)
So, let's look at the layout of sewer pipes in a private house. Pipe distribution in a country house is carried out according to one of two schemes:
- Natural (that is, by gravity).
- Pressure, that is, forced (with a pump).
It would be better and even more correct to give preference to the first, that is, with gravity flow. The forced installation option should only be resorted to as a last resort, when it is not possible to ensure natural drainage of runoff water from the building. Such a system is energy-dependent; if the electrical power is turned off, the sewerage system will simply stop working. An internal storage tank of a pumping unit can accommodate a certain volume of waste water, but it is limited.
Installation procedure
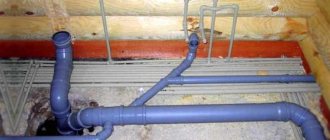
The sewer system in the house must be assembled from bottom to top. To begin with, you need to make an outlet in the basement (output through the cottage foundation) in order to connect the street and indoor parts of the water drainage. After this, it is important to raise the riser with installation on each floor above the floor surface of the tee or cross in order to connect horizontal bends. It is recommended to make a riser turn into the outlet into the street with one bend with a knee at an angle of 90 degrees, and two at 45 degrees, or even three at 30 degrees. Such a bend will be smooth, which will reduce the risk of a blockage forming in such a place. The photo shows the features of installing pipe connections in the sewerage system of a country house.
The opening with the base is made with a size of 0.4 * 0.4 meters or more. There should be a free space of about 15 cm from the pipe to the very edge of such a hole. This is required so that in the event of subsidence of the cottage and soil heaving in winter, the outlet will not be destroyed or deformed. The remaining gap will be sealed with clay and tow.
Installation work on risers
Installation work consists of sequentially mounting individual elements away from each other. Connections and their fastening to each other are carried out thanks to the presence of socket elements at the ends. From the floor on the first floor, you first need to install a tee on the branches. After this, the pipe will be about 1 meter high. Afterwards, the revision is installed, and then another work is installed to pass the ceiling to the new floor. There will be a tee again and everything will repeat itself. There should be a distance of 1 to 1.5 meters from the floor level to the inspection hatch. If the pipeline is made of plastic products, then the riser must be attached to the wall using clamps on dowels. In this case, there should be a gap of 0.2 meters from the wall surface to the pipe. It is important to place the clamps under the sockets and with a distance of 4-5 meters from each other in terms of height.
The passage through the ceiling and the space above it after installing the pipes must be filled with cement mortar with a thickness of 3 cm from the pipe and a height above the floor surface of 10 cm. This concrete edging is made to protect the riser, as well as provide noise insulation and prevent the spread of fire during fire time.
Installation of bends
Installation of elements such as bends is required at a slope from plumbing fixtures of 2.5-3.5 cm per linear meter. If the slope is much less, then waste water will begin to stagnate in the sewer pipeline. And with a lower slope, the drains will begin to flow very quickly, which is why heavy particles and fat will settle inside, gradually creating a blockage. The length of the horizon line should not be more than 10 meters. If it is laid using the open method, the pipeline can still be made 2-3 meters larger. But for sewer pipes that are closed with a screed, this is unacceptable. And in any case, an inspection must be provided for the entire 8 meters of the site horizontally in order to carry out cleaning. The sloped outlet is fixed with clamps on the wall surface in increments of 1 to 1.5 meters. If you make this distance larger, the plastic line will begin to sag.
Features of the arrangement process
In a one-story cottage, sewer pipes in a private house are usually made with one riser in the sanitary unit and two horizontal outlets in the kitchen and bathroom. But if the house is huge and has 2-3 floors, then the sewerage system layout will be much more complicated. Here it is often necessary to install a couple of separate risers. But in general, the principles for arranging the collection of household wastewater with plumbing devices are the same - pipe slope and supply of wastewater to one point for discharge from the building.
In order for the sewer system to work as well as possible for many years, when designing and installing it, it is important:
- Leads with a riser must be connected not with straight crosses, but with elements with branch pipes at an angle of 35 degrees.
- To fix individual lines at a slope, clamps are used with a pitch of no more than 1.5 meters.
- It is important to seal the places where vertical risers pass through the ceilings with cement mortar.
- Remove any burrs from the ends of the plastic pipes after they have been cut to the required length with a hacksaw.
- To form hydraulic valves, use siphons.
- Place the fan outlet as far as possible from balconies and windows.
According to SNiP, in a private country house, the installation of sewerage pipes can be carried out using hidden and open methods (in boxes made of non-combustible materials or shafts). The first option makes it possible to constantly monitor the condition of the pipeline and, if necessary, will simplify their repair work, while the second is more aesthetically pleasing. Another important and popular mistake is to use a simple ventilation shaft to save money on a fan pipe. Sewer-type air exhaust and house ventilation cannot be combined, since otherwise the unpleasant odor from the sewerage system will end up not on the street, but in the building itself.
Nuances of choosing pipes and wiring diagrams
To obtain comprehensive information on how much it costs to distribute water in an apartment using one or another scheme, you should clarify the feasibility of choosing materials.
For example: distributing water in an apartment with polypropylene makes sense when preference is given to a tee circuit. For a high-quality solution to this issue, you will need the ability to ensure the connection of plastic fittings mounted with metal threaded connections through a special type of welding.
Considering the availability of polypropylene pipes in the modern market, installing water supply in an apartment will not seem too burdensome. And the argument in professional recommendations regarding the choice will be the ease of installation and operation, achieved due to the ease and possibility of use under any conditions over a period of 30 years. Moreover, plumbers who thoroughly know their business masterfully use both pastes and proven practice-tested flax for plumbing purposes, as well as FUM tape made of fluoroplastic as sealants.
Relying on the services of professionals, the interested party does not have to worry about the quality and reliability of labor-intensive work using the collector method of water supply. In this case, metal-plastic materials that can withstand high pressure will be recommended. Moreover, capable of bending and suitable for cutting with the most common precision scissors, these pipes will not cause difficulty in installing the system. The reliability of the connection here depends on the ability to use collet fittings. But the representatives will deftly cope with this task.
Metal pipes will delight you with a high level of mechanical strength. The subject of attention will also be excellent water resistance and the ability to maintain shape, regardless of the pressure in the system.
Copper pipes, which have bactericidal properties and are resistant to corrosion, are the choice for those customers who are not particularly worried about how much it costs to install water pipes in an apartment and how much it costs to purchase materials. True, everything will pay off handsomely if you take into account the wear resistance and guaranteed operation, stretching over time from 50 to 100 years or more.
Underground laying of sewer pipeline
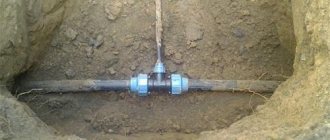
The street section of the sewer pipeline will also be laid downhill from a private country house in a dug trench. In this case, the pipe must be deepened below the ground freezing level so that it does not freeze in the winter. If it needs to be laid higher, then it is important to thermally insulate this line. The outlet is installed on a sand bed with a thickness of 0.3 meters. The top and sides of such a pipe will be sprinkled with sand so that the stones do not put pressure on it.
Who can help with solving the pipe routing issue?
So, there is no need to “break spears” and ignore the help of professionals who can easily cope with a task of any complexity. Residents of the capital and surrounding areas just need to call and conclude a cooperation agreement with, which is ready to start work any day of the week and time of day.
Relying on plumbers with good professional training, the plumbing in the apartment will be done in exactly the way that is ideal in a particular case (tee or manifold wiring).
Optimal slope and depth during construction
According to SNiP recommendations, for pipes with a diameter of 50 mm, a stable slope of 3 cm is made for each meter of installation .
With a cross-section of 100 mm, this value can be reduced to 2 cm. In order to avoid blockages and “greasy” sewage in the kitchen, it is advisable to increase the slope by 0.5-1 cm for each meter of wiring. When installing on a plot of land, the same angle of inclination is maintained. The sleeve (a pipe with a larger diameter than the main pipeline, protruding 15 cm from each end) is installed in a hole made in the foundation. It provides a transition to the external sewerage system, and is located 30 cm above the soil freezing level .
Further on the land plot, a trench is dug to the septic tank. Its approximate depth is 0.7-1 m.
Burying pipes below the freezing level (on average it is 1.6 m) is unprofitable - you will have to make a very deep septic tank. If a constant slope is maintained, this will be 4-5 m, where groundwater may already appear. The cost increases due to additional concrete rings and more durable (corrugated) pipes that can withstand both the pressure of the drain and the weight of the soil.
The drain temperature is usually above room temperature, which prevents freezing, and if desired, thermal insulation or insulation with a heating cable can be used.
