It is quite possible to make a facing material such as ceramic tiles with your own hands. Making ceramics at home can be done using plastic and silicone molds. They are sold in a fairly wide range in gardening and construction stores.
Modern housing cannot be imagined without tiled cladding. And ceramics, made and painted with your own hands, will become a real decoration in kitchens, bathrooms, and even as a decorative element in rooms. For those who are not afraid to make the required amount of ceramics themselves, the technique of making such a coating at home comes to the rescue.
Decorative tiles can also be made to look like stone. Any type of natural stone can be imitated. Such material will resemble its natural analogue as realistically as possible. How to make tiles that imitate stone yourself? In the simplest version, gypsum powder is used for this with the addition of fillers and dyes, which form a unique pattern for each finished product. But it won't be ceramics.
Why you should make ceramics yourself
Tile in the form of artificial decorative stone can also be ceramic. Homemade tiles have advantages over finishing with natural materials. The main advantage of decorative ceramics made to resemble stone is its cost, which is significantly lower than the cost of natural analogues. The components used in production make tiles lighter than natural materials. Ceramics made to look like brick are perfect for decorative finishing.
There are no limits to your imagination when it comes to how to make tiles for your needs. It can be decorated in any way you like. For example, the kitchen can be decorated with ceramic finishes depicting still lifes. You can “settle” sea creatures in the bathroom, and fancy patterns or fairy-tale motifs will be in place in the nursery. Stone-like tiles will look great in the living room, hallway, and around doorways. This finishing material will perfectly complement the design wherever its use is appropriate.
Such a universal finishing material, made with your own hands, will not only enrich and diversify the interior, but will also provide significant cost savings. Despite the fact that homemade tiles are less durable than factory products, with proper care they can last for decades, delighting you with their original, absolutely unique design. These bases are enough for you to start making ceramics yourself to cover small sections of walls, paths, openings, etc.
How does homemade production differ from factory production?
Many people are accustomed to the idea that making tiles is only possible using complex technological equipment, which means that making your own tiles at home is unrealistic. But this is not true. Of course, when making ceramics yourself, the technology differs from the factory one.
The stages of making tiles yourself include:
- Kneading clay.
- Shaping.
- Drying.
- Firing in a special oven.
- Applying glaze.
- Re-firing.
How to make ceramic tiles in the right quantity? In domestic conditions, a sufficient number of forms will be required. The more molds are purchased, the faster the process of manufacturing the coating material will go. It is important to consider that it will take about 2 days to produce one tile. Dried tiles can be removed from the mold only after this period. Thus, the cycle of using the mold ensures that one product is obtained every 2 days.
Advantages of spray paints for ceramic coatings
- Easy to apply. Thanks to aerosol packaging, the paint applies quickly and easily to the surface: just shake well
Aerosol enamel for baths and ceramics DECORIX
spray paint for 20-30 seconds and spray its contents from a distance of 20 - 25 cm from the surface with smooth, even movements. This simple rule will help you avoid unwanted drips and, as a result, get a smooth, beautiful surface.
- Dries quickly. Having painted ceramic tiles at home today, within a day you will be able to use the updated object.
- Reliable. A durable coating will serve faithfully for at least 5 - 7 years, especially if you used epoxy paint.
- Economical. Thanks to aerosol packaging, spray paint is more economical to use than the can version.
- Gives a perfectly smooth surface!
How to choose clay
Do-it-yourself tiles cannot be made from just any clay. It is important to take into account the plasticity of the selected raw material, because it will not be possible to make high-quality tiles without this. Clay can be low-plasticity and plastic. It can also be called skinny and fat. To determine how plastic the clay is, just take a small piece, roll it into a sausage and stretch it. If it stretches well, this means that the raw material has sufficient plasticity.
To make tiles with your own hands, it is recommended to choose clay with an average plasticity index or not very “fat” raw materials. The best option would be medium-plastic clay, which will make a fairly strong tile. During the firing process, such a tile will not “tear”. The clay must be damp. Before use, it must be allowed to rest in the bag, preventing the evaporation of water. The structure of unpacked clay contains pores with air, which reduces its plasticity and impairs its binding properties.
How to form tiles
Step-by-step instructions for making tiles yourself are not complicated. The production of ceramic tiles begins with molding:
- The clay is placed in molds and compacted tightly. This must be done so that the edges of the form and the product coincide.
- Excessive amounts of clay must be removed, otherwise the decorative tiles will have very sharp edges after drying. If you try to fight them off, the tile may break.
- Drying the clay should take as long as it takes for it to completely harden. This can be determined by a change in the color of the material: sufficiently dried clay will become significantly lighter, which will be a sign of evaporation of excess moisture from the tile. As soon as this happened, a semi-finished product called raw material was obtained.
Despite the fact that the raw material looks quite strong, it can crumble when tapped. At this stage, you can still change anything. It is enough just to throw the raw material into a container with wet clay so that it takes up water, softens and becomes suitable for use again.
The next step is firing, which changes all the physical properties of the clay and no alterations will be possible.
Consumables and raw materials
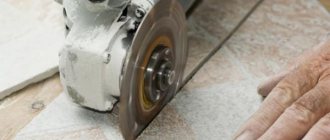
For production, you should stock up on the necessary equipment and tools. The main ones are a concrete mixer, a vibrating table and tile molds.
- It is best to use a concrete mixer to mix the solution. If it is not there, you can try to beat the mixture using a drill with an appropriate attachment or work with a shovel and trowel. The latter option, however, is too labor-intensive, and the kneading is not thorough enough.
- Forms with a solution are placed on a vibrating table in order to displace air from the mixture using intense shaking. Thus, the consistency of the concrete is more dense. The table consists of a plate, which is attached to a metal frame using springs, and a vibration motor. The latter sets the table surface in motion. You can make such equipment yourself or use an old washing machine for this role, turning it on to the desired mode.
The solution contains three required ingredients: water, sand, cement. But for a higher-quality slab, coarse filler, plasticizer, dye, and dispersant are added to the mixture. You also need mold lubrication.
- The quality of the product depends on the cement. It is best to take material of class M500, M400 is allowed. The higher the grade, the better the strength of the final product. Before buying, you should check the quality: if the compressed cement in the palm of your hand clumps, this means that it is stale.
- Sand should be taken without clay, leaves, debris and impurities. Size – up to 0.6 mm.
- Coarse filler is small crushed stone, pebbles, screenings.
- The plasticizer promotes faster hardening of concrete, giving it plasticity and strength.
- Since the dye or pigment is quite expensive, it is recommended to paint only the top part of the slab and leave the bottom gray.
- A dispersant is a substance that contributes to the frost resistance of a material.
Lubricant is used to make it easy to remove the dried tiles from the mold. There are ready-made formulations, but you can also use motor oil or even regular sunflower oil.
How is firing carried out?
If you plan to make floor tiles at home without glaze, then only one firing will be enough. If, after the first firing, it is planned to cover the plates with glaze, then a second firing stage will be required.
The facing tiles are fired at a temperature not exceeding 1000°C. The first firing is called biscuit firing. Its result will be a porous structure of the material, which will ensure the absorption of the required amount of glaze at the second stage. This is how they basically make floor tiles with their own hands.
The second firing is carried out at a similar temperature, which will ensure that the glaze is baked sufficiently. When creating floor tiles with your own hands, it is better not to make glaze, as it is very slippery, which is unsafe, especially in the bathroom. Wall tiles are most often made with a glassy coating.
During the firing process, the tile shrinks. It can be significant. That is why tiles at home must be made in quantity so that there is enough finished material to cover a certain surface. The number of spare parts can be determined by eye, because it will be difficult to make an exact calculation. In addition, it is necessary to provide for possible slaughter and cracking of products during the cladding process.
Decorating the product
There are also advantages to the fact that tiles have a porous structure. This will be useful in further decorative processing. It is the voids that absorb part of the outer coating and prevent it from spreading.
To make the facing tiles glossy, they make a special glaze with their own hands. It consists of the following components:
- glass;
- kaolin;
- tripolephosphate.
The resulting dusty powder is mixed with clean water. Other minerals are also added to the mass, the total list of which includes about 30 items. Apply the glaze to the tiles using a sprayer or brush. The pouring method is also used.
In order to harden and bond with terracotta, the product is subjected to a second firing. It is important not to increase the temperature of the bottom layer to a critical level, otherwise the tile will melt. Using glazes of different compositions, unique compositions are made on majolica. If creating a glass-like coating is not suitable, a glossy sheen is achieved with enamel or varnish.
Decoration
Now you know how to make ceramic tiles yourself at home. Before commencing volume production, experiment with shrinkage, composition and design of sample pieces.
Experienced potters create such beauty in just ten minutes that you are amazed. But is it possible to make beautiful ceramics yourself?
What to use for firing
Some skeptics argue that it is impossible to reach temperatures close to 1000°C in domestic conditions. But for the manufacture of ceramics, 900°C may well be sufficient. And this value can be provided by a muffle furnace.
For biscuit firing, the temperature should be from 850°C. It is then that the remaining moisture evaporates from the tile and it becomes finely porous, like a biscuit.
You can stop at this stage if the tiles are intended to be laid on the floor. After this firing, the tile becomes quite hard and strong. When creating wall tiles with your own hands, when you want to get a tile cladding with a smooth surface that imitates natural stone or some kind of pattern, additional processing will be required. Ceramics that have gone through one stage of firing without glaze are called terracotta. If it is necessary to obtain majolica, then a second firing of the ceramics will be required to form the glaze coating.
How to paint tiles
Making tiles is not everything. It must externally correspond to the intended design. To do this, you will need to master some additional decorating techniques so that the drawing you make with your own hands is unique.
How are patterned ceramics made?
One of the ways is painting on ceramics. This is a fairly simple method that allows you to give the tiles an original appearance. You can also use the decoupage technique to decorate the tiles.
Do-it-yourself tiles are rarely made without a pattern. You can paint your own made tiles using the decoupage technique. If you choose the right materials, you will get a fairly strong coating that will be able to withstand damage. These tiles will last a long time.
A step-by-step action plan consists of several steps. First of all, you need to choose a suitable napkin motif. What to choose from? For example, for a kitchen it could be a basket of fruit, wine, or floral motifs, a landscape, etc. The appearance of hand-made tiles for painting will be better if the motif covers the entire surface.
If the napkins are multi-layered, then for decoupage you will only need the top layer with a pattern. When wet, the napkins stretch, so it will be necessary to treat them using a certain method. The napkin should be laid out with the pattern facing up on a flat surface. After this, it should be coated with hairspray, covered with parchment and ironed with a warm iron. This procedure will allow the napkin to retain its shape.
Applying glaze
Your tiles need to be shined. To do this, you can prepare your own special glaze. It may consist of glass, kaolin and tripolyphosphate. These components produce a dust-like powder. It must be mixed with clean water. Other minerals can be added to this mixture. The general list includes about 30 species.
The prepared glaze is applied to the tile using one of three methods (or combinations thereof): spray, brush, or pour-over method.
The coating must harden thoroughly and bond to the terracotta. To do this, it undergoes secondary firing. It is important here that the ceramic mass does not reach a critical value according to temperature data. Otherwise the tile will melt. Glaze will allow you to create unique and elegant artistic solutions.
How to apply a drawing
At the next stage, the prepared tiles are degreased with alcohol or detergent. The finished motif is then placed face down on a stationery file and held under a thin stream of water to wet it. After this, the excess water is drained and the napkin is straightened. Next, the file is placed on the tile. Take a soft cloth and smooth the surface with light pressure. The file is carefully removed, the napkin should remain on the surface of the tile.
If bubbles and folds have formed, they should be removed using a fan brush, moving from the center to the edges. It is important not to press too hard to avoid tearing the paper. After a few minutes, the napkin should be secured with PVA glue. To apply the glue, you should again use a fan brush. The finished work should sit until it is completely dry.
Next, take an aerosol can of car varnish and cover the surface of the tile with a thin layer of the product, which must then dry completely. If during work the napkin accidentally tears, you can paint on the corresponding area with acrylic paints. The same can be done if a motive of insufficient size was used. In such a case, you can shade the transition from the drawing to the rest of the surface or paint a shadow in gray tones. After finishing the painting, the surface is also covered with a layer of varnish.
Colorful tiling for the kitchen or bathroom is ready.