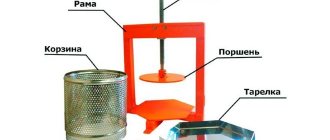
When repairing or adjusting a car's suspension, it becomes necessary to fix the spring in a certain position.
Various tool concepts:
- Passive: Represents two brackets connected to each other either rigidly or using a threaded rod.
Simply secures the spring, compressed using the weight of the vehicle. After lifting the body with a jack, the elastic element remains in a compressed state. - Active: The compression mechanism can operate under load when the shock absorber is under operating tension. The position of the body relative to the ground does not matter.
Let's consider the second option in more detail.
How does a spring remover work, and what types are they?
What is a puller used for? It overcomes the straightening force of the springs. The applied force on the puller brackets is commensurate with the weight of the car, but this does not mean that its design is too expensive and high-tech.
There are many options, but they are divided into only two types: mechanical and hydraulic drive.
Mechanical spring remover
Most often it has a threaded drive mechanism.
With a sufficient diameter of the pin (providing a good gear ratio on the thread), and a long handle of the key, you can compress the springs manually without excessive effort.
The technology is as follows: two pullers are symmetrically put on the rack. By turning the threaded rod, you bring the claws to the middle of the spring directly on the shock absorber, compressing it to the required size.
Pullers placed on both sides ensure uniform compression. When working with the suspension of trucks or heavy SUVs, experienced craftsmen install 3 or even 4 pullers.
Semi-permanent racks
Service stations often use semi-permanent struts to remove springs from shock absorber struts. The tool is quite universal and fits most pendants. Thanks to the drive mechanism gearbox, working with it is convenient and safe.
The only drawback is that it is not always possible to compress the spring directly on the car. After all, this is a bench device: the puller works with the suspension removed from the car.
Lever type
Lever type pullers have a similar “problem”. The mechanism is reliable and safe, but its dimensions do not allow it to fit into the space under the wing of the car.
Hydraulic puller
Of course, there are pullers with compressors, electric drives, and other devices that make life easier when servicing a car. This is all good until you see the price tag.
Sometimes it is more profitable to visit a car service center several times than to purchase an industrial puller for personal use. Which exit? Make your own instrument.
How to compress a shock absorber spring without zip ties
Let's list the steps involved in tightening the shock absorber springs yourself. Everything looks simple:
- When the body is supported by a jack, two ties are brought to the spring from opposite sides;
- By rotating the nuts with your hands, you achieve confident engagement of the hooks and springs;
- Using a wrench, the nuts on different rods are rotated in turn;
- It is better to play it safe and secure the compressed spring with straps or wire.
shock absorber spring clamps
No explanation required here. The result is shown in the photo.
Spring compressed by ties
When using homemade and even purchased equipment, follow these simple tips:
Before using the ties, the threaded connections are lubricated with cyatim or solid oil; The ties cannot be removed from a compressed spring, even if it is additionally fixed;
When carrying out work, exercise maximum caution. It is better to sacrifice body parts than your own health. The suspension features of Lifan cars are discussed in these articles:
Features of the suspension of Lifan cars are discussed in these articles:
Tightening shock absorber springs with your own hands is simple and realistic
Quite often it happens that the shock absorbers on a car wear out or fail. This is not surprising, and there can be many reasons for such consequences. In this case, every car owner is faced with a number of troubles and the only solution may be to replace the shock absorbers.
You can do this at a service center or in your garage, but this will require spring tensioners (some call them shock absorber coils), which require a special puller, as well as some knowledge and skills.
Shock absorber
How does a shock absorber work?
A mandatory component of every shock absorber is a spring.
There are now all sorts of progressive types of this mechanism, such as oil or pneumatic, but the design of each of them includes the same spiral element, which helps to maintain a given level of the car above the ground, and also facilitates work when there is a load on the shock-absorbing device itself.
Quite often it happens that the shock absorber is in perfect order, while the spring element has worn out, lost the necessary rigidity, or has completely burst. In this case, it needs urgent replacement, which can be done with your own hands only if you have a puller.
There is a flip side to the coin, when everything is fine with the spring, but you need to carry out repair work on the shock absorber itself, in which case a puller will be indispensable.
Spring tightening process
Let's start with the fact that the pullers described above are not the only ones of their kind; there are several other configurations of this device; you can also make it yourself or simply buy it. However, without it, the screed will be a complete nightmare and an almost impossible task.
When starting to perform this operation, it is necessary, first of all, to remove the strut with the shock absorber, having first placed the car on a jack and securely fixed it.
Next, the puller is attached to the upper and lower coils of the springs, and manual work begins. Depending on the operating principle of your puller, you will either rotate some element of it, or, as in the case of the “frog,” alternately work with two pedals.
As for the use of a puller, it is designed to facilitate the entire repair process, because without it you would not only have to fix the stand with a vice, but also make enormous efforts to compress the springs; someone would need to hold them while you work on the entire mechanism etc.
In addition, by using this device, you make the repair process safe for yourself, practically eliminating the chance of spring failure.
Conclusion
The process of tightening shock absorber springs is a measure that every driver faces who wants to repair shock absorbers with his own hands, rather than take his “iron horse” to a car service center.
However, without a puller, it is not that it is completely impossible to carry out this operation, but it will be accompanied by a lot of difficulties and a fairly high risk for a person.
If you use such a simple and inexpensive device for screeding, the risk is immediately minimized, and the work process itself becomes easy and fast.
We cook the screeds ourselves
In general, it makes sense to make shock absorber spring ties yourself. How to do this is discussed further.
Four nuts and two threaded rods
The metal products listed below are easy to find in almost any supermarket. For example, you can buy two M16 threaded rods. You will also need four extended nuts, as well as a steel plumbing pipe. Its internal diameter is 16-16.5 mm.
The end result is what is shown in the pictures. All the necessary information on slot machines for hryvnia is available online.
Here is a list for those who want to start playing slot machines for real money with withdrawal to a card. Ukrainian users love to spin the reels of online slots and win real prizes.
You will also need a steel rod, which is used to make reinforcement. Let's look at how screeds are made:
- Two identical cylinders are cut from the pipe, the length of which is 80-120 mm;
- Threaded rods can be shortened if necessary;
- 8 rods approximately 30 cm long are made from reinforcement;
- Using any bending equipment, the rods are bent to obtain hooks;
- Four rods are welded to two nuts, another four - to pipe sections;
- The set of components is completely ready for use at this stage.
It is easier to weld by placing the workpieces on a plane. The essence of these words is illustrated by the picture:
How to weld hook rods
Actually, what follows is a film where the technology is shown “inside and out”. The author even solved the problem with the lack of a bending machine: to bend one rod, you need two similar rods welded to a steel profile.
If the reader thinks that using welding is difficult, then it is better not to take risks. Welded joints can withstand significant loads, but only if they are performed according to all the rules. Spring ties can be made without welding. A suitable drawing is given below.
How does a spring remover work and what are they?
DIY silent block remover for VAZ 2110
What is a puller used for? It overcomes the straightening force of the springs. The applied force on the puller brackets is commensurate with the weight of the car, but this does not mean that its design is too expensive and high-tech.
There are many options, but they are divided into only two types: mechanical and hydraulic drive.
Mechanical spring remover
Most often it has a threaded drive mechanism. With a sufficient diameter of the pin (providing a good gear ratio on the thread), and a long handle of the key, you can compress the springs manually without excessive effort.
The technology is as follows: two pullers are symmetrically put on the rack. By turning the threaded rod, you bring the claws to the middle of the spring directly on the shock absorber, compressing it to the required size.
Pullers placed on both sides ensure uniform compression. When working with the suspension of trucks or heavy SUVs, experienced craftsmen install 3 or even 4 pullers.
Semi-permanent racks
Service stations often use semi-permanent struts to remove springs from shock absorber struts. The tool is quite universal and fits most pendants. Thanks to the drive mechanism gearbox, working with it is convenient and safe.
The only drawback is that it is not always possible to compress the spring directly on the car. After all, this is a bench device: the puller works with the suspension removed from the car.
Lever type
Lever type pullers have a similar “problem”. The mechanism is reliable and safe, but its dimensions do not allow it to fit into the space under the wing of the car.
Hydraulic puller
Of course, there are pullers with compressors, electric drives, and other devices that make life easier when servicing a car. This is all good until you see the price tag.
Sometimes it is more profitable to visit a car service center several times than to purchase an industrial puller for personal use. Which exit? Make your own instrument.
How to make a shock absorber spring remover
Each car shock absorber has an external spring that is very firmly attached to the edges of the part. It also takes over the functions of protection against large particles and provides a small shock-absorbing effect. Without strong springs, installing a shock absorber makes no sense, since it will be damaged very quickly.
So the question is how to install and remove them. The shock absorber remover helps the repairman easily get rid of the springs and move on to repairing the main part or replacing its protection.
It can be either hydraulic (such a device can be sold in specialized stores) or mechanical (it can be made at home with your own hands). The type of puller indicates how it works and the time it takes to work with it.
In other words, a mechanical puller will perform tasks slower and require physical force, but is this really important when we are talking about significant financial savings on maintenance, replacement of shock absorbers and the purchase of a hydraulic type
“Do-it-yourself shock absorber spring extractor”
In the recording, an auto mechanic talks about how you can make a shock absorber spring remover using scrap materials. After watching the video, you will be aware of what materials and tools need to be prepared, as well as how the manufacturing process occurs.
Manufacturing a shock absorber spring remover
Many car enthusiasts use a regular chain: they wind a few turns around the coils of the spring and tighten the chain. After lifting the car with a jack, the shock absorber strut is stretched, but the spring remains compressed. This is a dangerous method: if the chain slips, the spring may spring back and cause serious injury.
How to make a simple puller similar to an industrial one
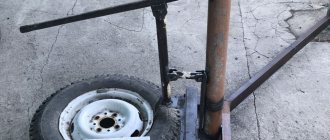
A mechanical semi-stationary “machine” can be created from a “Volgovsky” jack.
- old jack from Volga-24, Moskvich 412 or other Soviet passenger car = 0 rub.
- old connecting rod from any engine = 0 rub.
- steel corner from a landfill 1 meter = 0 rub.
- a pair of rods from broken shock absorbers = 0 rub.
- a handful of bolts and nuts M12 - M14 = conditionally free.
Shock absorber spring clamp from a jack
There is also an alternative option that does not require special preparation or a large number of tools. To make it, we will need a grinder, a connecting rod from a classic, as well as an old jack from a VAZ (original). The procedure is as follows.
Using a grinder, we cut off the lower support on the jack, as well as the rivets. Next, in the place of the lever for raising/lowering the jack, we mount two ears for the bolts using welding. In the place where the rivets were removed, we weld a piece of pipe measuring 25x25, we do the same in the place of the welded ears, only we take a 20x20 pipe. You can further strengthen the jack with another piece of pipe, cut to the required length. In general, this device for tightening shock absorber springs is quite effective, and it can be made quite quickly without much expense.
Branded spring tensioners
Of course, there is special equipment used when repairing cars of a certain brand. To compress springs, however, universal ties are more often used. The appearance of these devices is shown in the figure:
Branded spring ties
It is clear that a set of universal zip ties can be bought in a store. However, the cost of such equipment is higher than the price of all the components in total.
Design features and principle of operation of spring tensioners
In order to tighten the spring, it is necessary to apply force to the outer coils. You can perform this action in several ways:
- Using a threaded connection (similar to screw type jacks).
- Using a hydraulic cylinder.
- Modern tools use the latter method to tighten springs.
The simplest screed model consists of three elements:
- a rod with a thread applied to it,
- spring grip with thread or nut,
- additional grip under the spring.
The stop with a nut or thread, being twisted, approaches the stop that maintains a static position, as a result of which the spring is compressed. As an alternative to a threaded rod, a modified telescopic or hydraulic cylinder system can be used in the tie design. The hydraulic cylinder type is used primarily in professional grade ties.
We cook the screeds ourselves
In general, it makes sense to make shock absorber spring ties yourself. How to do this is discussed further.
Four nuts and two threaded rods
The metal products listed below are easy to find in almost any supermarket. For example, you can buy two M16 threaded rods. You will also need four extended nuts, as well as a steel plumbing pipe. Its internal diameter is 16-16.5 mm.
The end result is what is shown in the pictures. You will also need a steel rod, which is used to make reinforcement. Let's look at how screeds are made:
- Two identical cylinders are cut from the pipe, the length of which is 80-120 mm;
- Threaded rods can be shortened if necessary;
- 8 rods approximately 30 cm long are made from reinforcement;
- Using any bending equipment, the rods are bent to obtain hooks;
- Four rods are welded to two nuts, another four - to pipe sections;
- The set of components is completely ready for use at this stage.
It is easier to weld by placing the workpieces on a plane. The essence of these words is illustrated by the picture:
How to weld hook rods
Actually, what follows is a film where the technology is shown “inside and out”. The author even solved the problem with the lack of a bending machine: to bend one rod, you need two similar rods welded to a steel profile.
If the reader thinks that using welding is difficult, then it is better not to take risks. Welded joints can withstand significant loads, but only if they are performed according to all the rules. Spring ties can be made without welding. A suitable drawing is given below.
Two ties in 10 minutes (video)
Self-production of shock absorber spring ties: drawings, photos and videos
Sometimes it is necessary to compress the suspension spring without removing it from the car.
For this you need zip ties. In a simple case, two or more rods equipped with so-called hooks can serve as ties. The hooks with their hooks cling to the spring from the outside.
All ties are usually placed on opposite sides of the spring. And then, by turning the threaded rods with a wrench, you can easily perform compression.
Branded spring tensioners
Of course, there is special equipment used when repairing cars of a certain brand. To compress springs, however, universal ties are more often used. The appearance of these devices is shown in the figure:
Branded spring ties
Cheaper Russian analogue, they look kind of squishy, there is a risk that they will break loose and hit you right in the forehead Branded spring tie JTC 23-280mm, cost more than 6,000 rubles Spring tie 270mm JTC (cost more than 2,000 rubles) Spring tie for 370mm JTC (cost more than 2,000 rubles) Spring tie for 270mm JTC - packaging
It is clear that a set of universal zip ties can be bought in a store. However, the cost of such equipment is higher than the price of all the components in total.
We cook the screeds ourselves
In general, it makes sense to make shock absorber spring ties yourself. How to do this is discussed further.
Four nuts and two threaded rods
The metal products listed below are easy to find in almost any supermarket. For example, you can buy two M16 threaded rods. You will also need four extended nuts, as well as a steel plumbing pipe. Its internal diameter is 16-16.5 mm.
The end result is what is shown in the pictures. You will also need a steel rod, which is used to make reinforcement. Let's look at how screeds are made:
- Two identical cylinders are cut from the pipe, the length of which is 80-120 mm;
- Threaded rods can be shortened if necessary;
- 8 rods approximately 30 cm long are made from reinforcement;
- Using any bending equipment, the rods are bent to obtain hooks;
- Four rods are welded to two nuts, another four - to pipe sections;
- The set of components is completely ready for use at this stage.
It is easier to weld by placing the workpieces on a plane. The essence of these words is illustrated by the picture:
How to weld hook rods
Actually, what follows is a film where the technology is shown “inside and out”. The author even solved the problem with the lack of a bending machine: to bend one rod, you need two similar rods welded to a steel profile.
If the reader thinks that using welding is difficult, then it is better not to take risks. Welded joints can withstand significant loads, but only if they are performed according to all the rules. Spring ties can be made without welding. A suitable drawing is given below.
How should the spring be tightened?
Let's list the steps involved in tightening the shock absorber springs yourself. Everything looks simple:
- When the body is supported by a jack, two ties are brought to the spring from opposite sides;
- By rotating the nuts with your hands, you achieve confident engagement of the hooks and springs;
- Using a wrench, the nuts on different rods are rotated in turn;
- It is better to play it safe and secure the compressed spring with straps or wire.
shock absorber spring clamps
No explanation required here. The result is shown in the photo.
Spring compressed by ties
When using homemade and even purchased equipment, follow these simple tips:
- Before using ties, threaded connections are lubricated with cyatim or grease;
- The ties cannot be removed from the compressed spring, even if it is additionally fixed;
- When carrying out work, exercise maximum caution. It is better to sacrifice body parts than your own health.
Features of the suspension of Lifan cars are discussed in these articles:
- Lifan Breeze pendant
- Lifan X60 suspension
- Lifan Smiley pendant
Drawings of universal threaded ties
Let's return to the question of how to make a device for tightening shock absorber springs yourself. Below is the appearance of the finished devices:
Factory-made threaded ties
On one side of the rod there is a left-hand thread, on the other - a right-hand thread. The standard thread pitch is M18. But buying threaded rods is not enough here. And to cut the thread yourself, you will need special equipment.
Drawings of the components that make up the entire structure are shown here:
Threaded tie (3 parts)
To make parts, you need a lathe, drilling and, probably, milling machine. It may be easier to contact a workshop. Print the drawing by downloading it from the website.
Most likely, there are no other drawings of universal ties on the Internet. And what is shown above is taken from a book on repairing domestic cars. You can use it.
Let's say the ties were made according to the drawings and all the parts fit together. But even then the advice about using lubricant remains valid. You need to take solid oil or cyatim and apply this material to the threads of the nuts.
Packaging cyatim-201, 20 gr.
Cyatim-201 lubricant is a rather expensive material. You can reduce consumption by mixing it with machine oil in a 50/50 ratio. Good luck.
How should the spring be tightened?
Let's list the steps involved in tightening the shock absorber springs yourself. Everything looks simple:
- When the body is supported by a jack, two ties are brought to the spring from opposite sides;
- By rotating the nuts with your hands, you achieve confident engagement of the hooks and springs;
- Using a wrench, the nuts on different rods are rotated in turn;
- It is better to play it safe and secure the compressed spring with straps or wire.
Video of spring tensioners on shock absorber
No explanation required here. The result is shown in the photo.
Spring compressed by ties
When using homemade and even purchased equipment, follow these simple tips:
- Before using ties, threaded connections are lubricated with cyatim or grease;
- The ties cannot be removed from the compressed spring, even if it is additionally fixed;
- When carrying out work, exercise maximum caution. It is better to sacrifice body parts than your own health.
Features of the suspension of Lifan cars are discussed in these articles:
Do-it-yourself spring remover in a car suspension
- When repairing or adjusting a car's suspension, it becomes necessary to fix the spring in a certain position.
- There is a service tool for this work: a spring remover, with which you can remove chassis elements both in a specialized workshop and in a garage.
- Various tool concepts:
- Passive: Represents two brackets connected to each other either rigidly or using a threaded rod.
Simply secures the spring, compressed using the weight of the vehicle. After lifting the body with a jack, the elastic element remains in a compressed state. - Active: The compression mechanism can operate under load when the shock absorber is under operating tension. The position of the body relative to the ground does not matter.
Let's consider the second option in more detail.
How does a spring remover work, and what types are they?
What is a puller used for? It overcomes the straightening force of the springs. The applied force on the puller brackets is commensurate with the weight of the car, but this does not mean that its design is too expensive and high-tech.
There are many options, but they are divided into only two types: mechanical and hydraulic drive.
Mechanical spring remover
The technology is as follows: two pullers are symmetrically put on the rack. By turning the threaded rod, you bring the claws to the middle of the spring directly on the shock absorber, compressing it to the required size.
Installing one puller on a spring will cause it to break.
Pullers placed on both sides ensure uniform compression. When working with the suspension of trucks or heavy SUVs, experienced craftsmen install 3 or even 4 pullers.
Correct installation of pullers on the spring
Semi-permanent racks
The only drawback is that it is not always possible to compress the spring directly on the car. After all, this is a bench device: the puller works with the suspension removed from the car.
Lever type
Hydraulic puller
The hydraulic system is pressurized using a foot lever.
At the same time, the car mechanic’s hands are free, working comfortably and safely. Source: https://obinstrumente.ru/ruchnoj-instrument/semnik-pruzhin.html
Drawings of universal threaded ties
Let's return to the question of how to make a device for tightening shock absorber springs yourself. Below is the appearance of the finished devices:
Factory-made threaded ties
On one side of the rod there is a left-hand thread, on the other - a right-hand thread. The standard thread pitch is M18. But buying threaded rods is not enough here. And to cut the thread yourself, you will need special equipment.
Drawings of the components that make up the entire structure are shown here:
Threaded tie (3 parts)
To make parts, you need a lathe, drilling and, probably, milling machine. It may be easier to contact a workshop. Print the drawing by downloading it from the website.
Most likely, there are no other drawings of universal ties on the Internet. And what is shown above is taken from a book on repairing domestic cars. You can use it.
Let's say the ties were made according to the drawings and all the parts fit together. But even then the advice about using lubricant remains valid. You need to take solid oil or cyatim and apply this material to the threads of the nuts.
Packaging cyatim-201, 20 gr.
Cyatim-201 lubricant is a rather expensive material. You can reduce consumption by mixing it with machine oil in a 50/50 ratio. Good luck.
Tightening shock absorber springs with your own hands is simple and realistic
Shock absorber spring tensioner
Quite often it happens that the shock absorbers on a car wear out or fail. This is not surprising, and there can be many reasons for such consequences. In this case, every car owner is faced with a number of troubles and the only solution may be to replace the shock absorbers.
This is interesting: Video of adjusting the rear axle gearbox of a VAZ 2107
You can do this at a service center or in your garage, but this will require spring tensioners (some call them shock absorber coils), which require a special puller, as well as some knowledge and skills.
Do-it-yourself suspension spring replacement
Do-it-yourself suspension spring replacement
Due to compression and stretching, the spring dampens unevenness, potholes on the road, as well as vibrations of the car body. Since the springs take the heaviest impacts, they often burst, although this is very difficult to detect until it is removed. Experienced drivers can guess the problem by bumps in potholes, car pulls, or noise in the chassis. Replacing a suspension spring with your own hands is not difficult if you follow the preliminary steps. With the appropriate equipment, it is accessible even to beginners.
Let's consider the stages of removing and replacing the front and rear suspension springs of a car. The procedure is similar for almost any car brand.
How does a shock absorber work?
A mandatory component of every shock absorber is a spring. There are now all sorts of progressive types of this mechanism, such as oil or pneumatic, but the design of each of them includes the same spiral element, which helps to maintain a given level of the car above the ground, and also facilitates work when there is a load on the shock-absorbing device itself.
Quite often it happens that the shock absorber is in perfect order, while the spring element has worn out, lost the necessary rigidity, or has completely burst. In this case, it needs urgent replacement, which can be done with your own hands only if you have a puller.
There is a flip side to the coin, when everything is fine with the spring, but you need to carry out repair work on the shock absorber itself, in which case a puller will be indispensable.
What types of spring ties are there?
Tools for tightening springs are divided into 2 main groups and can be:
- Stationary – intended for service stations.
- Portable – used by ordinary users.
From the point of view of the method of fixing the spring, couplers are divided into the following types:
- Central - have a threaded rod or hydraulic cylinder, which, when in working condition, pass through the central part of the spring. The spring is captured by special “cups” or disk stops.
- MacPherson - involve placing a threaded rod or hydraulic cylinder in operating condition outside the spring. Hooks or C-shaped stops, operating on the principle of a cantilever, are used as grips for the spring.
Central type couplers can only be used when servicing springs in standard suspensions, provided that the spring and shock absorber are located separately. In turn, MacPherson models can be used when working with combined shock absorber struts.
As for the type of drive, users can choose from a mechanical (in the form of a threaded rod) or hydraulic (with a hydraulic cylinder with a force of up to 2 tons) model. The latter option is intended for servicing trucks and agricultural machinery.
The range of tools and accessories offers the opportunity to purchase an inexpensive universal set. A set of tools may include the necessary components in the form of a working cylinder and clamps with locks, as well as special adapters, keys, and so on.
Quite often it happens that the shock absorbers on a car wear out or fail. This is not surprising, and there can be many reasons for such consequences. In this case, every car owner is faced with a number of troubles and the only solution may be to replace the shock absorbers.
You can do this at a service center or in your garage, but this will require spring tensioners (some call them shock absorber coils), which require a special puller, as well as some knowledge and skills.
What is a puller
A puller is a special device that allows compression of shock absorber springs so that repair work can be continued in the future. There are many variations of this device, but the most common puller for springs is two metal slats with threads cut along their entire length and hooks attached to both sides, which move towards each other when turned. Those. when you need to compress the springs, you just need to turn the rack, and the fixed hooks will tighten the spring.
There is an even more simplified puller method - a belt puller. In this case, two “frogs” are used with durable fabric belts tucked into them. The belts are thrown onto the upper and lower coils of the springs, then the car owner begins to work with “frogs”, pressing each one in turn. Subsequently, these actions tighten the belts, and the “spiral” begins to tighten, after which repair work can be carried out.
DIY rear suspension spring replacement
Rear springs come in two types: assembled with a shock absorber and without it (for example, on Renault Logan). They should also be changed in pairs on the same axis. As with the front springs, it is assumed that the preliminary steps have been completed and the spring is available for removal.
Without shock absorber
1. Raise the rear of the car on a jack.
2. Install the ties on the spring and compress to the desired position.
3. Using a flat-head screwdriver, remove the spring from its socket.
4. Remove the ties, as well as the upper and lower elastic bands.
5. Change the spring and perform the reverse assembly process.
With shock absorber
1. Unscrew the lower bolts of the shock absorber.
2. Jack up the rear of the car (under the rear axle stocking).
3. As you rise, watch the brake hose and the spring, which gradually comes out of its socket.
4. If the lifting height is sufficient, remove the spring and spacers.
5. Replace the spring and shock absorber assembly.
6. When returning it, it is important that the spring fits exactly into the lower recess of the cup.
7. Lower the car body.
8. Tighten the lower bolts of the shock absorber.
If the replacement is carried out correctly, the clearance increases by 6-7 cm.
Spring tightening process
Let's start with the fact that the pullers described above are not the only ones of their kind; there are several other configurations of this device; you can also make it yourself or simply buy it. However, without it, the screed will be a complete nightmare and an almost impossible task.
When starting to perform this operation, it is necessary, first of all, to remove the strut with the shock absorber, having first placed the car on a jack and securely fixed it.
Next, the puller is attached to the upper and lower coils of the springs, and manual work begins. Depending on the operating principle of your puller, you will either rotate some element of it, or, as in the case of the “frog,” alternately work with two pedals.
At this point, the tie can be considered complete; the main thing to remember is that you should not compress the spring completely, increasing the risk of breakage of both the spring itself and the compression device. It is enough to simply release the element you need from the pressure and repair or replace the shock-absorbing mechanism.
As for the use of a puller, it is designed to facilitate the entire repair process, because without it you would not only have to fix the stand with a vice, but also make enormous efforts to compress the springs; someone would need to hold them while you work on the entire mechanism etc.
In addition, by using this device, you make the repair process safe for yourself, practically eliminating the chance of spring failure.
How to make spring ties with your own hands - Metalworker's Guide
In this article we will talk about how, with minimal expenditure of money, time and effort, you can make ties and how to use them correctly.
Manufacturing instructions
There are many ways to make such a device. their idea is to save money and use unnecessary scrap materials to make an instrument.
In any automotive market you will be able to find a hydraulic device that is easily used for repairs, but its cost is high for a small device.
If you dig around in your garage, you will definitely be able to find things there that seem unnecessary at first glance. Analyze whether they can partially recreate the design you saw on the market.
It is unlikely that it will be possible to recreate hydraulic couplers for a shock absorber, but replacing them with a mechanical device is quite possible.
Let's look at a brief instruction on how to make ties for shock absorber springs with your own hands.
- We remove the front wheel shock absorber and measure the size of the large spring that prevents replacement. We start measuring from the first large turn and end with the last one. We write down all the data on a piece of paper, preferably in one unit of measurement (centimeters or millimeters), which is more convenient for you. It is recommended to make clamps specifically for the front wheels, since these shock absorbers most often break and require repair.
- We find a strong metal pipe with a diameter of 2 centimeters in the garage and cut it into 4 pieces 10-15 centimeters long.
- Next, we find a standard rod with a diameter of 0.7-1 centimeters and cut it into pieces 20-30 centimeters long. You should have 8 such short strong rods.
- We find a threaded rod or buy a pipe with a diameter of 1.5-1.7 centimeters and cut it into 2 pieces, the length equal to the measurement obtained in the 1st point, which can be extended to 5 centimeters. If the selected tubes do not have threads, we cut them using a special tool from all edges of each piece over 10-15 centimeters.
- We process all the edges of the tubes and rods in such a way as to get rid of metal burrs; the edges should be even and smooth.
- We bend the metal rods equally so that they form a hook on one side. Please note that such rods are very strong and difficult to bend, so you can use additional tools.
- Using mobile welding, we connect the rods and short tubes so that the hooks are evenly located on both sides of the tube. We cut off the excess edges of the rods so that they are flush with the tube. We get 4 small products from rods and pipes.
- We put the resulting parts on long tubes and tighten large nuts at the ends. The hook is put on so that its smooth side faces the edge of the bar.
- That's all the work, the shock absorber tie is ready. It will fit both the front wheel and the rear (if you added a few extra centimeters to the bar). Test it on one of the shock absorbers and correct any shortcomings if any appear.
This technique allows you to quickly build a mechanical device that can compress or slightly expand the shock absorber spring to repair, replace or check it.
The only disadvantage of this method is that the master must be able to use mobile welding.
If such a device is not available or you do not want to use it, then you can build a similar device without using a complex mechanism.
The method of producing shock absorber ties based on an old strong jack is considered very good . If you remember, such devices were included with old Soviet-era car models.
Its operation scheme is clear; all that remains is to make sure that one part of the jack can be attached to the upper coil of the shock absorber spring, and the other branch to the lower one.
This can be done through various means - look at what is present in your garage among the parts and be sure to find something suitable.
Keep in mind that the above methods for producing screeds are not the only ones of their kind; they can be changed or supplemented depending on the type of car, its model, skills and desires of the car owner. It’s worth using your imagination to make this mechanism simple and uncomplicated.
Application of screeds
Such ties can be used for both front and rear wheel shock absorbers. They perform the function of compressing a large spring, which protects the shock absorber from external influences.
Since each type and model of car has individual parts, to produce ties, use only your own dimensions, and not standard ones taken from the Internet or other literature.
After all, you still have to remove the shock absorber, so what difference does it make - before or after the production of the ties?
In conclusion, I would like to advise every car owner to take care not only of the appearance of the vehicle, but also of its internal parts.
Take care of your car and it will reward you with a long and high-quality service life.
“How to replace shock absorber springs”
After watching the recording, you will learn how to remove and install rear springs on a VAZ car. The video also shows what tools you need to prepare for this.
How to tighten shock absorber springs yourself?
If you need to repair shock absorber struts or car suspension, the question arises of how to tighten the shock absorber spring. To achieve this goal, spring ties are used. They are necessary in order to compress and remove any type of spring.
Spring tensioning equipment
Spring ties can be of two types, depending on the basic principle of operation:
• Mechanical – based on mechanical action on a spring. Their price is low, and they are often used by car enthusiasts.
•Hydraulic – the action on the spring is created using a hydraulic pump. Used in large car repair shops. The price is much higher.
Pullers for springs can also be portable or stationary . They don’t differ much in price, but they differ radically in the way they are used.
If you decide to repair the vehicle yourself and do not know what kind of puller you will need, then you should pay attention to the diameter of the compressed spring.
This is the main characteristic when choosing a screed.
If you have not given up the idea of repairing your vehicle yourself, then you need to pay attention to the fact that some models of couplers are offered by the manufacturer specifically for certain types of suspensions. But they can also be universal.
How to make a screed device yourself
If you calculate the price of the components of a spring puller, it will be significantly lower than the price of a finished puller. Therefore, the question arises: how to make a spring puller with your own hands. It is possible to make spring ties yourself. But at the same time you need to have a welding machine and the ability to make something with your own hands.
It is clear that the principle of their operation will be based on the mechanical effect on the spring. For one spring, two ties are required, secured on opposite sides for uniform compression. Their design is standard: a threaded rod with hooks and nuts.
By turning the rod or nuts with a wrench, we can easily compress the spring. Since the design is simple, it does not require special skills in manufacturing.
But you should remember that the device you make must be reliable, since now you are responsible for your own health.
Necessary tool
So, you need to have a welding machine and a grinder . You also need to purchase two threaded rods with a diameter of 16 mm, four long nuts for this thread and a steel pipe with a diameter of 16-16.5 mm, fittings.
Manufacturing process
Let's consider the process of manufacturing shock absorber spring ties point by point:
1. Cut threaded rods (2 pcs.) to the required size. Their length must be no less than the free length of the spring. Rods that are too long will be inconvenient to use;
2. From the reinforcement, cut (8 pcs.) hook blanks approximately 30 cm long;
3. Cut cylinders (4 pcs.) approximately 10 cm long from the pipe;
4. Bend hooks from reinforcement blanks;
5. Using welding, weld two hooks to each cylinder. We carry out the welding process on a plane, achieving symmetry of the parts;
6. We assemble the components (we put two cylinders on the rod with the hooks in the opposite direction and screw the nuts onto the ends).
In some designs, a long nut is welded in the middle of the threaded rod. Then the compression process is carried out with a wrench, turning the rod itself by this nut. You can make a tie for springs using an old jack. The main thing is that it is reliable and safe. Let's look at the process point by point:
1. Shorten the jack leg a little. Make sure that this does not affect the operation of the jack.
2. Choose a stand holder from the available tools. For example, we can take a connecting rod head or other suitable part from a car disassembly site. It is necessary that it be of a suitable shape and can withstand heavy loads.
3. We fasten the jack leg and holder. Since they are made of different materials, welding is not possible. Therefore, we drill holes and secure with two bolts
4. We weld an upper holder from a metal corner onto the upper part of the jack. For reliability, we make it a little longer in the form of a cut letter A and weld an additional stiffening rib to the jack body.
5. Using paint we give the structure an aesthetic appearance.
This holder is much more convenient to use than store-bought ones. The described methods for making shock absorber spring ties are not the only ones.
They may differ in size, materials used and available means.
It’s worth turning on your imagination and correctly adapting seemingly unnecessary parts in your garage, and this creative process will bring you pleasure not only financially, but also morally.
How to tighten a spring correctly
Since the process is a little dangerous, we will list all the points that make up the spring tie in order to completely secure it. Follow the main points:
1. Raise the car with a jack and install two ties on the spring on opposite sides;
2. Rotate the nuts with your fingers until the tie hooks and the spring are securely engaged;
3. Continue turning the nuts with the wrench. Moreover, the rotation must be carried out in small steps on different rods alternately. The spring should compress symmetrically on both sides.
4. Remove the spring if you are sure that it is securely compressed by the ties.
Conclusion
The process of tightening shock absorber springs is a measure that every driver faces who wants to repair shock absorbers with his own hands, rather than take his “iron horse” to a car service center. However, without a puller, it is not that it is completely impossible to carry out this operation, but it will be accompanied by a lot of difficulties and a fairly high risk for a person. If you use such a simple and inexpensive device for screeding, the risk is immediately minimized, and the work process itself becomes easy and fast.
Replacing the front spring without a puller or zip ties.
Published on August 28, 2016
Replacing the front spring without a puller or zip ties.
where are the tuning levers from the package?
Replacing the front spring without a puller or zip ties.
Hello Roman, in your case, when replacing the lever, you could not bother yourself with this work, unscrew the wheel, put a beam under the lever and lower the car with all your weight. Then take a thick wire and tie the springs on both sides. And then take everything apart. A lot I did this once, but then I had to get the ties anyway. I think this method is suitable for anyone who is replacing the springs with new ones)) good luck to everyone in the repairs.
Tough.
