Types of toilet valves
The inlet valve (also known as filler, filling or filling) serves to supply water and stop filling when it reaches the limiter. The outlet valve (aka drain) takes on the functions of flushing water, adjusting the volume and flow rate.
Each inlet valve for a toilet cistern must have a shut-off device to shut off the water. The design of some fill valves for toilets with bottom connections includes a check valve that prevents water from the tank from entering the water supply system when the water supply is turned off.
All inlet and outlet valves for the toilet, in turn, are divided into different types, according to material and design features. Since sanitary fittings are constantly being improved, models with completely new characteristics appear, the information and classification below should be considered approximate.
Valves classification
By material
Inlet and drain valves are made from the following materials:
- entirely made of plastic;
- mainly made of plastic with individual elements made of steel or brass (fitting thread, rocker arm and other parts).
In terms of reliability, modern models for flush tanks with plastic threads, supplied to the market by well-known manufacturers, are not inferior to metal ones.
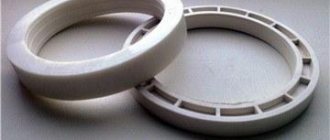
Gaskets and membranes are made of rubber or silicone; the latter look preferable because they do not lose elasticity.
By location
The following installation options for toilet filler valves are possible:
- with bottom water supply – attached to the bottom of the cistern;
- with side connection – attached to the side wall of the tank;
- 2 in 1 – the valve has a removable fitting attached from the bottom or side; it can be attached to the bottom and side wall.
By type of design
Types of toilet fill valves:
- with a side connection and a conventional float on a long metal rocker, the design is familiar from Soviet toilets; with valves of a later time, the filling goes through a tube to reduce noise;
- with a bottom water supply and a float on a long rocker, is a modernized version of the previous model, rare;
- with a side connection and a vertical stand along which the float moves;
- with bottom water supply and vertical stand for float;
- the previous version, supplemented with a check valve.
Classification
Intake mechanisms can be divided into groups according to three criteria:
- material composition,
- location,
- type of construction.
By material
- Brass or bronze . Products made from these alloys are practical, durable, reliable and completely resistant to corrosion. But such metal valves are quite expensive.
- Plastic . Plastic products are very popular because, along with their long service life, they are quite inexpensive.
By location
- With bottom liner. Valves with this connection are located at the bottom of the tank. With this method, water intake occurs completely silently. Also, the lower location allows you to hide the inlet hose and free up the space in the toilet room from unnecessary fittings.
- With side liner. Valves with this connection are located, respectively, on the right or left side of the tank. This design is the simplest, which has a positive effect on its service life.
You need to select inlet units depending on the design of the toilet cistern. Also, when choosing, you must adhere to the following rules:
- The product package must include the valve itself, the float, O-rings and a fixing nut.
- O-rings must be elastic, correct in shape and free from defects.
- The plastic element must not have visible scratches or nicks.
- The movement of the float should occur smoothly, without sudden jumps.
By type of design
Once upon a time, valves were ball valves; the device looked like a ball, which was used in all tanks. The modern device is called an inlet device, since it has no resemblance to the design of ball mechanisms, but is used together with a float. There are several types of float devices for the toilet tank:
- Croydon valves consist of a shell, a float with a lever and a piston with a seat. In this mechanism, the movement of the lever is perpendicular to the action of the piston. This system is used in old tanks and has a fairly low price.
- The piston ones are equipped with a forked pin with a lever axis. Here, the water is adjusted by horizontally lifting the lever, which moves the piston, at the end of which there is a special seal that comes into contact with the seat and blocks the flow of liquid. This is a fairly common model and is included in the middle price category.
- Diaphragm valves have a rubber or silicone membrane instead of a gasket, which moves when the piston moves. This is the latest device, which is used only in the latest models of toilets. The advantages of this valve include fast water intake, instant shut-off of liquid intake and, depending on the quality of the fittings, silent filling of the tank. Among the disadvantages, one should take into account the presence of a constant water pressure in the system (0.05-0.1 MPa) and the purity of the liquid, since if the membrane is damaged, it is impossible to replace it on your own. In this case, you will have to purchase the entire intake mechanism.
Types of float valves
Float valves for toilets are divided according to the type of locking mechanism into the following types:
- piston;
- membrane
In a piston device, a floating float, when rising, presses on a piston moving towards the flow of water until it rests against the saddle. Piston locking mechanisms are already outdated; they do not have any unique design features.
The disadvantages of such devices include noise during filling and the constant sound of falling drops due to the loss of tight pressure to the inlet over time.
The membrane locking mechanism is activated by the action of the pusher on the rubber or silicone membrane. Among the advantages of membrane devices are fast water collection, less noise, and constant flow intensity. Disadvantage: good constant water pressure is required.
Modern diaphragm valves
Most modern inlet valves for the flush tank are diaphragm devices. After draining, the membrane with the pusher moves away under the pressure of the incoming flow, allowing water to flow into the tank.
Purpose
This mechanism:
- regulates the flow of water into the tank to a certain level,
- releases water into the toilet when the flush is pressed,
- ensures the presence of a constant amount of liquid during pressure changes in the water supply.
The valve operates due to a decrease in water pressure, which flows into the tank with the simultaneous rise of the float. When a critical level is reached, the lever closes the valve and the liquid stops flowing into the tank.
Working principle of drain and fill valve
The general scheme of operation of plumbing fittings for a flush tank includes three stages: automatic water supply – overflow protection – draining.
The actuation mechanism of the fill valve is as follows:
- When water is collected after flushing, the float gradually floats up and moves the lever, which actuates the pusher or piston of the locking device.
- When the maximum filling level of the drain tank is reached, which is regulated by setting the float, the inlet hole is closed.
- The water supply to the toilet cistern stops.
The principle of operation of the drainage device is simple - when you operate a lever, button or handle pull, the rod closing the drain hole rises and the water is drained.
Another function of the flush mechanism is to protect against overfilling of the cistern in the event of improper adjustment of the toilet inlet valve or failure of the shut-off device. For this purpose, the drain valve design provides a special overflow pipe.
The upper end of the pipe is below the edge of the tank, and the lower end is aimed at the drain hole. When the water level in the tank exceeds the upper section of the pipe, excess liquid is drained into the toilet. In some models, the overflow pipe is mounted separately from the rest of the drainage device, but the safety drain mechanism is the same.
When installing and adjusting plumbing fixtures, the upper section of the overflow pipe is installed so that it is located on the same level with the upper plane of the float and at least 10 mm below the hole for the side supply, as well as the air inlet holes, if any.
The design and principle of operation of the diaphragm valve of the drain tank
The work of shut-off valves is conventionally divided into several stages. Let's take a closer look at each of them:
Stage 1. The valve is open, water is drawn into the tank.
The pressure of the liquid in the pipe acts on the membrane, pushing it to the side, which allows the process of filling the tank to begin. Number 1 indicates the inlet to the pre-fill chamber. The latter also has a hole that allows water to flow directly into the tank. The mechanism also contains a membrane (number 3) and a piston (4).
There is a hole in the membrane through which a rod with a hole marked with the number 5 is inserted. Its diameter is approximately 1mm. With its help, the liquid penetrates into the filling chamber created by the piston and membrane. When the float is in the down position, hole number 6 in the piston is open, allowing a small volume of water to enter the tank. As a result, approximately equal pressure is achieved in the preliminary and filling chambers, as well as outside them. This condition is the main difference between a diaphragm valve and a stem valve.
Stage 2. Raising the float due to filling of the tank.
The float pushed out by the liquid floats up, moving the rod with the seal to the inlet hole indicated by the number 6. The subsequent movement moves the membrane with a large seat. This ensures the tightness of the filling chamber, thereby stopping the accumulation of water.
Stage 3. Drain.
When you press the drain button, the float drops, stopping its impact on the rod. It opens the hole in the piston, relieving the pressure in the filling chamber. The pressure of the liquid in the pipe pushes back the membrane with the piston, starting the procedure described in the first stage.
Installation of valves for a toilet with bottom supply
The list of components and parts of the valve device for a toilet cistern with a bottom connection includes:
- float;
- craving;
- rocker arm;
- rocker axis;
- float stand;
- stand extension;
- return element;
- pusher;
- membrane;
- two-piece body with nozzle and thread;
- filter;
- conical gasket;
- swashplate;
- nut for fitting.
The extension is used to extend the float stand when installing a filler valve with a bottom connection, if the toilet tank is very high and it is necessary to raise the filling level. The return element changes the movement of the incoming water flow from top to bottom, thereby reducing noise.
The mechanism of some models, mounted in a drain tank with a bottom connection, is equipped, in addition to a shut-off valve, with a check valve. This additional unit prevents the contents from being discharged back into the water supply when the water supply is temporarily interrupted.
Installation and repair
Considering that automation for a toilet cistern with a bottom line has been used relatively recently in our country, many craftsmen are experiencing certain difficulties with its installation and repair. However, it should be said right away that there is nothing complicated in these processes, although it has certain differences.
Some types of such structures have their own individual characteristics and, accordingly, their own installation method, suitable only for them
Installation
- First of all, it should be noted that all such products have their own technical passport, which is accompanied by installation instructions. If these documents are not included in the kit, then you should not purchase it. It is also important to mention that the toilet itself usually comes with the necessary connecting elements and fasteners.
Usually only the pipe itself is connected to the inlet valve using wrenches, although sometimes they are used to tighten the control nut on the ceramic itself
- When starting installation, you first need to install the lower part of the toilet, fixing it in the required position. Before this, it is recommended to check the correctness of the water supply and the length of the hoses. If the need arises, the supply system can be modified in accordance with the design of the product.
- The next step will be to install the tank. It is at this moment that the internal structure is installed.
Some installation instructions contain detailed drawings of these structures, which is very helpful for self-assembly, since most manufacturers supply these parts partially disassembled
- Usually, the filler valve for a toilet with a bottom connection is first installed when connecting the tank itself. To do this, sealed rubber bands and adapters are fixed. Some designs assume that the inlet valve will be installed at the same moment, but it all depends on the specific model.
- All other elements are assembled according to the instructions and drawings in it. However, it should immediately be noted that first it makes sense to completely disassemble the drainage device and then reassemble it. This will allow you to independently verify the tightness of the connections and the level of clamping of the parts.
Advice! All elements of such systems are assembled by hand without the help of special tools. However, this must be done so that the connections are sufficiently tight.
Sometimes the water level marks on the product do not correspond to reality and you often have to make the adjustment yourself
Maintenance and repair
Usually the biggest problem when setting up and maintaining such a system is the question of how to adjust the toilet tank with a bottom line. This is due to the fact that it has a fundamentally different design, although it is based on a float.
Holes that are not used for introducing water into the tank should be closed with special plugs, but they are not always included in the delivery of such mechanisms and must be purchased separately
First of all, it is necessary to fill the tank with water so that its level does not reach the overflow hole or funnel by 1-2 cm. After this, adjust the float so that, floating on the surface, it closes the inlet valve at the entrance to the tank.
Repair of such products does not require quite a long time. Therefore, sometimes it is much easier to replace an entire unit than to repair some parts. The fact is that the price of such a device is relatively low, and the simplicity of the design significantly increases its service life.
However, there are situations when replacing the flush system involves almost complete disassembly of the toilet. Therefore, it is worth remembering that products with metal elements that are subject to corrosion do not need to be purchased at all. Some craftsmen, for lack of an alternative, simply replace the brackets and strips with structures made of stainless material.
Advice! When purchasing a specific model of such a drain system, you need to immediately buy some spare parts for it. In this case, special attention should be paid to rubber gaskets and seals, which fail most quickly. The fact is that after a certain time they may not be on sale.
Partial replacement of the drain system using stainless steel parts
Recommendations from the experts
- You need to be very careful when working near ceramics with a tool. Even minor mechanical damage or impact can lead to a chip or crack.
- If, after installation, leaks were found in the contact areas between the outlet valve of the toilet cistern and the drain hole, then it is worth doing a little grinding or cleaning the surface of all contacting elements. If this defect has not been eliminated, then you should contact the seller for a refund or replacement.
- When the system is being repaired, it is worth cleaning all parts from rust. However, this must be done very carefully so as not to damage the parts on which it appeared.
Sometimes even such a simple job is associated with a number of difficulties and some people need to turn to specialists to complete it
Maintenance of drain and inlet fittings
Water in domestic engineering networks often contains mechanical impurities (rust, sand, salt deposits), so many malfunctions occur due to clogged plumbing fixtures. For this reason, the vast majority of valve maintenance activities involve cleaning.
When servicing and carrying out preventive maintenance, special attention is paid to the filter, membrane, inlet nozzle of the filler valve, locking ring or bulb, and drain hole. It should be borne in mind that the filter is usually installed in Russian-made models; it is not always found in samples from foreign suppliers.
Another part of the problems is related to improper filling of the tank and leaks. The basis for eliminating these shortcomings is the connection and adjustment of components, the serviceability and tight pressure of the gaskets, and the tightening of the nuts to the end.