Can the space under the bath be left open? Of course, it is possible, but mainly this happens in two cases. Firstly, if the bathtub itself has beautiful figured legs and a neat outer surface, then it is designed for just such an installation. And secondly, if the owners are completely indifferent to what their bathroom or combined bathroom looks like. In other options, a special decorative panel, often called a screen, is mounted under the sides of the bathtub. This is the only way to ensure that a small room for taking water procedures will look aesthetically pleasing - otherwise some kind of incompleteness remains.
DIY bath screen
The modern assortment of construction stores offers a variety of both ready-made solutions and materials suitable for creating such a structure. Choosing the best option, suitable both in terms of the availability of self-installation and external data, can be quite difficult if you do not first figure out what and how you can make a bath screen with your own hands. In addition, when starting work, you should take into account some of the nuances of arranging this specific interior detail, as well as the requirements for its design.
Classification of plumbing screens
Theoretically, the screen is called the enclosing structure, the podium is a platform with steps. In practice, these two concepts are often combined; a screen is called a solid masonry with steps and sides for a sanitary bowl. There is no official classification of homemade screens according to the following criteria:
- manufacturing technology - frame or masonry;
- availability of access to communications - blind type, with hatches, doors, removable panel, cut-out element;
Screen with doors
- type of door opening – sliding, hinged;
Sliding doors
- shape - flat, with niches for feet, with steps for a built-in bathtub, one-sided, L-shaped (corner), island (oval, rectangular, round for bowls of the appropriate configuration).
Configuration options for bathtubs of different shapes.
Materials used to construct the screen:
- septal block;
- foam blocks;
- brick;
- bar;
- galvanized profile.
Rough finishing is usually done with plasterboard or aqua panels. The following materials are used as facing materials:
- ceramic tiles and porcelain stoneware;
Tile screen
- PVC panel;
Cladding with plastic panels
- MDF;
Screen decoration with MDF panels
- mosaic;
Mosaic finishing
- lining;
Cladding
- sheet plastic;
- furniture board, plywood;
- louvered doors.
When choosing a screen construction technology, you can focus on the following factors:
- renovation budget;
- bath material;
- labor intensity of work;
- decorative value and integrity of the bathroom interior;
- the degree of need for access to the inside of the structure;
- physical, anatomical characteristics of users.
This tutorial discusses the pros and cons of screens and provides video instructions for making the most popular options.
Design ideas
When making a screen, you can give free rein to your imagination.
- You can add a pull-out shelf with magnets. It is useful for storing various small things that we use in the bathroom: combs, shampoos, bubble baths and others.
- Another element is curtains. The most low-budget design element. It is suitable if your bathtub has non-standard shapes and it is impossible to make a hard screen. With skillful selection of curtains in combination with additional decorative elements, you can create a rather cozy bathroom. Just keep in mind that curtains should be easy to remove, as textiles require washing.
- A mirror visually expands the space. It can also be used in screen design.
- Frosted glass is an interesting design idea. They come in plain, matte, colored, patterns and various textures. Glass is quite durable, so its use is safe, so feel free to select and combine it with the interior of the bathroom.
The best posts
- Construction of a swimming pool on a summer cottage with your own hands, photo
- How to remove soap from a plastic mold with photos and videos
- Making stencils for a children's room (+40 photos)
- Master class “How to make a bow from a satin ribbon for hair or for a Christmas tree” with video
- Track lights for business
- Crochet. 300 schemes of motifs and patterns
- How to use fashionable stripes in the interior of an apartment without overdoing it?
- How to make a semi-arch from plasterboard yourself?
Self-production
A frame screen for a bathtub is cheaper than a similar design made of brick or partition blocks. However, the labor intensity of the work increases:
- fastening of the load-bearing elements of the frame is possible only to the walls and floor;
- To finish a frame structure with tiles, you must first cover it with sheet material (usually moisture-resistant plasterboard, less often aquapanels, DSP);
- In places where doors and hatches are installed, it is necessary to install additional racks and horizontal jumpers.
Metal carcass
On the other hand, it is most convenient to lay tiles on drywall. Therefore, frame technology is used quite often.
The masonry is very convenient for fencing sanitary bowls of complex configuration and island installation method. This method is used to strengthen acrylic bathtubs and to make steps and sides of podiums.
The masonry can be immediately covered with mosaics or tiles, the hatch/door can be installed in any convenient place.
Frame construction
The classic option is a frame made of galvanized profiles for gypsum plasterboard systems, covered with plasterboard. This diagram allows you to do the following:
- make completely removable panels on hooks or magnets;
- install hinged doors or sliding hatches;
- improve access to communications due to the small thickness of the structure;
- install a blank screen under the tiling;
- create a ventilated structure with louvered doors.
It is possible to finish drywall with tiles, porcelain stoneware or mosaics of any format. Instead of plasterboard, you can attach lining, wooden, or plastic panels to the frame if the walls of the bathroom are finished with similar materials.
From a hygiene point of view, the lining should be flush with the outer plane of the bathtub rim. Therefore, the drywall should extend 1 cm inside (the thickness of the tiles and tile adhesive). Accordingly, the racks and horizontal lintels should be located even deeper (to the thickness of the plasterboard).
Stationary deaf
Experts recommend using frames only for cast iron, steel and stone sanitary bowls with high levels of spatial rigidity. The main problem when assembling the frame is the low rigidity of the upper horizontal profile along the long wall of the bathtub. Therefore, the element is strengthened by twisting two profiles with self-tapping screws. Step-by-step instructions for the work are available in the video:
This method is convenient for covering one long side of a bathtub mounted between two walls in a niche.
Removable type
If you need constant access to the interior of the screen, its front panel is removable. The industry produces a sliding plastic screen on a frame made of a square tube to solve similar problems. But it has disadvantages:
- low rigidity;
- wide gap at the bottom;
- not suitable for interiors completely tiled.
A step-by-step method for constructing a removable screen panel is in the video:
Given the weight, the structure must be operated by two people.
Folding panel
Compared to the previous version, the folding screen panel or some part of it can be operated by one person. But, the ease of access under the bathtub in this case is reduced. Video instructions are below:
The panel is fixed in a vertical position using magnets or door closers. Instead of covering the gypsum board with tiles, you can finish the screen with panels made of plastic or MDF.
With louvered doors
The main restrictions for using this screen option are: the presence of free space in the area where the swing door opens and the finishing of the bathroom with cladding of a similar design, for example, clapboard, PVC wood panels. The assembly algorithm is given below:
To avoid sagging of the doors, the racks, the doors themselves, and the hinges must be strong enough.
Sliding panel doors
On the one hand, making your own screen from sliding plastic panels is quite simple. On the other hand, to do this in the store you need to find a PVC panel with a width of at least 60 cm, which is quite difficult. You can assemble the doors from several narrow panels by gluing reinforcement elements on the back side, but this will increase the labor intensity of the work.
Step-by-step instructions are presented below:
In comparison with the factory screen, this design is initially tailored to the specific size of the plumbing fixtures and the location of its installation. Therefore, there are no gaps at the bottom, the rigidity is much higher.
Masonry
The traditional material for masonry is ceramic brick. However, tongue-and-groove, foam concrete, and aerated concrete partition blocks are often used. An additional bonus is their good machinability:
- aerated concrete and foam concrete can be easily cut with a hacksaw;
- holes for hinges of doors and hatches can be drilled with a regular drill, not a hammer drill;
- the upper part of the blocks is trimmed with an ax or chisel without much effort in order to launch the masonry inside under the bathtub.
Masonry increases the rigidity of the acrylic bathtub, which is also an additional advantage of the technology. The surface of the screen does not need to be plastered/puttyed before laying the tiles.
Screen made of foam concrete block
When installed vertically on an edge, the masonry will be made in one row. This option has maximum rigidity and allows you to significantly strengthen the bath. The blocks can be laid on mortar or attached to the supporting structures of the building and to each other with polyurethane foam.
Foam concrete is susceptible to cracking over time. Therefore, it is best to reinforce the masonry surface with fiberglass fabric in a layer of plaster.
The technology of work is shown in the video:
The aerated concrete block has increased resistance to moisture and cracking compared to foam concrete
Podium for corner bath
When installing a sanitary bowl in the shape of a sector of a circle, an angular brick screen is used. The podium additionally has one or several steps that facilitate the use of plumbing by the elderly, children, and the disabled.
Sector podium manufacturing technology:
For cladding curved surfaces, mosaics are usually used; the steps do not have to be in the shape of a semicircle; a straight staircase is possible.
Why do you need to cover the bathtub?
Modern acrylic bathtubs are often sold with ready-made plastic screens made according to their dimensions. They are assembled and installed quite simply.
As for steel and cast iron structures, as a rule, screens are not provided for them and you will either have to make them yourself or leave them open.
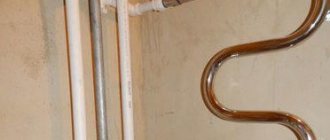
Open pipes look rather unattractive and spoil the interior of the entire bathroom
Whether or not to close the bathtub is a matter of taste and preference of the owners . But surely everyone wants to have a beautiful and tidy bathroom. The screen gives the bath an attractive and finished appearance and covers the sewer pipes protruding from underneath it.
However, this is not the only reason to install a barrier. The space under the bathroom can be put to good use for storing various household appliances by making a functional screen with shelves.
You can make niches in the fence, install hinged or sliding doors.
The bathtub can be installed without a barrier if this is provided for by the design idea. In this case, it is necessary to purchase a bathtub with a special coating and install it on beautiful legs
With an open structure, water constantly gets under the bathtub during bathing and dirt accumulates. A humid environment promotes the formation of fungus, mold and various bacteria.
The floor under the bathroom also gradually wears out and takes on an unattractive appearance.
To avoid these troubles, it is better to cover the structure with a beautiful screen.
The screen performs not only an aesthetic, but also a protective function, preventing moisture from penetrating under the bathtub. Barrier doors will become a convenient place to store household small items
Foot niche
When installing a screen, the comfort of using the bathtub for washing and servicing the inner surface of the bowl is reduced. In other words, the feet rest against the wall, preventing you from getting close, for example, to clean or wash large items that do not fit in the washing machine.
There are four design options to make this task easier:
- a cutout 5–10 cm high between the screen and the floor;
- niche at the same level;
- screen surface beveled downwards;
- a niche with a beveled plane in the middle part of the screen.
The video shows the technology for assembling a frame with a niche for the feet:
The main disadvantage is the accumulation of dust/dirt at the junction of the niche with vertical surfaces and floor coverings. It is possible for horizontal tile joints to shift due to an increase in the length of the inclined surface. It is also considered bad design practice.
Materials
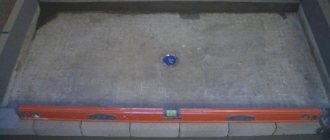
The very first stage of work is making a frame for the bathtub. It can be made of wood from slats or from metal profiles. The wood must be moisture resistant. Be sure to apply a compound that fights fungus and mold. When taking measurements, use a building level. They are very convenient to work with when drawing projections of bathtub corners on the floor and walls.
Escape hatch
It is possible to manufacture a homemade emergency removable hatch. Unlike factory analogues, it is manufactured without magnets, hinges and other accessories using the following technology:
- a window is made in the masonry, slightly smaller in size than the tile;
- at the time of laying the tiles, the back of one cladding element is covered with tape;
- After the glue has hardened, the joints are grouted with sealant.
The tiles covered with film do not stand out in any way in the general array. If access to communications is necessary, the seams are cut off with a knife, and the tiles are removed with a vacuum suction cup, as in the video below:
After repairing the drain, the lining is mounted in place, the seams are again filled with sealant.
How to make a sliding screen for a bathtub with your own hands
The easiest way to install a sliding screen with your own hands is to buy a ready-made set of doors. If you can’t purchase a kit, then you can make the panels yourself. Most often, plastic, aluminum profiles, corners and fasteners are used to make a homemade screen.
The first thing you need to do when installing a sliding screen is to install a metal frame
The sliding panel installation process involves:
- Applying markings for the frame. The marking depends on the height and length of the bathtub, and is done using a building level. The starting point, in this case, is the side of the bathtub.
- Frame installation. Aluminum profiles are connected in parallel using corners.
- Installation of guides to the upper and lower frames.
- Cut the plastic and install the sheets into the grooves of the guides.
The valve can consist of two or several elements. For convenience, metal or plastic handles are attached to the panels.
Inspection hatch
If constant access under the bath is necessary, for example, for storing basins, buckets, detergents/cleaning products, doors or hatches are built into the masonry or frame system. The industry produces inspection hatches with hinged, sliding and tilting doors with conventional and push-type opening mechanisms.
The opening for the hatch should be made in the lower front part of the bath. This is where the sewer pipes pass, the drain and the siphon are located. If there are hydromassage jets in the bowl, you will need several hatches or a removable front panel.
Thus, you can make a screen yourself using two technologies and cover it with almost any materials. To increase the quality of service of engineering systems, doors and hatches can be added to the design.
Advice! If you need bathroom renovation specialists, there is a very convenient service for selecting specialists from PROFI.RU. Just fill out the order details, the experts will respond and you can choose who to collaborate with. Each specialist in the system has a rating, reviews and examples of work, which will help with the choice. Looks like a mini tender. Placing an application is FREE and does not oblige you to anything. Works in almost all cities of Russia.
If you are a master, follow this link, register in the system and be able to accept orders.
Required Tools
Before you make a bathtub screen with your own hands, it is important to prepare the tools used during work. They may differ depending on the chosen design, but some elements are always used:
- plumb line, level or other high-quality and reliable measuring equipment;
- cement mortar if you plan to use brick during the work;
- grout for joints in brickwork or tiles, acting as a decorative material to create a coating;
- grinder for cutting various materials;
- a screwdriver and a drill, and these tools provide a frame, which is then sheathed with various selected finishing materials;
- special impregnations used for wooden or metal elements, increasing their resistance to moisture;
- polyurethane foam or sealant for remaining gaps in structures, which allows you to create a perfectly sealed structure.
Other tools are often required, since their choice depends on what material is used in the work process.
Tools that may be needed to install a screen under a bathtub
Material