Types of pallets
Brick shower tray
The installation principle is the construction of a monolithic structure followed by tiling. The bricks are laid vertically, on their sides, offset, maintaining a minimum gap between adjacent elements.
During construction, keep in mind that the bottom of the shower must be raised to the installation height of the drain ladder.
Floor lifting methods:
- pouring screed onto the subfloor;
- installation of two layers of bricks;
- laying insulation and then applying screed to it.
During construction, it is permissible to use bricks of various types and sizes. If the pallet is made of hollow blocks, during the work process fill them with the same mixture with which you perform the installation.
Installation can be carried out using a mortar based on cement and sand or tile adhesive with high elasticity: this composition has a long setting time, which allows you to adjust the masonry.
The sides of the pallet are most often completed simultaneously with the construction of the bottom and walls, which ensures the integrity and solidity of the entire structure.
Advantages:
- relatively low cost of materials;
- rational use of bathroom space, the ability to implement any design solutions.
The disadvantages of brick pallets include the length and complexity of the installation process.
It is undesirable to use sand-lime brick to install a shower tray under tiles due to the material’s susceptibility to destruction under the influence of moisture.
Monolithic shower tray
If the bathroom has a non-standard size and shape, you can create a monolithic shower tank by installing formwork of the desired size and shape, installing communication systems, pouring screed and cladding. The work is carried out in two versions: with and without laying a heat-insulating layer.
The installed screed must ensure water drainage from all corners of the pan, so it is made at a slope to the place where the drain is installed.
The following mixtures are suitable for making a shower tank:
- cement-sand;
- semi-dry cement composition;
- cement with the addition of expanded clay.
The formwork is assembled from wooden boards, scraps of chipboard or oriented strand boards.
The advantages of a shower of this type include high strength and solidity of the structure, low cost of materials, and the ability to make a tray of any shape, including curved ones.
The disadvantage is the complexity of the work and large time costs.
Frame podium for shower cabin
The design is characterized by the absence of a strong, monolithic base: after marking the desired location of the podium, a drain ladder is installed and fixed on the base, a wooden frame is assembled (from timber pre-treated with antiseptic and fungicidal agents, with a cross-section of 40x40 mm, or a metal profile).
A deck made of several layers of moisture-resistant oriented strand boards is placed on top of the timber. When laying sheets, you must ensure that the seams are not located on top of each other.
After making the structure, all the cracks are puttied and the shower tray is tiled.
Podiums of this type are suitable for installation in wooden or frame buildings.
What tools will you need for the job?
If there is enough space in the bathroom, then using brick and concrete you can create a structure of any shape. The size and height of the tray depends on personal preference. When the dimensions of the future device are determined and drawn, you can stock up on materials.
Need to purchase:
- cement;
- brick;
- metal mesh;
- special mixture for waterproofing;
- primer;
- sand.
Tools for performing the work:
- drill;
- putty knife;
- brush;
- level;
- roulette.
If a shower stall is designed after the construction of a building or in a city apartment, then using these materials it is necessary to build a podium. It will be located above the floor level throughout the house. When building a house, you can immediately take into account the presence of a shower. Due to this, the floor level mark in the shower will coincide with the floor level in the house, which is very convenient for people with disabilities.
Tools for arranging a tray for tiles for a shower stall
To make a pallet from brick or concrete screed, you will need the following materials and tools:
- building level, rule;
- pencil, ruler, tape measure;
- trowel, toothed metal and rubber spatulas;
- construction mixer or drill with a kneading attachment;
- lighthouses;
- drains and sewer pipes;
- waterproofing materials;
- cement-sand mortar, bricks;
- boards for formwork;
- tile adhesive, grout mixture;
- tile cutter or angle grinder;
- plastic crosses;
- facing material.
How to make a shower tray from tiles with your own hands?
Surface preparation
- at the initial stage, decide on the size and desired shape of the pallet, make a drawing;
- clean the surface of old coating that does not have strong adhesion to the base. In case of significant unevenness of the floor, apply a thin layer of cement screed, and after the solution has dried, apply a primer;
- check that communications are working properly;
- clean up debris and dust;
- if necessary, connect the additional neck to the main sewer line.
Waterproofing and installation of drains
Before laying bricks on the bottom or pouring the first layer of screed, waterproof the base by installing a dense polymer film, roofing felt, coating with bitumen, or water-based mastic. If you use hard materials (rolled or sheet), cover the entire perimeter with hydrophobic tape and coat the cracks with a waterproof agent.
Treat the floor over the entire area, additionally including insulation of adjacent walls (up to the expected height of the sides). You can create the desired slope of the base for installing the ladder by installing wooden stops before pouring the screed or permanent metal frame.
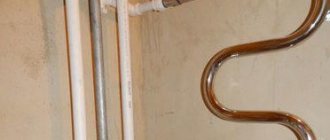
It is recommended to choose pipes and drains made of plastic, since the material is easy to install and is not susceptible to moisture. The drain grate must be strong and rigid, so it is advisable to choose metal products.
Construction of sides
Place the edges around the perimeter of the pallet after the screed has dried. Installation can be done from bricks laid on a long edge, from water-repellent gypsum boards or using concrete (in this case, make wooden formwork from boards up to 40 mm thick, which will be removed after the solution has hardened). The sides must exactly follow the shape of the shower tray.
Pouring the main screed
Perform the final filling of the inner surface with a concrete screed after the sides have been formed and the previous layer of mortar has dried:
- fix the beacons on the base with a solution;
- check the installation plane with a level, taking into account the required slope of the surface;
- prepare the mortar for work and fill the screed, adjust the slope angle to the drain with a trowel or metal spatula;
- finish the sides of the pallet from the inside and outside.
To provide additional waterproofing of the pallet, add liquid glass to the mixture of cement and sand in a ratio of 4:4:1, respectively. First dissolve the silicate in water, then add it to the dry ingredients.
Re-waterproofing
After the final layer of screed has completely hardened and dried, re-insulate the surface to ensure that the pallet is completely waterproof. Since the next stage of work will be laying the facing material, apply bitumen or mastic in a neat, thin layer. The entire surface of the pallet and sides are subject to treatment, excluding the exit point of the ladder.
Covering the shower tray with ceramic tiles
- prepare tile adhesive for work;
- Apply the composition to the pallet, use a notched trowel to make grooves on its surface: first of all, do the laying on the bottom, then on the vertical planes;
- lay the ceramic tiles on the glue, press, install adjacent elements, insert plastic crosses;
- check with a level that the required angle of inclination to the drain is observed: at least 1 cm per 1 m2. Keep in mind that glue applied in a thick layer may shrink;
- When decorating the sides, perform the cladding first on the sides, then lay the elements on the upper plane.
When making a pallet of a non-standard shape, installation of the covering can be done with very small tiles - mosaics.
To install decorative elements in rooms with high humidity, choose an adhesive and grout mixture that have moisture-resistant properties.
Hardening and drying
For various adhesive mixtures there are certain conditions and terms of setting and drying. The use of most types of compounds allows you to start grouting the joints 24-36 hours after finishing the tile laying work; quick-drying solutions harden after 7-8 hours.
The main factors influencing the rate of hardening of the glue are air temperature (the optimal value is 20-25 ⁰ C) and the humidity level in the room (up to 70%). When exposed to low temperatures, the liquid contained in the solution hardens and the glue loses its adhesive properties.
Try moving the tile a little or tearing it off the surface - if the cladding is immovable, you can grout the joints.
6-7 hours after laying the decorative elements, clean the seams from any remaining mortar - if the fugue lies on an unprepared base, its moisture-proofing properties will deteriorate, and the appearance of the seams will be unpresentable.
After 5-6 hours after filling and filling the gaps, the mixture will set, and you can begin to remove its excess from the surface of the tiles.
After 24-48 hours, the grout will dry completely: you can install the fence or cabin doors and take a shower.
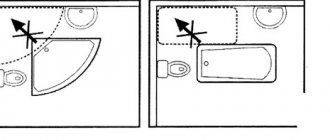
Choosing a location and deciding on the size
When drawing up a project and determining the type of structure, it is initially necessary to select its location. This parameter largely depends on the size of the bathroom, its layout, and the placement of plumbing communications.
Water pipes can be installed in any area, but organizing the optimal slope for drainage is more difficult. It is necessary that the riser is as close as possible. Otherwise, you will have to raise the floor level, which will lead to high costs, and in some rooms it is impossible to perform such actions at all.
After choosing a suitable location, you can begin to calculate the dimensions of the pallet. The dimensions of the product are selected taking into account factors such as the area of the bathroom, the physical characteristics and wishes of each family member, the location of other elements, and the presence of a minimum free area in front of functional plumbing items.
Also, when choosing a form, in addition to the basic requirements, its compliance with the interior of the sanitary room is taken into account.
Features of the construction of sides
Making a shower tray from round tiles with solid sides has a number of features:
- the construction of the edge begins at the stage of pouring the rough screed - the height of the formwork should ensure that it functions as a fence for the concrete mixture and serves as a support for the side;
- after pouring the mortar onto the subfloor and leveling it, insert 4-6 cut reinforcement rods (with a diameter of 8-10 mm, with a smooth surface) of the appropriate height along the edge of the pallet - transverse stiffeners;
- after the screed has hardened, tie 2-3 rows of longitudinal rows (from reinforcement with a cross-section of 8 mm) to steel sections with wire;
- make spacers and install the formwork for the inner wall of the side, fill in the mortar.
Finishing
When the waterproofing has completely dried, it’s time for finishing. I decided to use glass mosaic instead of floor tiles: it is easier to adjust to an uneven surface and it is not difficult to install, since it is sold in ready-made sheets on a mesh base. Having laid out and adjusted all the sheets in place, I glued them on using special glue. The seams were grouted with latex grout with increased resistance to cracking and mold (photo 5). I applied it diagonally with an elastic rubber spatula, immediately removing the excess. To avoid leaving a whitish coating on the mosaic, I removed the grout in three steps: first with just a damp sponge, then with water with the addition of a few drops of acetic acid, and finally with crumpled dry newspaper. I waited half an hour and finally wiped off the remaining white deposits with a slightly damp sponge and newspaper until a dry, “clean” squeak was achieved (photo 6).
The shower tray turned out great. Over several years of operation and wintering, both in a heated and in a freezing house, no cracks or damage appeared on it.
Photo: Photo by the author
Organization of drainage
To set up a reliable system for draining homemade pallets, a ladder is used; siphon systems are more suitable for ready-made tanks.
To prevent the penetration of odors from the sewer pipe, the shower drain can be equipped with a water seal and a dry seal.
If the shower is rarely used, the water in the drain may evaporate, which can cause an unpleasant odor in the room. A dry seal prevents the penetration of air from sewer pipes in such an “emergency” state.
Installation of the ladder can be performed in the following options:
- in the center of the pallet or with a slight offset - in this case, the slope of the facing surface should be on all sides towards the drainage point;
- in the corner - water drainage is ensured by creating a slope in two planes;
- near the side wall - one inclined plane is required.
If the flange size matches the cladding format, install a drain system grate instead of one tile. In other cases, install the ladder at the border of contact of two or four decorative elements.
When connecting to a bathroom drain, keep the pipe sloped at least 3 cm per meter of length towards the drain.
Gutter installation
In the answer to the question “how to make a shower tray with your own hands,” the installation of a drain (or drain) occupies a special place. It will be extremely difficult to correct problems once the pallet and cladding are completed, so it is very important to ensure high quality.
Installation of a ladder in a screed
To do this, you must use the following rules and recommendations:
- The connection between the drainage point and the sewer system is made with a slope of about 3°. This ensures optimal flow rate and prevents blockages and stagnation of water in the shower pan.
- The joints of all elements must be sealed.
- For installation, it is recommended to choose plastic pipes and fittings of the highest quality. They can serve for a very long time because they are not subject to corrosion and destruction from other types of external influences.
- The drain ladder must be firmly fixed. The foundation is poured only after making sure that the structure will not move either at the time of pouring or during the process of strengthening the mortar.
Shower drain installation diagram
Read about how to choose and install a siphon for a sink with overflow in another article.
Recently, a hygienic shower in the toilet has become increasingly popular. Find out more about this on our website.
And there is information about the types of water meters at this address https://okanalizacii.ru/santeh_vodoprov/schetchiki/kak-vybrat-schyotchiki-vody.html
Adviсe
- If you need to connect pipes from the kitchen or washing machine, use a drain system with two outlets. If a large number of people live in a house, pay attention to the throughput of the drain - in order to avoid water overflowing onto the floor, this figure should be high;
- for a comfortable and safe stay in the shower, use ceramic elements with a relief, rough surface;
- A convenient addition to a tank made independently would be the construction of a small step at the stage of forming the sides.
The shower room will have a complete look and functionality if you decorate it with plastic (fiberglass) doors, attaching a metal profile for the guides to the monolithic structure through the finishing. Transparent material will provide good illumination of the cabin without additional installation of lamps.
Waterproofing - what material to choose and why it is needed
The bathroom usually has a small area, and its ventilation cannot always cope with high humidity and condensation. In the shower, pure water ends up on the floor and finishing materials. If waterproofing is not provided here, then moisture can easily be absorbed and seep through the ceiling, which will lead not only to unpleasant situations with neighbors, but also to the destruction of walls, cladding, the appearance of mold, and an unpleasant odor.
Waterproofing is divided into:
- lining (roofing felt, stekloizol, hydroizol, isol);
- cast (epoxy mixtures, liquid glass, pitch, bitumen1);
- painting (materials based on polymers, resins, minerals, bitumen);
- coating (bitumen, polyurethane mastic, polymer cement);
- penetrating (water-repellent impregnation).
The choice of one type of waterproofing or another largely depends on the available funds, preferences and skills of the craftsman. When installing a high shower stall, several different types of insulation are usually combined, for example, the base is covered with bitumen, and roofing felt is used for the intermediate layer.