The need to replace the toilet
It is not always necessary to change a plumbing fixture if there are malfunctions in the sewer system. If water is constantly leaking from the tank in the bathroom, this is a serious reason to think about it.
When it drips onto the floor and all the pipe connections are fine, the problem is usually due to a chip or crack. In this situation, it is possible to eliminate the leak only temporarily; the toilet should be replaced as quickly as possible.
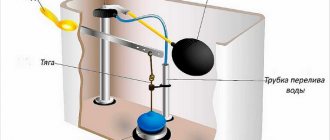
If water from the drain tank flows into the sewer along the wall of the bowl, then, most likely, the installation of new plumbing fixtures will not be necessary, since the cause of such a malfunction is most likely a leaky valve. Since all internal elements for flush tanks are sold separately, they only need to be replaced with new products.
Plumbing faience and porcelain are rather fragile materials that are characterized by instability to sudden temperature changes. The enamel can become covered with a network of cracks, spoiling the external aesthetic component of the device and threatening complete destruction of the bowl. If this product develops chips or other problems, the toilet should be replaced as soon as possible.
None of the toilet users can know for sure when the ceramic coating on it will not withstand and will burst under the influence of water currents, the weight of a person or as a result of internal stress. It’s good if the residents are nearby at this moment and one of them can quickly eliminate the emergency situation, otherwise the toilet of the neighbors living on the floor below will need to be repaired.
Another sign of a plumbing problem is the presence of an unpleasant odor. Most often, it is caused by improper installation of the sewer system, as a result of which the drainage stagnates in the pipes. When everything turned out to be in order with the pipeline, and the earthenware is clean, the cause of the smell should be sought in the fact that the glossy coating has begun to deteriorate.
If the integrity of the enamel is damaged and the porous structure of the sanitaryware begins to come into contact with impurities, it begins to absorb unpleasant “odors.” It will not be possible to cope with these odors, since the destruction process is irreversible. In this case, it is impossible to do without replacing the old toilet with a new one.
Another important reason for dismantling old and installing new plumbing is the planned renovation of the bathroom. Few property owners decide to keep the same fixture when changing the design of their bathroom.
Since new, more modern products appear on sale regularly, updating a bathroom with replacing plumbing fixtures can transform its interior beyond recognition. Regardless of whether you choose a classic option or an unusual model from the catalog, the process of how to properly change a toilet occurs in the same sequence.
Preparation of communications
- Sewerage. The place where we will connect the toilet flush must be thoroughly cleaned of various salt formations and debris. Otherwise, the corrugation or corner that will connect the toilet to the sewer riser will not fit tightly in the sewer outlet and the leak will have to be repaired.
- Water pipes. In the place where we will connect the cistern, it is necessary to install a tap in order to be able to repair or clean the toilet without completely turning off the water.
The nuances of choosing a new plumbing fixture
Before carrying out renovations in the bathroom, you should carefully prepare for it. You especially need to think about how to change the toilet in an apartment with your own hands when the residents continue to use the toilet.
In this case, the plumbing fixtures should be changed as quickly as possible, but without proper organization of repair work this becomes impossible. First of all, they select a suitable model, prepare all the tools and building materials, and then begin to implement their plans.
The most important thing before installing and dismantling the toilet is to purchase a new plumbing fixture. Depending on the selected model, a set of tools and materials is prepared to perform the replacement.
There are two types of toilets:
- floor;
- hanging.
Floor-standing models are more popular and their choice is huge. They come in “compact” and “monoblock” types, with separate tank and bowl, as well as with a hidden drain system.
A monoblock is a product that combines a water tank and a bowl into a single system. In a compact toilet, these two parts are sold as a set and are connected during installation - this is the most popular option presented on the domestic market of plumbing products.
Retro models, during installation of which the tank must be placed under the ceiling and connected to the bowl with a pipeline, have become increasingly rare in recent years. In them, to flush, you need to pull a string or chain with a handle. Such plumbing fixtures look appropriate in a bathroom decorated in the appropriate style.
A modern solution is to install a hidden drain system. Before replacing an old toilet with a new one of this type, it is necessary to consider the construction of a false wall, behind which the flush tank with the installation system will be hidden. Externally, hidden models look very neat, since only the drain button will be located on the wall, and utility lines will remain hidden.
The bowl of a wall-hung toilet is not placed on the floor. It is hung on anchor bolts mounted into the wall. As a result, there is free space under the bowl and it can be used to advantage. This design is also advantageous from a hygienic point of view. It is not difficult to wash the floor underneath, but dirty residue often collects around the floor product.
Another important point that should be taken into account before replacing the toilet with your own hands is the direction of release from the bowl, which comes in three types:
- at an angle;
- straight;
- vertical.
The most popular option is to use a direct horizontal outlet. During its implementation, the toilet is connected to the sewerage pipe at the same level. The oblique release was used mainly during the years of Soviet multi-story construction, but it can still be found today.
As for devices with a vertical drain, they are usually used in homes in America and China. Its convenience lies in the fact that the toilet can be placed anywhere in the bathroom, and communications are laid in the interfloor ceiling. This arrangement option can also be implemented in domestic sewer systems, but only in private households.
Most common mistakes
Before changing the toilet in an apartment or house, you need to carefully study the instructions of the manufacturers of these products. It is almost impossible to avoid mistakes when dismantling and installing plumbing fixtures in the absence of relevant experience.
There are several types of plumbing work, during which novice craftsmen perform incorrect actions. Knowing them will help you avoid unpleasant surprises during installation activities.
To prevent liquid from stagnating in the sewer pipes, it is necessary to maintain a slope when installing the drainage system. According to building codes and regulations, it should be from 3 to 5 percent in the direction of the sewer riser. If the question is being considered not only of how to change the toilet, but also of moving it to another place, this should not be forgotten.
Some property owners rush to replace the toilet at the very beginning of the bathroom renovation. Experts advise avoiding such actions if possible. The fact is that earthenware plumbing is fragile and during further construction work in the room there is a high probability that it will be damaged. Therefore, it is advisable to change the toilet with your own hands as a last resort.
If a bidet is already installed in the bathroom, the hanging bowl should be positioned flush with its top edge. Only in this case the plumbing fixtures look harmonious in the interior of the room and are convenient to use.
When replacing sewer pipes, inspections must be installed. Access to hatches should always be free - you can use aesthetic doors to cover them. This requirement should not be neglected, since in the event of an emergency you will have to use audits.
Replacing an old toilet with a new one without the help of a professional is quite risky, especially if you have no experience. When installing plumbing yourself, the main thing is to take your time and follow the instructions.
Set of tools for installation
Before carrying out this type of plumbing work, prepare in advance everything that is needed to replace the toilet from a standard set of tools. Its configuration may vary depending on the condition of the outdated toilet equipment that needs to be dismantled, as well as on the type of sewer pipes and the method of attaching the new device.
You will definitely need the following tools:
- hacksaw or grinder;
- perforator;
- screwdriver;
- adjustable wrench;
- gun for applying sealant;
- chisel and hammer;
- building level;
- rubber spatula.
You will also need personal protective equipment - special gloves and goggles. A hammer drill is used to create holes in concrete for dowels onto which a new plumbing fixture will be attached. An adjustable wrench is required for work related to connecting water supply lines.
When tightening the screws, use a flat or Phillips screwdriver, and to reliably seal the joints, use a gun into which a bottle of sealant is inserted. A hammer and chisel are used when replacing a toilet in a Khrushchev-era building with a cast-iron pipe connected to an old sewer riser installed in the Soviet years. To check the correct installation of the bowl, use a building level.
How to install a toilet?
The base of the bowl is placed on the prepared surface in two approaches. The device is tried on for the first time. The unit is assembled without seals in the adapters. The location for anchor holes cannot always be marked through the mounting lugs. In this case, a mark is made on the side, opposite the holes. Then the toilet is moved away, holes for the anchors are drilled using a hammer drill or a drill and polyethylene dowels are inserted. At the next stage, all actions are repeated again, and the device is placed along the contour mark so that the fastening bolts fall through the holes into the plastic dowels. The fastenings are tightened, but without fanaticism, with a sense of proportion. The installation of the toilet is complete, all that remains is to equip the flushing unit with the parts suggested by the manufacturer.
Related materials
In addition to a set of tools, before changing the toilet with your own hands, you need to purchase building materials for installation, including:
- pipe for connecting to the water supply system;
- sealant;
- corrugated pipe for connection to the sewer riser;
- tap;
- FUM tape;
- fasteners.
When exchanging a toilet - an old product for a new one - the main point is to ensure a reliable seal. Any loose connection or gap may result in a leak. When connecting a plumbing fixture to a sewer system, the best solution is to use silicone sealant in a cylinder.
Before replacing a toilet in an apartment or house, you should purchase plastic corrugated pipe products to connect it to the pipeline that discharges wastewater. This product is convenient because it is flexible and suitable in most cases. When bending, the corrugation can take different positions, compressing and stretching. It is suitable for both horizontal outlet and angled outlet.
To seal the joints, use sealing tape or do it the old fashioned way, using tow. The set of fastening elements includes screws, bolts, dowels, nuts, washers, plugs for connecting all components and carrying out installation work. If any fasteners are missing, they can be purchased additionally.
Preparatory work
Of course, you remember that if you have ceramic tiles on the floor, then the floor must be level. If you neglect this detail, the toilet may split or crack. But if you don’t have tiles, then be sure to make an even screed. After completing the work, leave the floor to dry for at least three days. This is due to the fact that the toilet will be mounted using toilet dowels, and in order to securely fasten them, you will need a reliable base. So it’s better to take your time than to redo it later.
Since you are replacing the toilet yourself, you can now proceed to preparing communications:
Carrying out work to dismantle the old toilet
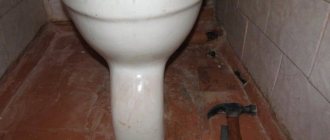
To change a toilet with your own hands, first dismantle it. If the device is not too old, there are usually no problems with this process. When the model of plumbing and cast iron sewer pipes are still Soviet-style, in this case you will have to work hard.
If the device is not in very bad condition, the dismantling process will not be too laborious:
- First, before draining the toilet when replacing it, turn off the water pipe.
- Prepare containers for collecting water and rags.
- Disconnect the tank by unscrewing the bolts from below.
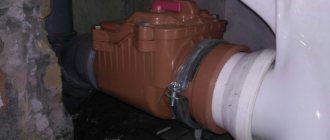
- Remove the plastic eccentric or corrugation connecting the bowl outlet and the sewer system.
- Using a regular sponge, remove any remaining water in the container.
- Using a wrench, unscrew the fasteners located on the sides of the base; there are usually 2 or 4 of them.
- Use a knife to remove the silicone sealant from under the base.
- The bowl is removed from the tile.
In the past century, all installation work was done in such a way that the plumbing would last for decades. Until now, when replacing a toilet in a Khrushchev-era building, you can find the device mounted on cement mortar and embedded in a screed with rags wrapped around the base and finally covered with several layers of paint. In this case, its connection with the sewer pipe is covered with a thick layer of solution.
Now this installation method looks ridiculous, but until the home craftsman has to dismantle the rare device. In cases where ceramics are not a concern, the toilet bowl can be dismantled in parts. To do this you will need a hammer and chisel.
You must first knock at the junction of the bowl and pipe, while simultaneously rocking the mount. If the structure does not give in, you should hit the neck of the plumbing fixture and it will crack. After this you can remove it. The main thing is not to hit the cast iron pipe with a hammer, since it is fragile and will crack easily.
Replacement of individual equipment
Before you remove the old toilet and replace it, check that it may not require complete dismantling. Sometimes it is enough to change only a few failed elements: change the drain, corrugated pipes, tank or fittings.
Let's look at how to install a flush cistern on a toilet if it needs to be replaced:
- First, the water supply is turned off.
- Then the water is drained from the tank.
- After this, unscrew the hose from the valve or tank, and then remove the mounting bolts of the toilet tank.
- We dismantle the old tank.
- The installation site of the new drain tank is thoroughly cleaned of any traces of rust.
- Now the new tank is bolted to the toilet shelf and sealed with gaskets.
- When the replacement of the old toilet cistern is completed, fittings are installed in it, which is also sealed.
- Lastly, a flexible hose is screwed to the float valve and the water supply is turned on.
5 simple steps on how to change the corrugation on a toilet:
- First of all, you need to pump out the water from the pipe, lifting it slightly towards the drain.
- Then you need to remove the old corrugation by removing the dried sealant, cement and the old outlet in the socket with a chisel.
- After this, you need to thoroughly clean the sewer pipe and outlet from any dirt and debris.
- Wipe the inner edges of the bell with a dry, clean cloth and apply a sealing solution.
- Then we apply sealant to one edge of the corrugation and install it all the way into the sewer socket. We put the other edge on the toilet flush and seal all the connections.
That's all the subtleties of installing a corrugated pipe on a toilet. If desired, everyone can independently replace it, putting a little effort and diligence into this matter.
Watch a video tutorial on how to replace the fittings in the cistern:
Features of installing a new product
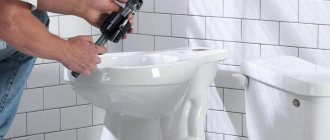
After you have managed to remove the toilet with your own hands, you can begin installing the new product. Depending on the model purchased, the installation process will differ. Installation of a plumbing bowl with a floor mounting option and an attachment with a hidden tank is carried out in different ways. Detailed instructions will help the home handyman to cope with the installation of the toilet.
Preparing the surface before installing the toilet
The complexity and sequence of preparatory work depends on what type of flooring finish is located at the installation site of the new sanitary fixture. If the floor tiles and screed were damaged during dismantling, they will definitely need to be restored. If the surface intended for installation has not undergone noticeable changes, then the installation of a new toilet can be carried out directly on it, provided that it is level on a horizontal plane. To check this, you should use a building level.
Installation process of a compact toilet
In order to replace an old device with a floor-standing product of the “compact” type when installed on a tiled floor, you need to use a step-by-step description of how to replace a toilet yourself:
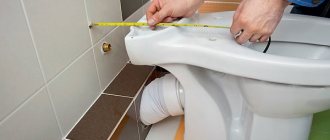
- First of all, determine the location of the new device. The bowl is placed in the bathroom without fastening. You need to try to sit on it. It is advisable to try on several options.
- Once the exact location is known, the base of the bowl is outlined with a washable marker. It is also used to mark the places where plumbing fixtures will be attached.
- The product is put aside, and after that all the necessary marks remain on the floor. Then, using a drill with a 12-bit drill bit, holes are drilled in the tiles. If the surface is concrete, then it is better to beat it with a drill number 12. Dowels are inserted into the prepared holes.
- Then they take a corrugation or cuff to connect the outlet of the device to the sewer system. The connecting element is placed in place, having previously treated the joint with sealant.
- The new bowl with corrugation is installed correctly. Bolts are threaded through the mounting lugs and screwed in using an adjustable wrench. The main thing is not to overdo it when performing this work and not to damage the ceramics.
- The device is connected to the sewer pipe, treating all joints with silicone.
- A tank is installed on the bowl.
- The elements are connected with bolts and the container is connected to the water pipe.
Finally, all joints and threaded connections are checked for leaks. If no deficiencies or deficiencies are found, you can use new plumbing equipment.
The process of how to change a toilet of this model yourself is simple, since modern products are designed in such a way that when they are replaced, the floor covering remains intact.
Dismantling
Unscrew the mounting bolts
Disassembly diagram
With the old Soviet fastening method, you must first remove the bolts. They can be unscrewed or simply broken. Most often, they are no longer susceptible to the influence of the tool, so it is easier to break off the heads. Then you will have to break out the toilet itself. It is very firmly mounted into the sewer pipe, because in those days they made it to last for centuries. Having completed dismantling, you need to clear the work area for installation of a new unit. If the model is relatively new, then you won’t have to break anything. You need to unscrew the bolts, which most likely are not too rusty yet. Next, you need to disconnect the plastic pipe from the sewer system.
Installation of a hanging bowl and a hidden tank
It should be noted that the work on how to change a toilet of a conventional design to a wall-hung product with a hidden drain container yourself differs from the previous option in greater complexity. In this case, it will be necessary not only to replace the plumbing equipment, but also to repair the floor covering, build a false wall with its further finishing with tiles or other modern materials.
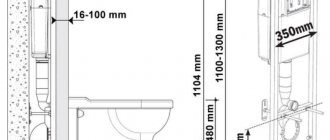
You have to attach the hanging bowl to a durable installation. After finishing the walls, the fixed metal frame will not be visible. When carrying out renovations in a combined bathroom, when decorating the interior, it is advisable to install a wall-mounted washbasin and a bidet of a similar design.
A detailed description of how to change a regular toilet to a wall-mounted one is as follows:
- Mark the location of the plumbing fixture. A sewer pipe with a diameter of 110 millimeters and an inlet is connected to it.
- Try on the purchased installation, which is a rigid frame for installation. You need to decide on the height. The standard placement is 450 millimeters from the floor to the seat and 100 millimeters from the floor covering to the bottom edge of the seat.
- Using a marker, mark the places of fixation to the floor and wall of the bathroom so that they exactly coincide with the mounting holes.
- They are prepared using a hammer drill and the frame is installed. Using a level, check the correctness of the installation work.
- Water is connected to the drain tank.
- The installation kit includes a diagram for cutting plasterboard sheets to cover the installation site. GCR is attached to the metal profile and to the installation. It is better if they are moisture resistant.
- Finishing is carried out taking into account the personal preferences of residents.
- When replacing a toilet bowl, it is connected to a corrugated sewer pipe and a drainage system, not forgetting the need for sealing.
- The bowl is screwed directly to the installation frame through drywall and tile using pins.
- The device is connected to the sewer system and the drain tank.
Despite the fact that the process of replacing an old toilet with a wall-mounted product takes a lot of time, the result of such a repair looks stylish and expensive. The work of installing an electronic plumbing fixture with the addition of automatic hygiene functions has much in common with fastening and connecting a conventional product, but there are still some nuances.
The fact is that to connect a smart wall-hung toilet, you need to provide it with power. For this purpose, a separate line is usually laid, since smart equipment is sensitive to voltage drops in the network.
Dismantling
Let's say it like it is - removing the old toilet with your own hands will not be easy. There are rare occasions when it is not too securely in place and all you need to do is disconnect it from the water and sewer supplies. But if you have an ordinary apartment in, then things are not so smooth, since, as a rule, the toilet is walled up in the floor, and it is not possible to get it out of there. Then you will have to break the toilet with your own hands.
When dismantling the cast iron tee, note that it has one outlet with a diameter of 10 cm for the toilet and 7.5 cm for other sewer pipes. Since you will be replacing the pipes with plastic, you will need a 5 cm bend so that you don’t have to install a reduction in the tee
You can replace such a tee due to its large dimensions - a plastic one will be more compact. It must be removed by carefully loosening it so as not to accidentally damage the intermediate tee standing on the sewer riser.
Toilet replacement process
Installation of plastic pipes
After dismantling is completed, assembly begins. They start with the riser. Insert a piece of pipe into the tee, then a revision tee. A piece of the required length is inserted into it, onto which the coupling is previously put on. When all the parts are installed, the coupling is moved upward, connecting and sealing the parts of the riser. After this, a horizontal section is assembled according to a pre-drawn diagram. The plumbing is connected, a check is made to see how the new sewer system works in the Khrushchev building. If leaks are detected, all defects are immediately eliminated.
Connecting the toilet to the sewerage system
The method of installation of the structure affects the choice of fittings for connection to the sewer pipe. Work is carried out before placing the bowl until the position of the toilet is completely fixed. The following connections are selected:
- A plastic pipe or a funnel pipe is used to secure the failure of the water seal. It is recommended to install in apartments of multi-storey buildings, where there are a large number of water intake consumers.
This is a one-piece piece. Selected according to the diameter, which must match the diameter of the sewer pipe inlet.
- Cuffs from two pipes - eccentric. The center is aligned to the side, and the pipes are connected to each other by soldering. The part is selected by length. Allows you to easily connect the device to the sewer. The O-ring at the end of the pipe fits tightly onto the sewer pipe. If it is made of plastic, no additional sealant treatment is carried out. It is not recommended to install a connecting element if the distance from the plumbing to the sewer is large.
Choose and buy a toilet online
We have agreed on DISCOUNTS for our readers in the LEROY MERLIN store.
Buying online is cheaper than buying in a store (online prices are lower)! It is very profitable, convenient and safe: you can buy any product without leaving home or visiting a store. All purchases will be delivered to your home. And if for some reason the product does not fit, you can return it to the store.
In addition, in the online store, on each product page you can see the exact characteristics and real customer reviews.
- To select a floor-standing toilet model at a discount, follow the link>>>;
- To select a wall-hung toilet model at a discount, follow the link>>>;
- To select an installation for a toilet, follow the link>>>.
Nuances of connecting to the sewer system
Assembly of plumbing fixtures will not work if the toilet bowl is selected incorrectly according to the release form. This will affect when connecting to the sewer, because each outlet has its own connection characteristics.
Release to the floor
It is possible to install a toilet with a floor outlet if the sewerage distribution runs in the floors. A special flange is attached to the entrance to the sewer with dowels. A bowl is installed on it.
Horizontal release
This method allows you to reduce the distance to the wall. The recommended condition is the installation of a rigid system for connecting plumbing fixtures and a sewer riser. But in apartments it is often replaced with corrugation.
Oblique release
Before assembling a model of a toilet with an oblique outlet, the installation site is marked, holes for dowels are drilled, the bowl is secured to the floor, and the installation is checked for tightness. The angle reduces the chance of leakage.
