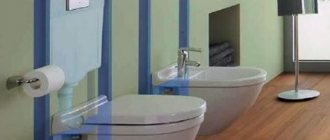
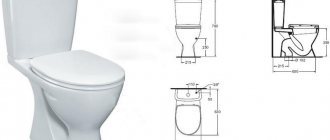
Floor-standing toilets have been out of competition for a long time, but everything is changing. Owners of modern apartments are increasingly choosing hanging models. This pleasure is not cheap, but this is practically the only drawback of this solution. But among the advantages of the design are its excellent design and ease of maintenance.
It is important that the installation of a wall-hung toilet is carried out in accordance with all the rules. We will tell you how and in what sequence the work is carried out, what devices will be needed to attach the bowl. Taking into account our recommendations, you can do everything yourself or supervise the actions of plumbers.
Required tools for installing an installed tank:
- This is, of course, a hammer drill with a 10-diameter drill.
- Bulgarian - any.
- A 13mm wrench or much better if you have a 13mm ratchet.
- Hammer.
- Crosshead screwdriver.
- Knife - any knife will do.
- Roulette.
- Marker or pencil.
- Level - preferably with magnets.
- And the most important thing is accuracy and attentiveness.
- Press jaws for metal-plastic or soldering iron for polypropylene.
- Gas and adjustable wrench and flax.
- A container of good silicone and a gun to squeeze it out.
Methods for installing a wall-hung toilet.
At the moment, two methods have been developed for attaching a wall-hung toilet: on an installation or on a concrete base. The owner of a plumbing fixture has the right to choose between these options, guided by only two criteria: if he wants an almost one hundred percent guarantee of fastening that will not come apart even under serious mechanical stress, then he needs to pay attention to installation. If the main goal is to install the toilet faster and without particularly significant material costs, then mounting on a concrete base is most suitable. Let us now pay attention to the aspects of each of these methods.
Installation of a wall-hung toilet on an installation.
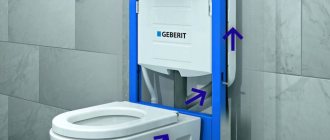
The main feature of this method of attaching a wall-hung toilet is that the device is attached to the wall using a special frame pre-installed into it, which plays the role of an installation. In order to correctly carry out fastening using this method without the help of professionals, it is necessary to strictly follow the installation plan, which is divided into several stages:
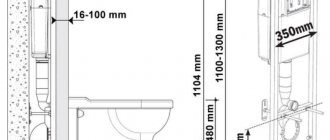
— Installation of the toilet frame. This structural component of the device is attached to the floor and main wall using dowels inserted into specially made holes. Next, at the attachment point, the sewerage and water supply pipes are removed. The installation itself must be level. Requirement for it: complete parallel contact with the wall to which it is attached. At this stage, you need to determine the height of the toilet above the floor. This figure is forty centimeters, but changes at the request of the homeowners;
— Supplying water to the tank. At the request of the device owner, the eyeliner can be supplied either elastic or rigid. Remember, while the water supply is being installed, the tank valve must be kept closed, otherwise a situation may arise with damage to the water supply;
— Connecting the toilet to the sewer system. This stage begins with the toilet outlet being inserted into the sewer outlet, and after this operation the resulting connection is secured with corrugation. To accomplish this, the bowl of the wall-hung toilet needs to be screwed onto the installation for a short time. After this, it must be removed again; the time for its installation will come at one of the subsequent stages;
— Covering the work area with plasterboard. The sheets are attached to the frame already at the moment when it is fixed to the wall. Often, the user is provided with instructions for covering with plasterboard by the manufacturer of the product, who includes an algorithm of actions included with the toilet itself. Plasterboard covering can be carried out in two ways: either by completely covering the entire area of the wall, or by covering only the area of the installation itself. See the video of covering the installation with plasterboard below.
— Attaching the toilet bowl is the final stage, its essence: hanging this component of the device on a part of the steel frame using two small pins.
As you can see, there are no particular difficulties in independently installing a wall-hung toilet on an installation; you just need to pay great attention to the installation of the frame itself, since the reliability of the entire final result of the installation depends on its successful and verified fastening.
Installation of a wall-hung toilet on a concrete base.
This method differs from the previous one in that the toilet is mounted not on a frame built into the wall, but on a concrete base created by yourself. The standard list of parts required when installing a toilet in this way includes boards, nuts, screws and washers, two rods with threads no thinner than two centimeters and a length ranging from half a meter to eighty centimeters, a plastic pipe no shorter than ten centimeters, a drain coupling and silicone sealant. In the future, the algorithm for attaching a wall-hung toilet without installation looks like this:
— two rods are mounted into the main wall. In the future, they will be enough to withstand a load of four hundred to five hundred kilograms, which is enough to firmly seat the toilet;
— the height of the toilet is set, after which you can trim and install the flush coupling;
- on the boards that will be used as formwork, places for holes for fasteners are calculated, after which you can begin installing them;
— the depth of the rods is calculated (usually it should not exceed fifteen centimeters), after which they are fixed in the wall using special glue for concrete;
- then the toilet bowl is tried on, and then you can start concreting, the result of which should be a solid block of concrete that maintains the openness of the coupling and has protruding pins;
The further process of installing a wall-hung toilet on a concrete base does not have any fundamental differences with the process of attaching a standard floor-mounted toilet. The drain is connected, the joints are sealed, the bowl is installed on rods, which are secured with nuts on top. The final touch is to install the cistern above the bowl.
What makes this method of installing a wall-hung toilet fundamentally different from the previous one is that there is no need to purchase and install an expensive steel frame. It is with the help of this method of installing a plumbing fixture that it will be possible to save a lot of financial resources.
System Description
A floor-standing toilet with a hidden flush is a plumbing device with a streamlined shape. Installed flush against the wall. The cistern in the form of a flat box is mounted into the wall. The toilet is equipped with a microlift, which ensures silent raising and lowering of the lid.
Distinctive features
Distinctive features of the system include:
- neat appearance - close to the wall without an annoying drain tank. The drain pipe, siphon, and tank are veiled in the body;
- lack of noise - the wall muffles the sounds of draining and collecting water;
- ergonomics – the device does not take up much space;
- reliability - a properly installed structure lasts a long time.
Pros and cons
The ergonomic appearance of the floor-standing toilet is the main advantage that gives preference to this model. Hidden communications enhance the appearance of the room. The next advantage is the silent drainage of water.
The design takes up little space due to the flush cistern hidden in the wall. The device is complemented with reliable components, which extends its service life.
Discomfort is caused by the inconvenience of repairing in the event of a breakdown, however, this happens extremely rarely. The model and installation are expensive, but the price is justified by the long service life.
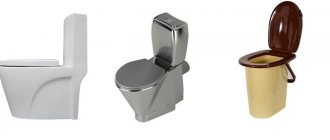
Material
Floor-standing toilets are made from materials that are used in the production of conventional products:
- Porcelain is a practical type of material, as it is resistant to mechanical and chemical influences, odors, and ease of care. Porcelain models are expensive;
- earthenware is a cheaper material, but the porous structure contributes to rapid contamination. Therefore, buy a faience toilet with a glazed surface.
- liquid metal - high cost and susceptibility to contamination are the reason for the limited distribution of models;
- stainless steel - due to its strength and reasonable price, the product is installed in public places.
Release form
Products are available in three forms:
- straight - with a horizontal pipe running parallel to the floor;
- vertical - the socket is located under the toilet;
- oblique - the outlet pipe is located at an angle of 45 degrees to the floor.
The main condition for the correct installation of a floor-standing toilet is that the size of the drain pipe matches the communication pipes.
Bowl shapes
The attached toilet is available with the following bowl shapes:
- funnel - has become widespread due to its functionality. Does not collect dirt and does not retain odors, waste immediately enters the water through the drain valve;
- the plate is an outdated model, widespread in the former USSR. Waste accumulates in the niche, which requires a large amount of water;
- half-shelf – combines the design features of the described models. It is distinguished by functionality and economical consumption of water.
Types and organization of drainage
There are three types of drain:
- cascade - streams of water, distributed evenly, wash the bowl from all sides;
- shower - water is supplied in the form of a natural whirlpool, capturing waste;
- suction - after filling the bowl with water, the drain hole opens under pressure and the water carries away the contents.
Mounting without installation
How to attach a wall-hung toilet if, for some reason, it is impossible to use the installation system for the toilet?
It’s worth mentioning right away: it’s still advisable to purchase a hidden-mounted tank. However, there is a more compact alternative - a valve that creates a short circuit between the toilet and the cold water supply riser for a few seconds. Of course, such a flush system is very sensitive to cold water pressure.
What will be the fasteners for a wall-hung toilet in this case?
They will be two studs with M20 threads, nuts and washers. Our task is to securely fix them in a wall or other structure, ensuring a maximum load of 400 kilograms, standard for wall-hung toilets.
This simple set can replace an expensive frame installation.
There are several ways to do this.
- The most universal of them is to assemble the formwork and pour a concrete stand into which studs will be pre-inserted at the required height. The width of the washers and nuts on the back side will prevent them from being pulled out of the concrete.
- A wall made of brick or even aerated concrete can be passed through with a long drill of the appropriate diameter. Then, on the opposite side, the holes are drilled to fit the diameter of the washers. After the studs are inserted and the toilet is tightened, the holes are puttied flush with the wall.
- Finally, in the case of a concrete wall, a pair of long (at least 120 mm) anchors can help out, for which the turner will have to order very specific mushroom-shaped nuts. The anchor is first tightened without the toilet installed, and only then, when it is already loose in the wall, is the fragile earthenware bowl attached.
A low concrete column with studs embedded in it became a strong mount for a wall-hung toilet.
Mounting options
Depending on the outlet design, floor-standing toilets are either attached to the wall or screwed to the floor.
Floor mounted toilet
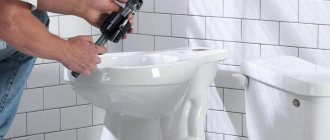
The toilet bowl must have holes for screws. The bowl is secured in such a way as to connect the outlet to the sewer outlet. Install a drainage system.
Sound insulation of sewer riser
The big advantage of a floor-standing toilet with a hidden cistern is its noiselessness, since the pipes are hidden in the design of the product, and the pipes leading to the cistern are hidden behind the wall and plasterboard partition.
To prevent the sounds of draining water from being heard in the bathroom, the sewer drain is installed outside the apartment.
If this is not possible, silent pipes with thickened walls are used. They are somewhat more expensive than conventional pipes, but last for more than two decades.
Additional sound insulation can be provided by wrapping the pipe with insulating materials: rubber, isopropylene, polyethylene foam.
Installation of a tank with a button
When choosing a hidden tank, keep in mind that there are the following types of drain buttons:
- stop drain – pressing the button causes a drain, a second press stops the flow of water;
- normal - when you press the button, a full portion of liquid in the tank is simultaneously released;
- dual-mode - an economical option, in which the first press partially empties the tank, the second - drains the water in full.
Advantages and disadvantages of wall-hung toilets
Wall-hung toilets are gaining popularity due to their main advantages over floor-standing ones:
non-standard appearance allows you to create an exclusive interior
Thanks to its design features it saves space
Hidden installation of all communication pipes and hoses will give the bathroom a more aesthetic appearance
free access to the floor covering will facilitate cleaning work
Despite the large number of positive characteristics, the wall-hung toilet has some disadvantages:
higher price for the suspension system range
quite complex installation, requiring skills in this work
hidden communications create difficult access during maintenance
Analysis of fastening methods
Construction practice indicates at least three methods of attaching toilets to the floor surface:
- standard installation kit;
- by using special adhesives;
- by installation on cement mortar.
The standard installation kit (dowel-screw) is usually recommended for use as long as it is installed on an extremely flat floor surface.
The method, from the point of view of reliability and stability of the structure, is considered acceptable, but does not completely satisfy in all cases. We usually apply the “standard” to compact models that have light weight and modest dimensions.
Another method of attaching the toilet to the floor is glue mounting, which provides a high level of joint strength. But in this case, quick dismantling of the product if necessary is excluded. Therefore, the adhesive installation method is used where installation involves long-term use of plumbing fixtures without the prospect of replacing them.
The procedure for installing and fastening the toilet to the floor by placing the sole of the device on glue. For gluing, as a rule, special adhesive pastes and solutions are used
Epoxy resin is often used as an adhesive. This glue is distinguished by high characteristics in terms of reliability and strength of fastening.
Cement mortar is often considered as an alternative to the standard and adhesive methods. In fact, this method is not much different from “planting with glue”, since cement contains an adhesive component. Meanwhile, connecting the toilet to the floor with cement mortar shows a lower degree of strength compared to special-purpose adhesives.
The choice of fastening method largely depends on the type of base on which the installation is being made. You can learn how to install a toilet on a wooden floor from the article, which covers this issue in detail.
