Metal utensils in the kitchen
Despite the fact that many housewives have long been using pots and pans made of fireproof glass or ceramics, metal cookware is still extremely popular. She has many advantages:
- heats up quickly:
- cools down quickly;
- tolerates temperature changes well;
- it is easy to care for;
- costs much less than analogues made from other materials.
True, metal pans also have disadvantages - in particular, not all of them can be repaired. Utensils are mainly used from the following materials:
- of stainless steel;
- aluminum;
- steel coated with enamel.
Important! Cast iron cookware is still used to prepare some dishes; it retains heat better and distributes it evenly. Read about what and how to cook in such dishes in our culinary blogs:
- What's better to cook in a cast iron frying pan?
- How to cook meat deliciously.
- How to cook oyster mushrooms.
- Caring for cast iron cookware. Rust which is a problem.
But, unfortunately, cast iron cookware most often cannot be repaired. But you can try to put the rest in order.
How to use enamel cookware correctly
To protect your cookware from these problems, you must always follow all the rules and regulations for its use:
- In particular, immediately after purchase, it is recommended to “harden” the new product by boiling a saline solution in it (2 tablespoons of salt per 1 liter of water). Subsequently, do not allow heating of an empty pan, or filling a heated container with cold water.
- Particular attention should be paid to kitchen appliances and fixtures. It is desirable that all kinds of spoons, stirrers, whisks, and spatulas be made of wood, silicone or Teflon.
- It is not recommended to cook viscous dishes in an enamel pan or boil milk. Neglecting this rule runs the risk of milk residues sticking to the enamel surface or unwanted sticking to the bottom of the cereal.
- Do not clean such utensils with acidic or alkaline agents , and do not allow dishes containing vinegar to be stored in them for a long time.
- Enameled utensils should be stored in cabinets designed for this purpose, on shelves where they will be protected from shocks and falls.
- The owner of dishes restored in this way must remember: no matter how much he covers up the damaged areas, its service life is still limited. Even with careful handling, repaired products will last no more than 3-4 months, after which you will have to think about replacing them.
Previous
PotsMethods for cleaning enamel pans from carbon deposits
Next
PotsMethods for cleaning pots from burnt jam
Brazing Solder
Repairing pans using a bolt is the simplest method, but it is not suitable for every case. For example, it is unlikely that it will be possible to repair a curved surface this way. In this case, you will have to solder, and you need to use hard solder - that is, do the same as tinkers used to repair metal utensils on the streets and markets.
You need:
- tin plate;
- tin solder;
- flux;
- sandpaper;
- file;
- high power soldering iron.
Tinned sheet metal is used to make AA battery cases - from there you can take it and use it in this way:
- Sand the area around the hole until the enamel is completely removed and only bare metal is left.
- Apply flux.
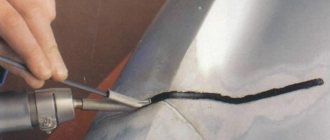
- Tin the damaged area with a soldering iron using hard solder.
- Cut out a patch from tin.
- Tin it in the same way.
- Apply a patch to the hole.
- Warm it up with a soldering iron.
- Wait for the solder to melt.
- Press the patch onto the outside of the pan.
- Remove excess solder - this is done with a file.
Solder must be applied in a thick layer - no less than 5 mm. With such a repair, the patch will not fall off for quite a long time. You can cook in a saucepan, but not too often.
Important! Lead is toxic, so if you plan to cook in a pan in the future, use pure tin as solder.
Advantages of welding stainless steel with argon
Repair of various stainless steel products is carried out using an argon arc. This process brings with it a number of advantages.
- The seam is of high quality, reliable and durable, and all thanks to the complete absence of pores.
- The products are externally aesthetic due to the characteristics of the material and careful welding.
- Thanks to the use of argon, it becomes possible to repair metals with different compositions: bronze, nickel, carbon steel, titanium, brass, and so on.
- This type of welding can be used even when working with metal sheets of small thickness.
- Argon is used to protect products from high temperatures.
- The process takes place without the use of filler wire.
- Argon is supplied manually or automatically.
- You can observe any stage of welding.
- There is no splashing of metal particles.
- Any plane is suitable for argon welding.
- There will be no slag in the seam.
- Speed of the process.
- The need for minimal technical equipment.
The only downsides are the difficulty of performing the work and the need to purchase high-quality, expensive equipment. It is also important to be able to properly configure the device so that welding is fast and efficient.
Restoring enamel
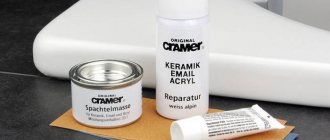
How to repair an enamel pan if there is no hole, but the enamel has chipped? We need to restore the enamel. To do this you will need putty, which you can make yourself. You need:
- kaolin – 225 g;
- trephine – 60 g;
- calcined borax – 40 g;
- sodium silicate – 30 g;
- powder glass – 20 g;
- slaked lime – 20 g;
- water – 10 ml;
- capacity;
- mortar and pestle:
- pharmacy scales.
All ingredients can be purchased at chemical stores, but it is easier to do this through an online store. Grind the ingredients thoroughly and mix. Then follow this procedure:
- Clean the surface and dry it.
- Degrease the area where you will apply the putty.
- Apply putty.
- Let it dry for two days.
Quartz sand enamel
There is another type of homemade enamel. For it you will need:
- casein;
- sodium liquid glass;
- borax;
- quartz flour;
- crushed glass.
Here's what needs to be done with all this so that the repair of an enamel pan gives the expected result:
- Combine 12 parts casein, 6 parts liquid glass, 10 parts borax, 14 parts quartz flour and 5 grated glass.
- Mix everything well, add a little water to make a homogeneous dough.
- Prepare the enameled surface in the same way as in the previous case, that is, strip it down to the metal and wipe it with acetone or gasoline, and then dry it.
- Apply the composition you prepared, rub and let dry.
- Then sand it smooth and nice, and you can use it.
Damaged enamel on a pan - is it acceptable to use?
Often, erased enamel is discovered when washing a pan with abrasives or hard sponges. In addition, a piece of enamel may break off after falling or hitting a hard floor (for example, tiles).
So, as a result of such actions, the crack can go further, and the damaged area will expand.
If the outer wall of the vessel is damaged, you can safely continue to use it and not try to restore it.
But if she is damaged from the inside, this can lead to:
- the rapid appearance of traces of rust in such areas, and, as a result, its transfer to food;
- the appearance of harmful oxides and other harmful reactions after contact with organic acids during the preparation of plant foods;
- the formation of chemical components during heating of the vessel;
- unpleasant aftertaste of the prepared dish;
- accidental ingestion of an enamel piece into the body.
If the pan is poorly coated, it may contain heavy metals and other bad substances.
“The enamel coating performs a protective function, but if even a microscopic piece breaks off, unpredictable consequences can occur. In this case, such utensils can be used to wash vegetables and fruits, but they are definitely not suitable for cooking!”
Big hole
But what should you do if a large hole has formed in your favorite saucepan, for which there is simply not enough tin from the battery? You will need a piece of copper, that is, a copper plate. Also very useful:
- needle file;
- file;
- sandpaper;
- gasoline or acetone;
- soldering iron;
- tin;
- rosin;
- flux.
Before applying the patch, everything needs to be carefully prepared:
- Wash the pan thoroughly.
- Clean the damaged area from all deposits and rust, if any.
- Clean the plate too until it shines.
- Wipe both surfaces with acetone, gasoline, and white spirit.
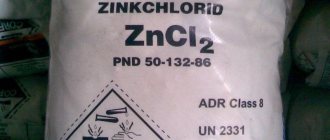
- Apply flux or treat the surface with soldering fluid (available at any hardware store).
- Warm up your soldering iron.
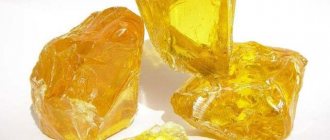
- Place the sting in rosin.
- When a light smoke appears, you can start.
- Pick up solder - you need to hold the tip until a film appears.
- Apply solder to the repair area.
- Level it from the outside and inside of the pan.
- Gradually apply pieces of solder and smooth out until the hole disappears.
How to prepare a soldering iron?
If you have already dealt with a soldering iron, repairing a pan will not seem difficult to you. For those who have decided to do this for the first time in their life, it makes sense to first prepare a soldering iron. It needs to be tinned:
- Clean the tip - this can be done either with sandpaper or a file.
- Warm up the device by plugging it in.
- Rub the tip over the piece of rosin.
- Separate a little solder with the heated tip.
- Making circular movements, ensure that the tin spreads evenly over the entire tip - the end should be coated on both sides.
- If you don’t get an even layer, repeat the procedure, but try to clean the tip as best as possible.
Important! If you notice a blue film on the prepared soldering iron, it needs to be cooled.
Can it be used?
You can use the pan, but not right away. It must first be prepared. This is done like this:
- Wait for the solder to cool.
- Clean the soldering area so that the patch does not stand out too much.
- After this, you can try to boil the water - if you did everything correctly, the pan will not leak.
Important! Well, the utensils are saved, it’s time to check whether milk will flow out of it. By the way, if you still don’t know in which pan it is better to cook milk, we will tell you in our article: “In which pan is it better to cook milk porridge.”
other methods
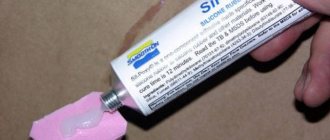
In some cases, it is better not to solder metal surfaces, but to glue them together. True, you won’t be able to cook food in sealed pans; this will only work as a bucket. But just in case, you need to know these methods. Adhesives suitable for you:
- BF-2;
- BF-4;
- epoxy.
BF-2 and BF-4
These adhesives are made from phenol-formaldehyde resin, so cookware repaired with their help is not suitable for cooking. The method of application is simple:
- Clean surfaces thoroughly to ensure no grease, rust or dirt remains.
- Treat the gluing area and patch with acetone or gasoline.
- Apply a thin layer of glue - it is more convenient to do this with a brush.
- Allow the item to dry for about an hour.
- Apply a second layer of glue.
- Let it dry a little.
- Place the surfaces against each other (for example, a metal plate to a hole), press.
- Place the product in the oven and heat for an hour.
Epoxy adhesive
This solution consists of several components. He has:
- epoxy resin;
- dibutyl phthalate (plasticizer);
- aluminum oxide or quartz flour;
- hardener
After the patch is glued, the product must be placed in the oven, preheated to 200°C and heated for about three hours. This is the best variant. If you don’t have an oven, you can preheat it to 120°, and then leave the pan alone for a day, after which it will be ready for use. You can store food in it, but you shouldn’t cook it.
Recovery process
As I said earlier, my mother asked me to buy epoxy resin. It is a safe substance for restoring enamel on dishes. So, mom did the following.
It is necessary to carefully fill each chip with resin and let it dry. As soon as the treatment area is dry, you need to thoroughly clean it with wax paper. Don't be afraid to put in some effort to even out the surface of the enamel where the resin is located.
Now you need to let the resin dry completely. After this, my mother carefully sanded the area of the former chip using sandpaper. It is important that the edges of the treated area are flush with the surrounding area. But you need to be careful not to accidentally damage the surrounding enamel.
How to seal a pan with a hole at home - the best ways
When your pan starts to leak, you can try sealing it. This method will allow you to increase the life of your cookware. You need to know how to properly seal a pan so that high temperatures and liquid do not cause another hole to form.
You will need
- copper plate;
- solder;
- sandpaper or file;
- flux, gasoline or “soldering acid”;
- soldering iron
Repair steps
1. Use a small piece of aluminum solder wire or tin solder if the hole is small. If the hole is large, it is recommended to use a piece of copper plate or patch that is slightly larger in size than the hole.
2. Before soldering the utensils, you need to clean the surface of the bottom with a file, sandpaper or file so that the metal is visible. There should be no plaque on the pan, and the copper plate should be polished to a shine. After this, use solvent or gasoline to degrease the surface, then use flux to lubricate the dishes, you can take a brush. In this method, flux is used to completely clean grease stains, as well as remove oxide films from metal. Some people use "soldering fluid" or "soldering acid" instead of flux.
3. Heat the soldering iron and dip it in rosin or ammonia powder - this will clean the device from metal oxides. When light smoke appears, you can begin repairs. Touch the solder with the tool until it becomes covered with a shiny film. Next, transfer the solder on the tip to the soldering area. The entire damaged surface of the bottom of the pan must be tinned with solder.
4. Small holes can be completely covered with solder. If a plate is used, then solder must be applied around the hole, carefully leveled and a patch applied on top. You can once again heat the entire surface of the patch with a soldering iron so that the plate sits firmly in its place.
5. When the solder has cooled, use a damp rag to wipe the surface, then take a sandpaper and clean the repair area.
6. How to seal an aluminum pan? It is very difficult to solder such dishes. Immediately after cleaning the weld area, you need to quickly pour in pre-melted rosin so that an oxide film does not appear on the surface. For soldering, a very high-quality soldering iron of at least 100 W is used. Take solder from 80% or 95% tin, and also 20% and 5% bismuth. Use stearin or paraffin flux. If you comply with these conditions, you can easily seal an aluminum pan.
- We recommend reading: How to clean stainless steel spoons and forks at home - the best ways
General tips and tricks
It is better to take solder with a high percentage of tin, but not less than 80%. The other part of the solder should be bismuth and various additives. The best flux for soldering enamel cookware is stearic flux or, in extreme cases, paraffin flux.
An important component for the successful performance of work related to soldering an enamel pan is a powerful soldering iron with a wide tip. In this case, the power of the soldering iron must be at least 100 W. Otherwise, you won't be able to heat the metal well enough, and the solder won't stick to it properly.
And, of course, proper preparation of the metal surface is very important for successful work. It must be absolutely clean and dry, since the quality of soldering of enamel cookware at home largely depends on this.
