No one is immune from car breakdowns on the road. But, if you can easily fix some breakdowns yourself, for example, replace a wheel, then in other cases the driver of the car panics and does not know what to do.
So on our roads you may well puncture the tank of your car, and in this case, it is likely that you will not reach your destination. Let's consider what can be done in this case, how to repair the gas tank yourself, so as not to resort to the help of a tow truck, especially since this trouble can overtake you in a place where big problems can arise with technical assistance.
How can you tell if your car's gas tank is broken?
First of all, let's figure out how to determine that the gas tank of your car is damaged.
A sign of damage to the gas tank may be a strong smell of gasoline in the car interior. If you smell this smell, pay attention to the fuel level readings. If the level drops noticeably faster than it should, the gas tank is broken.
We get out of the car and inspect the gas tank to identify a breakdown. When a breakdown is found, there are three ways to solve this problem.
DIY gas tank repair
The first method is used when the breakdown of the gas tank is quite extensive and the design of the tank itself allows this repair to be performed. In this case, the breakdown can be tightened with a regular bolt onto a nut, onto which a rubber pad is placed.
And this is done like this: we widen the hole to the size of the bolt, put a washer on the bolt and install the rubber gasket that we previously cut out. We place a bolt through the neck of the tank onto the prepared hole and screw it in, and only then install a gasket, washer and tighten the nut on the outside of the bolt.
Of course, the best option is to use gasoline-resistant tires, but a tube from a truck will do. There is no need to use raw rubber, which will quickly dissolve in gasoline and the repair of the gas tank will have to be done again. When you arrive home, you can put it all in decent shape, i.e. counteract, remove excess threads and paint over the repair area.
This method of repairing a gas tank is widely used by truckers, and they know a lot about car repairs. Moreover, such repairs will allow you to use the gas tank for many more years, since there will definitely be no more damage to the gas tank at the place where the work is carried out.
Second way. If the gas tank puncture hole is not too large, then it can be repaired using ordinary Moment glue. The only thing you need to remember is that the glue must be domestically produced; Western samples will not cope with such a task. We saturate a piece of fabric with glue and apply it to the hole.
Since the glue takes a long time to dry, and we have no time to wait, after applying the fabric to the sample, we spray it with nitro paint, which should be in the repair kit of your car. This will be enough to get to the service station.
Third way. If your car has a carburetor engine, that is, a car that has a diaphragm-type fuel pump, then in the event of a breakdown of the gas tank, you can not perform any repair work at all, but simply take a larger plastic bottle, pour gasoline into it and then remove the flexible hose from the fuel pump that goes into the fuel tank, and insert it into the prepared plastic bottle.
It would be nice to secure the bottle near the cooling radiator and just like that, you can safely drive to a car service center. If you don’t have any bottles at hand, you can use the washer reservoir for this purpose.
Cold welding gas tank repair
A good way to urgently repair a gas tank is cold welding.
With this method, the broken hole in the gas tank is sealed with epoxy resin: first we clean the repair area, mix the epoxy with a hardener, if you need to warm it up, you can put it on the engine so that the glue can heat up, stir it again, take a suitable rag, thoroughly saturate it with glue and apply it to the hole in the tank.
And in this case, for some time you will save yourself from problems with a breakdown of the gas tank, and if you performed the cold welding efficiently, then you don’t even need to contact a service station for help.
A car breakdown can happen anywhere. If you notice that the fuel tank of your car is leaking, then the problem must be partially eliminated on the spot. This way you can get to either a service station or a garage, where the problem can be completely eliminated. How? The answer is given below.
- General safety rules
- Plastic Gas Tank Cold Welding
- Adhesives (sealants)
- Hot soldering iron
- Repair using “cold welding”
General safety rules
If the fuel tank of your car starts to leak, and you decide to carry out the repairs yourself, then you need to adhere to the following rules:
- Before starting repairs, drain all fuel (put the car on a jack and drain the gasoline using pipes);
- Dry the fuel tank thoroughly;
- If necessary, remove the tank (it all depends on the location where the hole occurred);
- Check the entire tank to see if there are still holes somewhere.
Plastic gas tank
Most often, in plastic gas tanks, longitudinal cracks appear on the body of the tank itself or at the place where the tank halves are welded. There are several ways to patch such a container.
Cold welding
Whether it will be possible to repair a fuel tank by cold welding depends on what kind of plastic the tank itself is made of. If soft plastic was used, then it will be more effective to solder the hole, since cold welding will not “fall” due to poor adhesion of such plastic. If the plastic is hard, then you can safely buy cold welding. Use it according to the manufacturer's instructions. Car owners do not give a clear answer as to how durable such treatment will be.
Remember! When sealing a hole in a fuel tank using cold welding, it is very important to thoroughly dry the surface to be treated.
Before applying the weld, you need to clean the surface of the tank so that it is clean, slightly uneven, so that the adhesion is more reliable. Cold welding must be labeled as “gasoline resistant” on the packaging, otherwise the work will go down the drain.
We recommend: The best rust converter for cars
Adhesives (sealants)
To seal a plastic gas tank, you can use fiberglass and epoxy resin. Before sealing, clean the surface, then apply a layer of fiberglass and impregnate with resin. Allow the surface to dry, then repeat the procedure. At the very end, treat the surface with an anti-corrosion agent. The entire procedure may take you about 4 hours.
If such a problem happens to you on the road, you can use Moment superglue and a piece of rag to seal it. You need to saturate and apply layers to the hole one by one. This method will help you get to the nearest service station.
Did you know? Today the world is concerned about the problem of environmental pollution from automobile exhaust.
Therefore, the Israeli company Solon invented fairly environmentally friendly gasoline Gold-95 , which produces extremely few harmful emissions into the atmosphere. Also, the price of this gasoline is comparatively lower than other types of fuel. The use of such fuel does not affect the condition of the engine in any way.
Hot soldering iron
The most effective repair method is to solder the gas tank, even if it is plastic. For this you need:
- Soldering iron (200 W power);
- A piece of plastic;
- Alcohol ;
- Metal mesh (1 mm pitch);
- Sandpaper;
- Brush;
- Metal scissors;
- Electric jigsaw.
Important! When sealing a plastic gas tank, you need to use the same plastic from which the gas tank itself is made. Otherwise, different types of plastic will not connect, and the flow will continue.
Soldering the fuel tank occurs as follows:
- Using metal scissors, cut out the desired piece of mesh;
- Sand the surface;
- Wipe the mesh and surface with alcohol;
- Heat the soldering iron, place the mesh on the plastic, solder it (hold for 2 - 3 seconds, both materials should be connected, it is not necessary to fuse the mesh completely);
- Clean the patch, degrease it, apply it to the hole and start heating it (the patch needs to be completely fused with the mesh and the tank);
- Hold the soldering iron for 3–5 seconds, otherwise the plastic will be pressed through, and after the patch has cooled there will be no more holes.
Metal gas tank
It is quite possible to repair a metal gas tank yourself in several ways.
Repair using “cold welding”
The principle is similar to repairing a plastic gas tank. First you need to clean the surface from dirt, after which you need to clean the surface and degrease it. Do not degrease the surface of the tank with gasoline, as it forms an oil film.
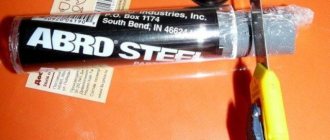
First you need to buy a special cold welding for metal . Before use, you need to cut off a piece of this weld, knead it well with wet hands (or gloves), and then cover the hole. Before using the car, you need to wait until the welding polymerizes.
Remember! Due to constant vibration during vehicle use, a hole that was treated with cold metal welding may disperse again. Be careful.
How to solder a gas tank
To seal a steel gas tank you will need the following:
- Gas-burner;
- Soldering iron (300 W power);
- Solder;
- Flux or rosin;
- Soldering acid;
- Sandpaper;
- Copper plate (length and width 2 - 3 cm larger than the size of the crack);
- Drill with wire brush or grinder;
- Alcohol;
- Brush;
- Paint with anti-corrosion effect.
First of all, clean the pothole area of paint and dirt (use an angle grinder or drill with a wire brush/coarse sandpaper). You can capture 4-5 cm more than the damaged area.
Next, use the prepared copper plate.
Note! If the hole is located on the curved part of the gas tank, then you need to shape the plate so that it fits as tightly as possible to the surface of the tank.
Clean the plate with sandpaper and treat the surface and patch with alcohol. Turn on the soldering iron and let it heat up to such a temperature that the solder melts easily. Apply acid with a brush to the surface of the tank, then apply flux or put rosin.
Dip a soldering iron into rosin and solder, then press it onto the flux or rosin applied to the tank. After melting the rosin, smoothly work the soldering iron into the tank until the solder covers the metal. Treat the patch the same way, but without acid. After tinning all surfaces, you need to press the patch to the repair site, then press the soldering iron to this place for 5 - 15 minutes. Wait for the solder to melt on both parts. After this, press the patch, do not let it move. When the surface has cooled, treat it with paint.
Interesting fact!
Toyota automaker has begun producing cars that run on hydrogen fuel. Such cars are positioned as additional means of transportation for those who do not want to pollute the environment. Hydrogen fuel is much cheaper than other types of fuel, environmentally friendly and much more calorific than gasoline and diesel. The designers believe that such cars will help save the planet from car exhaust.
Alternative methods for repairing a gas tank
To repair a gas tank, you can use not only, for example, liquid metal welding. There are other methods that are applicable in extreme conditions.
The patch can be installed using a rubber gasket and a nut bolt. Start by widening the hole to the size of the bolt. Place a rubber gasket on its narrow part. Pass the entire structure through the neck into the hole. Install the cuff and washer on the outside, then tighten everything with a nut. Take gas-resistant rubber, but if you don’t have it, you can use a piece of inner tube from a truck. If you make such a patch in good faith, it can last about 5 years.
The gas tank can be replaced with any bottle! This method is acceptable for carburetor cars. You need to fill a plastic container with gasoline, immerse the hose that goes to the tank from the gas pump into it, then securely fasten the container so that it does not tip over. This way you can get to the nearest service station.
Damage can be eliminated with laundry soap. This method is applicable in case of surface problems. You should pay attention to the method of repairing an aluminum tank. To do this you will need aluminum solder, a gas torch, a wire brush and alcohol. As before, you need to treat and degrease the surface, heat the metal with a torch, and then fill the damaged area with it. Continue to heat the hole so that the solder does not cool down, while at the same time scrub the metal of the tank with a brush to remove the oxide layer. Otherwise, the solder will not bond well to the aluminum.
It will be useful for any driver to know how to repair a fuel tank. This way, you won’t be caught off guard by any gas tank breakdown, even if you’re far from civilization.
Subscribe to our feeds on social networks such as Facebook, Vkontakte, Instagram, Pinterest, Yandex Zen, Twitter and Telegram: all the most interesting automotive events collected in one place.
How to detect damage to the gas tank
Most vehicles have a fuel tank located on the bottom, which increases the risk of damage when driving over rough terrain or poor quality roads. A simple blow to the gas tank can cause a dent in it, but targeted pinpoint damage will result in a puncture. The following factors indicate that the gas tank is broken:
- The smell of gasoline began to be clearly felt inside the car;
- The fuel level needle began to approach zero faster than usual.
We recommend: Polishing and grinding discs
If you notice signs of a breakdown in the gas tank, you should stop the car and turn off the engine. After this, carefully inspect the gas tank for damage and leaks. When they are found, you will need to act, depending on the specific situation. Below we present several ways to repair a fuel tank yourself in road conditions.
What material is a car gas tank made of?
Fuel tanks are a dangerous structural element of a car. The safety of using the vehicle depends on its tightness. In addition, leaks from the gas tank reduce fuel efficiency and affect the environment.
Fuel tanks are made of metal (steel or aluminum) and plastic. Steel tanks are often installed on trucks and cars that run on methane. Gasoline engines are produced complete with an aluminum firebox. Plastic fuel tanks are suitable for all types of fuel, inexpensive, easy to maintain and repair. The share of cars with a synthetic tank is 2/3 of the total.
Repairing a cracked metal gas tank
In order for gas tank repair to be not only competent, but also safe, certain rules must be followed. They boil down to the fact that all additional equipment will need to be dismantled, the fuel drained and the container washed.
When repairing a cracked gas tank, it is necessary to drain the fuel, remove the container and wash it.
How to remove the gas tank
Removing the gas tank involves removing the hatch, cable, neck, fuel sensor and pump. The list of certain elements, as well as the process of dismantling them, depends on the specific car.
Tools you may need:
- pliers;
- side cutters;
- screwdriver;
- wrench or socket of appropriate size.
Sequence of actions during dismantling:
- First, the remaining fuel is drained. For this purpose, the design of the tank has a special hole in the lower part. To prevent fuel from spilling on the ground, prepare the container in advance. If there is no plug, gasoline can be drained using a hose and a pump bulb.
Before removing the gas tank, it is necessary to drain the remaining fuel.
- After emptying the tank, disconnect the connector, which is responsible for connecting the wires to the fuel level sensor. This connector may be located under the rear seat or in the luggage compartment. The element can be separated by snapping off the special tab. After this, disconnect the ventilation hose located at the bottom of the tank.
After the fuel has been drained from the tank, remove the connector with the fuel sensor wires, as well as the power supply to the fuel pump.
- Using a screwdriver, loosen the clamp of the fuel supply hose and tighten the tube. If the hose does not come off, try turning it in different directions.
One of the stages of dismantling the gas tank is the removal of the fuel hoses, for which the fastening of the clamps is loosened
- Removing fasteners. To do this, unscrew the nuts that secure the clamps securing the gas tank to the body, and then remove them from the studs. The free side is lowered, then the second side of the fastening is released.
To dismantle the tank fastenings, unscrew the nuts securing the fuel tank clamps
- Remove the gas tank filler cap by simply unscrewing it. After this, the tank is moved to the side to release the neck from the rubber seal.
To remove the gas filler neck from the seal, you will need to remove the plug.
- The ground wire is disconnected from the tank body. It is secured with a nut, which must be unscrewed with a wrench of the appropriate size. There are no longer any elements holding the fuel tank in place and it can be removed from the vehicle.
When nothing interferes with dismantling the tank, it is removed from the car
Cleaning the gas tank
After the fuel has been drained from the tank, it will need to be cleaned of contaminants, for example, by washing under running water using detergents. After drying the tank, it is necessary to clearly indicate the places of future work and understand whether there is a need for its dismantling or restoration is possible directly on site. Is it possible to repair a gas tank without draining the fuel? You need to understand that doing quality work, even with the slightest leak, is problematic. When all the preparatory aspects have been resolved, they proceed directly to the repair procedure.
To reveal the extent of the damage, the container must be washed and dried.
Necessary tools and materials to repair a cracked metal gas tank
Depending on the chosen repair method, the list of tools and materials used will differ. In general, you will need the following:
- tire pump for supplying compressed air;
- hose connected to a hot water supply;
- special cleaning liquids;
- petrol;
- drill;
- bolts and nuts;
- file;
- degreaser;
- sandpaper;
- primer paint.
How to solder a gas tank
One common method of repairing cracks in a metal fuel tank is soldering. To carry out the procedure, you will need a soldering iron with a power of more than 200 W, soldering acid and tin. Leave the tank neck open during operation. Let's start restoration:
- We determine the location of the leak.
- If any deformations are found, we straighten them out.
- We carefully clean the soldering area and degrease it, for which you can use any product (acetone, solvent, gasoline).
Before soldering, the damaged area is cleaned to bare metal.
- Apply soldering acid to the soldering area.
- To make it easier to tin the problem area, heat it with an incandescent lamp or hairdryer.
To apply tin, the damaged area must be heated
- We tin the metal. If the crack is large, we fuse tin in several layers until the damage disappears.
For large crack sizes, tin must be deposited in several layers
- When the soldering area has cooled down, clean it of rosin with a solvent or other means.
After soldering is completed, the area is cleaned of rosin with a solvent.
On old gas tanks, in addition to eliminating the crack, it is appropriate to clean the tank from corrosion, and then apply primer and paint.
How to brew a gas tank with a semi-automatic machine
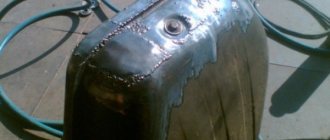
To carry out welding work on the fuel tank, you will need to pour water inside to prevent ignition of gasoline vapors. The welding site is cleaned to bare metal, removing corrosion using a wire attachment on a grinder or drill. If a large area is damaged, it is cut out, a metal patch of similar thickness is applied, and then scalded. After cooling, the container is covered with primer and painted.
Cold welding repair
When repairing a crack in a fuel tank using cold welding, the same preparatory measures are performed as for soldering (draining fuel, washing, drying, cleaning). If the damage is in an accessible place, the container does not need to be removed from the vehicle. When working with cold welding, you must take care to protect your hands, i.e. use rubber gloves. Then cut off the required amount of the composition and knead it well in your hands. As a result of the chemical process, the product will begin to soften. At this moment, it must be applied to the damaged area with great force, and then leveled.
One way to repair a gas tank is to use cold welding
For greater reliability, a piece of fabric is placed on top of the first layer, then the second layer is applied. Depending on the type of cold welding, it may require dilution with various means. In this case, it is recommended to perform the kneading procedure in a metal container.
Sealing a crack with epoxy resin
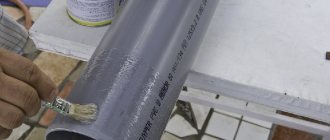
Repairs using epoxy resin are resorted to when it is not possible to carry out a full restoration by soldering or welding. All epoxy components are mixed according to the instructions. The damaged area of the gas tank is thoroughly cleaned and a layer of resin is applied to it, after which it is covered with a piece of fiberglass or a clean rag soaked in the same substance. Several such layers are applied. When the patches are dry, you can fill the gas tank with fuel and continue driving. It is worth considering that epoxy resin, as well as cold welding, has an excellent expansion coefficient and low bending strength compared to metal. This suggests that repairing a fuel tank using such materials is a temporary measure.
We recommend: Clutch repair. Repair of discs and master cylinder
How to seal a car's gas tank?
Today there are two options for gluing
- Using cold welding to seal cracks and holes;
- Epoxy glue or popularly called fiberglass. It is better to buy a two-component one.
Each method is good in its own way. Of course, you can find other ways to eliminate leaks in a gas tank, but they are less effective than the above.
Tools and related equipment
- Several sheets of sanding paper;
- Half a liter of acetone;
Epoxy resin;
Fiberglass.
First, we purchase all the above materials, carefully read the terms of the instructions for use.
Troubleshooting algorithm
- We drive the car onto a viewing hole or overpass;
- We mark the location of the leak with chalk;
We remove the fuel tank from the car;
Pour out the remaining gasoline or diesel fuel;
Be sure to dry it in the open air, since the vapors of the chemical reagent are explosive;
Using a rag and a soap solution, we externally clean the gas tank from residual tar, dirt, and other impurities;
To clean difficult-to-remove chemical compounds, we use coarse sandpaper;
Degrease the surface of the gas tank with acetone. This procedure must be carried out several times, since the quality of gluing of the gas tank material depends on how well the degreasing is carried out;
Preparation stage and epoxy bonding
For gluing, it is necessary to use glue with a viscous consistency, otherwise the effect may not be achieved.
- We cut the pieces of fiberglass so that they protrude 1-2 cm more than the perimeter of the crack or other damage. We thoroughly soak the scraps of fabric in epoxy;
- Carefully place the fiberglass cloth on the surface of the gas tank so that there are no air bubbles left, otherwise eliminate the defects;
Using a rag, remove excess glue and resin;
Smoothes the glass strip with a small piece of plastic to make the platform even;
After this, we proceed to apply the second ball and carry out a similar procedure. Depending on the degree of damage to the gas tank, the number of fiberglass balls is determined. Accordingly, minimal damage will require a minimum number of fiberglass balls, deeper affected areas will require a larger number of balls.
Note to the driver, it is necessary to remember that the quality of the rest of the structure depends on how the first layer is laid.
Each subsequent layer should be slightly wider than the previous one and at intervals of 15-20 minutes.
In addition, we impregnate the last layer with additional aluminum powder, which can be purchased at a car store.
After a day, the structure will completely dry and harden. You can sand it using fine sanding paper.
We proceed to painting or priming, depending on the need.
We use cold welding similarly to the above processes. Despite advanced technologies in the form of welding, many drivers prefer old, proven and durable methods. So the question of how to seal the gas tank has already been sorted out. A similar procedure can be carried out both in a garage and at a car service center, depending on your decision.
A fairly common occurrence that can catch the driver in the most unexpected situation. Failure of a gas tank is a serious problem that must be at least partially eliminated at the scene of the accident. This will allow you to transport the car to the nearest service center, where a major inspection and repair can be carried out. Repairing a gas tank with your own hands is not too difficult for people who have some knowledge about this.
The location of the gas tank is the lower right corner of the rear sector of the vehicle. This is due to ensuring safety for the driver and passengers, as well as the formation of the correct center of gravity in the car, which improves its handling. However, the lower section most often suffers from constant physical impact, which leads to repeated damage to all the mechanisms located here. The fuel tank is no exception.
DIY gas tank repair
The fuel tank is quite simple, and it is a reservoir that is filled with gasoline. In this case, the gas tank can be made of steel, aluminum, plastic or other materials. It is better to replace a broken gas tank with a new one; inexpensive options can often be found at various car “dismantling” sites. However, if you are on the road, it is possible to repair the tank yourself in order to get to a service point or continue operating the machine until you buy a new part.
Method 1: Repairing the gas tank with a rubber pad and a bolt
The most effective way to repair a gas tank on the road is to seal it with a rubber plug. It is advisable to use it when there is a breakdown in the fuel tank of a large diameter, and a bolt can be inserted into it. Repairs are carried out as follows:
- The hole in the tank that needs to be repaired must first be expanded to the diameter of the existing bolt;
- Next, a washer with a rubber gasket is selected for the bolt;
- Next, you will need to install a bolt through the neck of the fuel tank into the prepared hole and place a washer and rubber gasket on it from the outside and tighten it with a nut.
Important: Select rubber as a gasket that does not dissolve under the influence of gasoline. Do not use “raw rubber”, which will quickly become unusable.
It should be noted that this method of repairing a gas tank is popular among truckers. By sealing the hole in the fuel tank in this way, you don’t have to worry about its reliability. If it is not possible to replace the gas tank in the near future, it is recommended to remove the threads and paint the joints to avoid corrosion. If the patch is done correctly, the gas tank can last for months or even years.
Method 2: Solving the problem with the gas tank on a carburetor engine
Carburetor engines are actively becoming a thing of the past, but they still remain on older car models, and it will be useful for drivers of such cars to know what to do if the gas tank breaks down. The design of the carburetor with diaphragm-type fuel pumps is such that it allows you to use any container as a gas tank by lowering the hose that comes from the gas pump into it.
Find any free bottle; if there is none in the car, you can use the washer reservoir. Fill the container with gasoline and place the soft hose that comes from the gas pump into it. Please note that if you are using a bottle, it will need to be secured well to prevent it from tipping over during travel. When everything is done, you can go to the service station.
Important: Before continuing to drive, make sure there is no fuel left in the gas tank to prevent it from spilling on the road.
Method 3: Repairing the gas tank using a glue patch
If the damage to the car's tank is not very serious, you can make a simple patch on a fabric backing and secure it with glue. To do this, you will need to acquire a piece of fabric, good Moment glue and nitro paint of any color, which is often found in cars. The sequence of actions when repairing a breakdown is as follows:
- Cut out a small piece of thick fabric. If the fabric is thin, you can fold several layers;
- Next, completely saturate the fabric with Moment glue or its equivalent and apply it to the puncture site;
- Next you need to wait 2-3 minutes until the glue dries;
- Once the fabric is securely in place, treat it with nitro paint to minimize the possibility of fuel leaking through it.
Such a patch will help you get to the service center and carry out a full repair of the fuel tank.
Important: Do not replace fabric with rubber when using this method of emergency repair. When the car is moving, the rubber element will quickly peel off, while fabric reinforced with nitro paint will cope just as well with the task of sealing the fuel tank.
Method 4: Cold Welding Method
Cold welding is a great way to repair a gas tank gap. Its complexity is that the driver must have with him: epoxy resin, hardener, sandpaper and cloth. If you have all this, you can repair the gas tank according to the following instructions:
- The first step is to prepare the surface for applying epoxy resin. To do this, carefully clean the area around the damage with sandpaper;
- Next, mix the epoxy resin and hardener. If you need to heat them up, you can put them on a warm engine;
- Soak the fabric with the resulting adhesive base and apply it to the damaged area on the gas tank.
- Wait until the adhesive base dries.
In many private car repair shops, gas tanks are restored using this method, since it is quite reliable. The fuel tank can be safely used for several years after such repairs.
Communities › Kulibin Club › Blog › a simple way to solder a gas tank
video of a simple method of soldering a gas tank - maybe someone will be interested?
Comments 49
I impregnated the fabric with epoxy glue and glued it! And here the tank must be washed
Why have stores stopped selling cold welding?
Why have stores stopped selling cold welding?
Well done! passes! Have you tried heating it with a gas burner? wouldn't it be faster?
Well done! passes! Have you tried heating it with a gas burner? wouldn't it be faster?
There is a gas canister with a screw-on burner, but at work the electricity is free!
It felt like they were shooting at the tank with a shotgun. And it’s also not clear how to do it without acid?
Why are you all stuck on acid! If you don’t know how to solder without it, it doesn’t mean you can’t solder without it!
It felt like they were shooting at the tank with a shotgun. And it’s also not clear how to do it without acid?
Solders well and holds up well
No! - I wouldn’t do that...
This is not the first year I've done this
same question. Anyone needs to be treated with acid. I soldered like this www.drive2.ru/cars/toyota...3102/journal/911824/#post so far the flight is normal
acid removes the oxide film from the metal! and if the metal is heated enough, the tin will lie very well! But we don’t solder with acid! bad effect on soldering! (only in extreme cases)
How do you solder without flux or acid? This is impossible.
if the metal is well heated, the solder will fall very well and easily! Rosin flux and acid are only assistants!
if the metal is well heated, the solder will fall very well and easily! Rosin flux and acid are only assistants!
I agree 100%!
Damn, I was waiting for the explosion)))) What a bummer))
I personally saw how exactly this method caused a friend in a place with a tank to fly 10 meters away from the fumes! although the tank has been evaporated and treated with special chemicals! VERY SHORT! Why not just make hatchets with mesh?
Source
Causes of gas tank cracks
On most cars, the gas tank is located in the rear (right, left, under the rear seat). This design feature is explained by safety for passengers and the driver. In addition, vehicle handling is improved. However, the rear part of the body is quite often exposed to external damage during the operation of the car, as a result of which the gas tank also suffers.
The most common cause of cracks is mechanical stress leading to holes in the container. Considering the quality of Russian roads, sometimes even a slight impact is enough to cause a hole to form.
Significant causes of damage also include metal corrosion, which is an inevitable process. The more mileage a car has, the higher the likelihood of this type of problem. Less common are power system faults. Since a rarefied pressure is created in the middle of the tank as fuel is consumed, this affects the condition of its walls. During operation, small cracks may appear on them, and as a result of their enlargement, leakage occurs. This situation indicates the need to repair the gas tank.
One of the reasons for gas tank damage is corrosion.
What to do if your tank leaks
The appearance of a crack, hole or any other type of damage to the gas tank is typical not only for domestic cars, but also for foreign cars. When the seal of the tank is broken, it is necessary to fix the problem as soon as possible. Operating a vehicle with such a malfunction can lead to disastrous consequences, and danger threatens not only those in the car, but also those around them. Due to the fact that the fuel tank is a simple structure, restoring the tightness will not be difficult. However, much depends on the degree of damage and the feasibility of such an event. Since gas tanks are made of different materials, different repair methods are used.
New technologies have many advantages
One of these elements is a plastic gas tank, which has undeniable advantages over its metal counterpart:
Weight. Plastic products are usually about 3 kg lighter than metal structures. This indicator is especially taken into account in the world of auto and motorsports, in the production of sports cars and motorcycles, where there is a persistent struggle against excess weight; Anti-corrosion resistance. Corrosion does not threaten plastic products, unlike metal ones. No matter how the metal is processed from the outside, the aggressive external environment still makes its way to the structure of the substance, causing irreparable damage to it. The same problem is inherent in the internal space; the destroyed surface fills the fuel with metal particles, which contaminate the filters and other elements of the car’s fuel system; Safety. A plastic gas tank is easily deformed and takes a hit compared to iron, which, as a result of hard contact with other rigid structural elements of the car, can create a spark, which, in turn, is fraught with ignition of the fuel at best. Perhaps a sadder result is that when fuel vapors are mixed with air in certain proportions, an explosion is possible; Manufacturing cost. With an established scheme for the production of this plastic product, its price is much lower than that of iron products. Thus, the use of a plastic tank in the design of the Lada Kalina made it possible to reduce the cost of the car. It is also known that many other manufacturers use polypropylene products, for example, Hyundai, Ford, Renault, Nissan and many other well-known brands.
The photo shows a plastic gas tank. Let's talk about its disadvantages
Plastic gas tank repair
Repair using epoxy glue is the fastest. This is a temporary measure to fix a leak along the way. You can patch the hole using a plastic welder - an extruder. Welding tanks using this method requires certain experience and knowledge of technology. It is recommended to practice on a small piece of plastic before welding.
To correctly calculate the productivity of an extruder, you need to know the size of the cross-section of the crack. Welding begins from the edge of the fracture, laying the molten plastic welding wire evenly across the entire width of the hole with a small margin. For thorough welding, movements are made across the crack, completely filling the hole. In order for the seam to lie evenly, it is necessary that the hot air gun and the shoe of the device are evenly heated.
Repair using electric welding
Welding a fuel tank using a argon arc welding machine and tungsten electrodes is considered the most reliable method. It reliably connects non-ferrous metal with alloy steel. Most gas tanks are made of aluminum, so inverter welding is not suitable for repairs. The repair area is cleaned of oils and dirt. The patch is welded around the entire perimeter, trying to maintain a homogeneous gas environment. The seam is smooth and durable. After cooling, the repaired area is painted or covered with bitumen mastic.
