Decorative wood burning is an art that appeared in 700 BC. e. In one form or another it was found in almost all nations. Homeland - Peru. It came to Russia at the end of the 20th century. The technique was used to decorate nesting dolls.
The first tool designed for wood burning ran on gasoline. Due to this fuel, the platinum needle was heated . The master, burning a pattern on a wooden surface, was forced to constantly ensure the supply of fuel by controlling the foot pedal.
Burning was replaced by decorative painting. The technique, beloved by many, faded into the shadows, although craftsmen devoted to their craft continued to decorate boxes, chests, jugs, and other wooden objects.
Tools for performing pyrography [ edit | edit code ]
In the second half of the 20th century, thanks to the invention of the electric pyrograph - a device for burning (hot engraving) - pyrography developed as an independent technique not only in creative arts, but also in artistic graphics. At the same time, wood pyrography is one of the most popular (along with embroidery and modeling) types of children's and amateur creativity in many countries around the world.
Modern burning devices for contact pyrography come in two types:
- Transformer with nichrome nozzle and temperature control.
- Soldering iron type with brass nozzles (mostly they come without a temperature regulator, but there are models with adjustment. Sometimes pyrographers independently modify soldering iron burners by connecting dimmers to them.)
For productive operation, a transformer contact device for burning must have sufficient power (about 40 W), smooth temperature control (at minimum, the needle/nozzle should barely leave a mark on the surface being burned, at maximum it should be red-hot), there should be screw clamps on the pyrograph handle, which securely hold the nichrome needle/attachment. For self-production of needles/nozzles, 0.8 - 1 mm nichrome wire is usually used.
You can burn wood with a jet of flame; for this you use a gas can with a gas burner attached to it, for example, with a piezo ignition. With some skill, you can burn out not only a black background, but also shades.
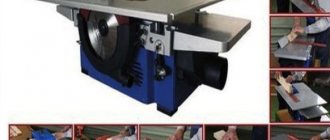
In addition, there is Novosibirsk tone pyrography, when working in this technique, instead of a hot needle, a special device is used, invented by scientists from the Novosibirsk Akademgorodok. This device is a pistol-shaped oven with replaceable nozzles of different diameters, and with a thin hose through which the pyrographer blows air into the heating chamber directly by blowing into the hose with his mouth, or by connecting it to a compressor. This non-contact burning device allows you to burn wood with a stream of hot air, like a brush [1].
Pyrography can be done using a converging lens. This is done in sunny weather. The surface to be treated is a wooden board, plywood, plastic or other similar material. For burning, the lens is positioned so that the sun's rays are focused on the surface being treated. The lens is then moved so that the bright spot moves across the surface, leaving lines. The required lens size depends on cloud cover and the height of the Sun above the horizon - the larger the lens, the stronger it burns. Usually a lens with a diameter of 5 centimeters is suitable. But too large is inconvenient because it can cause the surface to catch fire.
Read also: Do-it-yourself car battery charge monitoring
Decorative wood burning is an art that appeared in 700 BC. e. In one form or another it was found in almost all nations. Homeland - Peru. It came to Russia at the end of the 20th century. The technique was used to decorate nesting dolls.
The first tool designed for wood burning ran on gasoline. Due to this fuel, the platinum needle was heated . The master, burning a pattern on a wooden surface, was forced to constantly ensure the supply of fuel by controlling the foot pedal.
Burning was replaced by decorative painting. The technique, beloved by many, faded into the shadows, although craftsmen devoted to their craft continued to decorate boxes, chests, jugs, and other wooden objects.
Modern instrument
Handicraft circles became widespread in the USSR. Schoolchildren began en masse to attend wood burning classes for beginners. Many people still have a beautifully decorated cutting board in their kitchen. With the advent of a new type of device, burning has become accessible and safe. The scope of use of the device has gradually expanded. It was used to decorate leather, textiles, bone surfaces, and paper.
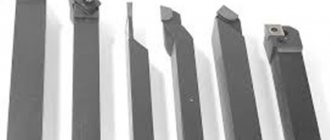
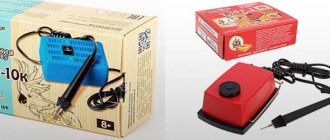
The simplest electric burner consists of:
- step-down transformer;
- handles;
- nozzles of various types: feathers, filaments.
An electric burning device does not always satisfy the structural and functional requirements. Some people prefer to replace the built-in rheostat with a more reliable laboratory transformer, which allows for better quality burning of paintings with different tone intensities .
Where to begin
It is necessary to begin the process by becoming familiar with the intricacies of applied art. You need to learn how to choose the right wooden material. It is better to give preference to soft hardwood. Poplar, linden, and aspen are well suited.
Some types of trees can withstand temperatures of 250 °C, others ignite at 120 °C. The softer the wood, the better and more comfortable the burning.
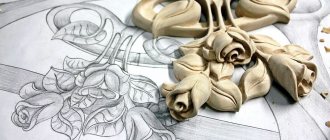
Before work, the board is processed. The surface must be flat. After this, the image is transferred using a stencil, pencil or knife with a thin tip. The sketch can also be drawn by hand.
For complex designs, it is recommended to use carbon paper. To ensure that the surface of the craft remains clean and does not get dirty from carbon paper, the design can be transferred to transparent tissue paper. Then fix the picture on wood or plywood. Brewed starch or wheat flour is used as an adhesive base. Pyrography is done directly on tissue paper, the sketch is removed after burning.
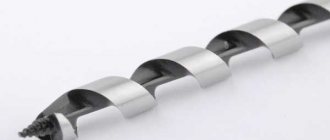
Master classes are held for beginning artists, where you can learn the basics of needlework and get advice . The first job should be a drawing, which does not require special skills. A tool purchased from a specialized store is used. On sale you can find a huge selection of replacement brackets for burning from nichrome wire with a diameter of 0.3–1.5 mm. This material tolerates thermal loads well. You can also make tips for a burning soldering iron yourself from wire.
It is necessary to prepare a stand made of non-flammable material for the working tool: a ceramic plate, a mug, a glass made of thick glass. You need to turn on the device in advance, placing it on the stand: the nozzles heat up quickly.
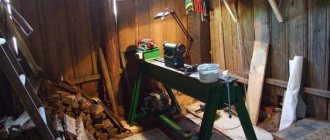
Upgrading a wood burner, need help
Tell me where to read the materiel. What is the actual essence of the question: they gave me a soldering iron, it’s simple, and therefore heats poorly. I disassembled it, hoping to see the circuits and then dance from the original, but after disassembling it I saw nothing but contact insulation. After thinking a little more, I realized that the power of the soldering iron is 30W, caused by the high resistance of the heating element - tool steel. So I want to improve it - take a 220V power supply with more power in W, but I don’t know why it turns out that there’s nothing wrong with all this, but I want to figure it out. Help. Will the power supply from a PC be suitable if it is converted to 220V instead of 12V?
Possible duplicates found
you go to the store and buy a soldering iron of the required power.
so there is no spiral, just a sting in the socket essentially. Now I've taken up the question of how to make a power supply from scratch with 220V parameters and the ability to change the power in watts
hmm, so there is definitely a spiral made of very thin wire, the insulator looks like it really is ceramics with foil. change the spiral?
Well, for example, copper wiring with a slightly larger cross-section?
Well, I can also get nichrome wire
yeah, it's crazy. I figured it out - the temperature of the tip of this soldering iron depends on the winding resistance. What happens if I reduce the resistance by cutting the wire a little and stretching it to the same length?
If you can, try it. That's what they do.
On the one hand, the spiral will heat up more and may burn out. But on the other hand, the burner is not a soldering iron and its operating temperature is lower, i.e. the spiral works with under-coil and its winding is permissible.
But, I wrote below that in this case you will probably destroy the mica insulation and get a device that will receive an electric shock.
you can always buy
Well, you can even return it, there were no seals, just return it, for example, under the same guarantee. but it’s not that interesting. Since I missed it as a child and I don’t know physics well, it means I have to catch up from the beginning
A simple guy decided to create an ordinary perpetual motion machine, i.e. The transformer includes 220V of normal power and comes out with 220V of increased power, it’s simple.
It’s not clear whether you need a soldering iron or a burner?
What's not to like about this?
What do you want to receive?
It burns wood poorly, practically in no way, you have to keep it in one place for a long time, the only plus is that there are nozzles
I'm afraid that it will be a little difficult to bring this device to life!
The power of the burner is determined by its heating element.
If it is made of nichrome wire, it would be possible to wind several turns. But at the same time, you will probably destroy the mica insulation and end up with a deadly electrical appliance with damaged electrical insulation - I do not recommend doing this.
If the heater is ceramic, most likely there is nothing to do there at all.
If there is some other heater (for example, a powerful resistor, which is unlikely), then nothing can be done at all.
As an option, turn on the burner through an autotransformer to increase the voltage. But this risks burning out the heater of the burner, and the LATR itself also costs as much as two normal burners.
You can probably study the design of this device and convert it to low voltage, but you will need a power supply.
Burning methods
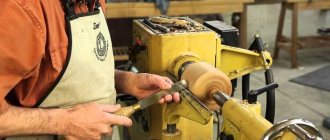
Burning on the board begins after the soldering element of the pyrograph heats up to the required temperature. Uneven heating of the tip at the moment of burning indicates a malfunction of the tool or the need to change the working attachment. To avoid overheating of the burner, it must be turned off periodically.
Read also: Structure and features of the technological process at the enterprise
It is impossible to erase or remove the drawn lines - you need to avoid blots and mistakes. For convenience, the wood is fixed at an angle; the working hand with the burner is provided with stable support.
Volume is added to artistic work using shades. They are achieved with lines of different thicknesses and varying intensity of burning. The faster the hot tip moves along the board, the thinner the burnt outline is obtained. You can adjust the shade of the drawing by varying the temperature of the pen. The larger it is, the darker the pattern turns out. It is necessary to burn out easily, without pressure, sudden jolts, or long stops.
If you need to apply a stroke at an angle, then draw it from top to bottom, without burning through the wood to its full depth. You can pre-form the recesses with a chisel. Create a decorative background for the picture using shaped nozzles.
Instructions for Beginners
- You need to take a comfortable position. Your back, neck, and arms should not get tired when working. The board is placed on the table in such a way that any part of the drawing can be easily reached.
- It is recommended to start with the outer lines: errors on them will not be so noticeable (and they can also be sanded). Then you should move on to the main part of the drawing, and only after its completion - to the secondary fragments.
Burning is carried out in several areas of the canvas at once, one at a time.
- After burning is complete, you can paint the image or varnish it.
Things to remember while working:
- Hand movements must be precise.
- The speed at which the tool is passed through wood and the intensity of pressure affect the thickness of the line and the depth of color.
- Soldering iron attachments allow you to produce lines of different shapes and thicknesses.
- The attachments must be periodically cleaned of carbon deposits using a sanding block.
- The nozzle should only be touched with pliers during operation.
Wood burning, also known as pyrography, is gaining increasing popularity among people of all groups and ages. And this is understandable, because pyrography is not only an exciting activity, during which imagination and skill develop, but also a wonderful gift for family and friends in the handmade style. Wood burning is accessible not only to experienced wood burning gurus, but also to beginners. We will tell you in more detail below how to burn wood correctly with your own hands for beginners.
How to choose the right burning tool for beginners
The first step in mastering the art of burning is to purchase a burning device, ideally if such a device will be powered by electricity. You also need small planks or pieces of plywood, cut to the desired shape. You don’t have to cut them yourself; it’s enough to purchase several options in specialized stores. By the way, they also sell wooden figurines of various sizes and shapes, ready-made boards in frames, with sketches printed on them from the most basic to incredibly complex images.
When choosing a burning device, many people wonder whether it is possible to burn wood with a soldering iron? Our answer is, of course you can! This is the easiest way to burn wood patterns at home, accessible to everyone.
The only difficulty in finger burning is that you need to use soldering irons of different diameters. But if you decide to purchase a specialized device for wood burning, rather than a soldering iron, remember that for beginner burners, the ideal option would be a pen-shaped burner, with which you will simply draw according to a template. Such a tool is usually accompanied by brackets and pins, which are placed at the base of the burner handle; they then form lines of patterns of different thickness and color.
Read also: How to correctly Miroslava or Miraslava
The wood burner should be heated to the maximum immediately before work, this will be indicated by the tip being hot to a dark red color. Carrying out burning on wood comes down to constantly changing the inclination and heat, and sometimes the size of the pen, which allows you to achieve different depths of the burnt line, which means it will differ in color. Shades of different line depths range from light brown to rich dark brown.
Making cartoons
For work we will need the following tools and materials:
- Plywood sheet;
- Sketches (pictures);
- Burnout apparatus;
- Paints;
- Tassels;
- Clear varnish;
- Copy paper;
- Sandpaper.
So, let's get to work. First, let's prepare the base. To do this, smooth the plywood sheet with sandpaper. Then we transfer the prepared sketch through carbon paper to the base.
We begin to burn the design along the contour.
Related article: Carpet needle embroidery: master class with patterns for beginners
After completing the action, we begin to paint the finished craft. We wait until it is completely dry.
Apply varnish and remove until completely dry. The picture with cartoon characters is ready!
Consider Julie Bender's sepia-toned pyrography
Using the art of wood burning, Julie conveys the smallest touches of animals so unrealistically that you feel as if you are drowning in a variety of palettes of tones and midtones. Each detail of her burnt paintings is made with microscopic ultra-fine shading and play of light rays. To create one such painting, it takes her more than one day; the master requires not only talent, perseverance and several years of experience, but also a love for such art as pyrography.
First, Julie observes the animals for a long time, absorbing every feature and shadow on their skin as they move, and then, inspired, she makes sketches on a carefully polished wooden board made of maple or thick watercolor paper using a simple pencil. Maple has a creamy tint and a slight graininess, which allows you to give the future painting a sepia color. Then, using burner tips of different sizes and shapes, he carefully works out every highlight of light, every shadow and stroke of the animal’s fur. One painting of hers, the size of a notebook sheet, sometimes takes up to several months of work! This is what it means to love your work and receive a well-deserved reward for it; the cost of one fiery work can reach 4 thousand dollars.
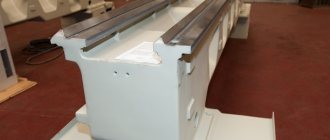
Cut the plywood
We do not use or provide cutting diagrams for standard sizes of plywood sheets, because you cannot find a sheet of plywood measuring 1.52 meters by 1.52 meters (even the first grade) without one crack, patch, knot or any other defect. And because of the individuality of each individual sheet of plywood, we choose how to cut the sheet as efficiently as possible for burning portraits.
We often burn on large-sized plywood, and then saw it to fit the format on site. Then it is convenient to cut into sheets that fit on the working field.
Learning beautiful wood burning from LeRoc
The famous South African artist, using fire and available tools, can burn portraits of people, animals, equipment, and trees. He uses a soldering iron as his main tool; previously, the favorite burning method was the flame of a lighter, nails and pliers. The pyrographer dedicates all his works to connoisseurs of nature and graffiti, because in his opinion they are components of each other.
Looking at pyrography on surfboards by Peter Walker
Peter Walker is a famous Australian pyrographer who burns his work onto surfboards. Hollow planks of wood are cut from fast-growing trees, each plank is finished by hand, sometimes with other designers involved. Peter performs burning using laser technology.
Cutting board "Scorpio"
For work you will need the following tools and materials:
- Purchased ready-made cutting board (which is intended for burning);
- Black simple pencil;
- Burning device;
- Paints;
- Tassels.
So, let's get to work.
First, we find an image of a scorpion (you can find it on the Internet or in a book). Print out the sketch. We transfer the sketch onto the finished board using carbon paper.
The burning device must be plugged into an outlet. We are waiting for complete heating. And we begin to burn out the sketch. We do this carefully.
Related article: Do-it-yourself cotton toys: master class for beginners
Don't forget about compliance with safety precautions.
If your plaque is a gift, then you can write various wishes on it if you wish. And burn it out in the same way.
Now you need to paint the finished board. To do this, take paint, a brush and water. And we begin.
On the side where the drawing is located, coat it with transparent varnish and remove it until it dries completely. That's all, our gift cutting board is completely ready.