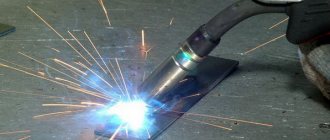
Types of machines (for wood and metal)
Depending on the operations performed, functionality and size, lathes are divided into several groups. Each has its own characteristics in design and operation. Read also: Basics of turning, equipment and professional skills, what is turning?
Universal
The universal lathe is designed for initial roughing, as well as sharpening, cutting and drilling. Also, using this equipment, carvings are applied to a wooden object.
Lathe-screw
This type of lathe is designed for processing cone-shaped workpieces and for applying threads.
Turning and milling
Most often, this equipment is used for boring grooves. If such a machine additionally contains a copying device, this will allow the work to be completed faster and more accurately. Also, such machines help to obtain objects of completely unusual shapes, real works of art.
Desktop
This equipment is suitable for domestic use only. Such machines can be located in an apartment, in a garage, in a private house and perform the most standard operations for processing wood products. It is on such machines that folk craftsmen make the most necessary and beautiful items for their interior.
How to choose a sharpening method depending on the type of cutter?
The main part consists of their cutting part for metal or wood - structural similarity. There is a mount. But controlled removal of part of a part is possible in various ways, the type of tooling depends on this.
The type of cutter is determined by the number of surfaces (there can be two or more). Surface characteristics are determined by the width of the blade and its shape; there are also variations depending on the possibility of adjustment (the direction is chosen arbitrarily). The edge is an integral design feature.
The choice of the type of cutter, that is, a specific model with technical characteristics, depends on the type of work to be done. For example, for the simplest processing of the external shape of a wooden part, one option will be needed, but for a standardized scheme for making metal carvings, a completely different one will be needed. Not only the type of cutter changes, but also the method of sharpening it.
Flat straight
Depending on whether metal or wood is used, the features of creating flat straight incisors change. The main purpose is surface treatment. But these variations are used to create small, simple holes, recesses and grooves in products. Flat straight cutters have the following characteristics:
- the ability to quickly create rectangular holes;
- blade width variations - from 4 to 40 millimeters;
- sharpening angle variations - from 25 to 40 degrees.
Detailed study of the machine
All lathes are designed in a similar way and are built from the same components. Each unit in the machine performs its own function and has its own structural features.
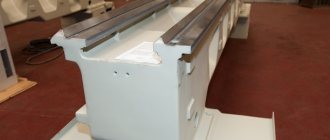
bed
This is the basis of any machine. The bed is a cast piece of equipment and prevents excessive vibration, which can lead to wear on the machine and inaccuracy when processing the workpiece.
Apron
The apron transforms the rotational movement of the lead screw into the translational movement of the caliper. The movement from the running roller is used to mechanically move the cross slide. The lead screw is necessary when cutting threads, and the lead roller is necessary for all other turning operations.
The apron contains 4 cam clutches, which are responsible for the forward and reverse motion of the carriage and slide. The apron also has a blocking device that prevents the simultaneous activation of longitudinal and transverse transmission.
Caliper
The support is designed to secure and move the cutting tool. The caliper is located on the lower slide and the movement itself is determined by the rotation of the screw.
Headstock
The spindle head is one of the main components of any lathe. The accuracy of the location and movement of the workpiece depends on this detail. The headstock consists of: a housing, a spindle, bearings, a device for controlling the movement of the spindle, a button for turning the equipment on and off. The basis for all parts of the spindle head is its body. The body shape may vary depending on the machine model.
Tailstock
The thrust head is also attached to the frame and is necessary for securing the cutting tool. This is also the support for the right end of the workpieces. The support headstock is brought to the blank along the frame guides and fixed motionless with a bolt and nut.
Tool rest or incisor holder
Another basic part for a standard wood lathe. The convenience and safety of the entire process depends on it.
Operating principle
The basis of the machine is the bed. The headstock is located on it, and the electric motor is located on the inside. The engine rotates a spindle with a Morse taper, and a tailstock (support) is attached to the opposite side of the equipment.
A tool rest, which can rotate in any direction, is attached as close as possible to the workpiece and guides the cutter, supporting it. The machine can have manual gearbox adjustment or automatic. The most modern models have a variator, which allows you to adjust the speed.
Sharpening angles: types and characteristics
Incorrect selection of sharpening angles determines the ineffectiveness of the procedure. If you do not realize the mistake and continue the action, the cutter will be damaged and you will have to buy a new one.
The cutter has several types of angles. Two main, two auxiliary and angles in projection or plan. The characteristics of each are determined depending on the shape indicators, processing quality, product typology, edge material and many other parameters.
Principal angles
There are two main angles - front and back. The front one determines the quality of work and how much chips will be produced. As the degrees increase, a greater deformation of the product results. If you increase the indicators of the second, the amplitude of vibrations increases, which negatively affects the holder.
Auxiliary angles
The auxiliaries are located on the auxiliary platform. The main auxiliary is between the direction and the cutting edge. The second auxiliary is the angle between a straight line segment that runs through the top of the plan and intersects at the edge area.
Plan angles
Angles in plan are represented by the main, auxiliary and the one located at the apex. The main one is the plane near the projection and the main line. Auxiliary - continuation of the projection in the direction of work. Located at the top - near the plane with the intersection of the main one. Moreover, if the indicators of the first and second cannot be less than zero, then this is possible for the third. Minus values are achieved if the vertex is at the highest point of the projection, while the maximum plus will be when it is at the bottom.
Measuring cutter angles
The measurement is carried out using a table goniometer, which consists of a base, a measurement sector, a moving template and a screw for fixation. The measurement is carried out according to the algorithm:
- placement on the base;
- contact between edge and plane;
- the direction of the measuring part is parallel to the edge;
- laying the template to the site.
The value is measured using a special ruler. A vernier is also used, which is combined with the side platform of the equipment. It shows more accurate measurements.
How to secure a workpiece
To secure the workpiece, it is necessary to make notches using a core. After securing the workpiece, reliability should be checked using the support headstock. If the tailstock presses the head tightly and does not deviate from the position of the bed during operation, the blank is securely fastened. Also, if fastened correctly, the workpiece should not click during operation.
Tool used
When processing a workpiece on a lathe, a master can use a variety of tools, depending on the work required. Some of them are suitable exclusively for rough work, while others are used for finishing the product. Read also: how to make wood turning tools with your own hands.
Turning chisels
Chisels are the most common and at the same time the most diverse working tools that are necessary when working on a wood lathe. Depending on their purpose, they are divided into several groups.
Reyer
This is a semicircular chisel, which is used for working with non-standard products. Used for rough turning of wood. The blade has a groove shape that allows you to remove large amounts of wood. Reyer blade length up to 30 cm.
Meysel
This is a chisel knife that is sharpened at a certain angle. Used for finishing wood turning. Using an acute angle, meisel is used for finishing the profile surface, and an obtuse angle is used for turning a blank with the formation of roundings.
Shaped tools
With the help of these tools you can give the final look to the product and also decorate it with patterns. Such tools are successfully used for boring internal surfaces.
Chisel hook
This type of tool is used for turning recesses and boring internal cavities.
Chisel-comb
The comb is used to apply artificial marks and grooves to the product. The comb also helps to apply threads to the finished product and make markings on it if necessary.
Chisel-ring
This is another version of the chisel, which is used to create internal cavities in a wooden product. The cavities can be of various configurations, at the request of the master.
Preparing the blank and installing the tool rest
Giving the workpiece a cylindrical shape
Wood of almost any species can be suitable for processing on a lathe, but the specific choice in each case depends on what kind of part will be created and how it will be processed. Before starting work on the machine, the workpiece must be pre-processed with a plane or an ax, giving it a shape close to cylindrical.
The wooden blank prepared in this way for use is clamped as tightly as possible in the machine before turning it. For his tridents, using a chisel, it is recommended to make small indentations at the ends of the workpiece, which will prevent the workpiece from possibly falling out of the equipment during operation.
The support bracket of the tool rest should be installed at a distance of no more than 5 millimeters from the blank and always slightly higher than the axis around which it rotates when working on a lathe.
By placing the tool rest slightly lower than the axis of rotation of the blank, the cutting tool will only scrape the surface of the wood, and not cut it, as it should be. As a result of this work, the surface will become rough rather than smooth. In addition, in this case, the tool may bend under the workpiece, which, quite possibly, will lead to injuries to the one who turns this or that object on the machine.
After every 5-10 minutes of work on the machine, it is necessary to tighten the rear spindle, which will prevent a decrease in the reliability of clamping the blank. As the diameter of the workpiece decreases, the tool rest must be gradually brought closer to its surface.
Types of jobs
Each type of work involves a certain technology and several special secrets. In addition to his work on the machine, any master must be able to understand wood, read drawings, as well as sharpen cutters and set up the machine itself.
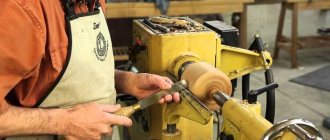
Turning
The first step is to start the shaft. You can start turning only after the shaft picks up speed. First comes the rough processing of the product. It occurs at speeds up to 1500 rpm. The master uses a semicircular chisel with a blade and side parts. The master leans on a tool rest when working.
Rip off
Rough peeling of the workpiece is done with a semicircular chisel. The tool must be inclined towards turning and located in the axial plane of the part.
Sample
Sampling or scraping in other words is carried out using ovals or hooks. Most often, this type of work is used in the manufacture of dishes.
Pruning
A sharp knife is used for pruning.
Cutting off
A cutting tool is used for this process. It leaves a perfectly straight cut and then does not require additional sanding. To avoid mistakes, the craftsman needs to make an initial mark with a pencil and accurately determine the location of the cut.
Making a dowel
A dowel is a cylindrical rod with which various components of the product are attached. The dowel is made of wood, metal, and plastic. You can make such a round tenon yourself if you have a lathe and simple tools.
Design of turning tools
Sharpening cutters for a metal lathe will not be done correctly until the master understands the nuances, features and rules of sharpening turning cutters. The main components of this design are the rod, which secures the device to the lathe, and the working head, its cutting part must be adjusted and constantly sharpened.
Let's take a closer look at the tool head. It consists of two types of base - rear and front. The front one has a distinctive feature - it removes the chips generated during work. The rear surface is the part of the fixture to which the workpiece is located during processing. Depending on the location, it can be auxiliary or primary.
The main component of the cutter is the cutting edge; it is located at the cross section between the front and rear planes. The device for sharpening wood chisels and cutters also has an additional edge, which is located at the cross-section of the main and auxiliary bases.
The main characteristics of sharpening metal turning tools are the sharpening angles of the tools, which are divided into additional and main. We will talk about them further.
Design of turning tools
Machine setup
First of all, it is necessary to adjust the alignment of the centers. If the main work of the machine is turning long workpieces on the centers, then problems with alignment will not greatly hinder the master. If the workpiece is clamped in a chuck and drilled from the end, then the misalignment of the axes even by a couple of degrees will break the hole to a cone.
After the first start, you need to configure the machine according to the parameters that are suitable for processing a specific workpiece. This is the number of revolutions of the spindle, the speed in the gearbox, the stroke of the slide.
Working method for beginners
Inexperienced craftsmen make several basic mistakes when working on a wood lathe. It is important that each method of work has its own nuances and an experienced specialist knows them.
When fastening between two centers
This is one of the most popular methods of working on a lathe. It consists of turning a part that is fixed between the front and tailstock. This way you can make a variety of products, even large ones. This is the optimal method for beginners.
Grinding to cylindrical shape
For this job, you will need a semicircular cutter with a smooth cutting edge to level the surface of the part. The master should begin work with one window of the workpiece and continue to gradually remove excess material without strong pressure. When performing this operation, you should not rush, and the result should be an even cylinder of the desired diameter.
Leveling with a flat cutter
This is the next stage of work. The lathe must be turned off and the tool rest moved closer, since the dimensions of the part have changed. The blade of the cutter should rest on the support and hold with one hand. The second holds the handle, and holds the tool so that it counteracts rotation.
Using a parting cutter
This option is used if the part needs to be cut from the workpiece. The cut is smooth and does not require additional sanding. Before making a cut, you need to mark the part with a pencil. Then you can not make a mistake when cutting.
Making decorative elements
For decoration, the master uses decorative elements. Most often, a roller and a groove are made on a lathe. A cylindrical belt is made between these parts. By combining these decorative elements, you can turn almost any wooden object, from the simplest cornices to complex furniture elements.
We sharpen wood on a machine while clamping at one end
This working method requires a special approach. To hold the workpiece, several types of holders are used, as well as combined ones.
Turning cavities
Before creating a cavity in a part, it must be roughed. To turn cavities, the support headstock is removed from the machine. The workpiece is installed in the headstock clamp. The cavity is turned out using a semicircular cutter.
How to sand correctly
Most often, parts processed on a lathe do not require additional grinding. But sometimes sanding is required. In this case, you should remove the tool rest and take a strip of fine-grained sandpaper. The equipment must be turned on at low speed.
Decorating the details
To complete the finishing, it is necessary to remove the tool holder and sand the product from below with fine sandpaper. You need to turn the skin crosswise. To make the product look beautiful, it must be treated with paraffin or wax while moving.
Techniques for working on lathes
The workpiece prepared for turning must be securely fixed in the centers (Fig. 80, a-c).
Small workpieces are processed manually. When turning by hand, the tool rest is installed so that the cutter blade is at the level of the axis of rotation of the workpiece (center line), and the edge of the tool rest is located from the workpiece at approximately a distance of l = 5÷10 mm (Fig. 81, a), then it is more convenient and easier to sharpen hold the cutter in your hands.
Rice. 81. Cutter position:
a - during manual turning, b - when turning with a caliper; 1 — tool rest, 2 — support
When turning, the cutter is pressed tightly against the tool rest. The cutter is moved along the tool rest until the workpiece is turned along its entire length (at the width of the tool rest). At the same time, you should not deepen hand cutters into the wood to a depth of more than 2-3 mm for roughing and 0.5-1 mm for flat ones, so as not to “undermine” the wood.
As the chips are removed from the workpiece, the tool rest is moved forward, closer to the workpiece, and if the workpiece is longer than the width of the tool rest, then it is moved along - to the front or tailstock.
During machining, the cutter is installed in the support at the level of the centers. Its working part should protrude no more than a length l=1.5 h (Fig. 81, b) so that the cutter does not vibrate during operation (and does not exceed 1 mm).
When processing workpieces of detachable models, glued in the plane of the connector through paper, metal strips are used, secured to the end parts of the workpiece with screws (Fig. 82, a).
Rice. 82. Techniques for checking the thickness of glued halves of a workpiece with a compass:
a - workpiece prepared for testing, b - the lower half is thicker than the upper, c - the thickness of the halves is the same
The recesses of the strips into which the centers of the machine are inserted usually turn out to be slightly offset when screwing in the screws with respect to the geometric center of the end of the workpiece (which is located on the parting line). Therefore, after turning, the detachable parts are unequal in thickness (Fig. 82, b), i.e. h≠h1≠r. To achieve the same thickness of the detachable parts, after preliminary turning, a chisel (or pencil) is pressed to the surface of the rotating workpiece near one of the ends and a closed line (circle) is drawn with it encircling the workpiece (see Fig. 82, a). The same line is made at the other end. Then, with a compass opening equal to approximately 0.5 of the radius of the circle - the marks, from one of the two points formed by the intersection of the encircling marks and the parting line, measure the length of half of the encircling marks. If the length of the semicircle of one split part is less than the length of the other, the workpiece is rotated so that the split part with the shorter semicircle length is on top. Using a hammer or sledgehammer, apply one or two light blows to the measured end of the workpiece so that the center in which the workpiece is secured moves to the end parting line. After this, the workpiece is ground again and the thickness of the halves is checked again. If the length of both semicircles is the same, then the thickness of the detachable parts is the same. Now you can continue processing the workpiece, bringing it to the specified shape and size. Although this method is common, the deviation of the thickness of the halves from the specified one sometimes reaches 1-2 mm.
A number of factories use more advanced devices that eliminate preliminary checking of centers and ensure that the dimensions of detachable parts are obtained with high accuracy. In Fig. 83, a and b, there is a drawing of a device consisting of a comb (fork) - the center of the headstock and centering plates at the headstock and tailstock. In Fig. 83, d shows a centering device of a different design, consisting of two faceplates, the most convenient and ensuring the deviation of the thickness of the detachable parts from the specified one is no more than ±0.1 mm. Faceplates of this design are also used for boring core boxes.
Rice. 83. Devices that ensure minimal deviations of the thickness of split models from the specified thickness when turning on a machine:
a - drawing of a cartridge with a comb design of the Uralmash plant, b - drawing of centering faceplates of the Uralmash plant, c - general view of the workpiece, centered using faceplates, d - faceplates of the design, e - general view of the workpiece, centered using faceplates; 1 - chuck, 2 - fork (comb), 3 - headstock faceplate, 4 - tailstock faceplate, 5 - front end of the spindle, b - center of the tailstock
84. Fastening the workpiece in a cup chuck:
1 - cup chuck, 2 - spindle, 3 - workpiece
When turning a one-piece workpiece with fibers located parallel to the axis of rotation, the workpiece is fixed in a hollow cylindrical chuck (cup), which is screwed onto the front end of the spindle, mounted in the headstock of the machine (Fig. 84). Before installing the workpiece on the machine, the corners of the bars are cut off. Using an ax, one end of the workpiece is adjusted to fit the inner hole of the cartridge and the workpiece is hammered into the cartridge with a sledgehammer or the butt of an ax. After processing the product, the cartridge is screwed together using a cylindrical rod inserted into one of the holes made in the body of the cartridge.
Workpieces made from disks or sectors (the fibers are located perpendicular to the axis of rotation), with a diameter of up to 300 mm, can be fixed directly to the chuck (Fig. 85, a). Workpieces with a diameter of 300-600 mm or more are fixed on a faceplate of larger diameter using an auxiliary board (Fig. 85, b). If the workpiece has a diameter exceeding 600 mm, it is fixed not on the board, but on an auxiliary wooden cross made of edged boards 40-50 mm thick.
Rice. 85. Fastening workpieces to faceplates and turning them:
a - fastening directly on the faceplate, b - fastening on the faceplate with an auxiliary board, c - cross chuck, d - flanged chuck with a screw, e - method of processing a workpiece mounted on the faceplate; 1 - faceplate, 2 - workpiece, 3 - auxiliary board, 4 - screw with a countersunk head, 5 - screw with a semicircular head, 6 - capercaillie, 7 - cartridge with screw
Chucks and faceplates of other designs are also used. For turning workpieces of large diameters, instead of a faceplate, a cross chuck (Fig. 85, c) can be used, screwed by wood grouse to an auxiliary device made of edged boards connected crosswise.
The production of small bosses from round blanks with a diameter of up to 50-100 mm and a thickness of up to 25 mm can be done on a flanged chuck with a screw (Fig. 85, d).
In Fig. 85, d shows a technique for processing a workpiece mounted on a faceplate.
What can be made?
An experienced craftsman can use a lathe to produce a huge number of items, ranging from simple slats to exquisite pieces of furniture.
Salad bowls
Depending on the size of the workpiece, you can make deeper salad bowls or flat ones. In any case, the work requires patience and fixing the workpiece at one end.
Boxes
These products require more skill from the turner. But the result can be a real work of art.
Railing posts
Even a novice master can do this with a certain amount of patience.
Furniture legs
Here the master's imagination is limitless. By combining different decorative elements, you can make truly graceful legs that will attract everyone's attention and admiration.
Toys
Dolls, bears, and, of course, nesting dolls - all this in the hands of an experienced turner can be obtained from a simple wooden block.
Lamp body
Another type of decoration that will adequately decorate the interior of any room.
Cups
A wooden cup is suitable as a reward for the winner and will decorate the shelf of any sideboard. Additionally, you can burn a memorial inscription.
Vases
Wooden vases made on a lathe are distinguished by a variety of shapes and decorations. Flowers always look much more beautiful in them, and the atmosphere is closer to natural.
Description of sharpening technique
Safety precautions
Sharpening is carried out in compliance with safety regulations. The specialist puts on protective equipment for the face and gloves. Depending on the chosen technique, security methods vary. Do not touch the device or sample until it has completely cooled down.
Conducting fine-tuning
Finishing of slotting tools is carried out according to the chosen method. Used manual methods, automated machines. It should be understood that:
- the incisors are not immersed in water - they break;
- during finishing, water is supplied for cooling;
- First, the back edge is processed, and then the main and auxiliary faces;
Carbide versions are finished with copper deposits (impregnated with boron carbides). Other types are finished with whetstone soaked in kerosene, with minimal abrasiveness.
Safety precautions at work
A lathe is a dangerous equipment, so you should follow the safety rules:
- hold the chisel correctly;
- securely secure the workpiece in the spindle;
- do not wear loose clothing;
- To protect your eyes when working, wear special glasses.
If safety instructions are not followed, there is a risk of injury. Do not approach a working machine while intoxicated or under the influence of drugs.
Advice from experienced professionals
The most important thing that all experienced craftsmen say is that you should not be afraid of the machine. It's just a tool, with the right approach and enough patience, anyone can become a professional turner. It is important to set up the machine and select all the working tools correctly.
Wood turning has attracted people since ancient times. If at the very beginning the turners worked in twos, then after the invention of the electric motor everything changed significantly. Now anyone can become a wood turner if they can “feel” wood.