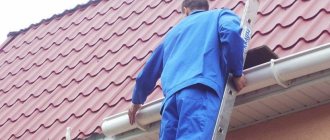
The gutter helps protect the roof and walls of the house from excess moisture. Nowadays it’s easy to purchase your favorite drainage system in a store. Well-known brands offer protection from moisture, and specialized companies offer installation guarantees.
The costs for this are considerable, the amount comes out to be large. You can purchase a drainage system in a store and save on installation. Better yet, make such a device yourself with a little effort and knowledge.
Materials for homemade gutters:
- plastic bottles;
- sewerage pipes;
- tree;
- galvanized metal sheets;
- copper metal sheets;
- profiles for drywall;
- ceramic drainage.
Why is a drain needed?
Why can't the roof be left without a drain? Many houses have rather unusual and beautiful roofs, and their owners want to abandon the arrangement of this important system only because they do not want to spoil the appearance of the roof and the building as a whole. After all, a drain is a system of gutters and pipes that do not look as elegant as, perhaps, the house itself. But making such a decision will be fundamentally wrong - no matter how beautiful and unusual the house is, it needs drainage from the roof.
PVC drainage system
Basic requirements for drainage
First of all, the drainage system protects the building from the effects of precipitation on the facades and foundation . Water dripping from the sky is far from the cleanest liquid; it contains a lot of chemicals, and in some regions, literally the entire periodic table. And some building materials, under its influence, begin to quickly lose their appearance and collapse, which is why the structure no longer becomes as strong and reliable as it was originally. And wet walls lose some of their heat-saving properties and look ugly.
When a house is built on heaving soil, everything is even more serious! The soil is saturated with water, in winter it all expands and begins to put pressure on the building itself
On a note! A roof drainage system does not always look simple or unsightly. Now you can make components of any shape and even adjust them to the style of the entire structure, which means they won’t look tacky.
The drainage system operates simply: water that gets onto the roof is collected in one gutter, through which it is directed to a certain point of the so-called safe drainage. And if the system is designed correctly, then it reliably protects both the foundation and walls from water.
Organized roof drainage
Gutter as one of the main and important components of the device
One of the main structural elements that receives water from the roof. There are several varieties of it: wall-mounted or hanging. Plastic, galvanized metal or copper are used for manufacturing.
Wall
It is localized close to the overhang of the roofing material at the very edge of the roof. The product is a side, up to 20 cm high and acts as a barrier to rainwater. Such gutters are installed at an angle to the overhang and directed towards the drain funnel. To connect the trays, glue or a double lying flange is used. Their tilt angle is 15 degrees, which prevents liquid from overflowing over the edge.
Rain or hanging
It is tightly attached directly under the roof overhang, which prevents accumulated liquid from flowing under the gutter. For fixing, steel hooks are used, shaped to match the product. Since this fragment does not bend, in order to avoid overflowing, a hole must be made in it in a pre-marked place. When calculating the slope in this case, the amount of precipitation that fell during the year is taken into account.
Classification of gutters
The following types of gutters are distinguished by shape:
| Variety | Characteristic |
| Semi-elliptical | Copes well with large flows of water, as it provides greater throughput |
| Semicircular | It is resistant to loads and has a high level of rigidity. This gutter is universal, as it is used on most roofing structures. |
Gutters are also classified according to the material of manufacture:
- Plastic. They have an attractive appearance, light weight and low cost. With proper fastening and use, the service life is 15-25 years. You can install them yourself. Such fragments are secured using couplings or latches with rubber seals. Sometimes glue is used for fixation. But such products have a high risk of mechanical damage and become brittle at subzero temperatures. Small scratches on the surface can be masked with acrylic paint.
- Aluminum. For connection, fasteners with rubber and silicone seals or specialized glue are used. Untreated material can quickly become rusty. A layer of varnish will help avoid this.
- Galvanized. They are metal products with pre-applied polymer protection. Characterized by a wide range of colors. For fastening, brackets with latches equipped with rubber seals are used. Such gutters are highly durable and do not corrode unless the polymer layer is damaged. The disadvantage is the frequent lack of the correct shape, which complicates the assembly of the system.
You can also buy copper products in stores. They are durable, rust-resistant, have an attractive appearance and a long service life, but they are expensive.
Copper rainwater is durable, corrosion-resistant, has an attractive appearance and a long service life, but it is expensive.
How to calculate gutters correctly?
The standard element length is 3-4 m. For small buildings, products with a cross-section of 70-115 mm are sufficient. On large structures, gutters with a cross-section of up to 200 mm are installed. It is necessary to calculate the specified fragment so that the distance between the nearest craters is 8-12 m.
Assembling the gutter design
If the length of the gutter is more than 12 m, then several fragments of fasteners connected to each other are required. After this, plugs are installed at the edges of the structure and it is fixed on the brackets.
Types of drainage
Prices for gutters
Gutters
Drainage from pitched roofs can be organized in three ways:
- unorganized , when water naturally drains from the roof under the influence of gravity, falling on the walls and flooding the blind area;
- organized internal , when the roof drainage system is located inside the building;
- organized external , consisting of pipes, gutters and funnels located on the outside of the building.
Organized drain schematically
Internal drainage design
On roofs with slopes, unorganized and external organized drains can be installed. Moreover, the former are used less and less often - builders give preference to the latter, despite the need for additional investments in construction and a certain number of works.
Parts of a serial production drainage system
Previously, in Russia there was often no system for drainage from roofs - simply the roof outlets were made larger and the water flowed down them to the ground. More precisely, it was called just an unorganized drain. But in this case, special requirements were placed on the foundation of the building, and the surrounding area around the house had good waterproofing. This method is still relevant and used, but it is still usually installed only in regions with minimal precipitation (no more than 300 mm per year). All possible conditions for its arrangement can be found and read in SNiP 06/31/2009.
SNiP 06/31/2009. Public buildings and structures . Downloadable file (click the link to open the PDF in a new window).
SNiP 06/31/2009
Such drainage can be used if the height of the building does not exceed 5 floors, and the roof itself must have one slope, the slope of which is directed towards the courtyard inside the personal plot. In this case, the roof must be equipped with a canopy that extends beyond the roof by at least 60 cm. Also, under such a drain there should not be any paths for transport or people. The only advantage of such a drainage system is that there is no need to invest in roof drainage work.
An example of an unorganized drain
Unorganized drainage does not provide protection to the foundation; rather, it will reduce its load-bearing capacity. Also, over time, it will cause destruction of both the finishing of the walls and the base.
The best option for organizing drainage from pitched roofs is external drainage. Thanks to it, the water will be located only outside the building, collecting on the roof, and flowing only to a certain place. And such a drain itself is easy to install and does not require any special costs.
Plastic drain. Master class (part 1)
Plastic drain. Master class (part 2)
On a note! Internal organized drainage, provided that the roof has slopes, is used very rarely, as it is a complex internal system of channels. This type of drainage can be found in industrial facilities.
Drainage funnel for flat roof. There is practically no internal drainage on pitched roofs.
Subtleties of design and installation of drainage on pitched roofs
The drainage system must first be designed by making the necessary calculations and determining the location and length of gutters and pipes, their width and depth. Typically, the number and width of the gutter depends on the perimeter of the roof and the area of its slopes.
In any case, try to adhere as much as possible to the recommendations of the manufacturer of the system you purchased. But sometimes you have to install a rather complex drainage system, and you can’t do it without additional calculations.
Drainage system for pitched roofs
The simplest drainage system is for pitched roofs. Water from such a roof is directed only in one direction, and it is not difficult to “catch” it. In addition, if we are talking about one-story houses, they often have a chain attached instead of drainpipes and gutters, and it is much less noticeable on the facade.
Such rain chains are especially popular in Japan, where they play the role of a kind of decorative element. They are most often made of copper, and the main architectural tasks that are set for them are to have a complex spatial shape that is pleasing to the eye and alternate with decorative bowls. But, unfortunately, modern manufacturers of drainage systems for Russian latitudes do not take into account such innovations and do not produce special drainage parts for connection to the chain.
Therefore, if you still want to build something similar for a beautiful effect or simplicity of the system, then remember two simple rules:
- The chain should be tensioned so that it does not move from side to side. And to do this, simply bury its end in the ground or press it down with rubble.
- To prevent the walls from being splashed with water, such chains must protrude from the edge of the roof by at least half a meter.
Believe me, bringing this idea to life will not be difficult! Here are two of the simplest examples of its implementation:
Installation of drainage on a gable roof
For a standard gable roof, drainpipes should be placed at all external and internal corners. There they are almost invisible, and in fact, this is their natural location. From a technical point of view this is also correct.
As for the location of the gutters, a lot depends on the roof itself:
Our tables will help you calculate the required number of vertical elements and their location for such roofs:
Gutters on roofs of complex shapes
Designing water drainage from a roof with a complex configuration is not easy. Here you need to take water from each individual slope or bay window, and it makes sense to install several drainpipes at once. This is where difficulties arise, which we will now discuss in more detail.
Number of stingrays
If there are a lot of slopes, and the drainage system is designed according to the minimum principle, too much water flow will enter the pipes and flow more slowly throughout the entire gutter due to its volume. And this is a load on all elements at once, and such water freezes faster in winter.
Superstructures and hatches
The second point that concerns the drainage system for a pitched roof of complex shape is that downpipes and gutters are also often necessary in architectural roof structures, above balconies and around turrets. There are technical difficulties here, because it is quite problematic to rid such places of freezing and water penetration. That's why practical minimalism is popular in the construction world today.
But the most interesting task for a roofer is to make a drain around a round turret. After all, it will not be possible to bend such a metal gutter efficiently. Therefore, in this case, they do this: they cut segments of a zinc, stainless or copper gutter and solder them together. After this, it makes sense to paint the drain in the desired color with powder paint to hide the seams.
As for the currently fashionable roof windows and skylights, gutters are not required for them. It is only important to correctly determine which side of the roof the water will flow from and where it may begin to collect. And because The roof of the lucarne has no overhangs; gutters are needed only for large areas and multidirectional slopes.
Excess of elements
Also, a significant drawback of such a drainage system design is aesthetic, since a large number of pipes will already stand out against the background of the walls.
The most problematic places on a pitched roof in terms of installing a drainage system are near the canopy and in front of the entrance to the house. And if the roof itself is not of an elementary design, then it is probably due to the fact that there is far more than one entrance to this house. But it is important that the pipes here are inconspicuous against the background of the facade, and it is quite difficult to hide them in such places. That's why you'll probably see it on veranda posts, in the corner of the house or by the window:
Color solutions
With a complex roof configuration, the gutter itself often has an irregular geometric shape and does not always look symmetrical and pleasing to the eye. Therefore, in this case, its color is selected so that it looks like a natural continuation of the roof and even merges with it.
But if the gutter itself in its entire structure has a beautiful profile, which also emphasizes the shape of the roof, then it is installed as an important architectural element and accentuated, combining it with the color of the facade details so that it stands out against the background of the roof or even contrasts with it. But for now, gray silver gutters are left only on the facades of houses in modern techno or high-tech style.
As you can see, the problem of excess drainage elements is quite easy to solve by choosing the right colors and design of the pipes. For example, match the color of gutters and pipes not only with the roofing, but also with the façade elements of walls, columns, door and window openings. Those. You have three options for choosing the color of a roof drainage system with a complex configuration:
- so that the pipes and gutters themselves are inconspicuous on the facade;
- so that their color, on the contrary, contrasts with the color of the facade or window frames;
- so that the drainage system is an independent and noticeable architectural feature.
But it is much better to intelligently minimize their number without losing quality. And here it is better to entrust the matter to a professional who will correctly calculate the entire system.
Structure of the drainage system
For a roof drainage system to work correctly, it must include all the necessary elements. Despite the fairly simple device, it must contain the following design details:
- gutter, which is the main part of the system. It is made from a semicircular pipe and is installed along the perimeter of the building, absorbing all the water flowing from the roof. The gutters should have a slight slope towards the drain funnels;
Installation of a roof drainage system
- the individual parts of the gutter, if it turns out to be too long, are connected to each other using coupling connectors ;
- internal and external corners ensure the connection of gutters on the corner parts of the building;
- water intake funnel directs water into the drain pipe and is installed on the gutter. There should be a protective grill inside it, which will protect the pipes from blockages as a result of debris and leaves getting into them;
Installation of funnels to gutters
- a vertically positioned long pipe is called a drain or drain pipe . Liquid from the gutters enters it through funnels. The pipe must go to the sewer system;
- the end of the drain is the so-called elbow . This drain part has a bend that will help maintain the distance between the walls and foundation of the building and the place from which the water flows. Also, elbows can connect funnels and drain pipes; they are connected to the funnels at an angle of 45 degrees;
- Clamps or brackets allow you to secure the gutter to the building. These are fastening elements, they are installed in increments of about 30-60 cm and are usually attached to the rafters or front board on the facade;
- plugs can also be installed on the gutter , which are responsible for limiting the flow of water.
Table. Materials used to manufacture the system.
| Material | Characteristics |
| PVC | Easy to install, lightweight and convenient elements. Assembly is carried out without any particular difficulties, since all parts are precisely adjusted to each other. PVC is not afraid of exposure to water, does not rust and is quite resistant to other factors. The service life of the system is up to 50 years. |
| Metal | To make the drain, galvanized or black metal can be used. Nowadays it is used less and less, as new types of materials have appeared that make it possible to create more durable structures. Service life is only 10-15 years. |
| Copper | A traditional but expensive material for the manufacture of drainage parts. Has no disadvantages, except for the cost. |
| Metal-plastic | A material that combines the advantages of metal and PVC products. Strong, durable, can serve without complaints for over 50 years. |
Copper drain in a private house
Drainage design
Depending on the method of organization, drainage from the roof can be unorganized and organized. In the first case, no stormwater systems are installed, and liquid from the roof falls directly down. At the same time, it falls on the foundation and walls, accelerating the destructive processes in them. Organized involves fixing a stormwater structure to the roof, which allows water to be drained further from the structure.
Depending on the installation method, the system can be external or internal. The first type is installed under the overhangs of the roofing material and is suitable for pitched roofs. To make this design, metal or plastic is used. Internal drainage is installed in houses with a flat roof.
It goes through the wall. In this case, the roof is made at a slight slope, at the very bottom of which there is a water intake funnel. Most often, such a roof drainage system is installed in multi-story buildings.
System calculation
To cope with the flow of water, the drainage system must have certain sizes and shapes. They directly depend on the amount of precipitation in the region, the size of the building and other factors.
The calculations are based on the drainage area - it is on this that, first of all, the parameters of the gutter and pipes will depend. For example, for small country houses (water collection area less than 30 m2), it is enough to purchase a drain pipe with a diameter of 50-75 mm, and a gutter with a cross-section of about 70-115 mm. For modest cottages (collection area does not exceed 50 m2), a pipe with a diameter of 75 to 100 mm and a gutter with a cross-section of 115-130 mm are suitable. But for buildings with large roofs (collection area - about 125 m2), you will have to purchase drain pipes with a diameter of at least 90-160 mm and gutters with a cross-section of 140-200 mm.
How to calculate a drainage system
The effective liquid drainage area can be calculated using the formula S=(B+1/2H)xL , where B is the length of the horizontal projection of the edge of the roof slope, L is the length of the roof, and H is its height. All values are used in meters.
When calculating the cross-section of the pipe, the angles of inclination of the drain must also be taken into account, because if they are insufficient, the gutter will quickly fill with water, which simply will not have time to flow down it. And at a large angle of inclination, the funnel of the drainage system will choke. For 1 linear meter of gutter, the slope should be approximately 2-5 mm.
Choosing a scheme for installing plastic gutters
On a note! The distance between adjacent funnels in the system should not be more than 24 m. It is best to place them 8-12 m from each other - then it will be possible to achieve a slight inclination of the gutters.
The cross section of the funnel is also easy to determine. It is enough to estimate that per 1 m2 of roof in horizontal projection there is about 1.5 cm2 of the cross-sectional area of this element. It is also important to remember that one funnel can collect water from approximately 10 m of gutter. To simplify calculations, you can use online calculators.
Calculation of roof drainage
The number of internal and external corners is easy to calculate - only the configuration of the structure is taken into account here. And the number of brackets is calculated depending on the total length of the gutters, and it is important to remember that their installation step is 50-60 cm for metal systems and only 30-40 for plastic structures, provided the gutter slope is up to 1 cm for every 3-4 m. Where the funnel is installed, the fastening elements must be secured at a distance of at least 15 cm from it. The same applies to the junctions of gutters, corners and plugs.
How to correctly calculate the number of pipes for a drain?
In order for the structure to work correctly, it is necessary to calculate the required number of its elements. Their cross-sectional area should be sufficient to ensure that water flows through the edges of the gutter without stopping or overflowing even during the heaviest rains.
When choosing structural elements, you need to take into account the roof area, pipe cross-section, and climatic operating conditions of the storm drain. The standard value is: 1 sq.cm. cross-sectional area covers 1 sq.m. roof area. For small houses, a drain fragment with a diameter of 50-75 mm will be required. For large structures this value increases to 160 mm.
As for the funnel, for 1 sq.m. the horizontal roof area is 1.5 cm2. its sections. Calculation of internal and external connecting angles is made based on the design of the drainage system.
Installation features
The technology for installing a drainage system from a pitched roof is simple, but has a number of nuances that must be taken into account. One of the most important is the correct method of fastening, because this will determine how strong and reliable the system will be. The brackets must be securely screwed to the front board, sheathing or rafters at a certain pitch. Installation is carried out until the final finishing of the roof. If they are not secured correctly, the structure will begin to sag over time, causing the gutters to leak.
Plastic roof drain
An important point is the correct installation of the gutters themselves. They should be positioned so that they are partially covered by the edge of the roof - approximately 1/3. In this case, it will be possible to achieve the most efficient collection of liquid. In this case, the edge of the gutter should be located approximately a couple of centimeters lower than the slope itself - in this case, the gutter will not be damaged when snow and ice melt from the roof.
The connection of two gutters is a moment that also requires special attention. They can be fastened with glue (if they are made of plastic), couplings and seals (for plastic or metal gutters) or by soldering (the method is optimal for copper structures).
Methods for installing fasteners for laying gutters
On a note! PVC products may change slightly in size due to temperature changes, so it is recommended to connect them so that they retain some mobility. Otherwise they may become deformed.
The drain pipe itself, located vertically, should be located as close as possible to the wall of the house and secured with clamps. This will increase its resistance to wind. Individual sections of pipes, as well as pipes with funnels, are also connected using special connectors.
Gutter installation
By the way, as for clamps for drain pipes, in the upper part, near the roof, the pipe is fixed with a rigid clamp, and in the middle or lower with a loose clamp. The distance between them should be approximately 2-2.5 m.
The runoff can be discharged directly into an underground stormwater system through a storm well, if one is available. You can also consider other options for recycling rainwater.
Gutters for drainage structures
Depending on the throughput, different markings are produced. The marking shows the ratio of the diameter of the pipe to the gutter.
The following options are considered:
- 100/75;
- 125/90;
- 150/110.
Gutters are divided into:
- semicircular;
- rectangular;
- corner.
If the first two types are responsible for collecting water from the roof, then the corner gutter changes the direction of flow.
Fixation is carried out on the outer and inner corners of the roof.
Plastic gutters can be used to make both sharp and obtuse angles. To do this, you need to cut out a part and mount the halves at the required angle. The fasteners are cold welded.
The average gutter length is from 3 to 4 linear meters. Sold individually.
They are attached to the roof with brackets and hooks in increments of 60–90 cm, maintaining a slope of 1 cm every 3–4 meters. The fewer connections there are, the faster and cheaper the installation will be.
Installation of a drainage system
Let's look at how the installation of a drainage system produced by .
Step 1. To install and assemble the system, you will need the following tools: a screwdriver, a miter box, a hacksaw, a bender, a building level, a tape measure, twine and a marker.
Screwdriver
Hacksaw and miter box
Strip bender
Building level
Tape measure, twine and construction marker
Using string for marking
Step 2. Anti-corrosion fasteners are used to secure all parts of the drain. It can be purchased at a hardware store.
Use only anti-corrosion fasteners
Step 3. Installation of the drainage system is done from top to bottom. First, the drainage gutters are attached, only after that the drainage system (drain pipes) is installed. Drainage gutters are installed below the level of the roof slope with a slope towards the funnel of approximately 2-3 cm every 10 meters of the gutter. For ease of work, markings are applied to show the mounting locations of the brackets.
Installation of gutters
The system is installed with a slope towards the funnels
Step 4. The first to install is the funnel at the bottom mark and the bracket at the top mark. A string is stretched between them, along the level of which the remaining brackets and couplings are attached. In this case, the brackets are installed so that the distance from them to the edges of the funnel or coupling is no more than 10 cm. There can be a distance of about 60 cm between the remaining brackets.
Bracket installed
The string is stretched
Attaching the coupling and brackets
Step 5. After installing the brackets, the gutter is fixed to them.
Gutter installation
Step 6. The joining of two sections of gutters is done using a special coupling.
Joining two sections of gutters
Step 7. The corners connecting the gutters in the corners of the house (internal and external) are attached. Plugs are installed at the ends of the gutters.
Installation of plugs and corner elements
Caps and corner elements installed
Step 8. Installation of the drainage system begins. To do this, you will need clamps to secure the pipe. It is rigidly fixed in the upper part, and in the lower part it is fixed with slipping.
Top fasteners
Bottom fasteners
Step 9. An elbow is attached to the drain funnel, which, using a piece of pipe, is connected to another similar elbow, but oriented in the other direction. This will bring the drain pipe as close as possible to the wall of the house. The second elbow is fixed to the wall using a clamp attached to it. This section is being assembled.
The transition is carried out through 2 identical elbows and a piece of pipe
The pipe must fit into the elbow until it stops
Second knee installed
The transition is being mounted
Step 10. At a distance from each other (maximum - 1.7 m), clamps for the drain pipe are attached to the walls.
How to attach clamps
Step 11. At a distance of 25-30 cm from the ground, the drain elbow is attached. All parts are installed strictly vertically according to the building level.
Fixing the drain elbow
All elements are installed strictly vertically
Step 12. Pipes from the top of the couplings and drain are always installed until they rest against the internal stop of the element, from below - to the line marked on the system.
The pipe is always placed on top until it stops
From below, the pipe is installed to the corresponding line
Step 13. After installing all the pipes, install intermediate clamps and tighten all elements.
Installation of intermediate clamps and tightening of all elements
Video - Drainage device
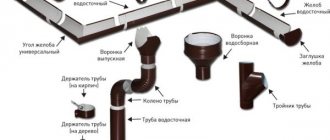
Gutter elements
Their list includes:
- Gutter Designed to collect rain and melt water from the roof.
- Gutter plug. Attaches to the ends. Directs water down the slope towards the funnel.
- Gutter connector. They are used to connect gutters to each other. Tightness is achieved through a rubber seal.
- Universal angle. Changes the direction of water flow. It needs to be fixed on the inner and outer corners of the roof.
- Pipe elbow. Often used to neatly go around building façade elements. Changes the direction of water flow through a pipe.
- Funnel. Works as a water receiver. Connects gutters to pipes. Redirects water from the catchment to the drainage system.
- Drain pipe. Designed for vertical water flow.
- Connecting coupling. Pipe fastening element. Responsible for compensating for thermal expansion.
- Drain. Drains water from the system into the soil.
- Universal clamp. Allows you to attach the pipe at the desired distance from the house.
- Metal, plastic brackets. Required for installing gutters on the roof eaves.
- Straight or side bracket extension. Used when you need to attach the gutter bracket to the rafters or roof slope.
- Adjustable angle. Suitable for right angles and up to 150 degrees.
- Clamp for fastening the pipe to the facade of the building.
- Protective grille. Prevents debris from entering the drainage structure.
- Rotating eaves eaves for wall mounting.
The number and names of elements for different types of roofs may differ and be supplemented.
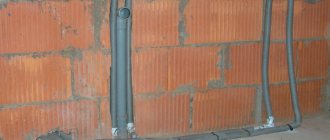
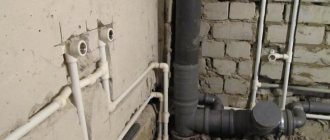
Do-it-yourself drainage installation from sewer pipes
A country house can be equipped with a drainage system made from ordinary sewer pipes. Let's see how it's done.
Step 1. A pipe 4 m long, having a fairly large cross-section (about 110 mm), is cut lengthwise into two halves. The most convenient way to do this is with a grinder.
The pipe is cut in half
Step 2. The pipe halves are connected to each other and fastened with self-tapping screws.
Connecting pipe halves
Self-tapping screws are used for fastening
Step 3. A drain funnel is formed. To do this, connect a piece of pipe and a cross with an elbow. After fixing, markings are applied in the middle of the pipe and continued onto the cross. The assembled elements are cut according to the markings.
A drain funnel is formed
Cutting elements
Step 4. To fix the gutters under the roof, you can use factory brackets or make them yourself from metal. They are screwed to improvised gutters.
The bracket is screwed to the gutter
Step 5. The gutter is installed along the roof slope.
The gutter is mounted along the roof slope
Step 6. The drain pipe is assembled, connected to the gutters and fixed to the wall of the building.
Sewage pipe assembly
Sewer pipe fixing
Checking the drainage system for functionality
Prices for popular models of screwdrivers
Screwdrivers
Common installation mistakes
In the absence of experience, the following mistakes are most often made:
- Failure to comply with the slope of the gutters. The recommended rate is from 3 to 5 mm per 1 linear meter. If the indicator is higher, water simply will not get there; if it is lower, areas of stagnant water and debris will form, and unscheduled drainage cleaning will have to be carried out. To correct such a defect, you have to break part of the roof.
- Saving on the number of brackets. The consequence is that an overly flexible structure becomes less resistant to wind loads, with a high risk of damage and breakage. For drainage from plastic, fasteners are carried out in increments of 50 cm, from iron and other metal - every 60 cm.
- The couplings are not connected correctly. The consequence is that leaks occur in such areas. Do not neglect the use of rubber seals and you need to seal the joints with sealant. It is recommended to double fasten the brackets (on both sides).
Craftsmen do not recommend purchasing materials for drainage from different manufacturers, since the installation process may reveal inconsistencies between elements and lack of tightness of the structure.
Organized and unorganized drainage
In the case when water simply flows from the roof, falling under the house, the drain is called unorganized . According to the norms and rules, this state of affairs is permissible in houses where the number of floors does not exceed two.
But in this case, in addition to the damage caused by moisture, you will have to remove the cornice, which will make the exterior less attractive.
IMPORTANT!
It is cheaper to install a drain than to later eliminate the consequences of its absence.
An organized roof drain is called when a building is equipped with a special system that removes rainfall or melted snow directly from the roof to a place where water can no longer cause damage. That is, this is the system that we are all accustomed to seeing on the facades of houses.
Unorganized drain
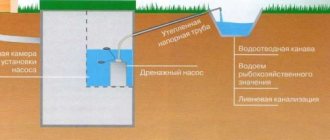
Internal drain
When arranging it, the pipes are placed inside the building at a short distance from the walls. The main elements of internal drainage: funnels, drain pipes, risers and outlets. The water is usually discharged to a sewer or drainage system. If such a drain is installed correctly, it will function reliably both in summer and winter. However, its installation is associated with certain difficulties, because placing elements inside the building and connecting them to each other is much more difficult than outside. Therefore, internal drainage is not in great demand.
Methods for attaching gutters
There are several methods for installing gutter fasteners:
- Fixing the drainage system to the front board. This option is chosen for two reasons. Gutter installation is carried out with a fully installed roof. In addition, when installing plastic elements, this option is more suitable. To fix metal elements in this way, you should choose short hooks.
- Another way is to use rafter legs as the basis for a drainage system. This option is feasible when the step size between the rafters is no more than 0.6 m. This method is highly reliable. It is suitable for roofs with a large area. However, it can only be used when laying roofing.
- Long-length hooks or combination brackets are often attached to the first roof sheathing strip. This method is optimal when the pitch between the rafters is more than 0.6 m.
- There is another method, designed specifically for cases when the previous ones do not work. For example, if it is necessary to attach a water drainage system in the absence of a frontal board or access to the sheathing. In this case, metal crutches should be mounted into the wall. Then the gutter is fixed to it with pins.
Typically, products with a thickness of 20 mm are chosen for the frontal board. However, some prefer to use 40 mm thick parts to increase reliability. The optimal range is 25-30 mm.
Closed storm system
Closed storm drainage systems look aesthetically pleasing and are more durable by reducing the impact of the external environment on the elements. When connecting pipes and funnels, sealants, adhesives and rubber seals are used, and sometimes welding. All elements of the transport system - pipes - are located inside the building, running in plumbing ducts or separately in areas provided for by the design solution. This type of equipment is very often used in multi-story construction, in buildings with a large roof area - parking lots, shopping centers, warehouses. It is practically not used in private civil construction - due to the complexity of the calculations and the need for highly qualified installers, any miscalculation or savings on some kind of protective grill leads to an emergency situation.
Popular gutter manufacturers
Many manufacturers present drainage systems for various types of roofs. One of the popular ones is gutters. The products are available in various colors and are resistant to mechanical and climatic influences. Döke products are divided into several series depending on technical characteristics, which makes it easy to make a choice.
provides a 25 year guarantee on its products
The products are also in demand and are presented in a large assortment. The elements of the drains are easily connected to each other, forming a strong and durable system. The company specializes in the production of plastic parts using modern technologies.
Plastic gutters are easy to install and look very attractive
produces various types of gutters, but one of the most popular options is a complex made of steel and plastic. The appearance, technical characteristics and size range of parts are varied, but all products are durable and easy to install.
Aquasystem gutters are a kind of hybrid of metal and plastic products
Video: installation of the Deke drain
Heating of gutters
In winter, water drainage systems undergo numerous strength tests.
Firstly, snow slides from the roof onto the gutter , subjecting the latter to increased loads.
Secondly, during the period when above-zero temperatures alternate with frost, ice accumulates in the pipes and other elements of the system .
This ice, under unfavorable circumstances, can rupture parts of the drainage system . Icicles add even more accidents to this whole situation.
To avoid this, special anti-icing systems are installed.
At the moment, the phenomenon of icing of gutters is being combated using a heating cable. They are stretched along the roof with or without a special coating. Thanks to them, ice does not form. These cables are connected to sensors that measure precipitation levels, temperature and a number of other points.
As soon as the sensors provide the data included in the thermostat program, it will turn on, warming up the necessary elements of the system.
Compared to the house, its sewer and electrical systems, without which it is difficult to imagine your life, gutters may seem like something insignificant. But that's not true. They protect the foundation and plinth from destruction, prevent moisture from damaging the façade, and can be used as important decorative elements.
Gutter heating
Savings on drainage, as well as on its maintenance, can result in much higher costs associated with major renovations of the building. When choosing the type of drainage system, material and components, you need to take into account the characteristics of a particular house, so it is recommended to either study this topic in more depth, or contact specialists.
Choosing a drain
The system for draining water from the house has many varieties. It is made from different materials, which have certain pros and cons. Usually everything depends on the construction budget and the design idea of the home owners. Before choosing a drainage system, you should consider a lot of features:
- Plastic gutters. Cheap and durable. They are easy to install due to their low weight and ease of connection of elements. Different parts are glued together with a socket or using glue. Plastic gutters perfectly absorb sounds and can be used for up to 25 years. The only drawback of such gutters is their low strength - if water stagnates, the pipes can break.
- Metal gutters. Made from galvanized steel. Typically, such pipes have a polymer coating on the outside that can protect the product from external influences. Pipes are resistant to rust. However, they are more difficult to install and do not absorb noise. Metal gutters are produced in round and rectangular shapes. They are painted in different shades. Their service life is more than 15 years.
- Copper. It has an attractive appearance, does not rust, and is easy to solder. During operation, the surface of such pipes becomes darker. Copper pipes can last up to 150 years. This explains their high cost.
To eliminate possible deformation of pipes during sudden melting of ice and snow, special snow guards are installed on the roof. The drainage system removes moisture to the drainage or a specially equipped area for this purpose. The type of gutter for a country house depends on the chosen roofing material. When laying copper tiles, the drainage system should be made of the same material.
Often, universal materials are chosen for finishing the facade and laying the roof. This allows you to install the drain taking into account the wishes of the home owners. For example, if the facade is covered with siding panels, and the roof is not covered with metal tiles, the gutter can be either plastic or steel.
When fixing plastic gutters to the wall of a building, it is necessary to leave a distance between fastening elements of no more than 60 cm. Galvanized steel is secured with anchors at intervals of up to 1 meter.
What to pay attention to when designing a drainage system
In order for the drainage system to function without failures, it is necessary to carefully consider the calculations of its performance and choose a drain that is suitable for specific conditions. The following factors are taken into account:
Roof area
Affects the total amount of collected rain or melt water. For large slopes, it is necessary to install several funnels and drainpipes
Precipitation levels for your region
The maximum and average precipitation per square meter allows you to estimate, respectively, the maximum and average volume of water that must pass through the system.
Number of drain points
On average, with a gutter size of 125*90, there should be one funnel per 10 meters of gutter. This will allow water to be drained from a slope with an area of 10-120 m2. And with dimensions of 150*100, one funnel can cope with 150 m2 of roofing or 15 meters of gutter length.
Slope angles
The greater the slope angle, the smaller the effective roof area that absorbs precipitation. However, as the slope angle increases, the rate of water drainage from it also increases.
Therefore, for particularly steep slopes, it is necessary to increase the size of the gutter - otherwise the water will not have time to leave the funnel and will overflow.
Roof features
Roofs of complex shapes, with a large number of bending lines and slope joints, pose a difficult task for calculation. In this case, it is better to involve experienced professional installers or make a large reserve on system performance.