Land owners often drill their own wells to install water supply and pumping equipment. These devices require good thermal insulation to prevent the water from freezing and stopping its circulation. For such purposes, a caisson is used - a special container for thermal insulation and tightness of the structure. Construction of a well with a caisson is a labor-intensive task that requires certain knowledge and compliance with established rules.
Why and from what to protect a well
If the well is operated only in the summer, and is mothballed for the winter with the dismantling of the pumping equipment, you can get by by installing a cap on it, which will hermetically seal the mouth and allow you to connect a pump and water supply to it. You can see this header in the previous photo.
But this option is not suitable for permanent residence households and summer cottages that are frequently visited at any time of the year. In order not to suddenly be left without water, you need to solve the problem of how to equip a water well after drilling with your own hands. Such arrangement involves not only the aesthetic design of the water source, but also its protection from a number of negative factors.
- From pollution.
If dirt from the surface of the earth, melt and rain water gets into the source, drinking from it will be dangerous to health. In addition, such contamination can cause failure of pumping equipment.
- From freezing.
Frozen water does not flow through the pipes. Moreover, in this state it tears them apart and destroys the mechanisms.
If you do not insulate the well, there will be no water in winter Source geobur.ru
- From vandals and thieves.
After a long absence, owners risk discovering that there is no pump in the well or that the system has been deliberately damaged.
- From damage.
The part of the well with equipment located above the ground can be accidentally damaged by garden tools, a vehicle, etc. Moreover, she herself is a source of danger.
Creating a protective structure for a well allows you to solve another problem: to make the work of servicing it easier and more comfortable for people. After all, it is in this building that all water supply equipment is installed, which requires constant monitoring.
Technical features
Taking into account some technical nuances, you can significantly save on the construction of a well equipped with a caisson. For example, use a factory-made caisson.
If you place the well closer to the house, then:
- the volume of earthworks will be reduced;
- fewer pipes will be required;
- you will need a pump of small power, sufficient only to raise water to the surface.
You can also save money when choosing a drilling method. To make a well for personal use, you can do the work using a hand drill. Sometimes they use electric tools and percussion devices.
Choosing a well drilling method
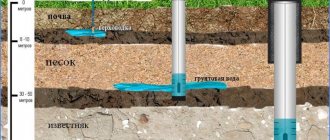
When choosing a specific tool, you need to proceed from the characteristics of the soil. When manually drilling a well yourself, you will have to make a lot of effort, but under favorable conditions you can reach the aquifer lying at a depth of up to 15 m.
It is recommended to make no more than five turns of the drill in one pass, otherwise it will be difficult to remove it.
A self-made drill gives the best results. The reason is that it is made for specific conditions, so it is more convenient to work with it
A shallow well can also be drilled using an auger. Its rotation is carried out both manually and using mechanisms. In any case, a tower in the form of a tripod is built over the future well to facilitate lifting the tool. When choosing the second method, you will also need an electric motor of suitable power.
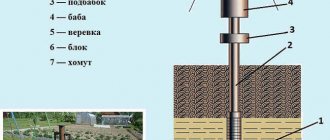
The shock-rope method is also used to cut a well. The working tool here is a pipe, the edges of which are sharply sharpened (a driving glass with a strong edge along the lower edge). Due to its considerable weight, it crashes into the ground with great force, then it is removed using a system of ropes and freed from the ground.
When using the percussion-rope drilling method, a tripod up to two meters high is used. At its top point there is a block with a rope thrown over it. A percussion instrument is attached to it
The casing (pipe) is taken with a slightly larger diameter than the pipe section called the sleeve. It should be placed strictly in vertical position. This is important for any drilling method. If this nuance is neglected, the soil may collapse.
Experts advise using PVC pipes with a cross-section of 12.5 cm. The first pipe is lowered after passing one meter. Further, the length of the casing is added as it goes deeper. The sections are connected using threads at the ends of the pipes.
Secrets of drilling a well
You can drill a well in any season, but the labor intensity of the work will vary. The worst option is spring. During this period, groundwater is at its highest level. Under such conditions, it is difficult to determine the location of the main aquifer.
Installing a well in summer is considered the best option, because... The water level stabilizes and its location is easy to determine. In autumn, the best month for carrying out this work is September. At this time, the rainy season usually has not yet arrived; it is possible to determine the aquifer without difficulty.
Precipitation in winter does not affect the state of groundwater. Manual drilling in winter is contraindicated, because... soils freeze very much
In winter, you can drill a well as long as the temperature does not drop below -20°. Due to freezing of the soil, the walls of the well are protected from collapses. Groundwater is at a minimum level.
Arrangement methods
There are 3 main ways to improve a well at your dacha with your own hands and protect it from external influences. The essence of each is equipment around its mouth in a small, dry and warm room.
Method 1 – well in the house
The most reliable and inexpensive way to protect and improve a drinking water well is to place it in a technical room or in the basement of a residential building with winter heating.
The equipment in the house will not freeze and will not be stolen Source abissinskii-kolodets.ru
See also: Catalog of companies that specialize in water supply, sewerage and related work.
This solution greatly simplifies the installation and maintenance of equipment, eliminates the risk of water freezing in pipes and melt water and precipitation entering the mouth. There is only one minus - the equipment creates a background noise. But when installed in an isolated room, it does not create inconvenience to the residents of the house.
Advice! If you have a heated greenhouse, a warm garage or a utility room in the yard, you can install a well in them.
Ideally, you need to think about how to properly install a water well on a site at the stage of designing or building the foundation of a house, in order to drill a well before the walls and roof appear. However, developers rarely think of such a solution, and then it becomes more difficult and expensive to implement. But it's also possible.
How to equip a water well with your own hands: step-by-step instructions
There are several methods, but we want to consider in detail the one that has already proven itself in practice.
Preparatory earthworks
They are carried out immediately after determining the location point and come down to digging a pair of holes and a 40-centimeter hole, followed by connecting them with grooves, and:
- the first is needed to break through the mine;
- the second is for the flushing pump;
- the third is for sand settling.
Pipe perforation
For the future column, you need to take a HDPE profile with a cross-section of 110 mm and make uniform holes along its entire length.
Creating a filter
The structure obtained in the previous step should be protected from clogging: to do this, wrap it in three layers, alternating stainless wire and mesh.
Tip cutting
Make it from a cut with a socket, giving it a tulip-shaped shape, using a circular saw. It will help you place the casing in the mine without any problems.
Formation of the tip
Close the previously obtained “petals”, warming them evenly with a hair dryer, and then securing them with a plaster or insulating tape.
Installation of the plug
Coat it on the outside (along the entire perimeter) with a silicone-based compound and insert it into the cavity of the tip for a tight seal.
Landing on the filter
AMETHYST - 02 M Residential building for up to 10 people or up to 2 cubic meters/day.
Aeration unit AS-1054 VO-90
Main table dispenser AquaPro 919H/RO (hot and cold water)
You put the resulting structure on the perforated profile, also lubricating it, and for reliability, fix it with rivets - so that it definitely does not fly off or move during the moment of immersion in the shaft.
Organization of water supply
It is needed to simplify and speed up punching, and since it is not yet possible to extract it from the well, you will have to collect it from some other source, deliver it to the site and fill the second hole with it through a hose. A volume of 1-1.5 m3 should be enough.
Drainage installation
Place the bucket with the pump in the same recess as in the previous step. This solution will reduce the absorption of dirt.
Moistening the grooves and preparing the tool
Make sure that the fluid flows constantly, and start plunging the drill into the ground - you will notice that it goes relatively easily.
Direct drilling
Rotate the tool (a 3.2 cm thick steel pipe with a movable lever and a pointed tip), remembering to press as hard as you can.
Length extension
Add new links as you deepen until you reach the required size. At the same time, lower the supply hose.
Completing drilling
Stop the process at the moment when the liquid begins to decrease from the hole (this will say better than words that you have reached the pool).
Installation of a pump for bleeding
It must be submersible and powerful enough to quickly clean the shaft.
Barrel casing
You install all the necessary pipes: the filter pipe, and after it the ordinary pipes, already unperforated, but also extended.
Final leveling
Insert a vibration pump into the created channel and start it so that it stabilizes the flow; It is possible that this procedure may take up to a whole day.
After this, you need to perform disinfection, and then, optionally, finishing the well - in order to better fit it into the landscape. As part of the last work, you can concrete the pit, install the head, and connect the equipment.
Video description
See how water drilling is done in an already built house:
Method 2 – above-ground pavilion
The second most popular way to install a water well, used primarily for summer water supply. In winter, light unheated buildings practically do not retain heat inside themselves. Their thermal efficiency can be increased by the following methods:
- bury the walls into the ground, reducing the height above the surface, and add soil from the outside;
- insulate from the inside with polystyrene foam or other heat-insulating material.
Insulated house made of thick timber over a well Source yandex.net
Video description
How to make a house for a well with a folding roof and a lock is shown in the video:
Method 3 – caisson
This method is the most common and is suitable for constructing underground sources in any climatic region. It consists of installing a caisson - a sealed well buried in the ground, through the bottom of which the wellhead is brought out.
Advantages of the caisson:
- good thermal insulation - the walls of the well are surrounded on all sides by soil, and its bottom, when buried below the freezing level, is in a zone of constantly positive temperatures;
- uncluttered area - only the upper part of the walls and the hatch are above the surface.
A caisson is the most suitable way to improve a well in a country house, since its upper part can be disguised with a flower bed or a decorative boulder.
Decorative cover for a caisson hatch Source https://gardendecor.ru/
What types of borehole caissons are there?
It is known that protective tanks can be round (cylindrical) or square. For well equipment, as a rule, round chambers are used with a main part diameter of 1 meter and a total height of 2 meters. This height is due to the fact that the water source is located at a depth of 2 meters and, in order to be able to get to it, the caisson hatch is brought to the surface.
A diameter of 1 meter was built for general convenience, so that it would be possible to carry out work inside the chamber in case of need to install, replace or repair equipment. And in order to reduce the cost of the tank, the manufacturers made a general decision - to make the diameter of the mouth no more than one meter.
The walls of the tank are usually made of iron sheets 4-5 mm thick. But since the metal is extremely susceptible to corrosion, especially in conditions of high humidity, the outside of the chamber must be coated with a special anti-corrosion compound (bitumen), and the inside of the caisson is painted with a primer, which protects it from rust, which increases the service life of the product.
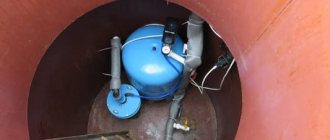
At the bottom of the tank there is a place for fixing the caisson on the casing. The outlets for pipes and cables are located in the walls. To provide convenient access to the equipment, the structure is usually equipped with a ladder. The tank is also closed with a sealed lid.
For autonomous water supply to a private house and garden plot, it is best to choose a plastic caisson, which can provide 100% waterproofness. The low weight of such a product greatly simplifies its delivery and installation process.
At the same time, when calculating the height of this structure, it is necessary to take into account the depth of soil freezing. To ensure that the device is below this point, its size is taken to be two meters.
The caisson is also made from brick or reinforced concrete rings. However, this type of protective chamber almost does not ensure tightness over a long period of time. This threatens expensive equipment with flooding and subsequent loss of performance.
