How to determine the need to sharpen a plane knife
Both hand and electric planes require sharpening from time to time, especially when used intensively. Contact with wood dulls the blade and the tool begins to work worse.
The following signs help you understand that it’s time to sharpen your plane at a certain angle:
- When removed, wood shavings often break and have torn edges;
- when planing workpieces, more effort has to be applied;
- After several passes, protruding bumps or hooks remain on the surface of the wood.
If we are talking about an electric tool, then other signs indicate the need for sharpening. Namely:
- change in sound during operation;
- the appearance of excess vibration;
- rapid overheating of a working tool.
When using an electric planer, the condition of the cutting part must be assessed primarily by the quality of the processed workpieces. Vibrations and unusual sounds may indicate damage not related to the sharpening angle.
When processing hard wood, the plane becomes dull faster than when planing soft workpieces
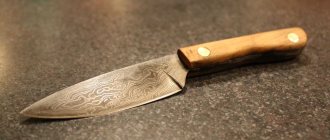
Planer knives: which ones can be sharpened
The main element of the mechanism in question are knives. Their cutting part can wear out quickly under certain conditions
When operating planes, attention should be paid to the fact that there are two types of devices:
- Manual ones are extremely common today. In the manufacture of the main part, plastic, metal or wood can be used. The blade is made using special steel, which is characterized by increased wear resistance.
- Electric planers are used when processing large quantities of material. Thanks to the built-in motor, you can significantly increase the speed and efficiency of the process.
It is necessary to take into account the fact that an electric tool can have several incisors at once. Due to this, the efficiency of the process is significantly increased. The main part is made of tool steel or tungsten. It is worth considering that the tungsten cutting part cannot be sharpened; after severe wear, it must be replaced. In this case, the surface may differ in shape and some other parameters.
What is the sharpening angle of the knives of a manual and electric plane in degrees
If the tool has become dull, then it is not enough to simply sharpen the plane knives at home until they are sharp. It is necessary to maintain a certain angle, otherwise the blade, even after processing, will not be able to remove chips from the wood efficiently.
The indicator depends primarily on the type of workpieces used in the workshop. According to the rules, the sharpening angle of a plane knife is equal to:
- 20-25 degrees - for processing pine, aspen, larch, linden or other soft wood;
- 30-35 degrees - for planing oak, maple, pear, hornbeam and other hard workpieces.
Most often, the cutting piece of the tool already has a clearly defined sharpening angle. There is no need to re-shape it; it is enough to simply adhere to a clearly visible bevel on the metal.
Attention! When carrying out home sharpening, it is very important to firmly fix the tool during the process, otherwise the clarity of the angle will suffer.
Sharpening profiles
The profile of a knife blade is linked to the properties of the material and the structure of the blade, as well as to the properties of the materials for which the tool is intended to process. Sharpening with a simple blunt wedge (item 1 in the figure) gives a stable but rough blade: the cutting resistance is high, and the knife tears quite viscous materials. A sharp wedge (item 2) quickly dulls or chips; on viscous and/or fibrous materials, the cutting resistance may be greater than with a blunt wedge due to the friction of what is being cut against the blade.
Knife blade sharpening profiles
Ideal in all respects is the ogival (smoothly sloping) profile, pos. 3. Experts are still arguing which generator is better - an involute, a hyperbola or an exponential. But one thing is certain - making an ogival blade in production conditions is difficult and expensive, and it is impossible to direct it yourself. Therefore, ogival sharpened knives are used only in special equipment, e.g. microtomes - biological devices for obtaining the thinnest tissue sections.
For disposable blades, e.g. safety razor blades, faceted sharpening is used, pos. 4, i.e. The ogive generatrix, as mathematicians say, is approximated by straight segments. The number of sharpening edges is indicated in the certificate or on the manufacturer’s website. For thick, coarse bristles, 3-4-sided bristles are better; for delicate hair not on the face - 8-sided. The 6-sided one is considered universal.
Angle α
The sharpening angle is always given in half the value α, because Many tools and, for example, bayonet knives are sharpened on one side. For knives for various purposes, the angle α is maintained as follows. within:
- 10-15 degrees – medical scalpels, straight razors, knives for artistic carving.
- 15-20 degrees – pastry knives (for cakes) and vegetable knives.
- 20-25 degrees – bread and fillet knives.
- 25-30 degrees – hunting, hiking, survival knives.
- 30-35 degrees – general purpose household knives.
- 35-40 degrees – carpentry tools, shoe knives, axes.
One and a half
Sharpening knives, except for special ones, is done almost exclusively with a one-and-a-half profile, on the left in Fig. One-and-a-half sharpening is so named because the flat edge of the blade (descent) is formed during the manufacturing process of the blade and cannot be sharpened. In fact, sharpening a knife with one and a half sharpening is no more difficult than sharpening it with a simple wedge. One-and-a-half sharpening is optimal for a knife that works with a variety of materials, and making a knife sharpener with one-and-a-half sharpening is much easier than using a faceted sharpening.
Sharpening the blade of a household or camping knife
In the center and on the right in Fig. The stages of blade sharpening and the numbers of abrasives used on them are shown. The abrasive number corresponds to the number of its grains per 1 square meter. mm surface. The finishing stage has some features:
- Hunting and camping knives are not supplied. This makes it easier for them to cut hard things (for example, bones) with broaching (with filing). In addition, if you accidentally cut yourself, the slightly lacerated wound stops bleeding faster, heals more easily, and there is less danger of infection getting into it.
- After abrading, the blades of straight razors, shoemaker's knives and for artistic carving are brought to mirror smoothness on a leather whetstone with GOI paste.
- Guiding and finishing the blades of kitchen knives can be reduced to one operation with abrasive No. 800-1100.
Methods and devices for sharpening knives of manual and electric planes
Sharpening at the desired angle is carried out using standard methods. You can use the same tools as when servicing kitchen knives.
Sharpening with a whetstone
The easiest way to sharpen the blades of an electric planer or hand tool at a selected angle is to use a whetstone, which is found in almost every home. The algorithm looks like this:
- The whetstone is placed on a flat tabletop or clamped in a vice to prevent vibration and slipping.
- The dull piece of the planing device is fixed in a special clamp or simply grasped tightly in the hand by the back.
- The sharpening stone is moistened with water, and then the blade is placed on its surface at the selected angle.
- Using smooth movements with light pressure, the knife is moved over the grainy stone, avoiding sudden jerks and slipping.
- From time to time, the block is moistened with water again to increase the efficiency of sharpening and remove the resulting dust.
After a few minutes, the blade is checked for sharpness. If the regrinding was successful, the piece of iron can be put back into the plane and tried at work.
Manual sharpening of a plane is convenient because it allows you to remove a minimum amount of metal
Sharpening using a machine
You can resharpen the planing device at the required angle using a special electric machine. The method is faster and seems very simple, but in fact it is recommended to use it if you have experience. For beginners, the machine will be more difficult than a manual sharpening stone. During the processing process, you can accidentally deform the blade or remove much more metal from it than necessary.
Sharpening a plane according to the rules on a special machine is carried out as follows:
- Remove the dull knife from the manual or electric device.
- Moisten the metal surface of the blade with water and set the machine to the lowest speed possible.
- Start the device engine.
- Place the blade against the rotating abrasive wheel at the desired angle with slight pressure.
- Process the edge until it becomes evenly sharp.
When sharpening on an electric device, it is recommended to use protective gloves to avoid injuring your hands from the rapidly rotating abrasive stone.
Attention! The plane cannot be machined at high speed. This increases the likelihood of damage to the cutting edge, after which it will be difficult to give it the desired angle.
When sharpening a plane on an electric machine, it is important to ensure that the blade does not overheat
Sharpening a plane using musat
If you don’t have a special machine or a simple sharpening stone at hand, you can restore the sharpness of the blade with musat. The device is usually used for kitchen cleavers, but it will also work well with a planer.
Musat is a long sharpening rod with a handle at the top. The tool can be ceramic or diamond. The algorithm for editing the angle of the cutting edge on musat looks like this:
- The device is installed vertically on a flat tabletop - the working part down, the handle up.
- The edge of the knife is placed against the surface in accordance with the table of sharpening angles for wood planes.
- With a slight arcuate movement, move the piece of iron along the rod from top to bottom.
- The procedure is repeated several times in a row until the blade becomes sharp on one side.
- The knife is turned over and, if necessary, the algorithm is repeated for the opposite surface of the cutting edge.
To prevent the musat from sliding on the table and maintaining an even position, it is recommended to place a soft towel under its tip. It is not necessary to press hard on the planing tool during the sharpening process at an angle, otherwise defects may remain on the cutting edge.
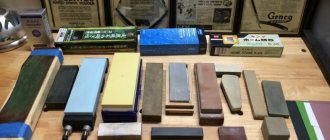
The most convenient way to sharpen a knife is with diamond grinding stone - just a few movements are enough to make the blade sharp.
What devices can you use?
The easiest and most affordable way to do this kind of work with your own hands is to use a device in the form of a wooden block. The plane knife itself is fixed in its upper part. By placing the block at one angle, you tilt it towards the abrasive. As a result, we get another fulcrum - the edge of the knife itself, which we will sharpen.
A simple device in the form of a block for sharpening plane knives
It is worth remembering that the work should be carried out so that the blade is sharpened at an angle of 30 degrees. Only in this case will your plane work as it should.
To obtain such an angle, you need to correctly select the height of the wooden block and the position of the knife itself on it.
In addition to this simple and homemade method, there are others that are no less effective. To sharpen planer knives with your own hands, all you need is a special block. The process itself must be performed in several stages:
- The first step is to prepare an abrasive stone. It is placed in water for a few minutes. This procedure allows the stone to absorb more water, which means there will be less dust and sparks during operation. After such “bathing”, the abrasive wheel is installed on a sharpening machine;
- Now you need to fix the plane knife in a special block. This device allows you to sharpen at the desired angle. Many manufacturers produce special pads, so choosing the right option will not be difficult. The knife is installed in the designated place and secured with nuts;
- Next, the sharpening itself is carried out. There shouldn't be any big difficulties here. The most important thing is that during this process the balancing of the knife is not disturbed. If this happens, the electric planer will not work properly.
Device with a clamp for sharpening plane knives
Some manufacturers of planes and other carpentry tools produce special devices for sharpening them. For example, you can find a special sharpener on sale. Such a device is capable of sharpening blades from planes and jointers from almost any manufacturer.
To sharpen, you need to install the knife in a special mount. Next, use the templates to set the required angle. The mount itself is equipped with a roller, with its help you can easily perform translational movements, thereby sharpening the blade.
But when using such a device, as with any other method of sharpening, it is necessary to pay special attention to the reliability of fixing the knife. Its plane must remain in place (at a certain angle to the sharpening surface) throughout the entire procedure. If this requirement is not met, the knife will be sharpened unevenly. This means that there is no point in talking about high quality when working.
After sharpening, it is advisable to correct the blade. Even with modern devices, minor defects can still occur. To prevent them from interfering with your work, it is advisable to pass the knife through a barrel-shaped roller. This device allows you to get rid of all small “tracks” and other defects in two or three passes.
From the video you will learn how to sharpen planer knives using a homemade machine.
How to properly sharpen a knife for a hand plane
It is easiest to sharpen the blade of a hand-held plane. The algorithm looks like this:
- Unscrew the clamping bolts on the tool and remove the blade from the block.
- A coarse grinding stone is placed on the table and moistened with water.
- The knife is placed on the surface of the stone in accordance with the desired angle.
- Perform slow circular movements on the abrasive stone for several minutes.
- After rough grinding, take a stone with a fine grain and repeat the same procedure on it in order to properly polish the processed edge.
Advice! It is better to sharpen the knife at the first sign of dullness. In this case, the procedure will not take much time, and it will be easier to restore the desired angle.
When regrinding a piece of iron, you can make movements not only in a circle, but also in the direction away from you
Overview of species
Depending on the quality of the planer knives, the operating speed of the tool is determined, as well as the final result.
Also, the type of blade affects the way the surface is processed and the shape that can be obtained at the end of the work. Manufacturers of machine tool equipment produce several types of planes, each of which differs mainly in the type of blade provided in the design.
If we classify planes according to the method of surface treatment, then the following types of knives are distinguished.
Direct
With their help, it is possible to process small-sized workpieces. If desired, you can choose a quarter to carry out the necessary work. The blades have a classic straight shape and are positioned at a specific angle to create the desired result.
Rounded
Demanded for processing large surfaces. Such blades are used when it is necessary to organize a neat and smooth transition between planing planes.
Curly
This category includes planes, the knives of which allow you to achieve complex geometric shapes when processing a wooden surface. Structurally, the blades resemble the knives of classic planes, however, they have a number of features. By using curly knives, they create a wave-like surface shape and imitate “aged” wood.
Spiral
Provides the most accurate cut. They are installed mainly in lightweight planer models, which are easy to operate. The advantage is the ability to adjust the planing depth. Knives built into the design of woodworking equipment differ not only in the shape of the surface sharpening, but also in a number of other parameters.
READ MORE: Lilac kitchen 58 photos features of using a lilac kitchen in the interior Design options for a kitchen set in lavender tones
How to properly sharpen knives on an electric planer
Sharpening knives on an electric planer with your own hands is no more difficult than adjusting the sharpness of the blades in a hand tool. But before carrying out the procedure, you need to inspect the device and understand what type of cutting parts it is.
The electric planer can be equipped with:
- Disposable knives. These blades are made of carbide material and have a double-edged edge. If one side of the knife becomes dull, you just need to turn it over and put it in its usual place with the opposite part facing out. Once the second edge wears out, the blade will have to be thrown away - it usually cannot be sharpened on an abrasive stone.
- Reusable knives. This type of blade has only one cutting side, and it can be adjusted by hand or on a machine to the desired angle repeatedly.
You need to sharpen the knives of an electric plane according to the following simple scheme:
- Unscrew the fixing bolts from the pressure plate and carefully remove the blades, making sure that they do not slip inside the tool.
- The cutting parts are fixed in a special plastic clamp, which is included with the planer.
- Moisten an abrasive bar with a large grain with water and place the blades on it at a certain angle of 20-35 degrees, depending on the type of wood being processed.
- Smoothly and with gentle pressure move the iron along the sharpening surface until the edges become sharp.
After successful straightening, the knives are placed back into the plane and pressed again with the plate.
Both cutting edges of the electric planer must be in the same plane when regrinding.
Locking blade machines
Knife sharpening machines with locking blades will attract the attention of those people who want to sharpen a knife not only efficiently, but also quickly. A design that rigidly fixes the knife blade relative to a sharpening stone moving at a set angle allows you to accurately set the angle of inclination
To create such a homemade machine with your own hands you will need:
- The base is a rectangular wooden plate with dimensions 440*92 mm and a thickness of 18 mm.
- Wooden die 92*45*45 mm (for fixing the vertical threaded rod).
- A wooden block 245*92 mm and 18 mm thick (the plate to which the knife will be attached).
- Iron plate 200*65 mm and metal thickness 4 mm.
- Piano hinge, 92 mm long.
- M8 hairpin 325 mm long.
- Nuts and bolts with M8 thread.
- Drill 6.5 mm.
- M8 tap.
- Self-tapping screws 50 mm, 4 pcs.
The die intended for fixing the vertical threaded rod must be drilled through with a 6.5 mm drill. The hole should be located at a distance of 15 mm from the edge of the die, approximately in the center.
Layout of the hole in a wooden die
Next, in the resulting hole you need to cut a thread for an M8 stud. The wooden block prepared in this way must be screwed to the base at a distance of 265 mm from the edge using ordinary self-tapping screws 50 mm long, screwed into the back of the base.
After the block and the base are securely fastened, you need to insert an M8 pin into the hole in the block. The pin should run across the entire cross-section of the beam and the base; thus the risk of changing its position is minimized. The pin at the base of the block must be firmly fixed with an M8 nut, slightly recessed when twisting it into the wood of the block.
The second part of the work involves assembling a clamping device to fix the position of the knife. To do this, a piano loop is attached to a block of wood 245*92 mm with three self-tapping screws from the end of the wooden plate, with the help of which it will be attached to the base of the device.
Attaching the fixing bar to the base using a piano loop
After securing the wooden part of the holding device, you can begin to attach the iron plate. In the center of the 200*65 mm plate, you need to drill an oblong groove, 90 mm long and about 1 cm wide. The groove should be located from the edge of the clamping plate at a distance of 60 mm. Additionally, you need to drill a hole at a distance of 20 mm from the opposite edge and cut a thread in it for an M8 bolt. Then you need to attach the clamping plate to the previously prepared wooden base using this bolt. Using another bolt and a suitable washer, you need to fix the clamping plate in the center of the cut groove. The fixation should be clear, but at the same time neat, so as not to damage the surface of the blade.
Attaching the Iron Clamp Plate
The most difficult part of assembling this device is preparing the control device that will set the sharpening angle of the knife. For this you will need:
- metal square profile 40×40 mm;
- furniture bracket, 40 mm wide;
- a pair of rivets;
- a piece of plywood 42×25 and 18 mm thick;
- bolt and nut M5;
- a pair of M8 wing nuts;
- whetstone;
- steel bar with a diameter of 0.8 cm and a length of 40 cm.
It is necessary to drill a couple of holes on a piece of plywood: a through hole with a diameter of 8 mm along a cross-section of 42×18 mm (the distance from the edge on the 42 mm side should be set at 15 mm) and a through hole with a diameter of 5 mm along the side with a cross-section of 42×25 mm (the distance from edges 10 mm). The square pipe should be cut in half so that you get a “U”-shaped bracket with a width of 40 * 15 mm and ears of 20 mm. You need to drill 8 mm holes in the ears, into which an M8 pin will later be inserted. Connect the resulting bracket to a furniture hinge using rivets. Using the second part of the furniture bracket, attach a block of plywood to the resulting structure with an M5 bolt.
Location on the spoke of the guide mechanism
Connect the touchstone to a guide rod, which is a steel rod with a cross-section of 8 mm. When connecting the keystone and the guide rod, you should strictly ensure that their center lines coincide. If desired, for ease of use of the sharpener, a handle-holder can be attached to the whetstone on the reverse side. All that remains is to secure the whetstone in the guide mechanism, secure it with a thumb and the homemade device for sharpening knives is ready.
Sharpener assembly
How to check the quality of blade sharpening
Before installing knives into the tool, it is recommended to check the quality of their sharpening. The simplest test is this:
- Take the blade in one hand and regular printer paper in the other.
- A sharpened edge is drawn along the edge of the sheet from top to bottom or they are tried to cut it across, holding it suspended.
- Evaluate the result.
If the knife is sharpened well, the cut will be perfectly smooth and neat. A dull edge will not cut the paper or will tear it roughly and unevenly. After regrinding, you need to check the tool in operation on a test workpiece, which you don’t mind ruining.
Warning! It is not recommended to evaluate the sharpness of metal with your finger without appropriate experience. A well-sharpened corner can leave a deep cut.
How to make a sharpening device and sharpen a plane knife or chisel with your own hands
If one corner of the piece of iron protrudes, then it is corrected by lightly hitting the piece of iron with a hammer from the side of the protruding corner (Fig. 4c).
After the iron is installed correctly, it is finally secured with a wedge. The wedge should not be driven too hard to avoid splitting the shoulders.
Rice. 4 Setting up the plane: a - correct grip; b - technique of knocking out a knife (piece of iron); d — correction of metal misalignment (front view)
Metal plows are adjusted using a clamping screw. After tuning, the instrument should be tested on a board. A well-tuned plane easily removes chips and planes smoothly, without burrs or scratches.
Carpentry. Mastery lessons. Content
Knife design
The knife of a hand plane consists of a working and a supporting part. In the configuration of the working part of the knife there are:
- A chamfer that forms on the back of a blade. It reduces the force of cutting the knife into wood by eliminating friction of the rear part against the workpiece material.
- The rake angle, which in most cases coincides with the accepted inclination of the knife in the plane body.
- The back corner of the chamfer itself.
- The working angle of the sharpening, which is equal to the difference between the values of the chamfer angle and the angle of inclination of the knife in the plane.
For the durability of the tool in question, the rake angle is of greatest importance: it is this that determines the smoothness of the planed surface, the conditions for removing chips from the processing zone and the load on the blade.
When choosing the optimal value for a given angle, the following factors are taken into account:
- Physico-mechanical properties of the processed material. In particular, as hardness increases, the angle must be increased. For processing soft wood (linden, aspen, pine, larch) it is recommended to set the knife at an angle of 45±5°, for working on harder wood (hornbeam, oak, pear) - 60±5°, and when processing even harder materials - even up to 80°. Such recommendations are associated with the abrasive action produced by the passage of chips as they rise from the planing zone;
- Type of planing. Almost every type of wood requires a certain angle of inclination of the plane to the plane of the workpiece being processed. For example, pine is best planed when the tool is tilted at a sharpening angle of the knives of a hand plane of 40...50 ° from the axis of the board. Less soft varieties are processed at sharpening angles of 25...30°. This technique provides better planing quality, but the knife heats up more and, therefore, becomes dull faster;
- Knife material and hardness. High-speed steels P12 or even P18 are most suitable for these purposes (for this reason, some home craftsmen use parts of friction saw blades that work under similar conditions to make plane knives). Planer knives made from ordinary tool steel type U7 or U8 will be less durable.