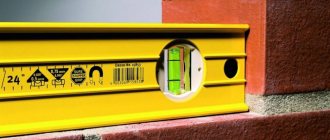
The building level is considered a device that is used in various works. Without it, it is impossible to carry out repair work ; even the installation of partitions and furniture is carried out only when such equipment is used. The building level is available in different modifications. It can be laser, bubble, water.
The selection of tools depends on convenience and the amount of work. It is important not only to choose wisely, but also to configure it. It is extremely rare that equipment is purchased ready-made, unless the laser device can be used immediately after purchase . Therefore, the question of how to configure the equipment is considered a priority. You should not start working without completing the settings.
Checking the accuracy of the bubble level (rules)
For some reason, many people think that the easiest and most reliable way to check the accuracy of a regular building level is only with a laser level.
Where did such blind faith in laser levels come from? They, too, can lie, and some of them lie very strongly. I'm not against laser levels, I use one myself, but sometimes it's easier to put it aside and use the good old bubble level.
So that's what I'm all about. There is a very simple way to check your level for accuracy, no matter where you are (in a store, at home or on a construction site) and whether you have a perfectly level plane at hand.
Level calibration
When the flask is secured with screws, calibration is quite simple:
place the rack against the wall and position the bottle strictly in the center. Mark and draw a line from below.
turn the level over to the other side and combine it with one of the ends of the segment. Again, make sure that the bubble is in the center. Draw a second line.
Now all that remains is to divide the resulting angle in half and draw a third line (bisector) between the two
apply the rod to this line and adjust the flask with screws until the bubble is centered
The correct vertical is plumb. Moreover, the plumb line must be made of non-ferrous metal.
Steel can be affected by magnetic fields if the cord is long enough. In addition, magnetized sawdust often sticks to the plumb line itself, and this is again an unnecessary error and deviation.
If the bulb is glued in, you can try to adjust it by gently tapping it with a screwdriver attached to the edges of the bulb.
You need to hit the elevated part. True, good accuracy is difficult to achieve in this way.
Either way, you have little to lose. After all, your level is already shamelessly lying. If this method helps, you need to glue the joints of the flask with superglue.
Device structure
As a rule, the level looks like a regular rectangular ruler, into which one or two (sometimes more) flasks with a special liquid ; in them you can see a small air bubble, which is considered a pointer. If this ball captures the space between two drawn marks on the bulb, then the plane being examined is vertical or horizontal. If it stands beyond the mark , then you can evaluate the degree of difference.
Each flask (eye) is filled with a viscous liquid so that the bubble can move. Another important condition is that the filler does not freeze in the cold. For this reason, alcohol is considered the main material for cones; it is tinted to make it easier to observe the measurement. The marks by which information is taken are marked on the flask. In some cases there are not two, but more for high accuracy.
It is extremely rare for a household level to have more than two measuring flasks: one for examining horizontal planes (180 degrees), and a second perpendicular to it for measuring vertical planes (90 degrees). You can find a third flask, which is adjusted to 45 degrees and secured. With specialists, you can notice a more bizarre mechanism, where there are more flasks; they usually duplicate the main ones to reduce inaccuracy, or measure other angles (for example, 60 degrees).
At the same time, a mechanism of any level can be understood by any specialist; difficulties with how to use the device never arise.
There is
an electronic level , which has a convenient screen where the measurement results are shown.
This is determined not “by eye”, but with the help of sound effects, as a result of which the numbers are more accurate and the error is significantly reduced. In addition to the key structural components on the body, there may be useful additions that often help the builder during the work period. For example, a ruler placed at one end of the device, or a milling surface, so that when installing the device it is more stable and easier to hold (for example, when measuring vertically). In addition, you can find a notch-bend on one edge for sloping planes such as pipes, so that it is convenient to determine their placement in space.
Types of levels
To correctly adjust the level, you must first decide what it will be.
Manufacturers today offer:
- Hydro level (water) is the usual type, which consists of 2 individual flasks connected using a hose. Its length is 5−25 m, and a scale is applied to the flasks for ease of use. There is no need to adjust this level; it is used only for the horizontal plane. The price of the equipment is low; this type of mechanism is designed to install other types of equipment.
- Bubble device - makes it possible to carry out precise work. In appearance, it is a ruler of various lengths, which contains 3 flasks filled with liquid (most often alcohol). A tool is used for vertical and horizontal measurements, but it must be installed before starting work.
- Magnetic - is special equipment with magnetic inserts; it guarantees a high level of convenience when working with iron surfaces.
- Pipe - has a light weight and small size. Perfect for measuring pipes, profiles and similar materials.
- Laser is a clear, special equipment with small dimensions. The range of its beam, with the support of which the measurement is carried out, is 100 m. The device system can be different, most often it is inserted on a tripod, but there are also magnetic types. The modifications themselves are presented in a wide variety; it is possible to choose directly the type you need.
- The electronic laser mechanism is digital special equipment; special instructions are used to configure it. The price of the equipment is higher, but the quality is excellent.
Vertical and horizontal check
Bubble levels are a bar with three bulbs; this level allows for precise work.
Vertical checking and adjustment can be carried out using a conventional plumb line. First you need to mark the point yourself, drive a nail into it or screw in a self-tapping screw. Next, a thread with a plumb line is tied to it. 2 more screws are screwed in at the bottom and top, their heads should touch the thread, it should slide along their surface.
Self-tapping screws should be placed so that the caps are parallel to the ground level.
Then the level is placed on the thread, and the position of the bubble is examined. If it is in the center, then the level is set correctly; if not, it needs to be adjusted a little. If no manipulations to adjust the building level help, this is a defective tool and cannot be used.
A pipe level is a type of bubble level designed for measuring pipes.
Horizontally, checking equipment begins with finding the ideal horizontal line; a hydraulic level will help with this. You can buy it at any hardware store; the cost of the equipment is low, but it can be used for various jobs in the future.
Checking the horizontal building level is carried out as follows:
- The hydraulic level must be filled with water, the liquid in the flasks should be at the middle mark.
- Next, take 2 sheets of plain paper and attach them to the surface of the concrete wall with construction tape. Their position should be parallel; lines are drawn on the surface of the paper, to which the building level will then be applied.
- One flask is applied to the sheet, a mark is placed at its position. You can use a tripod to mount it. If two people do the work, then the fastening problem is solved even easier - the second person will hold the flask in the required position.
- The second flask is applied to the sheet, a mark is made so that all the marks on the paper and the water marks are flush.
- A bubble level is applied and the position of the bubble is checked. If it is in the middle, then the level is set correctly. It does not require further configuration. If the bubble is displaced, then it is necessary to adjust the building level.
How to use a bubble level with three bubbles
The bubble level is easy to work with, and horizontal and vertical capsules are rarely an issue. Measurements are carried out by applying the device to the planes, as when checking and adjusting. The position of the bubble is observed in the same way; it should be in the center if the surfaces are smooth.
But the rules for using an inclined ampoule are not so obvious. This peephole is designed to check the angle of the plane. Next to it there is usually a rotating mechanism that allows you to adjust the ampoule to arbitrarily determine the inclination.
In budget devices, the third capsule is not adjustable and allows you to measure only an angle of 45°
The third bubble is used according to the following algorithm:
- the inclined flask is installed in the desired position using screws, focusing on a special graduated scale;
- the device is applied to the surface being measured;
- check the air bubble in the peephole.
If it takes a central position, then the tilt corresponds to the desired angle set when adjusting the bulb. If the bubble deviates, the surface requires leveling.
Electronic level
The electronic level is an improved version of the bubble level. It has three familiar flasks for checking the horizon vertically, horizontally, and at an angle of 45 degrees. In addition, the device has a digital display on which the rotation angle values are displayed according to the readings of the position sensors.
A rough check when purchasing in a store is done in the same way as in the case of a bubble level. That is, place the device on a flat surface and rotate it 180 degrees. If the readings on the display do not change, then everything is in order. But this rarely happens.
Calibration of the electronic level is mandatory by the manufacturer. According to the recommendations, it is done:
- before starting critical measurements;
- before first use;
- after the device falls onto a hard surface;
- after exposure to shocks or vibrations during transportation;
- after a temperature change, transition from a cold zone to a warm one.
The calibration procedure is described in detail in the instrument's operating instructions. In general, one of the display buttons is called CAL. To calibrate the level, you need:
- place it on a flat surface;
- squeeze for 10 seconds;
- press the calibration button, the display shows 0;
- wait another 10 seconds and press the button again;
- after one appears on the display, rotate the level 180 degrees;
- wait 10 seconds;
- press the calibration button and remove the device from the surface.
Important! For the calibration to be correct, it is necessary to select a guaranteed horizontal plane. In a construction site, this could be a sheet of foam floating in a trough filled with water. Other surfaces may not be horizontal, in which case calibration will cause the electronic level to read incorrectly.
Laser level
Laser levels and levels are very complex devices. Each of the emitter blocks has two degrees of freedom of regulation. One of them is responsible for the tilt of the horizon (for plane builders and rotary devices), the other for the angle of attack of the laser (the height of the end point of the beam). Like any device, during operation the laser level experiences shaking, light shocks, and temperature changes. Therefore, its accuracy is reduced. This means that even with a minimal beam error, you can get a deviation of, for example, a seam of 6-10 mm in a large room.
There are two ways to check the laser level.
- The angle of attack is checked in a large room with a flat floor, with a clearance between the walls of 5 to 20 meters. The device is placed at a distance of 1 m from one wall (number 1). The beam is directed to the nearest one, the position of the point or line is noted. Then they aim the laser at the opposite wall, fix the position of mark 2 and move the device to a distance of 1 m from it. The check is repeated, having previously adjusted the height of the tripod until the beam hits point 2. If the marks on wall 1 do not match, then the laser level needs to be adjusted.
- Checking the horizon for the builder of lines, planes, and rotary devices is carried out using the method of sequential rotation. To adjust the laser level, it is pointed at the wall. Mark the middle of the horizontal line within the angle of attack. Then turn the device until the edge of the light line reaches the mark. Vertical deviation will indicate that calibration is required.
Rotary devices that do not have a pronounced coverage angle are also checked by turning the device clockwise and counterclockwise. If the horizon is tilted incorrectly, the beam on the wall will deviate from the previously made mark.
Water (liquid) level
Another name for this tool is a hydraulic level. It is a rubber thin transparent tube. It works on the principle of communicating vessels, that is, the water level at the ends of the hose will be the same. Of course, if the device is not twisted.
Sometimes there are flasks at the ends of the hose, but they only harm the work, as they interfere with accuracy. Professionals most often either remove them or immediately buy the option without flasks. This tool is used only for horizontal measurements. Most often, at the very beginning of the renovation, they use the “horizon”, along which there is a guideline for floors or ceilings.
Terms of use
First you need to fill the hose with water, not reaching the ends by about 10–15 centimeters. Further work is done with a partner. One person stands at the corner and places a point at the desired height, then brings the water level in the hose under this point, raising and lowering the device.
At this moment, your partner stands in another corner and places the hose at approximately the same level. The first person at this moment watches when the water “settles down” and stands exactly at the mark. When this happens, the partner must make a mark in his corner, then move on to the next one. Next, the marks are connected with a paint cord or a pencil with a tape measure.
An example of work can be seen in the video.
Peculiarities
Since the length of the hose sometimes reaches 10 meters, work is only possible with a partner. But this makes it possible to “draw the horizon” even on a large construction site.
The hose requires careful storage without twisting or rough bends. Not suitable for work in winter in unheated rooms, since water can change its density.
What is a round bubble level for and how to use it
A type of bubble levels are round, which are designed for testing horizontal surfaces. The round spirit level differs from the rectangular body in design, but its operating principle is similar. Structurally, the device is a sealed flask, which has the shape of a hemisphere. The device consists of a plastic base and a hemisphere made of impact-resistant glass. On the sphere in the center there is a marking in the form of a circle. The flask is filled 95% with alcohol or distilled water. The remaining 5% is air or a measuring droplet. The central location of the droplet determines the deviation from the horizontal surface.
What are round bubble levels for? They are used not only in construction, as well as when checking the degree of shrinkage of constructed buildings, but also when conducting photo and video filming. The measuring device allows you to adjust the tripod horizontally, eliminating the possibility of skewed photographs or video recordings. Round spirit levels are also used when installing scales, as well as for leveling the position of installed machines, industrial equipment and jewelry surfaces.
This is interesting!
A round bubble level is used to level the horizontal surfaces of small objects.
Sources
- https://instanko.ru/izmereniya/uroven-stroitelnyj-puzyrkovyj.html
- https://tehnika.expert/dlya-remonta/stroitelnyj-uroven/kak-polzovatsya-puzyrkovym.html
- https://texnotoys.ru/bytovaya-tehnika/kak-pravilno-proverit-uroven.html
- https://zaborprofi.com/instrument/stroitelnyj-uroven.html
- https://seberemont.ru/kak-polzovatsya-stroitelnym-urovnem-pravilno/
- https://svetodyody.ru/kak-pravilno-polzovatsya-stroitelnymi-urovnyami-raznyx-vidov.html
- https://moiinstrumentu.ru/uchimsja-pravilno-polzovatsja-puzyrkovymi-stroitelnymi-urovnjami.html
- https://TehnoPanorama.ru/instrumenty/kak-polzovatsya-puzyrkovym-urovnem.html
Device characteristics
The device helps to form straight lines in any plane, control the desired slope or angles. There is a certain principle for selecting a device, its operation and testing.
Description and selection criteria
Building levels are used during home repairs and during major construction of buildings. Therefore they come in different sizes and types . Spirit levels are indispensable when laying pipes and various surfaces that require an angle of inclination. They are used during installation of vibrating and demanding equipment for a flat surface. Reliable slats have a metal casing that protects the device during falls and from other damage on the construction site. Metal slats are made of a special alloy that is resistant to corrosion. Plastic devices are less durable, but cheaper.
The device is selected with the ability to adjust the capsule. Determine the correctness and accuracy of the indicators. To do this, place a level in the store on a horizontal surface, marking the edge of the end of the bar with a marker.
The bubble is not always in the center of the ampoule, but extends 1-2 mm, for example, beyond the left ruler. The readings are remembered and the bar is turned 180 degrees.
How to check the bubble level in a few minutes. Step-by-step instruction
1) First of all, check the horizontal level. To do this, you will need to place a building level on any horizontal surface. For example, floor, table, etc.
It is best if this surface is flat. After this, we look at the bottle and remember its readings.
2) Rotate the tool in a circle on the same surface. It is necessary to rotate the level 180 degrees. We record the readings that the bottle gives. We compare them with those that were obtained earlier.
Note! The bubble should not change its position when a person turns the level in the opposite direction.
In this case, such a circumstance will indicate the accuracy of the readings obtained.
Remember, the level should show the same readings from either side.
Some people believe that if these values are different, then they have received a defective level that can be used for its intended purpose. However, this is not at all true.
Most likely, significant errors were made during the audit, which affected the data obtained. Although the possibility of marriage cannot be ruled out either.
3) We check the tool vertically. To begin with, we place the level against the wall or some other surface, look at the readings of the bubble and record them.
4) Turn the level over to the other side. The vial will also give a reading. They must be trusted with the data that was previously obtained.
This method of checking the bubble level is considered universal and is very popular among many installers.
It is simple to implement and does not require additional tools that can check the level for accuracy.
Some levels have a peephole adjustment function. Over time, the accuracy of the level may decrease.
Therefore, it can always be adjusted using special screws that are located on the surface of the tool.
What do the divisions on the flasks mean?
There are divisions on the ampoules with liquid in the construction device; they can be applied to the outside or inside of the capsules. There are two types of such marks on flasks:
- Marking. Using these marks, the tool is checked and adjusted; the drop should be located exactly between the marks, resting against them with its edges. If there is a deviation, then the device requires preliminary calibration.
- Error marks. The manufacturer places such additional risks closer to the edges of the ampoule. The instructions for the device must indicate the division price for these marks. If you know it, then when the air bubble moves in one direction or another during the measurement process, you can understand how much the surface deviates from the plane.
Most levels are marked only with the main marks for the vial.
In addition to the divisions on the flasks, on the body of some devices you can see a regular millimeter ruler, which is needed to measure the length.
Adjustment, configuration, repair of building level. How to adjust it?
There are levels in which adjustment is possible. The sensitive element (flask with liquid) is fixed with a bolt at such levels. If the bolt is loosened, you can rotate the sensitive element, thereby adjusting the level. Setup is usually done in one of two ways. Either we simply move the flask by hand (this adjustment is less precise), or there is an adjusting bolt, by turning which we adjust the position of the flask (more precise adjustment is possible). Not all hydraulic levels are suitable for adjustment. There are those in which the bulb is glued in. If such a tool is faulty, it must be thrown away.
Adjusting the level is not a problem if you have a strictly horizontal surface. But a vicious circle arises. To repair a building level, you need a horizontal surface, and to find a horizontal surface, you need a working level. Let's get a horizontal surface using a broken spirit level.
Cut a stack of small pieces of paper, such as newspaper. Let's find a stable (immobile) approximately horizontal surface. Let's put our faulty level on it. Place several pieces of paper under one end of the level so that it shows horizontality. Let's remember how much paper we put in this (first) time. Let's turn the level horizontally so that its right end is now on the left, and its left end is on the right. If the level is working, then it will continue to show horizontality, since a working level shows the horizon, and there is only one horizon, from right to left, and from left to right. If the level needs to be adjusted, then as a result of turning it over, the air bubble in the flask will shift, the level will show that it is no longer horizontal.
Let's place a few more pieces of paper under one of the ends of the level so that it again begins to show horizontality. You may have to place the paper under the same end as last time, perhaps under a different one. At the same time, we count each piece placed. Now we will remove exactly half of the pieces of paper placed in the second stage. If there were an odd number of them, then we round them up. Congratulations, we got the true horizon.
But the level shows a deviation. Loosen the fixing screw, turn the flask so that it shows horizontal, and tighten the fixing screw. The setup has been completed successfully.
Adjusting the vertical flask is done in exactly the same way. But to perform it you need an assistant, since it is performed on an approximately vertical wall. But on such a wall, pieces of paper and a level will not hold on their own. An assistant will have to hold them.
From a mathematical point of view, the proposed method is not entirely accurate, but for construction purposes the error is acceptable.
(read more...) :: (to the beginning of the article)
| 1 | 2 | 3 |
:: Search
Unfortunately, errors are periodically found in articles; they are corrected, articles are supplemented, developed, and new ones are prepared. Subscribe to the news to stay informed.
If something is unclear, be sure to ask!Ask a question. Discussion of the article.
More articles
DIY built-in closet. Instructions. Scheme. Drawing…. Built-in wardrobe - we design and install. How to do it yourself, with your own hands...
Examples of adhesives. Poxypol, liquid nails, universal superglue. Armir... Typical gluing errors. The right technology. Additional techniques - arm...
LED lighting lamps 220 volts. Features, impact on vision... Use of LED lighting lamps in everyday life. Properties, features. Review….
Knitting. Royal crown. Drawings. Pattern patterns... How to knit the following patterns: Royal crown. Detailed instructions with explanations...
Insulation to keep it warm... Insulation, typical mistakes, how to do it right...
How to install a coal boiler? Choosing a location, location?... Tips for choosing a location, installing a coal boiler, connecting a chimney...
Barrel steel, iron, metal. For sale. We buy, we buy, p... Iron barrel - choice, protection against rust, corrosion. How to buy and extend the term...
Knitting. Air diamonds. Drawings. Pattern patterns... How to knit the following patterns: Air diamonds. Detailed instructions with explanations...
Electronic levels
The electronic level is a more advanced, improved version of the bubble product. It has two familiar blocks to control horizontal and vertical. The third job is performed by an electronic unit with gyroscopes. When the level is placed on the control surface, the amount of its inclination is displayed on the screen. Alcohol is zero in the horizontal plane and 90 in the vertical plane.
The electronic level has a calibration system. It can be automatic in expensive models. For budget-friendly ones, a separate button is provided for setting up the settings. When a level is purchased from a store, its data is not perfect. Depending on the direction in which the device is applied to the surface, the display shows different angles of inclination.
Calibration of the electronic level takes less than a minute. The procedure is carried out according to the manufacturer's instructions. To guarantee measurement accuracy, you will have to find a perfectly horizontal plane. In an apartment, this could be a sheet of foam plastic, immersed in the bathroom. At the construction site it is placed in a container for the solution.
What you need to know when choosing a construction spirit level
Before you learn how to use a construction bubble level, you should first buy one. Finding a point where to purchase a tool is not at all difficult, but choosing a measuring device that is suitable for its parameters is much more difficult. What you need to consider to select the right bubble type level is listed below.
- What material is the tool made of? It can be plastic, metal, aluminum.
Wooden and polystyrene foam spirit levels are less common. Plastic has an advantage over its competitors in that such devices are much cheaper, but they are intended exclusively for household use. Plastic has larger measurement errors than metal and aluminum levels - The length of the device depends on where and what you plan to do with the tool.
For external construction and finishing work, levels of 1-2 meters in length are used. The maximum length of the devices is 4 meters. Levels with dimensions of 30 cm or more are suitable for interior finishing work. - The number of ampoules located in the instrument design affects the functionality.
Usually, for home use, two ampoules on a spirit level are enough, while construction specialists use devices with three flasks. The difference in price between devices with one or three flasks is insignificant, so it is better to immediately buy a spirit level with three ampoules - How firmly the ampoules are fixed - they must be firmly attached to the base through a plastic or rubber base.
If the containers wobble or fall off, then it is better not to buy such levels - Where are the control marks located - they should be applied to the inner surface of the glazing, which will eliminate the likelihood of their abrasion during operation
- The presence of additional functions - this affects the cost, but at the same time facilitates the operation of measuring instruments.
Additional features include the presence of magnets, backlight, and a telescopic mechanism to increase the length of the device - The presence of handles for ease of operation of the device - usually such handles are presented in the form of rubberized recesses in the body of the instrument.
Such handles are found mainly on expensive models of instruments.
It is on the basis of these criteria that it is necessary to choose a measuring instrument - a spirit level. When purchasing, it is recommended that you take a few steps to ensure that the device measures correctly. Let's look at how to check the accuracy of the bubble level below.
This is interesting!
Analogues of bubble levels are electronic ones, which use an electronic display instead of a glass bulb. The display shows digital values in the form of deviation from the linear surface. With their help, you can find out the magnitude of the deviation, which is sometimes very important.
Level setting
If the level gives inaccurate readings, it can be adjusted. It's very easy to do.
- To begin, find the flattest vertical surface.
- Place the tool on one side of the surface and measure vertically. In the place where it shows “evenness”, draw a line.
- Change the location, turn the device over and take the readings again. Draw a line. You should end up with an isosceles triangle.
- Measure the distance between the two sides of this triangle and divide it by two. The center of the third line is the horizon, the correct indicator of evenness. Now you just need to attach the device to this horizon and adjust the ampoule with the bubble.
You can see more clearly how to set up and measure the accuracy of a building level in the video:
That's all. Using the tips presented above, you can achieve results and configure your tool so that it no longer tries to deceive you. The main thing is to do everything correctly and follow the steps described above.
How to properly use different types of building levels
When carrying out construction work, you cannot do without a level to make accurate measurements of the corners on the site in accordance with the drawing.
They use different types of tools, for example, bubble, laser, water. Their use helps to accurately transfer angles of inclination from one structural element to another.
The use of a level or level in construction allows you to take measurements of small angles.
Rules for using a bubble level
The most common is the bubble level. Its design has the shape of an oblong narrow rectangle with 1-3 flasks. The body of the instrument can be either solid or hollow.
The body can be metal or plastic. Deviations are determined by the presence of flasks filled with alcohol. They contain a ball of air.
One flask is characterized by a vertical error, and the second - horizontal.
The defining characteristic of a bubble-type device is its length, which can vary from 20 centimeters to 4 meters. Each of the tools, including using a plumb line and a level, can only perform certain types of work, since there is no specific model for all cases. Each device is used when performing the following types of work:
- Using a short level allows you to install small elements, for example, sockets with switches, spotlights.
- The use of a medium level is associated with large-scale work, for example, related to laying tiles.
- A two-meter level allows you to check for “out-of-flatness” if it is used as a control rod.
Since the design of the bubble level is made of liquid and glass, you should act carefully when using this tool. If the device has ever been dropped or hit, its readings may be erroneous. After purchasing a tool, you should definitely configure it. For this purpose, it must be applied to a perfectly horizontally flat surface.
You can achieve an accurate result if you fill a large container with water and place a piece of foam plastic with a flat surface on top. This position allows you to check how the air bubble is located in the capsule. If a certain error is detected, the capsule should be rotated around its axis, adjusting the level.
Using a level, it is applied to the surface that needs to be examined.
Next, determine the position of the air bubble. If it is located exactly in the middle between the marks, then this means that the surface is perfectly leveled.
If the bubble deviates from the vertical to the right or left, it is necessary to tilt the surface in this direction. If the bubble deviates downwards when it is placed on a horizontal surface, then it is lowered. When the bubble deviates upward, the surface is raised.
How to use a building level - determine the horizontal plane
The simplest thing is to determine the horizontal using a bubble level. To do this, you need to make a mark on the wall with a pencil where you plan to drill a hole for the dowel. To ensure that the future shelf or cabinet hangs level, the location for drilling the second hole is determined using a level. To do this, we combine it with the mark, and by aligning the bubble in the flask, a second mark is installed.
To make sure that the shelf or cabinet will hang straight, you need to connect the resulting dots and perform a control check. If the device is used to level the refrigerator or washing machine being installed, then the legs on this household appliance must be screwed so that the bubble at the level is centered in all planes of the device’s position.
How to use a bubble level to determine a vertical surface
Using the second flask on the device, the evenness of vertical surfaces is checked, for example, the quality of brickwork, plaster, plasterboard sheets, etc. To do this, you need to lean the device against the surface and look at the location of the bubble. It should be exactly in the center, which indicates the evenness of the surface.
It is important to consider that the vertical surface is measured so that the flask with the bubble is at the top. This simplifies not only reading the result, but also reduces the error.
Tilt control
There are known models of bubble levels, the design of which has 2 transparent flasks. Such a tool is needed to check the angle of inclination of the surface, as well as determine the location of the line at a certain angle relative to the horizontal or vertical surface. Such a tool performs the function of a protractor.
Different models can be used to determine different angle sizes: inexpensive models are used to determine an angle of 45 degrees. More expensive level models can be used to determine other angle values. Such models are equipped with a third rotary flask. By rotating the flask, you can select the required angle.
When working with levels with 3 flasks, it is recommended to follow the following sequence of actions:
- Place the rotary flask in the position required for operation. To do this, loosen the screws, focusing on the graduated scale and latches. After the angle is set, screw them all the way.
- Place the tool with the working surface against the wall.
- The location of the bubble of the third flask in its central part indicates that the surface is located at the required angle of inclination.
It is recommended to use a bubble level with three bubbles if you need to control the angle of inclination of the surface. Using a building level with 1 or 2 transparent flasks for this purpose will not give results.
What not to do
When using a bubble building level, you should adhere to some rules for working with it. Among them are the following:
- Do not apply the level to the working surface with its side or top.
- Do not use the tool without first adjusting it. To do this, you need to prepare a level, pencil, ruler and nail:
- Perform adjustments on as level a surface as possible. This can be the left corner of the wall with convenient access to it;
- retreat from the corner 3-5 cm;
- drive a nail into the wall;
- bring one side of the level to the nail, resting it against the surface of the wall;
- draw a line on the wall;
- lean the other side of the level against the nail;
- draw another line.
Video description
How to check the level, watch in this video:
It is important to pay attention to the following nuances when purchasing a building level:
- Frame . It is recommended to choose a cast housing that is not less than 2 mm thick. A high-quality body is determined by the weight of the tool: the equipment should not be too light. The body also plays a very important role in the operation of its subject. The protected housing is a guarantee of proper operation of the equipment. Also, a high-quality tool should contain special rubber inserts.
- Flask . The marks on this part of the building level from the edge should not be less than 1 mm, like the cone itself. If it is small, then the bubble will not accurately show the evenness of the surface, which means you will have to spend additional time on adjustments.
Bubble level flask Source goods.ru
- Number of flasks . The building level should contain several flasks at once for accurate and quick measurements. They are mainly horizontal and vertical. But there are also tools that allow you to measure a surface at an angle.
- Error . Almost any such instrument has an error. Especially inexpensive devices can distort actual measurements by several millimeters. Therefore, this indicator also needs to be taken into account, especially if the level cannot be adjusted.
These are the factors you should pay attention to when purchasing a bubble building level. This is the only way to purchase a high-quality and accurate instrument.