Rules for installing a countertop kitchen sink
Before starting installation work, you should choose the place where the structure will be built. Usually it is tied to sewerage and water supply. It is possible to embed the device anywhere in the headset. When choosing an installation location, it is advisable to follow these recommendations:
- The bowl is placed as close to the work area as possible, making it more convenient to cook.
- The design divides the work surface into two parts: dirty and clean. In the first, food is processed, in the second, they are served.
- It should not be installed near a stove or refrigerator. It's not practical.
- It is advisable that there be light where the bowl will stand. If necessary, additional lighting is provided.
For a functional kitchen, it is best to choose a deep appliance: you can wash large dishes and other large items in it. A low mixer will give a minimum of splashes during operation.
How to choose a sink, taking into account the type, type of installation, material of manufacture
The sink should be comfortable, stylish and functional, so when choosing it you need to be guided by the following criteria:
- Size, shape and capacity.
- Resistant to high temperatures, mechanical damage and household chemicals.
- Appearance - it should fit harmoniously into the overall interior design of the kitchen.
For a small-sized kitchen, it is most rational to choose a corner design - it will help make the most of the usable space of the room. It needs to be built into a special corner floor cabinet, in the shape of a trapezoid. Also, a round or square sink would be appropriate in a small kitchen. Round and square sinks are the most compact and are well suited for a small kitchen.
Also, when choosing a sink, you need to pay attention to its depth - too deep puts a lot of strain on your back, since you need to constantly bend over, and too shallow is not entirely practical because splashes from washing dishes will also fall on the wall, stove or countertop. The optimal washing depth is 150-180 mm.
A corner sink with two or three bowls is a very convenient device, it is practical and does not take up much space, so it is suitable for small kitchen spaces
Thanks to modern materials and technologies, manufacturers produce sinks of various shapes - classic rectangular, round or square, as well as fancy asymmetrical ones. Therefore, when choosing the shape of the sink, you need to be guided not only by personal preferences, but also by the design of the kitchen and the size of the countertop.
It is advisable to choose a kitchen sink together with a mixer, then the composition will look harmonious
What to prepare before installation
For high-quality insertion of equipment into the countertop, in addition to the plumbing fixtures, you need to prepare:
- electric drill and jigsaw;
- Screwdriver Set;
- drill bits;
- pliers;
- square, pencil and ruler;
- fasteners, if they are not included with the device;
- rubber seal;
- silicone sealant.
Need to inspect carefully before purchasing. It should not have any dents or scratches if it is made of stainless steel. If not, you need to additionally check for chips. Even small defects will not allow it to fit tightly to the base, and this is unacceptable. It is optimal that the kit includes good quality fasteners. Otherwise, it is better to purchase them.
We select tools and materials for work
To fasten the sink quickly, you need special tools. Be sure to check before cutting along the marked edges of the countertop for a home sink that the kit includes fasteners for it.
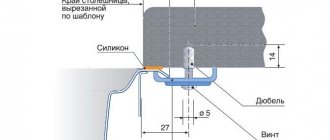
ADVICE. Manufacturers usually add double-sided clips to the box. The elements must be secured to the ends of the already cut table and to the inside of the sink. Additionally, there will be a tubular seal to seal the joints.
Take care of these tools:
- Jigsaw, set of blades for it. You can take a regular saw.
- Drill and drill bits of different diameters.
- Measuring devices - water level, tape measure, knife, ruler, screwdriver, square.
- Silicone sealant.
- Plumbing fixtures are installed on cabinets with sliding, opening doors. The back wall remains open in them. This allows the plumbing and drainage to be collected correctly. It is easy to access the pipes at any time.
- Before cutting out the countertop for the sink at home, you need to have rubber gaskets on hand. They will have to be used when installing the sink to remove water leaks. Parts must be treated with waterproof products.
Performing markup
Installation is a labor-intensive process that requires special care, as well as certain skills, because even the slightest mistake can ruin both the product itself and the countertop. Therefore, one of the most important stages in the installation work is marking.
There are standard placement rules that should be followed when marking:
- It should be located at least 5 cm (50 mm) from the edge of the tabletop on the front side.
- From the rear end, the distance from the edge of the cut should be no less than 2.5 cm (25 mm), since there is less pressure on the structure from the rear side.
Do not place it near a gas stove, as splashes of water may extinguish the fire.
Designers recommend placing it in the middle between work areas, this will ensure comfortable work. The kit includes a special template printed on the packaging. It needs to be cut out, attached to the tabletop and secured with masking tape, then outlined with a pencil. If there is no template, then the product must be turned over, laid on the tabletop and traced. After drawing the first line, you need to make an indent of 2 mm inward from it and draw a second line - the cutting line. This distance must be strictly adhered to, since if you make it smaller, it will not fit, and if it is larger, then problems with fastening and sealing may arise.
Also, when determining the location for placing the sink on the countertop and marking, it is necessary to take into account the placement of the input and output of plumbing pipes; they must freely approach the central point
Step-by-step installation instructions
Installing a sink into a countertop yourself will not be difficult, but the instructions must be read and followed. The quality of installation will depend on this.
How to embed a sink into a countertop
Most sinks have a template to install upon purchase. It is designed in the form of packaging cardboard. Simply cut it out and attach it to the tabletop. Using a marker, outline the outline - and you can proceed to subsequent work.
If there is no template provided by the manufacturer, you will need to make it yourself. You can use cardboard from the packaging of a TV or computer, but it must be durable. Having attached the shell to the cardboard, you need to outline its contours and cut out the desired part. If the template comes out big, it’s okay, you can always trim it and adjust it to the desired shape. It is better to cut off more initially. Otherwise, there is a chance that you will need to look for another cardboard.
Location and location cutting
For such work, it is appropriate to apply the proverb “measure twice, cut once.” You can move the template around the countertop freely until you begin completely cutting out the space for the sink. After determining the exact location, the template must be glued with stationery tape in order to evenly outline the contours. After this, the template can be thrown away . The surface at the cutting site must be covered with tape to avoid damage to the surface during work.
In order to learn how to install a stainless steel sink on a cabinet, you need to understand how to correctly cut a hole for it. First you need to drill several holes with a diameter of 2 mm along the outlined contour. They are made as close to each other as possible, 3-5 centimeters long. You need to drill for convenient and easy entry of a saw or jigsaw. Before starting to completely saw the contour, it is necessary to connect the holes into a single groove.
Cutting the countertop to fit the size of the sink
You need to cut out a place for it in the countertop. On the marking lines, drill a hole of at least 10 mm using a screwdriver in order to insert a jigsaw file into it. And with the help of a jigsaw, carefully, without jerking and strictly along the intended line, make a cutting.
We check the correctness of the cutting; to do this, you need to insert the shell into the cut hole. If it fits in easily and there is a small gap between it and the countertop, everything is done correctly; if the sink fits in tightly, then additional trimming needs to be done.
The next stage is processing the cut line, for this you need to rub it with fine-grained sandpaper, clean it of dust and shavings and treat the surface with a degreaser, and then with a sealant.
If the countertop is made of moisture-resistant board, it is not necessary to use sealant.
If the structure is rectangular, then cutting a hole for it is very simple, but with a round or irregularly shaped sink, this is more difficult to do, you need to be especially careful and careful
Types of kitchen sinks
Kitchen sinks have a very wide range. You can verify this by visiting a specialized plumbing store. There are many classifications of sinks. They can be at least divided into six types.
Depending on the type of installation, we can distinguish:
- Overhead, threaded and mounted. The option of a wall-mounted sink is not popular today. It is more appropriate in government institutions and dormitories than for the interior of a modern apartment. Invoices and threaded ones, in turn, are very popular among owners of apartments and private houses and compete with each other in the market. They are of equal quality, reliable, durable and have an aesthetic appearance.
- Sinks made of stainless steel of various alloys , chrome-plated or nickel-plated, acrylic, glass, granite. Artificial stone is also used. From this list, most people prefer metal sinks due to their low cost, ease of installation and ease of maintenance.
- Corner, rectangular, round and oval, curly. The simpler and more versatile the shape of the sink, the easier it will be to care for. Complex shaped sinks can decorate the kitchen interior well, but will not be practical in everyday use. Do not forget about the main function of the sink - having a convenient place for washing dishes and other things.
- Single and with two sections. There are models with convenient transfer of water from one sink to another.
- The mixer can be located on the sink itself or on the wall.
- The presence of additional functions, such as installing a filter, taps for connecting garden hoses.
The most popular are stainless steel sinks. They are durable, functional, easy to clean, suitable for any interior, and the most important thing about them is their reasonable price.
Steel quality testing can be done using an ordinary magnet. When purchasing, you must attach it to the sink. If it holds well, then the sink is made of good steel. When the magnet falls off even with slight movement, it is better not to use such a sink.
Sinks made of steel and granite are available in both overhead and inset versions. Installing a built-in sink into a countertop yourself is not a complicated process, nor is installing an overhead sink. But to do this, you first need to take care of the base.
Fixation methods
Depending on the material, it can be fixed with glue or fastening materials, but it is better to use these means together.
Glue is more suitable for fastening stainless steel products; this method will allow you to securely fasten the sink to the countertop, but only with the correct fit. Before the gluing process, you need to prepare the surfaces and apply a special polyethylene sealant. We coat the places of future fastening with glue, press it well, it can be used only after 24 hours.
Fastening materials are a more reliable method of fastening, but it must be combined with glue to prevent water from entering at the screw fastening points.
It is better to fix the fasteners using a screwdriver rather than a screwdriver, so as not to damage the product. You need to tighten the screws one by one, checking the fit.
Design features with built-in sink
Such products owe their name to the method used during installation. That is, when installing them, the washbasin crashes into the countertop. The tabletop is installed on legs fixed to the wall, using corners and special brackets. The entire structure of the console and bedside tables is built under the tabletop. Methods for embedding products can be very different:
- plumbing fixtures can be recessed below the level of the countertop;
- the product may protrude above the tabletop level.
Currently, cut-in washbasins, based on the criterion of design form, are divided into the following types:
- oval;
- square;
- rectangular;
- round;
- asymmetrical.
Rules for connecting to communications
After completing the work of attaching the sink to the countertop, you can begin connecting it to the communications.
- Securing the cold and hot water supply hoses - on one side to the mixer, on the other - to the water tap. When connecting, we use rubber gaskets to seal the joints.
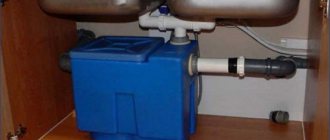
- Release the siphon and discharge it into the sewer pipe.
- Check all connections for leaks and install additional seals if necessary.
If the diameters of the siphon and sewer pipes differ in size, then a special sealing cuff-adapter can be used to securely fasten them
Installation of overhead and mortise sinks
The overhead sink can be installed in the usual and sliding ways . In the first case, there are slides installed on it on the side and front, and the cabinet itself has special grooves. After assembling the bedside table, you can install the sink on the grooves and begin connecting it. With the direct installation method, it is necessary to carefully seal the joints. This will be the attachment to the tabletop. The sealant will properly glue the sink to the bedside table: it has good waterproof properties. It is necessary to apply it around the entire perimeter of the top of the cabinet and fit the sink tightly.
Professional advice on installing sinks: what to look for
Experienced installers share the following secrets of their work:
- When installing a mortise sink yourself, you need to check the dimensions of the hole several times. It should not be too large, otherwise it will “walk” in the groove, and the fastenings will not provide the required strength.
- When installing a stainless steel sink, do not over-tighten the screws. This may cause damage.
- Instead of the seals that come with the kit, you can use sealant. You shouldn't save it. It’s easier to carefully remove excess than to deal with leaks later.
- When using a screwdriver or a screwdriver, it is important to be careful not to bend the hardware.
.
Types depending on the type of installation
The type of installation of a kitchen sink is an important criterion that depends on the sink model, its weight and size, as well as personal preferences.
- An overhead sink-sink is placed on top of the floor cabinet; it is inexpensive and easy to install. The disadvantages of this installation are that there may be gaps between the sink and the cabinet, where moisture gets in, causing the furniture to swell.
- Mortise structures can be installed on top of the countertop, under it, or at the same level with it; this method of installation involves the perfect joining of the edges of the kitchen sink with the edges of the countertop.
- Undercounter sinks are mounted below the countertop, they have a neat appearance and good sealing.
Under-table structures are mounted only on countertops made of natural or artificial stone, so you must contact specialist installers
Installation features
We install a corner sink.
Sawing a right angle. In order for an electric jigsaw to easily pass through the corners of the tabletop, several holes are first made in them with a drill, one after another, and they are combined. You should also pay attention to the fact that the corners and connecting lines of the inner and outer corners of the cabinet coincide.
We cut in a square sink.
Installing a sink into a countertop begins with drawing a line that runs parallel to the edge of the countertop. Then make an indent to the width of the sink and draw a second line. In a similar way, two perpendiculars are measured and laid. Mark the intersection point of the segments that connect opposite angles. The siphon is located in this place.
Installing a stone sink
Sinks made from natural stone, such as granite, do not have faucet or drain holes. The first can be mounted separately to a tabletop or adjacent wall. And it is impossible to do without a siphon.
Carefully making such a hole in a natural stone sink yourself, without sufficient knowledge and experience, is a very difficult task. For this you need an electric drill with diamond bits. For this reason, it is better not to install granite products yourself, but to trust specialists.
The nuances of installing overhead sinks
The method of installing an overhead sink in a countertop has a number of features. Installation is carried out on a separate module so that it covers its entire upper part.
This work is simple, since L-shaped elements with an oblique slot are used for fixation. You should first prepare at least 4 - 5 fasteners. Before installing a sink in the countertop, you need to connect the mixer, which allows you to avoid any difficulties during installation in the future.
Overhead sinks are fixed in the following sequence:
- The fasteners are applied to the inside of the kitchen cabinet and the corresponding marks are applied.
- Screws of 15 millimeters are screwed in the designated places so that they are at least 5 millimeters above the markings.
- The end of the cabinet is treated with a sealant to simultaneously protect the furniture and enhance the reliability of the sink’s attachment.
- The structure is placed on screwed screws and moved until it fits as completely as possible.
- Next, fix the fasteners and remove excess sealant, after which the sink is connected to the water supply and drainage system.
Selecting a sealant
The sealant plays an important role in installation. The building materials market offers several options for this product:
- acrylic - does not contain harmful substances, is excellent for metal, chipboard and MDF, dries quickly. The main disadvantage is strong shrinkage and rigidity; joints can crack over the years and will allow water to pass through;
- polyurethane - suitable for places with high humidity and unstable temperatures, good adhesion to almost all materials. The sealant is elastic and practically does not shrink, but it is better not to use it for MDF, chipboard, or plastic. The polyurethane composition is ideal for products made of stone, granite, metal;
- silicone - elastic, does not shrink, good adhesion.
Apply any sealant to clean materials to improve adhesion. Without preliminary preparation, cracks may appear and moisture may enter.
How to install a sink in a bathroom with a countertop?
The process of installing such a sink does not have any difficult aspects. You can install a built-in sink with a countertop with your own hands without any problems. The main thing to remember is the following important points:
- the installed plumbing must provide ease of use;
- it should not be located close to the wall;
- the built-in sink should not be located at the very edge;
- The sink should not fall inside.
First you need to decide on the location of the sink with the countertop , then you can proceed directly to the installation work.
Tools
During work, you cannot do without using special tools.
- ruler;
- pencil;
- hacksaw;
- drill;
- sealant;
- pliers.
The work begins by taking the sink, turning it upside down and laying it on the surface of the countertop, after which a contour is drawn along it. Next, we move on to measuring the distance from the fasteners to the edge of the tabletop. Focusing on the drawn contour, it is necessary to mark the second one, which should be smaller by a distance equal to the one from the fastening to the edge.
Next, along the second contour, a hole is cut in the sink. A hacksaw is used for this. But it is best to work with a jigsaw.
Once the hole is made, you need to sand it well. Particular attention should be paid to the inner edge of the cut , which must be treated with silicone sealant. After this, the sink is inserted. If during the installation process excess sealant comes out on the surface of the countertop, it must be removed immediately. After this, the fasteners are inserted and tightened well. When this work is completed, you need to leave the sink for a while to dry completely. When the sealant has completely dried, you can proceed to connecting the siphon and mixer.
Possible mistakes
Mistakes are often made that lead to undesirable consequences. People often save space by not taking into account the requirements for the distance between the sink and other equipment, which should be at least 40 cm. There are also other miscalculations:
- incorrect choice of kitchen sink size;
- tilting of the installed sink - occurs if you work without a level;
- incorrectly selected pipes and siphon;
- poor access due to inconvenient location;
- insufficient sealing during mortise-type installation;
- poor-quality fixation of fastening parts, which leads to mobility of plumbing fixtures;
- water penetration under furniture.
To eliminate errors and correctly perform the process yourself, watch the video, which describes in detail the work processes and all the intricacies of mortise-type installation:
Installing an undermount sink in the kitchen.
We recommend that you monitor your sink and provide it with the necessary care. After each dishwashing, you should wipe the product dry and do not place hot or very cold surfaces. The appearance of an unpleasant odor and leaks requires inspection of the siphon, pipes and mixer - cleaning may be required. If parts are damaged, they are repaired or completely replaced.
Slice processing procedure
Experienced experts advise: since in the process of creating a hole along the inner edge of the cut, roughness and small chips often form, you need to become familiar with the rules for processing the cut, failure to comply with which leads to a number of problems:
- Since it is impossible to ensure absolute sealing of the unprotected surface of the chipboard, its insufficient degree causes moisture to penetrate into this part of the tabletop. As a result, decay processes may be activated and a fungal coating may appear.
- Subsequently, the cutting edge becomes fragile and the stability of the shell decreases, which ends with its distortion.
- As a result of rotting of the countertop, its aesthetic, strength and performance qualities are reduced and then replacement will be required.
To prevent the above-described troubles, you should:
- Treat the end surface of the cut with fine-grained sandpaper and treat it with high-quality plumbing sealant. Professionals recommend using a spatula to perform this work; in the absence of which, the composition can be applied with your finger. Carrying out protective measures helps prevent wetting and subsequent swelling of the surface of the cabinet.
- If, when performing work such as cutting out a sink in a countertop, chips are found on the front side of the plastic, they are carefully treated with sealant, and there is no need to apply it in a thick layer, since in this case the thickness is not important.
- There is another way to protect the end side of the cut - it involves treating it with PVA glue. Despite the laboriousness of this process, it is reliable, like the previous option. To enhance the protection effect, the applied layer of glue should dry for about 30 - 50 minutes.
- Next, you should glue the seal made of foamed polyethylene; it is usually included with the sink. This material is fixed on the side of the sink along its perimeter. When, after attaching the seal, it can be seen, the material is carefully trimmed with a knife. If this is not done, the edges of the sink will not fit tightly to the countertop and water, getting into the gaps created, will cause swelling and further rotting of the end.
Since the process of attaching the seal directly affects the performance and wear resistance of the kitchen set, attention should be paid to it:
- You need to take the material and degrease it with a rag soaked in gasoline and solvent.
- Then sealant is applied to the seal in a continuous thin strip so that the glue does not come out when compressed and pressed against the outer edge of the sink.

