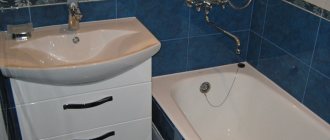
The vast majority of people start a new day with a visit to the bathroom. Based on this, it is pleasant at a time when this room, with its appearance and equipment, can give a boost of energy until the evening. This is facilitated by overhead sinks, which look unique and discreet in the bathroom.
In most cases, they are installed in large rooms, and installation is carried out on a moisture-resistant base, often on a countertop.
Thanks to the variety of shapes, sizes and materials, they allow you to realize every design idea. Let's take a closer look at these products.
Types of products and installation methods
There are several options for installing a sink into a countertop. The choice of installation method depends on the design features of the sink. The most common types of sinks are:
| Types of products | Advantages | Flaws | Installation principle |
| Invoices | Budget price category. Easy to install. | Small material thickness. Formation of a gap between the countertop and the sink. | The sink is placed on a free-standing cabinet so that it becomes an extension of the worktop in the kitchen. |
| Mortise | Ease of use. Practicality and durability. | High price. | Inserting the sink into the countertop, into a specially made hole, provides for fastening with clamps and brackets to the inside of the module. |
| Under-desk | Aesthetic appearance. Noise insulation. Durability due to reliable sealing of joints. | Inaccessible due to high cost. Not suitable for all countertop materials. | The sinks are mounted in a cut-out hole, but are fixed below the countertop, forming a single whole with it. |
Overhead two-section sink Source vseme.ru
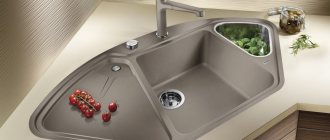
Kitchen sinks are traditionally made from stainless or enameled steel, as well as from artificial stone and composite materials, which are resistant to external influences and sudden temperature changes.
Which material to choose
Simultaneously with the choice of the design of the cabinet itself, the question arises of choosing the material for this piece of furniture. We talk about the materials that are most often used in the manufacture of cabinets, as well as their features, in the table.
Table 1. Types of materials for cabinets with sinks
| Material | Description |
MDF or chipboard | These materials involve the use of not solid wooden elements, but compressed sawdust, which can significantly reduce the cost of production and reduce the final price. It is believed that MDF has a higher level of quality compared to chipboard and is not prone to deterioration even with high humidity and temperature changes. Both MDF and chipboard require pre-coating with a protective layer (whether acrylic or varnish), which will significantly extend the life of these materials and make them more attractive |
Tree | Despite the fact that in most cases natural wood outperforms chipboard in terms of durability, in the bathroom all these merits fade. The fact is that wood does not tolerate temperature fluctuations (inevitable in this room), and constant humidity threatens the wooden washbasin with deformation and swelling. To save the situation, the wood should be periodically treated with varnish or oil, which will require additional funds. Among the species that can be recommended for a bathroom are oak, teak and beech. |
Plastic | Plastic is a universal material whose practicality has been repeatedly proven. In addition to the lack of reaction to temperature fluctuations, this material is also distinguished by its affordable price and extremely easy care, without requiring coating with various protective substances. Another advantage of plastic is the large number of models from which you can easily choose the appropriate option. The main disadvantage is its soilability - the plastic is easily covered with scratches, which does not affect its “direct responsibilities”, but spoils the appearance |
Metal | Washbasins made entirely of metal are practically never found in home bathrooms. Rather, we are talking about the presence of metal parts that are aesthetically integrated into the overall concept. Since metal vanities are a design choice and fit a very limited number of styles, they are difficult to find publicly available in stores - such items are most often made to order. It is important to keep in mind that only stainless steel can “stand” in a bathroom, while other types of metal quickly begin to rust and become corroded. |
Glass | Glass can be used both for making sinks and for making the cabinets themselves (which is quite rare). Like metal, glass is considered a luxury and is not a common material for sinks. Unlike metal, glass is much more practical, since it is not afraid of any moisture. Its weakness, as in the case of plastic, is that it gets dirty - streaks, dirt, dust, and so on very quickly become visible on the glass surface. Fans of glass cabinets should opt exclusively for tempered durable glass, which can be used without fear |
How to install a countertop sink
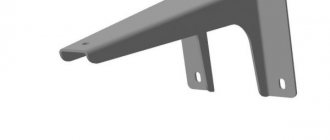
The method of installing overhead products has its own peculiarities. The sink is mounted on a separate kitchen module so that its upper part is completely covered. This work is usually not difficult even for beginners. The sink is fixed using L-shaped elements with oblique slots.
Before installing an overhead stainless steel sink on the cabinet, you need to complete the following preparations:
- Purchase at least 4-5 parts for fastening, as well as 15 mm self-tapping screws.
- Connect the mixer in advance.
Instructions for installing an overhead sink:
- Take the prepared fasteners. Attach them to the inner surface of the cabinet. Place marks.
- Focusing on the markings, tighten the screws. They should be located 5 mm above the markings.
Installation on a wooden frame Source remontkit.ru
Treat the end part of the cabinet with sealant. This will make the sink mounting location more reliable and protect it from moisture and dirt.
Place the product on the screws. Before attaching a stainless steel sink to the countertop, you need to check that it fits as tightly as possible to the cabinet.
Fasten the fasteners firmly. If excess sealant appears, clean it from the cabinet. Connect the water supply.
See also: Companies specializing in decorative forms and engineering communications.
Decoration of sinks
There are three main ways to “combine” a sink and a cabinet:
- built-in sink. This option is the most classic (and for most people, the only one), suggesting the placement of a sink over the entire surface (or most of) of the cabinet, in which a recess of the required size has been prepared for this purpose. The inconvenience of this option is the need to seal joints and seams, since the likelihood of moisture getting into the cabinet is high;
A built-in sink is the easiest option to install.
- semi-recessed sink. As you can easily guess, the peculiarity of such a sink is that it is only partially immersed in the cabinet, while the second part protrudes out. This option is ideal for compact bathrooms, in which placing a large countertop that completely accommodates the sink will “eat up” the lion’s share of the space. In addition, semi-built-in sinks are more convenient to approach from all sides;
Semi-recessed sinks extend beyond the edge of the countertop
- countertop sink. This type of sink requires the presence of a countertop, which we discussed above. Overhead sinks are quite rare and attract with their unusualness, however, when choosing them, it is important to take into account the dimensions of the product, since a washbasin that is too high or too low will be inconvenient to use. The height of the upper cut of the washbasin should be about 90 centimeters from the floor.
Overhead sinks are installed complete with a countertop
You can read about the types of sinks according to the method of their fastening below.
Types of sinks by mounting method
Mounting a mortise sink
Inserting a sink into a countertop involves a number of successive steps.
Preparing materials and tools
Before proceeding with the installation of the sink, check the complete set of the sanitary ware. The kit must contain all the necessary fasteners and seals. You should have on hand: silicone sealant, tape measure, level, Phillips screwdriver, screwdriver, electric jigsaw, drill.
Carrying out markings
The method of applying markings on the tabletop depends on whether the kit includes a cardboard template. Its presence greatly simplifies the work. The outer and inner contours of the sink are cut out using the template. Then it is placed on the tabletop, secured with tape and outlined with a pencil.
The template is applied to the upper surface of the tabletop Source remontu.com.ua
If the template is not included, marking the hole is a little more difficult. First, trace the edges of the sink, positioning the sink so that its bowl faces down. Then the sink is turned over and placed on top of the countertop in the same way as it will be installed when finished. Secure with tape. Align and trace the outline. The correct installation of the product and the ease of its operation depend on how accurately the markings are made. A cutting line is drawn inside the contour.
To make markings, it is better to use a pencil Source berkem.ru
Cutting a hole
Before cutting a hole for the sink in the countertop, take an electric drill and make 2-3 holes one after another on the cutting line to create a single gap. Its length should be such that an electric jigsaw can easily fit inside. With its help, slowly and very carefully cut out a hole.
If the jigsaw deviates a little from the marking line, it’s okay. A discrepancy of 2-3 mm is allowed. The cut site is cleaned of dust and the product is “tried on”. It should fit freely into the hole, but not cling or “walk around”. If the shell does not fit completely into the hole, it is slightly widened using a jigsaw.
The tabletop should not be turned over from the front side during cutting, otherwise chips may form. Source stopdacha.ru
Video description
Watch the video on how to embed a stainless steel sink into a countertop:
Connecting communications
At the final stage, communications, cold and hot water are supplied to the plumbing product. First, use a fixing screw and a rubber seal to secure the tap. Experienced craftsmen assemble the faucet before cutting out the countertop for the sink, connect hoses to it and fix it to the bowl.
Water hoses are pulled to the water supply system. Check the reliability of all connections. If necessary, use fum tape. Start the siphon and connect it to the drain corrugation.
After the communications are connected, it is important to check whether there will be a leak Source rudmar.ru
Installing a sink on a countertop (video)
Often this type of fastener is associated with luxury. Those who want to install such plumbing fixtures at home should remember that caring for them is more difficult. If you don’t mind and it doesn’t scare you, then go ahead and enjoy it.
- Author: admin
Rate this article:
- 5
- 4
- 3
- 2
- 1
(0 votes, average: 0 out of 5)
Share with your friends!
Professional advice on installing sinks: what to look for
Experienced installers share the following secrets of their work:
- When installing a mortise sink yourself, you need to check the dimensions of the hole several times. It should not be too large, otherwise the sink will “walk” in the groove and the fastenings will not provide the required strength.
- When installing a stainless steel sink, do not overtighten the screws. This may cause damage.
- Instead of the seals that come with the sink, you can use sealant. You shouldn't save it. It’s easier to carefully remove excess than to deal with leaks later.
- When using a screwdriver, it is important to be careful not to bend the hardware. If you don’t have much experience with this tool, you should give preference to a Phillips screwdriver.
Silicone sealant should be checked for hardening speed before use. Source mtdata.ru
Installing a sink in the bathroom - do-it-yourself installation - we tell you all the nuances
The eternal problem of lack of space in the bathroom or combined bathroom of standard city apartments forces us to invent various ways to save space. Responding to such consumer requests, plumbing manufacturers do not stand aside and are developing a variety of product options that will help solve this problem. One of the interesting and very rational approaches is to install a sink above the washing machine, which will not only save space in the room, but will also add an unusual touch to the design of the bathroom.
Installing a sink above a washing machine
Such sinks have an elegant appearance and original shape, so they fit perfectly into any interior style. However, it should be remembered that choosing a sink for an already purchased washing machine will become much more difficult, so it is recommended to plan a comprehensive purchase. Some manufacturers make kits that include both elements at once - they are already matched to each other in their layout and fit perfectly together.
The content of the article
1 Choosing a sink 1.1 Appearance of the sink 1.2 Dimensions of a water lily sink 1.3 Draining a water lily sink 2 Choosing a washing machine 3 Disadvantages of water lily sinks 4 Installing a sink above a washing machine
Sink selection
Sinks designed specifically to be installed above a washing machine or any cabinet are often called “water lilies.” Most likely, they got their name due to the characteristic shape and non-standard location of the drainage system.
Sinks designed to be installed above washing machines are usually called "water lily" sinks.
The drain in these sinks is not located in the central part, like most conventional sinks, but closer to the back of the bowl.
Sink appearance
“Water lilies” can have different shapes - square, oval, rectangular, with straight and rounded corners. Models with non-standard and completely unusual configurations are also produced. Therefore, there should be no problems with choosing a sink based on this criterion.
A variety of models allows you to choose a water lily sink for a specific bathroom design style
Sinks-sinks of this type, unlike ordinary sinks, may have a mounting hole for installing a mixer not only along the sink, but also in any other place, or EVEN not have it at all.
In addition to the variety of shapes, this type of sink is produced in a wide range of shades. They may also differ in the main material of manufacture. In a word, based on the totality of these criteria, a “water lily” can also be selected to suit every taste and color.
This type of washbasin is made from ceramics, acrylic, glass, metal, and in addition, recently products made from a polymer-based material called polymer concrete or artificial stone have appeared on the market. The advantage of the new type of sinks is their high resistance to all types of household chemicals and mechanical stress. Polymer concrete can imitate natural stone and have any color shade. All these criteria, as well as the variety of shapes of products made from this composite material, determine the breadth of the range and large selection possibilities.
Dimensions of the water lily shell
Appearance - appearance, but still, in the foreground when choosing a sink for installation above the washing machine, its linear characteristics should be.
The size of the sink can vary, and when choosing products for installation above a specific model of washing machine, you need to remember that the washbasin bowl should be slightly larger than the size of the appliance installed underneath it. This criterion must be taken into account especially in cases where the control panel of the washing machine is located not on the front panel, but on the top panel.
The size of the “water lily” should prevent water from getting onto the control panel of the washing machine
Let's pay attention to the diagram. For narrow washing machines with a depth (M) of 360÷390 mm, the corresponding sink size (L) should be 500 mm, and for large machines with a cabinet depth of 500÷510 mm, you should choose a washbasin with dimensions from the outer edge to the wall at 600 mm.
Size matching diagram for sink and washing machine
Why is this being done? There must be a gap (H) between the household appliance and the wall so that the supply and drain hoses of the machine, a siphon drainage system from the sink, and a flexible connection to the mixer can be placed there quietly, without pinching or twisting. The drain hoses require a connection to a sewer pipe (50 mm). The pipe, of course, can be hidden in the wall, but the connecting pipe still requires no less distance. In a word, clearance (H) is necessary in any case, and it is usually taken equal to 70 mm.
The diagram also shows the most typical locations for sink drain holes (item 1) and faucet installation (item 2). This asymmetrical arrangement provides a significant gain in overall compactness.
The height of the washing machine can be any of the available standards, but if the sink installed above it will be used by children and short people, then it is recommended to choose the device itself, if possible, as low as possible. Therefore, before purchasing a kit, you need to take careful measurements and determine the maximum allowable height.
The installation height also becomes a determining parameter, so that the washbasin can be used by children and short people
An important role for the overall safety of operation is played by the depth of the sink bowl, which is very important to provide for by choosing the correct size.
Draining a water lily sink
The drain for sinks of this type can have different configurations and is arranged in a non-standard way, but is always located in an area as close as possible to the wall. The hole can be regular, round, or original, made in the form of a narrow slit. It can be located in a kind of niche-recess, under the soap dish - in this case it is usually located in the lower rear area at the junction of the bottom and wall or on one of the sides of the sink.
Drain hole in the form of a narrow slit
The narrow drain slot is convenient because the siphon in such a system is located at the back of the sink, completely outside the washing machine body.
It’s good when the siphon is completely located in the gap between the wall and the washing machine
However, such a system also has its drawback - the narrow drain often becomes clogged and requires frequent cleaning, otherwise an unpleasant odor will begin to emanate from the siphon.
Water lily sink with overflow system hole
Some models of water lily sinks are equipped with a drain-overflow system, which prevents even the accidental overflow of the bowl with water, pouring over the edges and getting into the washing machine. The drain and overflow “windows” are usually located in the same way as on standard sinks, in the lower and side areas of the bowl. In addition, the drainage system is often equipped with plugs or even equipped with automation.
Video: a short review of water lily shells
Choosing a washing machine
Some manufacturers produce washing machines specifically designed for installation under the sink. Well-known companies produce such models: Zanussi, Electrolux, Eurosoba and Candy. Basically, all such models are designed for small loads of laundry – usually up to 3.5 kg.
Special models of small-sized washing machines are produced specifically for use in combination with a sink.
Many owners of even small bathrooms, not intending to sacrifice the performance of washing machines, purchase standard-sized models with larger loads. However, the height of the residents should also be taken into account, since the sink, with a washing machine height of 700 mm, will be raised to a level of approximately 890÷900 mm from the floor, and with a height of 850 mm - even up to 1040÷1050 mm .
Options for placing a water lily sink on the wall
As mentioned above, the depth of the washing machine must correspond to the same parameter of the sink, taking into account the required clearance at the wall - this criterion must be met not only for comfortable use of the washbasin, but also to ensure electrical safety.
Perhaps the most rational solution is to purchase a ready-made kit, despite the not-so-high loading rates of the washing machine
But still, if you have the opportunity to purchase a set of equipment, then it will be most convenient to go with this option, since you won’t have to invent or adapt anything. In the kit, the manufacturer has already taken into account not only all the dimensions, but also the external design of the elements - they look together as a single whole.
What makes up the total height of the working panel of a water lily sink?
In the diagram presented as an example, you can see what will make up the total height of the working upper surface of the sink. This is the height of the washing machine itself and, taking into account its adjustable legs, the height of the brackets, plus the thickness of the front edge of the sink itself.
Even a flat siphon still has a certain height
But if the flat drain siphon is located under the sink, then its height should also be taken into account.
Examples of correct and incorrect installation of a sink above a washing machine
The diagram shows examples of correct ( a ) installation of the machine, and performed with typical mistakes:
b - Inconsistency between the type of siphon and the selected installation scheme - the sink drain pipe has a sharp turn at a right angle, where blockages will inevitably form over time.
c - discrepancy between the sizes of the sink and the washing machine, the front panel of which remains completely unprotected from water entering from above.
Find out which top-loading washing machine to choose by reading the recommendations in the publication on our portal.
Disadvantages of water lily shells
Having decided to carry out a comprehensive installation of a washing machine and sink in this way, it is necessary to take into account the disadvantages of such a scheme so that they do not become a surprise during everyday use. Many are ready to put up with any disadvantages of such a complex in order to save space; some simply have no choice but to use such a design. But it is quite possible that for some these shortcomings will seem unacceptable.
The disadvantages of this installation include the following nuances:
From the design of the sink presented above and the elements attached to it, it can be understood that for its functioning a flat siphon for drainage is required. If for some reason the washbasin is not equipped with all the necessary parts for the drainage system, then finding the components separately will be extremely difficult, and sometimes almost impossible. The same thing awaits the owner of such a complex if, for some reason, even one of the elements of the system fails. As a rule, this type of sink is equipped with a hole for draining water from the bowl, which is located in its side part, and not traditionally in the center of the bowl. This circumstance in itself can cause a certain inconvenience, since often the water does not leave the bowl completely, and you need to take care of its removal yourself, using a sponge or soft cloth. Water retention also occurs in the flat siphon, which leads to frequent blockages. The same problem can arise with the already mentioned narrow slot-like drain holes. Another problem that you will have to face when installing such a kit is directly related to the washing machine itself. Until you develop a stable habit, you will have to hit the bottom of the appliance with your feet more than once when approaching the washbasin. The space under the sink is full, and therefore standing close to it will be uncomfortable at first. In order to create at least a minimum space for easy access to the washbasin, you will have to choose a narrower washing machine and a wider sink that protrudes in front of the washing machine body. However, it should be remembered that machines of compact depth do not have a large load of laundry. We will have to make some kind of compromise, look for a “golden mean”. If the sink is chosen and installed incorrectly, then the problem of protruding corners of the washing machine will arise, which can create inconvenience not only when washing, but also when moving around the bathroom.
We recommend: Installing and connecting a faucet in the kitchen - how to install a faucet on a sink
Despite these “cons,” the scheme is still growing in popularity. In cramped apartments, there may not be any other place to install a washing machine, so many homeowners simply “turn a blind eye” to the shortcomings and inconveniences.
Installing a sink above a washing machine
When installing a sink and washing machine, you won’t have to invent anything, since it is done, in principle, in the same way as when installing standard models.
The entire process of installing a sink can be divided into several stages - marking, installing brackets, assembling the product, equipping it with a mixer, installation and connection to the sewerage and water supply.
If we talk about the installation sequence, the sink and the necessary elements for connecting the washing machine are installed first, and only after that the device itself is installed.
If you plan to install the washing machine almost close to the wall, then the water and sewer pipes must be embedded into the wall in advance of installing the washbasin, leaving only pipes (water outlets) outside the wall, to which access will be provided for connection and control.
The brackets must exactly match the selected water lily sink model
The first thing you need to do is make markings on the wall to secure the brackets. They usually come with a sink. If they are purchased separately, then when buying a washbasin, you should immediately ask the seller to select brackets for it, since they come in different types and not all are suitable for a specific type of sink. The brackets are attached to the wall using dowels or anchors. But they are initially not hammered in (not tightened) to the end—a small gap of 3÷5 mm is left between the wall and the bracket, which will help to accurately adjust the horizontal position of the sink. After this, you can proceed to assembling the washbasin. A mixer is attached to it, to which flexible pipes for supplying hot and cold water are screwed.
Don't know how to properly install a faucet on a sink?
The scheme for both the bathroom sink and the kitchen sink is approximately the same. The sequence of operations for installing a faucet on a sink is outlined in a special publication on our portal.
Then the drain-overflow system is connected, if provided for by the design. After this, a drain siphon and a drainage pipe coming from it are installed. It is important to pay special attention to the tightness of all system connections, since there should be no possibility of even small leaks. To do this, you should install all the sealing gaskets provided by the design, and some elements may need to be “planted” with silicone sealant.
When assembling the drain-overflow system, special attention is paid to the tightness of all connecting nodes
The next step is to try on the sink, installing it on the brackets and setting it strictly to the level. If the fastener kit includes a support hook, then mark the location of its installation. After this, the brackets in the exposed position are rigidly attached to the wall, completely tightening the dowels or anchors. The sink must be temporarily removed to avoid accidental damage. Then, a hole is drilled in the wall into which the hook will be installed, and a dowel plug is driven into it. After this, the sink is installed back. A hook is inserted into the hole and carefully twisted until it stops. Before installing the bowl on the brackets, it is recommended to apply sealant to the area where the sink touches the metal and let it dry. This gasket will protect the sink cover from damage.
Installation of flexible water supply and drain pipe
The last step is to connect the drainage system to the sewer pipe, and then the flexible hoses for the mixer supply are connected to the pipes supplying hot and cold water. After the sink is connected to all communications, the washing machine is carefully installed under it, adjusting its position with screw legs to ensure complete stability and stability during operation. The drain pipe from the washing machine is also installed in the pipe prepared for it (often it is located on the siphon part of the drain system of the sink itself. Then the machine is connected to cold water to the corresponding pipe with a tap (water outlet). After this, all that remains is to open the taps on all supply pipes water, insert the power plug into the socket - and the complex can be used.
It should be noted that there is a simplified option for supplying water to a sink installed next to the bathtub. It consists in the fact that for two plumbing fixtures (sink and bathtub) one mixer with a rotating long spout is provided.
It is possible to install a common mixer tap with a long spout for the sink and bathtub.
If you use this option, you can not only do without a second mixer, but also free up the space behind the washing machine from additional connections. In this case, the “water lily” sink needs to be installed in such a way that it rests slightly on the edge of the bathtub, slightly overhanging it, since when turning the mixer spout in one direction or the other, water can get onto the panel of the washing machine.
Having finished installing the sink and washing machine, before you start testing them, you should once again check the locations of all connections of pipes and hoses, since even a small leak and water ingress on certain components of the washing machine can lead to dangerous consequences, the risk of short circuits, breakdowns on the housing phases and the likelihood of electrical injury. It is recommended to use a power supply network with a grounding loop for the bathroom, and connect the machine itself through a protection device - an RCD.
So, for a small bathroom, installing a sink above the washing machine is often the only option. But at the same time, it is extremely important to provide in advance for ensuring the general safety of such a complex during operation, the correct relative position of the sink and the machine, as well as the tightness of all connections.
Installation features depending on the shape and material of the sink
The insertion process may have its own nuances depending on the selected sink material and its shape.
Installing a corner sink
An important point when installing such a product is cutting out a right angle. In order for an electric jigsaw to easily pass through the corners of the tabletop, several holes are first made in them with a drill, one after another, and they are combined.
You should also pay attention to the fact that the corners of the sink and the connection lines between the inner and outer corners of the cabinet coincide.
Installing a square sink
Installing a sink into a countertop begins with drawing a line that runs parallel to the edge of the countertop. Then make an indent to the width of the sink and draw a second line. In a similar way, two perpendiculars are measured and laid.
Mark the intersection point of the segments that connect opposite angles. The siphon is located in this place.
Square shaped sink Source userapi.com
Installing a stone sink
Sinks made from natural stone, such as granite, do not have faucet or drain holes. The first can be mounted separately to a tabletop or adjacent wall. And it is impossible to do without a siphon.
Carefully making such a hole in a natural stone sink yourself, without sufficient knowledge and experience, is a very difficult task. For this you need an electric drill with diamond bits. For this reason, it is better not to install expensive granite sinks yourself, but to trust specialists.
Video description
Watch the video on how to embed a stone sink into a countertop:
We install ceramic products
Ceramic sinks have the following feature: one part of the sink is overhead, the other is cut into the countertop. Such models are fastened using a combined method. To ensure the reliability of the structure, both sealant and mechanical fixing devices are used.
In addition, to secure the sink, load-bearing structures are made from wooden blocks. You can do this yourself. Wood should be treated with antiseptic agents.
Products made of ceramics and natural stone are very heavy, so when installing them, durable countertops and cabinets are required Source www.build2last.ru
