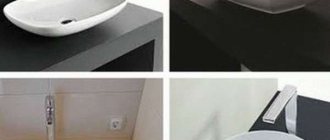
The sink installed on the cabinet looks beautiful. Visually it is perceived as a solid and monolithic structure. But most importantly, it is convenient, functional and quite compact. Therefore, it is not surprising that such a solution is popular among consumers. But everything must be installed correctly and reliably in order to guarantee trouble-free and long-term operation. We will talk about this in this article.
Types of sinks with cabinets
Previously, such bathroom fixtures were called “moidodyr”.
But in modern interiors such designs are often found.
They can be divided into several categories:
- Floor-standing models have become the most common. When placed in this manner, the cabinets rest on legs with silicone pads or a base. When installing such products, no additional fastenings to the wall or floor are required.
- In small rooms, it would be preferable to install a washbasin with a wall-hung cabinet. This will save space and make cleaning easier. This design is fixed to the main partition using powerful fasteners.
- Corner sinks are also suitable for small rooms. Boxes for them can be either floor-mounted or hanging. The shape and size of the bowl can be any.
- Some washbasins with a cabinet are equipped with a basket or mirror. They are built into the structure or represent separate elements.
- Asymmetrical sinks are installed in bathrooms with a special interior. In this case, the cabinet is installed in such a way that the washbasin is partially located on it. Often such models do not have a hole for the faucet. Most often it is installed on the wall, and sometimes the mounting location is made by hand.
How to install
The washbasin for the cabinets has been selected, the place has been prepared, we proceed to the installation itself. Usually this piece of furniture is sold along with the necessary fastening and connecting elements, and sometimes the necessary tools for assembly and installation are included. There is a diagram or installation instructions available. But you are unlikely to have to use a diagram or instructions; usually the design is so simple that you can install it yourself. And if you don’t need to trim, file for plumbing, communications, then this will take a maximum of 1-2 hours.
Pay attention to the quality of the fittings
Design Features
Such kits must meet several requirements.
Among them:
- ensuring the safety of things inside;
- moisture resistance of the material used in their manufacture;
- stability of the stand itself, as well as shelves, drawers and other contents;
- tightly closing doors;
- minimum occupied space;
- compliance with the overall design of the room.
Types of wall tables
Hanging vanity with bathroom sink
Over time, the variety of bathroom furnishing options has increased. Each item is now selected from the point of view of not only practicality, but aesthetics, functionality and compatibility with other elements.
A wall-mounted vanity is a piece of bathroom furniture in which a sink bowl is built into the design and mounted on the wall of the room. Based on the characteristics of the bathroom and the wishes of the buyer, you can choose the most suitable model:
- a regular bedside table with a wall mounting method, designed for storing linen, clothes, and household items;
- wall-hung design with washbasin and built-in faucet;
- large cabinets with the ability to accommodate 2-3 sink bowls with internal storage system.
Modern manufacturers present a wide range of cabinets, differing in the following characteristics:
- dimensions;
- colors;
- body materials, finishing: wood, plastic, metal, acrylic, MDF, chipboard;
- the presence and complexity of the internal storage system;
- functionality: adding a sink, faucets, mirror, lighting, drawers, shelves, and a section with a wastebasket to the cabinet.
At first, wall-mounted cabinets were the best option for arranging small bathrooms in city apartments. But over time, the product range was expanded. This made it possible to select options for spacious rooms and even for public places with high traffic volumes.
Need to know before starting work
The bedside table can be sold assembled, but most often it is a set of individual components. Therefore, before assembly, you must read the instructions and drawings. Compliance with the rules and consistency ensures that, when assembled, the stand will fit in the designated place and will not interfere with the connection of communications.
Before purchasing, you also need to evaluate the contents of the product. Additional drawers and shelves should have several height options to accommodate items of various sizes. The height above the floor at which the sink is supposed to be mounted should be suitable for each family member.
Criterias of choice
In addition to providing additional space for the location of plumbing fixtures, this design allows you to hide the often unsightly appearance of the connected pipes and siphon, which immediately gives the room a neat appearance.
Plumbing stores offer a huge selection of similar accessories , which can vary both in type of design and in style, external covering material, shape and color scheme.
A well-chosen vanity unit will harmoniously fit into the overall appearance of the bathroom and give it a complete and attractive look.
When choosing a bedside table for a sink, you need to focus on the dimensions of the room, appearance and existing interior. For example, the presence of an oval wall mirror and the smoothed shapes of the bathtub or jacuzzi itself will not be combined with a cabinet of strict, rectangular dimensions. In the classic design of a small bathroom, a cabinet with right angles will look quite natural and unobtrusively complete the overall picture.
Optimal installation location
If the bathroom previously had an old sink, then, if possible, put the new plumbing in the same place.
However, most often this option is not always possible due to the size of the purchase. Therefore, you need to choose the space that is optimal for using both the washbasin and the stand in advance.
To do this, you will need to follow some recommendations:
- take measurements of the bathroom and zoning it;
- determine where the bathtub, shower, and sink will be located;
- take into account the dimensions and trajectories of all retractable and opening elements of the cabinet so that they do not interfere with the communication lines and do not rest against the pipes;
- if water and sewerage are located openly, then some parts of the pedestal will have to be trimmed.
Features of installation on brackets
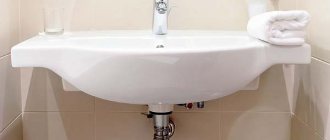
The wall-hung washbasin can also be installed on brackets. For this installation option, first, the fastening elements are applied to the sink, determining the distance required for installation, after which they make the appropriate marks on the wall and drill holes in the designated places using a drill. After drilling, dowels are inserted into the holes and the brackets are fixed to the wall.
The faucet is inserted into the washbasin, after which the wall-mounted sink is hung on brackets. As in the previous case, the last stages of work involve connecting the washbasin to the water supply and sewerage system. Provided that it is installed correctly, the sanitary ware is firmly fixed to the fastening elements and does not move.
Hanging sinks on brackets can only be attached to strong walls that can support the significant weight of the washbasin. The height of the sink in the bathroom corresponds to the height of the brackets and usually varies between 80-85 cm. If there is no free space in the bathroom, you can choose a corner wall-mounted washbasin model
In this case, it is important to measure the same distance from the floor to the sink level on adjacent walls and position the washbasin symmetrically relative to the corner
Tools for work
Before installing a sink with a stand in the bathroom, you need to make sure that you have all the components, fixtures and tools.
Among them should be:
- the cabinet itself and the sink;
- mixer with liners;
- siphon;
- fasteners;
- drill and screwdriver;
- construction level;
- wrench and adjustable wrench;
- fum tape or its equivalent.
Important nuances
Attaching the cabinet and sink to the wall is advisable if it is strong enough.
In other cases, it is important to use a supporting frame. The installation height of the washbasin is selected individually, the average range is 80–85 cm. To make the sink comfortable for children to use, you can install it lower, and higher for tall people. Plain paper will help to identify minor leaks after installing the washbasin (or make sure there are no leaks). It must be placed under the threaded connections and left for half an hour. If the paper remains dry, everything is fine. If wet spots appear, disassemble the connections and repair any leaks.
Read our previous article about which countertop to choose for your bathroom.
Section not found
Sink installation
There is no single instruction suitable for installing a cabinet with any type of sink. Each variety has a special approach.
For the most popular type of such plumbing fixtures - stands with legs for a washbasin - the sequence of actions is as follows:
- Shut off the water in the riser, having previously notified neighbors in the building using this pipeline. If there are plugs in the places where the wiring will be connected, remove them, or unscrew the old mixer hoses and siphon drain.
- Install the hot and cold water taps by first wrapping the sealing tape around the threads in a clockwise direction. 5-6 turns are enough. Press it with your fingers before installation.
- Close the valves.
- Screw on the supply hoses and tighten them by hand. Supply water and drain the dirt from the line, while simultaneously establishing the tightness of the structure.
- Place the cabinet in place. Check that there is free access to the shut-off valves and that the hoses are not pinched.
- Insert the drain from the siphon into the sewer. If necessary, drill a hole in the cabinet for this.
- Level the stand using a level. The height is adjusted with special legs.
After this, you can begin installing the sink.
To do this you need:
- Connect the drain pipe to the siphon. Excessive effort is not needed - the plastic is too fragile.
- Place the washbasin on the cabinet. Adjust the length of the drain corrugation.
- Mark and drill holes on the wall to mount the sink. It is advisable to use special drills to avoid damaging the tiles.
- Insert plastic dowels into the holes and screw the pins into them to hold the plumbing fixtures.
- After installing the siphon grid inside the sink, place it on the cabinet and secure it with nuts on the studs.
- Install the siphon through the sealing ring.
- Install the mixer, screw in the hot and cold water supply.
Serve water. Check that there are no leaks at the connection points. If leaky connections are detected, you need to turn off the water and tighten the nuts. Installing a sink with a stand in the bathroom yourself is easy. Having the ability to work with simple tools and the ability to work accurately will allow you to do it quickly and efficiently.
Similar articles
How to install a shower system with your own hands
How to put a bathtub on a brick support
How to assemble and install a siphon under the sink yourself
Recommendations for selecting furniture
The overall requirements for a cabinet installed under a bathroom sink are:
- General compatibility of the cabinet with the materials and colors of the entire design in the bathroom. This point means that if all the elements of furniture and plumbing are made in a soft style with smooth lines, strict rectangular furniture will look out of place, but with a classic bathroom design with luxury and wealth, the cabinet under the sink should at best be presentable, but by no means simple.
- High-quality and functioning fittings of the product, i.e. handles, legs and door hinges should be made of either plastic (can be gold-plated) or chrome-plated metal.
Gold plated handles - Painted vanity cabinets in a bathroom with a colored coating should have a perfectly flat and smooth surface.
In terms of functionality, it is advisable to install a cabinet under the sink with the following parameters:
- With a laundry basket to save space in a small room.
Cabinet with laundry basket - With height-adjustable shelves, so that during operation it is convenient to easily adjust the height of the shelves to the dimensions of cleaning products and detergents.
- A pull-out option, with the possibility of moving the cabinet to any place in the bathroom, however, it is necessary to take into account the location of all communications (water supply and sewer pipes), which, as a rule, are located permanently in most cases.
- The cabinet must have a base height or be on legs. Such a cabinet will be convenient both in caring for it and in its simple operation.
Other requirements when installing a cabinet under the sink are:
- A heated floor laid in the bathtub, which will facilitate the cleaning procedure, while ensuring the necessary ventilation of the room, which is an important point for a room with high humidity.
- Corner design of the cabinet, if the room for taking water procedures is very small in size.
Regarding the choice of location in the bathroom for a sink with a cabinet. It is advisable to determine it at the stage of laying pipelines for cold, hot water supply and sewerage. Since the space under the sink will be installed based on existing parameters, as well as purchased furniture. The room must be measured in advance and divided into segments so that both existing plumbing fixtures and furniture, as well as newly acquired elements, correspond to the location planned for them in it.
Possible installation problems and methods for solving them
If the water supply and sewerage come out of the floor or are in an inconvenient place, resort to sawing the furniture from below (if necessary, then in the shelf) and from behind in the right places using a jigsaw or an ordinary hacksaw, after which the connection will be made without problems. It also happens that the sink cannot be attached to the wall, since there are no corresponding holes or a pipe runs in a place suitable for drilling holes. This problem is solved by gluing the sink to the lining using silicone. The washbasin will hold quite firmly.
What to make a bathroom cabinet from
In this regard, modern home craftsmen have at their disposal not only “traditional” MDF, but also waterproof plasterboard, plastic or even glass. Each type of material has its drawbacks: drywall does not “hold” the weight load well enough, plastic quickly scratches and loses its original appearance, and glass, although it looks luxurious, is quite difficult to handle and install.
Once the material is chosen, it is worth thinking about its cladding. Glass, for example, can be decorated with a special mosaic, and wood with figured painting. Do not forget that the cladding should be in harmony with the overall style of the room.
Hanging
A very compact and at the same time roomy bathroom cabinet. It comes with a sink from , model number 0014000U28. Dimensions - 40x22x60 cm. This product does not imply any difficulties during the preparation or assembly process.
To work you will need:
- MDF sheets;
- knife saw;
- grinding machine or sandpaper;
- metal handle for furniture;
- hanging loops (2 pcs.);
- drill with a wood bit;
- screwdriver and screws;
- screwdriver;
- primer for paint;
- furniture polymer acrylic enamel;
- pencil and tape measure.
The height of the cabinet indicated in the drawing can be slightly reduced or increased if desired. Length and width are limited by the dimensions of the sink and cannot be changed
Production Description:
- The contours of the parts are measured on MDF sheets and each element is marked with a letter or number to make assembly easier later.
- Use a hacksaw to make cuts along the marked lines.
- Cut holes for water pipes and sewer lines.
- The sanding machine is passed over all cuts and surfaces of the boards until splinters and irregularities disappear.
- Carefully rub the primer into the front side of the parts. When it dries, sanding and leveling are carried out again.
- Start assembly:
- connect the body parts together;
- hang the cabinet door and screw on the handle;
- install a shelf in a side niche.
- Install the sink.