Why is wood drying necessary?
Anyone familiar with lumber knows that wood contains moisture. There is a concept of “natural humidity” - this is if the tree is growing or it has recently been cut down. The concept of “joint moisture” refers to lumber dried to 8-12%.
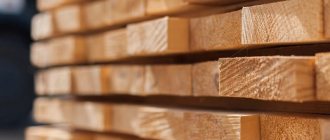
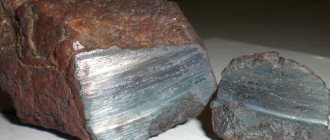
Wet lumber
During drying, the dimensions change and the wood dries out. Wood species differ in the degree of drying.
As the wood dries, cracks appear. If aspen, linden, birch and alder have almost no cracks, then ash, maple and oak always crack when drying.
Wet material does not make high-quality joinery, since during use such wood becomes deformed and cracks. In addition, raw lumber is susceptible to rotting.
To ensure that drying wood gives good results for carpentry work, use the following basic recommendations:
- Lumber is harvested in autumn and winter. During this period, the sap does not move and the tree has the lowest humidity.
- For work, small-sized workpieces are used, since after drying they are less susceptible to deformation.
- It is not advisable to dry hardwood (ash, hornbeam, beech) at home due to severe cracking.
Wood drying can be of the following types:
- Natural drying
Lumber is stacked outdoors. For ventilation, spacers are placed between the layers, and the top is protected from precipitation. During long-term storage, moisture leaves the wood and it dries out.
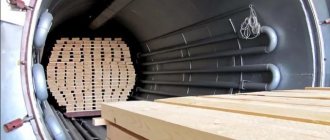
- Forced drying
There are a wide variety of forced methods for drying wood. The most common way to remove moisture from wood is using drying chambers. They regulate temperature and humidity. The drying process is much faster than under natural conditions. This article also discusses drying methods using infrared radiation and using a saline solution.
Every carpenter can try one of the following methods for drying lumber at home.
Expert advice
When drying wood, it must be remembered that the duration of the process depends on what type of wood will be used. For example, oak boards can take a long time to dry; this process under natural conditions takes up to 7 years. Some rocks crack when dried, and this only worsens the quality of the surface. If you are not sure that everything will be done correctly, then it is better to purchase ready-made wood that has the required level of moisture.
Experts advise using 2 methods of drying wood:
- The logs are sanded along the middle part, but the bark is left at the ends; the width of such a strip is approximately 100 mm.
- The bark is not removed, but cuts are made across the trunk to provide air access. The bark is not cut along; in this case it acts as an excellent tightening clamp.
During drying, you need to be guided by what types of wood and how they react to the drying process:
- Alder, linden, birch, aspen and poplar do not crack during drying. The surface of the workpiece remains smooth and of high quality.
- Wood species such as larch, spruce, cedar, pine, and fir crack to a small extent. They are often used for construction, as they have all the necessary characteristics. This material is durable, can withstand even heavy loads, and has a pleasant aroma and color.
- When drying, beech, hornbeam, maple, and ash crack greatly. When choosing this type of wood, it is best to take already dried and ready-made boards that have undergone factory processing, since it is difficult to prepare them with your own hands and a large percentage of waste is obtained.
Various methods are used for drying wood. During the drying process, the boards can not only lose some of their volume (there is a lot of moisture in wood), but also become deformed and become covered with cracks. And this is already unacceptable for building structures. That is why experts advise devoting the proper amount of time to preparing the material.
Atmospheric drying of wood
Complete drying in this way is designed for 2-3 years. If the carpenter has little time, then this method will not work. The undeniable advantage of drying in natural conditions is its ease of execution and minimum costs.
Atmospheric drying is considered using the example of the experience of the Carpentry .
Before drying, lumber is divided by grade into two packs to make it convenient to use.
Pack of quality lumber
The boards in this pack are wide, straight, without knots, and have the correct texture.
Boards with defects are placed in a separate pack.
Pack of 2 grade lumber
Choose a flat surface for drying. There should be no holes, stones or roots on it. Make a solid foundation. For this purpose, rails, pipes, and beams are used. In addition, waterproofing from roofing felt or film is installed. You can place a stack of boards on a ventilated hill, for example, on the roof of a barn.
The lumber is laid on the prepared base. For the first row, a board with wane and flaws is suitable.
A gap as thick as a board is left between the boards. The rows are separated by spacers. The gaskets are made the same size and the pitch is no more than one meter. At the extreme points of the stack, the spacers do not protrude beyond the ends of the boards.
Laying a stack of lumber
To prevent the ends of the lumber in the stack from cracking, they are painted over with paint, drying oil, PVA glue, and lime.
Ends coated with PVA glue
Roofing material, such as slate, is laid on the top layer of boards. Sediment must flow freely and not fall on the stack. Sometimes they make protection on the leeward side so that slanting rain does not wet the stack.
Stacked lumber stack
The duration of drying using this method depends on the type of wood and environmental conditions. Under good environmental conditions, up to 75% of moisture is removed from lumber with minimal deformation.
Not earlier than a year later, boards from the stack are brought into the room, and before use they are dried in a chamber to a humidity of 6-8%.
Video about the principles of natural drying of wood:
Laying methods
Natural drying of wood requires certain preparation of the material. For the rest, all that remains is to wait. The success of the entire drying process depends on the method of laying lumber. It is worth considering this issue as carefully as possible.
Wood is usually stored in stacks. The time, uniformity and quality of drying depend on the installation. You should experiment and periodically change individual elements of the stack. This will allow you to derive the ideal option for specific conditions. Laying features:
- the size of the stack directly depends on the climate zone;
- it should be laid on a special base, it should be quite strong, this is the only way to avoid breaking during the drying process;
- the supports of the base are made in the form of portable pyramids made of concrete; as an alternative, a wooden cage with cross beams measuring 60x60 cm is used.
Shoulder straps made of beams are laid on the supports. The maximum thickness should not exceed 10–12 cm. The stack may contain wood of the same species and size. The last boards are laid horizontally, with an indentation, on a face or edge. They must be separated by transverse spacers.
The role of the latter can be played by slats made of dry wood measuring 2.5x4 cm. If the stack is wider, the middle will dry out too slowly. This result is unacceptable. The width of the spacing should increase evenly towards the middle of the stack. So the central indents will be 3 times larger than the outer ones.
The dimensions of the stack depend solely on several factors: type, laying method, size of the bars. When laying by hand, the height does not exceed 4–5 m, and when using machines – 7–8 m.
Drying wood by boiling in salt water
After boiling, the wood does not crack. At the same time, in this way the material is protected from putrefactive microbes. As a rule, carpenters use boiling to process small workpieces.
Let's consider the method of drying wood in a saline solution using the example of the experience of the author of the YouTube channel Koval's Strokes .
Let's try boiling a block of cherries to make handles for knives. The block is freshly sawn, so it has high humidity and resin is released.
Bar before boiling
To cook a workpiece of this size, choose a deep pan, which is filled with saline solution. The solution is prepared from table salt: 5 tablespoons are poured into a liter of water.
Solution prepared for cooking
The solution with the workpiece is boiled for four hours over low heat.
Cooking the bar in solution
When boiled, sap comes out of the tree. After this, the brine solution becomes very cloudy. Depending on the type of wood, the block is boiled 2-3 times for 4 hours. Before each new boiling, the block is cooled and salt and water are added.
Boiled cherry block
The welded block is wrapped in newspaper and allowed to dry. Change the newspaper as it gets wet. The newspaper is changed until it stops getting wet.
The bark can be easily removed from a dried and welded block.
Welded block, prepared for cutting
The dry block is split into 4 parts, and after processing, handles for knives are obtained.
Video of the drying process by boiling in saline solution:
How can you dry boards quickly?
There are also times when you need to quickly dry the boards. Is there such a way? Yes, sure. Wrap the board in 5-15 layers of paper, one layer of cellophane and make holes in the latter.
After this, place the board on a warm radiator. A window sill is perfect for an apartment. Considering that the paper absorbs all the moisture, change it several times during the day. And turn the board over. With a thickness of 3 cm, 4 days will be enough for drying.
The main disadvantage of this method is that the board warps. But you can easily fix the situation with a plane.
Infrared method of drying wood
When there is a need for periodic drying of small volumes of wood, and it is expensive to buy an industrial dryer, then the FlexiHeat cassette model is used.
Let's consider the experience of the authors of the YouTube channel mtmwood .
It works on the basis of infrared heating cassettes. Such a cassette consists of a communication connector, a resistive layer and a shielding shell. The cassette temperature is regulated by a built-in thermal switch.
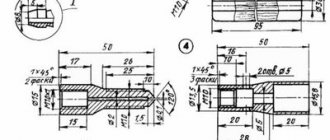
Let's focus on a dryer for 1.5 meter lumber.
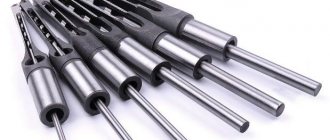
Parts for the base of the dryer
The parts are assembled and installed into a wooden base on legs. The bars are laid at a distance of 65–70 cm.
Dryer base assembled and installed
To reduce heat loss from below, Penoplex insulation is installed, which retains heat and does not allow moisture to pass through.
Dryer base with insulation
The frame for the dryer is assembled from wooden slats.
Frame for dryer
The frame is sheathed on the sides with tin, the roof is insulated, and a door with a handle is installed for convenient use.
Dryer ready for use
Before laying lumber, a control panel is installed and cable lines to the cassettes are laid.
Switchboard
Cable lines to the cassettes are routed through the floor, since complete tightness of the structure is not required.
Drying before laying lumber
Let's look at the operation of the dryer using the example of drying sawn birch burl, which is used for various crafts.
We will stack 6 cassettes. The white control cassette will be on the left, and the red heating element will be on the right. Wooden spacers are laid between layers of lumber.
Dryer with the first row of lumber
After laying the lumber and cassettes, the dryer is plugged in.
Dryer before turning on
After turning on the power, the cassettes begin to heat up. Moisture from the lumber evaporates, condenses on the cold metal walls and flows down. The insulated ceiling remains dry.
Fogging of the dryer walls
When condensation on the walls disappears, this means that moisture has been removed from the lumber.
Before stopping drying, the moisture content of the lumber is measured. To do this, use a professional moisture meter, which measures humidity in the range from 4 to 100%.
Checking the moisture content of dried boards
Using a cassette dryer, the moisture content of lumber is 6-8%. Measure the moisture content on a sample from the middle of the stack. It makes no sense to dry lumber below 6%, since the wood will gain moisture in the workshop.
Video about the infrared method of drying wood: