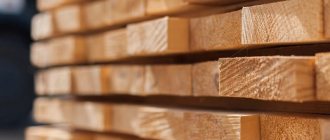
Vacuum drying of wood is a technological process that represents the heat treatment of wooden structures under the influence of a constant vacuum. This technology was developed in 1964 by Italian scientist Ernesto Pagnozzi. Vacuum drying shortens the processing period of lumber and improves its physical properties.
Features of using vacuum
Vacuum drying technology has both positive and negative sides. Due to its general high cost, it is used to work with the most valuable and finicky breeds.
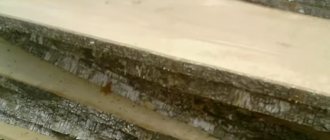
There are more advantages to this method. The use of vacuum drying allows you to avoid destruction of lumber, cracking, warping or other possible defects. In this case, a piece of wood will dry evenly, regardless of its thickness and length. This will take relatively less time, because the evaporation of moisture from wood in a rarefied environment occurs very quickly.
The equipment necessary for this is easy to transport and install, so it can be used in a variety of places, even directly in deforestation.
However, vacuum drying equipment is expensive, so small businesses and households can almost never afford it. Despite the small volume of the chambers (up to 10 cubic meters), the device consumes a lot of electricity. Perhaps this is the extent of its shortcomings.
Wood harvesting rules
The procedure and conditions for lumber procurement are regulated in accordance with the Forestry Code of the Russian Federation.
Read also: Connection diagram for Mercury meter via current transformers
The basic rules that must be followed during logging are as follows:
- felling of trees is carried out after submission and approval of a declaration, which justifies and describes the volume of felling, territory, type of wood, etc.;
- the first on the list for cutting down are trees that have suffered from natural causes or as a result of human activity (fire, storm, flood, disease);
- Only trees that meet age standards can be felled;
- during logging, it is necessary to remove the sawn material in a timely manner, prevent clogging of the area and demolish temporary buildings used in the work;
- It is prohibited to leave undercuts - individual trees in cleared areas.
The vacuum drying process is attractive, first of all, because it has a real opportunity to significantly reduce the drying time, while maintaining the high quality of dried lumber, and in some cases even increasing it.
Professional drying
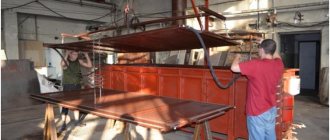
The body of the professional wood drying chamber is made of stainless steel. For complete sealing, its top is covered with elastic rubber, framed in a metal frame. Sensors are installed inside to measure humidity.
A specialist controls the camera from the outside - the equipment necessary for this is placed in a separate vestibule. It is imperative to have a vacuum pump with enough power to pump out air and accumulated condensate.
For heating, aluminum radiators (in the form of plates) with water are used, which is heated using a boiler outside the chamber. Due to the absence of complex elements, such a machine is easy to operate.
Temperature and vacuum sensors are used to control the process. If something goes wrong, the specialist will track it based on the readings on the monitor.
But professional equipment is expensive - for a medium-sized camera you will have to pay from 3 million rubles. But it copes with raw wood in just two weeks, while with natural drying the wood takes years to dry.
The specific drying time depends on the type and condition of the wood:
- boards made from freshly cut oak will dry for about a month, and freshly cut and thin-cut boards will dry for 15 days;
- wet (30%) oak boards dry from 16 days, but in the thin version (25 mm) - a little more than a week;
- boards made from freshly cut pine take 8 days to dry, and with less humidity (30%) – only 6 days;
- building timber with dimensions less than 150 x 200 mm and a humidity of 65% will dry in 12 days, but thick types (200 x 300 mm) - approximately 21 days.
Time also varies due to differences in instrument settings for different breeds. Some breeds are hardy, while others should be treated gently, gradually, slowly.
Operation of a vacuum dryer
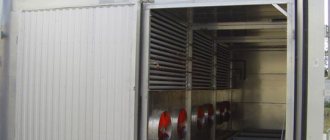
Vacuum drying of wood is divided into several stages. First, the wood is loaded inside the chamber. In this case, lumber is placed in layers between aluminum plates for heating. The specialist adjusts the drying parameters (temperature and pressure). This is necessary to work with different types of wood, after which you can turn on the device. When drying, the pressure is maintained at the same level, but the temperature can vary.
Note! During the warm-up stage, normal pressure is used and the vacuum pump is turned off. This is necessary to prevent defects from occurring.
When the wood is heated to the required temperature, the vacuum pump is turned on. It removes air from the drying chamber, thereby creating the required pressure. Moisture in wood moves from the center to the outer layers. Since the material is moistened, there is no need to use additional products. Uniform distribution of moisture saves the wood from damage.
The moisture that comes to the surface of the material evaporates due to the high temperature, settles on the walls of the housing and is removed by a pump.
The vacuum environment accelerates this process, because evaporation begins at a temperature of 40 degrees - this would not happen at normal pressure. The air surrounding the wood is never heated to a temperature exceeding 70 degrees. When pumped out, the upper rubber coating of the chamber is pulled inward and presses on the boards, creating a kind of press.
The final stage is conditioning. It is used only after the wood reaches the required moisture content. Heating is stopped, but the vacuum pump is not turned off. The wood gradually cools down, continuing to be under pressure, which is necessary to prevent changes in the shape of the material. When the temperature reaches room temperature, the pump is turned off and the wood is removed from the device.
Drying chambers and their structure
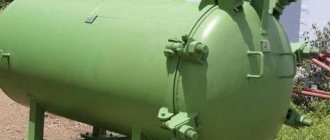
Drying equipment (chambers) are cylindrical or box-shaped, lined on the outside with metal sheets. Raw wood material can initially be stacked inside or placed on special shelves.
Convection is provided by compressor units, and air heating is carried out in radiator heat exchangers. The air is supplied from above, since after contact with the wood load and evaporation of moisture, the temperature of the air mixture decreases. This causes an increase in its density and the descent of cold, humidified air into the lower part of the chamber.
Drying devices can be intermittent or continuous. In batch systems, work is interrupted while the dried batch is unloaded and a new block of wood is loaded. Continuous dryers ensure constant movement of stacks from the “wet” part of the chamber to the “dry” part, and loading is carried out as free space becomes available inside.
This video describes in detail a device for vacuum drying wood with your own hands:
Do-it-yourself room equipment
A DIY vacuum dryer for wood will cost less than buying a professional device. To do this, you will need to select a chamber and equip it with a heat source and a fan.
Using inexpensive heating ventilation instead of a powerful pump is the main point of saving. Therefore, it is better to install the unit in a spacious room. It must be ventilated so that the air inside the housing can be constantly renewed, covered and sufficiently dry, otherwise the tree may become infected with mold or other diseases.
Camera
The best housing option for a drying chamber is an iron conveyor. It is cheaper to use a used one (they are actively used on the railway), but you will have to worry about its cleanliness.
A container for sea transportation is suitable for the job; you just need to look for a more airtight model. You can also use old scrap metal and weld the camera yourself. This is the most economical option.
To preserve internal heat, the walls must be insulated with foam plastic and trimmed with clapboard. It is better to purchase a special insulating material for reflection, but you can use foil or penofol, with the second option being preferable.
Equipment
When the chamber is ready, proceed to assembling and installing the heating device and vacuum pump. The heating system of the dryer must be installed separately from the general heating circuit, because it must function stably and independently. Select a radiator capable of heating water to 65-90 degrees.
Important! To ensure that the heat is distributed evenly during drying, you will need to install a fan.
This is a mandatory step, since uneven heating spoils the quality of the wood. When constructing dryers yourself, great attention is paid to fire safety.
To make loading wood easier, a loading system is needed. So, you can use trolleys on rails or a forklift. Raw materials can be dried either on shelves or directly on the floor. If the safety of wood is important, then it is necessary to install temperature sensors, which will help control the process. This is especially important for expensive wood species. If the structure is built correctly, the temperature in the chamber will change evenly.
Creating a drying chamber
Finished premises
Drying chamber for industrial production
So, we have argued the thesis that lumber must be prepared for use by drying. Now let's figure out how to make a board dryer with your own hands.
First, we need to select the room in which the drying process will take place:
- Since removing moisture from wood requires significant energy expenditure, the drying area must be selected based on the planned volumes of material.
- The optimal room height is 2 – 2.5 m (so as not to bend over). The width should allow the placement of one or two stacks of boards of 1.8 - 2 m each with a passage between them.
- The windows in the dryer must be bricked. We expand the doors so that we can easily load the material being processed.
You can use an old garage or barn for processing.
Note! For ventilation, either a small window or a vent is left, into which we will later lead the air duct.
- If drying boards is planned in a fairly large room, then it is advisable to make a separate partition in it. We build partitions from brick or thick enough timber to provide thermal insulation.
Construction of a dryer
However, it is not always possible to find a suitable room (most often a garage or barn plays this role).
This is why it will be useful to learn how to make a drying board for boards from scratch:
- We lay a strip or column foundation under the structure. Since the mass of the structure will be small, we make the base shallow.
- After the foundation concrete has dried, we assemble a frame from an aluminum or galvanized steel profile. We connect the frame parts using bolts and special brackets.
Note! The price of aluminum structures is much higher, but at the same time they are significantly more resistant to corrosion in warm and humid environments. So the use of more expensive load-bearing elements is completely justified.
- We cover the walls and roof with steel sheets, which we fix to the frame with metal screws (with a drill). For maximum efficiency, we perform double cladding, laying a layer of mineral wool insulation with a thickness of 100 - 150 mm between the metal sheets.
Read also: How to make a knife with your own hands video
Photo from inside a metal structure
- We lay a dense waterproofing membrane on the floor, which we cover with a layer of sawdust.
- We install doors that should close as tightly as possible. For additional sealing, you can reinforce the door frame with bars with rubber sheets attached.
- As in the case of using a ready-made room, be sure to install ventilation ducts for air circulation.
After completing the work, we check the tightness of the room, if necessary, eliminating defects in the cladding. Now we just need to equip our drying chamber.
Note! A closed dryer should not have any gaps that allow uncontrolled air flow. This is due to the fact that the presence of the slightest draft can provoke uneven processing of the boards, causing them to crack or deform.
Equipment
Instructions for arranging a dryer can be very different, because the equipment of the chamber largely depends on both our requests and financial capabilities.
And yet it is quite possible to formulate a general scheme:
- First, we make supports on which the stack of boards will be installed. We fix structures made of wooden beams on the floor, allowing the material to be dried to be raised approximately 10-15 cm above the floor level to ensure circulation in the lower layer of air.
Boards on a pallet with cross spacers
- Instead of supports, you can use wall racks. At the same time, we attach metal brackets to the load-bearing surfaces, intended for laying stacks along the walls of the drying chamber.
Note! This option is most often used when temporarily converting part of an outbuilding into a dryer.
Option with wall racks
- Next, install the heating device. This could be a stove, fireplace, heat gun, fan heater, etc. – it all depends on your preferences. The key parameter will be the power of the device, which is calculated based on the volume of loaded wood: to dry 1 m3 of boards, at least 3 kW of thermal energy is required, respectively, the more raw materials we need, the more powerful the device we will need.
- Together with heating devices, we install fans that will ensure air movement. Of course, you can save on buying a ventilation system and get by with natural exhaust, but in this case the time to prepare the boards for work will increase significantly, which means the cost of heating the chamber will also increase.
Placement of ventilation and heating
- We place fans and heating devices in such a way that warm air flows across the air flow. This installation can significantly reduce the aerodynamic resistance of the system, so that the dryer will work more efficiently.
Since our camera will require a large amount of electricity to operate, it is advisable to connect a separate power cable to it. In this case, we connect all used units to the distribution panel through an RCD with the corresponding power partners. Such a precaution will not be superfluous, since wood, even if not completely dried, can catch fire from the slightest spark that appears during a short circuit.
Advice! It is also advisable to install an automatic temperature and ventilation control system. It is quite expensive, but its use allows you to control the parameters of the internal environment of the dryer, thereby ensuring maximum quality of wood processing.
Integrated heating and ventilation system