We make a faucet with our own hands: electric, needle, non-freezing
Modern industry produces many different taps and valves to regulate the flow of liquid. There is a suitable one for every application.
However, the inquisitive minds of home craftsmen do not give up attempts to develop and implement their own designs.
Sometimes this is caused by the desire to save money, but more often by the desire to test one’s own strengths as a designer, mechanical engineer, mechanic and electrical engineer.
Types of cranes
Trying to replicate the design of a conventional shut-off valve makes no practical or economic sense unless your home workshop is equipped with high-precision milling, turning and drilling machines. The price of industrial designs for mass production is affordable even for the most modest budget. Another thing is technically complex shut-off valves for special applications, such as:
- ball with electric drive;
- needle;
- non-freezing;
- with instantaneous water heater;
Options for doing it yourself will be discussed below.
Ball with electric drive,
The motorized valve can find its application in modern “smart” water supply, heating and air conditioning systems created by home DIYers with minimal use of purchased components. In addition to testing your strength, there will also be a significant monetary benefit - a purchased device with an electric drive costs from 2 to 10 thousand rubles.
For a do-it-yourself ball valve with an installed electric drive, you will need the following materials and components:
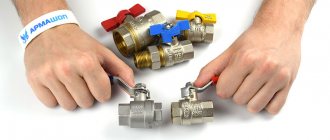
Figure 1: 3/4 valve
- window lift drive for Lada 1117, 2123 left LSA;
Figure 2: Power window
*
- five-pin automobile relays – 2 pcs.;
- limit microswitches - 2 pcs.;
- sheet metal 1 mm thick (for the frame and clamps);
- steel tube 10 mm - trimmings (for bushings);
- square profile 10*10 mm - 10 cm;
- metal strip 4 mm thick - 10*1 cm;
- spring with a diameter of 12 mm;
- M8*45 bolt with nut and washers - 2 pcs.
All electrical equipment is 12 volt. Tools needed:
- drill;
- metal scissors;
- workbench with a vice;
- welding machine;
- hand tools (hammer, screwdriver, wrenches, pliers, etc.)
The mechanism being created should allow the electric crane to be controlled both using a drive and manually. The manufacturing sequence is as follows:
- Bend a U-shaped frame from a sheet of metal.
- Make bushings from pieces of tube for attaching the window lift drive to the frame.
- Secure the drive.
- Secure the frame to the pipes coming out of the ball valve using clamps.
- Cut out an attachment for the gearbox axle from a square profile.
- Weld a strip to it.
- Assemble the lever mechanism of the drive from the strip and the handle, spring-loading it. The spring presses the levers together; if necessary, they can be quickly separated without the use of tools and the crane can be operated manually.
- The strip is hinged to the handle using a bolt and nut. Lock the nut.
- Attach the square profile to the window regulator shaft.
Next, you should test the kinematics by applying voltage to the electric motor. You can use a car battery or a power supply with a power of at least 50 W. The lever transmission should move smoothly, without jerking or distortion. If necessary, correct parts touching each other with a file.
Now comes the turn of the electrical part of the drive.
- Mount limit microswitches in the extreme positions of the handle.
- They should be connected in such a way that they open the control circuit of the relay through which the engine is turned on when the extreme position “Open” or “Closed” is reached.
Such a drive can be connected to the control circuits of a smart home system. A do-it-yourself electric water faucet will be cost-effective if the window lift drive is inexpensive. A new one costs up to 1 thousand rubles, and can eat up half the savings.
Instead of a window lifter drive, you can use any other electric drive,
Figure 3: Motorized crane
similar in power and torque.
Needle
*
A needle valve with a large adjustment range can be assembled from scrap materials at low cost. To make it you will need:
- Plastic disposable syringe 2 ml.
- Insulin syringe 1 ml.
- Bearing ball – 2 pcs.
- Springs - 2 pcs.
- Nut and adjusting screw.
- Epoxy adhesive.
- Fasteners
- Plastic ties - 2 pcs.
Figure 4: Valve diagram
The diagram shows:
- Syringes - black.
- Balls are blue.
- Springs - green.
- The stock is red.
- The direction of fluid movement is indicated by green arrows.
To make a faucet, you should:
- Select the balls by diameter. The large one should be slightly smaller than the internal size of a 2-ml syringe, the small one should be 2 times smaller.
- Select springs according to force. The compression force of a large spring is approximately twice that of a small one.
- Drill a hole in a large syringe near the spout equal to the inner diameter of the insulin one. Tighten the insulin syringe by the ears with ties, wrap it with synthetic threads and glue it.
- Insert a small ball and a smaller spring into a large syringe.
- Cut off the piston rod.
- Insert the large spring and the second ball.
- Insert the adjusting screw.
- Tighten the nut with screws to the ears.
Figure 5: Finished design
The incoming liquid will tend to press the ball away from the inlet hole, the spring will press it back the more strongly, the tighter the adjusting screw is tightened. If the screw is completely turned out, the flow will flow freely, if it is completely tightened, the flow will be blocked.
Anti-freeze faucet
Those who need to use the water supply on their property in winter are faced with the problem of the street tap freezing. With large temperature changes, the water inside the fittings and pipes turns into ice and can break them.
There are several ways to organize such water supply:
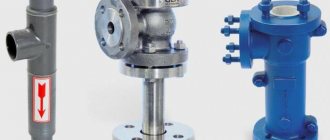
- Installation of a purchased anti-freeze tap. In it, the valve plate is located inside the warm contour of the walls. It is always installed with a slope towards the street. Then, after closing the valve, the remaining water in the pipe flows down and does not freeze in the pipe. The devices are available in different lengths, which allows installation in walls of varying thicknesses.
Figure 6: Anti-freeze valve
*
- A homemade version of such a device is a regular poppet valve mounted on a supply inside a warm wall contour. Its rod is extended by a rod passing through the wall in a tube. A handle is attached to the outside of the rod. The pipe must also be installed with a slope towards the street. This method requires an extra hole in the wall, but is several times cheaper. Of course, you will have to periodically chip off the ice that forms under the spout.
Figure 7: Homemade Anti-Freeze Valve
- A faucet installed on an underground insulated water supply system. In this case, it is necessary to have a drainage into which the water remaining after closing the tap in the vertical pipe will be drained. The design uses a three-way valve installed in an insulated pit.
Figure 8: Three-way valve
- The valve is controlled from the street via a stem extension. In the operating position, it turns on the water supply to the vertical pipe, at the end of which the spout is mounted. As soon as water is drawn, the tap is closed, the supply stops, and the remaining water in the pipe is drained through the third hole of the tap into the drain.
Sensory
A home craftsman is unlikely to be able to make a full-fledged sensor faucet. the problem will be in the placement and waterproofing of the infrared proximity sensor. A rather interesting design that allows you to turn the water on and off with your hands full can be assembled using
- Solenoid valve from a washing machine for 220 v - 2 pcs.
- Fitting 10mm*1/2 external thread - 2 pcs.
- Fittings from ¾ to ½ internal. thread - 2 pcs.
- Bell button for surface mounting.
- Wires.
The installation and configuration procedure is as follows:
- The valves are installed at the break in the hot and cold water line, directly in front of the mixer.
- Their drive is connected via a foot switch.
- During pre-setting, with the solenoid valves open, you need to set the required temperature and intensity of water flow and leave the mixer tap in this position.
- If you need to turn on the water, just press the bell button - the valves will work and water will flow from the tap.
When water is no longer needed, simply release the key and the springs will return the valve to the closed state. Particular attention should be paid to waterproofing wires and connections.
Instantaneous water heater for tap
*
Purchased instantaneous electric water heaters have a compact design and are equipped with a temperature control system, spout and aerator. It is unlikely that you will be able to make such a faucet attachment with your own hands in a home workshop.
the problem lies in the accuracy of processing parts and ensuring the electrical safety of the device. However, DIYers have developed a simple and quite effective design that allows them to do without complex and expensive components.
It works by heating a coil heat exchanger on a gas or electric burner. For production, average metalworking skills are sufficient.
Materials and tools you will need:
- Copper tube with a diameter of 10-12 mm - 1 meter
- Rubber or plastic hoses, heat-resistant - 2 distances from the burner to the sink +1 m
- 2 fittings from the internal diameter of the hoses to ½
- Adapter from tap for Eurocube
- 4 clamps
- Threaded arms and nuts for them - 2 pcs.
- Construction knife, screwdriver, gas wrench
The work is carried out in the following sequence:
- Wind a spiral from the tube according to the shape of the burner. Taper the spiral to make maximum use of the heat from the burner. The straight sections of the inlet and outlet pipes should extend beyond the slab panel by 20-30 cm.
- Attach the spiral to the stove grate. Place the hoses onto the pipes and secure them with clamps.
- Connect one fitting to the cold water supply (pipe or canister tap), the other to the mixer.
- Place the free ends of the hoses onto the fittings and also secure with clamps. Cold water should flow to the bottom pipe of the spiral.
Figure 9: Homemade instantaneous water heater
When operating such a heater, it should not be left unattended for a minute.
Conclusion
Drives for ball valves allow not only to control them remotely, but also to use them in automatic flow control systems. In particular, home flood protection systems have become extremely popular recently. Based on this, they can be called a promising invention (see also the article “Radiator valve - everything you need to know about this shut-off and control valve”).
From the video in this article it is possible to obtain some additional information on the designated topic.
Technical forum on robotics.
- Forum list ‹ Workshop ‹ Mechanics
- Change font size
- print version
- Shop
- Rules
- Wiki
- FAQ
- Registration
- Entrance
Servo drive for ball valve
Re: Servo drive for ball valve
by alexey_and » Mar 26, 2013, 08:13 pm
Re: Servo drive for ball valve
Myp » March 26, 2013, 08:39 pm
Re: Servo drive for ball valve
by alexey_and » Mar 26, 2013, 09:10 pm
Re: Servo drive for ball valve
Myp » Mar 26, 2013, 10:15 pm
hmm, I was really interested, I went to the bathroom to check, Skill 2027 with a torque of 36 Nm and a price of 2200 rubles. The ball valve turns without any problems, even trying to screw up the limiter.
and Shurik’s 600 ruble Leruamerlen battery ran out as usual. but I think I have to check it out. I'll check tomorrow if I don't forget))
Re: Servo drive for ball valve
by alexey_and » Mar 26, 2013, 10:52 pm
Re: Servo drive for ball valve
Myp » March 27, 2013, 10:26 am
I took a charged Shurik in the morning for 600 rubles. on fresh batteries it also turns without problems, you need to figure out how to attach the gearbox to the tap and stop the motor by closing the winding, otherwise, by inertia after acceleration, it tries to break the valve. You need a powerful power supply, Shurik, it consumes a lot of current. and do not turn them on at the same time
I’ve been wanting to build a leakage sensor for a long time and turn off the taps. but the price for the “Neptune” set of 8 thousand is clearly too much.
Added after 8 minutes 46 seconds:
Re: Servo drive for ball valve
by alexey_and » Mar 27, 2013, 11:05 am
and what kind of model is Shurik for 600 rubles? Is this a shurik or a screwdriver? Is there a speed control?
I don't think it's complicated. First I will make a concept board from a piece of plywood or a block. Then I’ll mill a slab of aluminum and attach it to it. Then I’ll bend the lid from iron from the auto shop, and the cunning ears on the tap will help out with the sealant. Can you tell me more about closing the winding?
is it necessary? Let them be powered by the original batteries, which are constantly charged. and then suddenly it’s a coincidence - the power will be turned off and something will leak, and the control logic will be powered by the oops
agree. and it would be nice if Neptunes and the like had good faucets included. it would be easier to buy. but in reality there is Chinese bullshit, and there were precedents for flooding, the taps simply turned sour. and I need to do not only shut off the water, but also backwash the filters; I already have sensors like these https://www.chipdip.ru/product/electroni. er-sensor/ work great, you just need to come up with a housing for them
Do-it-yourself electric valve for water 220V
Electromagnetic valves for water are devices with which you can remotely shut off or open the flow of water, gas and any other medium located in the pipeline.
These devices are called electromagnetic because they use an electromagnetic coil (solenoid) to operate.
There are several types of such devices and each has its own characteristics and differences in operating principles.
An electromagnetic valve is a type of shut-off valve installed on various pipelines, including domestic ones
Advantages of automatic watering
The main elements of the irrigation system are as follows:
- water flow dosing;
- uniformity of application;
- efficiency (watering at night reduces moisture evaporation);
- the system is underground;
- saves labor and time for the gardener.
Purpose of the solenoid valve
An electromagnetic valve for irrigation is always needed, even if there is no irrigation system. It is used in conjunction with a timer that turns it on at the right time. It is especially needed to fill the storage tank.
When water is supplied according to the schedule, the timer opens the valve and the tank is filled. It is advisable to water the area at the same time. All this is done in the absence of the owner.
All he has to do is water hard-to-reach places.
The main purpose of the valve is to supply water to the irrigation system at a given time. A 1-inch device is suitable for this, flowing 50-100 l/min at a pressure of up to 10 atm. It can also be used for short irrigation areas, since the built-in regulator allows you to adjust the required local flow. It is suitable for spray and drip irrigation when the pressure in the system is low.
One or more valves are installed on a drainage pad made of crushed stone and closed with a box. This can be done in any convenient place.
How does a distillation column work?
When the distillation cube, into which the mash is poured, is heated, a gradual boiling begins with the intense release of alcohol-containing steam. These vapors, lighter than the liquid, rise up the distillation column, from where they enter a water-cooled reflux condenser.
Here, at the highest point, steam condensation begins, and it again flows into the column in the form of condensate. That, in turn, is filled with special elements through which liquid flows. At this time, the mash continues to boil, and its vapors rise up the column, meeting condensate along the way.
It is this continuous process of exchange of liquid and vapor that is called rectification.
During such an exchange, the liquid condensate (reflux) is saturated with steam, and the steam, on the contrary, is saturated with a liquid with a lower boiling point. This process occurs continuously while the mash boils and condensation forms.
As a result, the lightest vapor with the highest concentration of alcohol is collected at the head of the distillation column, which is sent to the refrigerator for final condensation.
Already from the refrigerator, an absolutely pure distillate - moonshine - descends into the receiving container.
The operating principle of a distillation column is shown in this figure
Solenoid valve design
The valve is very simple. It contains the following details.
- Housing with a metal or polymer cover.
- Valve with rods and plungers.
- Solenoid in a sealed housing.
The external thread of the inlet and outlet pipes is 1/4″ or more depending on the fluid flow. The least amount of water passes through the solenoid valve for drip irrigation. Small-sized devices are built into a water pipeline and operate on a timer that sets different irrigation modes.
Recently, models combined with a switch have appeared. Available for purchase through the online store: the solenoid valve for irrigation C 1060 plus GARDENA, which has become popular. It automatically switches the water supply to irrigate the garden.
Advantages and disadvantages of needle valves
The advantages are as follows:
- smooth flow control;
- the valve is made of anti-corrosion material, so the needle valve is strong and durable;
- the ability to disassemble the valve in order to replace the old seal;
- protection against hydraulic shocks that can occur when quickly opening and closing a tap;
- the valve can withstand a maximum pressure of 220 Bar;
- the ambient temperature can vary from −20° to +200°С;
- The tap can be connected using an inch thread or a cylindrical thread.
Needle taps also have disadvantages:
- one-way feed;
- impossibility of use for pipelines with dirty water;
- large construction length;
- The needle valve cannot be repaired (when buying a new one, do not skimp on quality, otherwise the valve will not last long).
Solenoid valve for irrigation: operation diagram
The water valve is convenient to use because it can serve as a regular water tap during a power outage. To open it, the control solenoid is turned a quarter turn.
Homemade mini crane
Regardless of the height of the structure, the weight of concrete blocks always remains the same. To make work easier during construction, you can make your own crane. It is not difficult to assemble a small crane with your own hands with a lifting capacity of about 200 kg. The equipment is intended for domestic use and weighs 200-300 kg. This is a convenient model, easy to assemble and disassemble. Small dimensions allow you to transport equipment in a pickup truck. Prepared drawings will help simplify the assembly process; they include the following information:
DIY electric drive for a ball valve
A three-way valve looks similar to a brass or cast iron tee, but has a different purpose and design. The function of the device is to separate or mix water flows from two heating circuits, as well as switch the flow between two circuits. This is the basis for the basic classification of three-way valves:
- dividing;
- mixing;
- switching.
The three-way separation valve is designed to change the quantitative change in hydraulic parameters in the system. For example, if this is an apartment in a multi-storey building, then the owners do not have the opportunity to regulate the temperature of the radiators in the rooms, since the heat source - the heating boiler - is out of reach.
In this case, installing a three-way valve helps, which allows you to change not qualitative parameters (outlet water temperature), but quantitative parameters by changing the volume of hot water flowing from the common riser into the apartment.
A three-way mixing valve combines two water flows into one and also regulates the temperature of the coolant, but according to a different principle. The valve is connected to the supply and discharge pipes of a closed system.
One receives heated water from the boiler, the second receives already cooled coolant, which has made a circle around the system. By mixing two streams into one, the valve regulates the water temperature within the set limit.
Once the required values are reached, the liquid enters the second circuit (for example, into a warm floor).
Three-way switching valves allow you to change the direction of water flow in the system. For example, in a private house where a heated floor is installed, there is always a need to temporarily turn off one of the circuits.
For example, with warming, you can already do without heating radiators, but without floor heating in the house it is still uncomfortable.
Due to the switching valve, you can not restart the boiler, but simply switch the system to any of the circuits.
Attention! Three-way valves are divided into manual and automatic according to the adjustment method. The second category of devices is equipped with an electric drive, which allows you to set and maintain the specified system parameters automatically.
Electric crane: technical specifications
It operates from the mains at a voltage of 220 V. The tap diameter is 1”, 1/2” and 3/4”. The optimal pressure is about ten bar. Complete closing or opening takes about 7 seconds.
Power in standby mode is 5 W, and in working mode – 12 W. The temperature of the coolant in the maximum state is 10000C.
During operation it can withstand almost all reasonably permissible air temperatures and high humidity, but there should be no condensation.
These taps are made of stainless steel. Naturally, there are documents confirming the appropriate quality of the product, of course, if it is produced by a certified manufacturer. The cost may vary from one seller to another, but usually not significantly.
ZONAFAR crane
Another worthy company produces a range of top quality products. Manufacturer – Italy. The electric ball valve from this company is equipped with servo control. During its existence, it showed itself to be extremely positive. proof of this is user reviews online.
Representatives of this family do an excellent job in cases of water leaks in heating systems. Thanks to the high-quality material from which it is made (nickel-plated brass), it is resistant to corrosion, and for even greater protection it is coated with an anti-corrosion compound.
It withstands any atmospheric conditions very well. Very efficient and requires no effort to maintain. Another advantage is the huge savings: in standby mode it uses no electricity at all, and in operating mode it uses only 4.5 W.
If there is a power outage, the crane will remain in the state in which it was operating before the break; it is possible to turn it manually. The buyer, at his choice, buys a unit with a ball valve drive for 20 or 8 seconds.
Crane specifications
Operates from a 220 V mains voltage. The pressure is 16 bar. Full closing time 20 or 8 seconds. In operating condition, it uses 4.5 W of energy. The body is made of brass, and the driving shaft is made of this material. Operating temperature range -2500 C – 13000 C.
These devices are very convenient and at the same time easy to use, so they are becoming more and more popular every day.[art_yt id=”uKow1ArbAd8" wvideo=”640" hvideo=”360" position=”center” urlvideo=”https:// www..
com/watch?v=uKow1ArbAd8" namevideo=”Electric-actuated ball valves” desc=”Testing and operating principle of electric-actuated ball valves.” durationmin=”1" durationsec=”28" upld=”2015-06-19" tmburl=”https://i.ytimg.com/vi/uKow1ArbAd8/maxresdefault.
jpg” thumbnailwidth=”1280" thumbnailheight=”720"]
Currently reading
- Review and description of ball valves for welding
- Types of ball valves for water pipes
- Reliability and durability of gas ball valves
- Advantages and disadvantages of brass ball valves
Design features of a motorized valve
The design of the motorized valve is different for separating, mixing and switching models. All types of control valves have a metal body, which is internally divided into three parts, between which the control device - the rod - is located. It is by its shape and operating principle that the design of a three-way valve differs.
We recommend that you read: How to solder heating pipes correctly?
The electric drive is a part that combines all three types of three-way valves.
Using a built-in drive with a controller, the water temperature is automatically adjusted by reacting the device to changes in water temperature.
An electric drive, which is also called a servo drive, is a motor, but it does not rotate around its axis, like conventional devices, but turns within a limited radius.
Attention! Externally, a three-way valve with an electric drive can be recognized by the presence of a plastic rotary lever, on which there is a mark to indicate a scalar value.
Electric ball valve: description
These devices have proven to be effective in water supply systems due to their smooth on and off operation. Their enormous advantages and ease of use have long made taps popular for technological water supplies. Some models allow control even from a distance, but retain the manual control method.
Application area
Complex technological chains in some industries require complete control over ongoing processes.
Techniques and methods for controlling the movement of liquids were developed experimentally even before the start of mass production of such products. The first samples were made in single, sometimes exclusive versions.
The accumulated experience formed the basis for mass production, since the efficiency of application was the highest. This became beneficial for several reasons:
- Economic expediency. The high price of the products is fully justified by the significant reduction in maintenance costs;
- Management efficiency. Conventional utility routes with complex configurations require highly qualified service personnel, where the cost of an error can be high. The automatic control system, especially in automatic mode, completely eliminates the human factor;
- Reduced labor intensity. Systems that use an electric drive do not require human physical energy. The tap and other shut-off valves can be controlled remotely.
Today, a crane using an electric drive can be found not only in production, but also in household networks. In order to reduce maintenance costs and increase the efficiency of their activities, utility services are actively interested, and many are already using such products in practice.
Principle of operation
Today there are two types of sensors:
- Wired devices that are connected to the controller using wires;
- Wireless – send a radio signal to the controller.
In any case, the scheme of the system is as follows:
- When the sensor is immersed in water, its poles close, causing the device to send a signal to the controller.
- Next, the controller transmits an electrical impulse to an electric water tap, which shuts off the water supply.
It takes no more than fifteen seconds to close the tap after the sensor is triggered. To resume the water supply, you need to press a special button located on the electric drive housing. A properly installed system guarantees protection against sudden leaks in the water supply or heating system.
Purpose
The presented devices have shown high performance in water supply systems, as they smoothly switch on and off.
They are mainly used for process water supply, which is due to their great advantage and ease of use.
Some forms offer the ability to be controlled even from a distance, however they also retain the ability to be controlled manually.
Since the design of this device has excellent characteristics, the electric actuated ball valve has found wide use in liquid and gas supply systems. It is used in the food, chemical and processing industries. Installed in heating systems. Actively used in the electrical industry.
For any individual case, various types of fittings are selected, which are distinguished by cost, design and reliability. Based on the specified parameters, the final price of the crane may vary. For example, you can choose a steel option or PVC. A little further we will discuss the most well-known manufacturers with different price indicators.
What does the system consist of?
So, we have become familiar with the principle of operation of the system. Now let's take a closer look at the features of the elements of which it consists.
Electric crane
This device is a shut-off valve in the form of a ball valve with an electric drive. The only difference from a mechanical ball valve is that the position of the locking element is regulated not by a lever, but by an electric motor.
Advice! It is quite difficult to install a ball valve with an electric drive with your own hands, since its connection is made through a junction box using a PVA3x0.5 power cable. Therefore, it is better to entrust this work to a specialist.
To seal the connection between the locking mechanism and the electric drive, the device comes with O-rings. As a rule, they are made from alloys that are resistant to wear and contamination. The locking ball element itself is usually made of stainless steel and has good durability.
The following materials can be used to make the device body:
Usage
First of all, it must be stated that the electric drive only changes the position of the locking mechanism. This device is controlled by thermostats, thermostatic timers or other devices that send electric current to the electric motor of the mechanism.
As an example, consider the operation of this device in a flood protection system, which can be used for both water supply and heating.
So, in addition to shut-off valves, it includes:
- Leak sensors.
- Controller.
Such a system works as follows:
- The sensors are located in places where there is a huge possibility of water accumulation in the event of flooding . The operating principle of this device is based on the fact that water closes two contacts, as a result of which a pulse is sent to the controller.
- Upon completion of receiving a signal from the sensor, the controller sends electric current to the electric motor.
- The electric drive, for its part, closes the valve and thereby blocks the water supply. You can then turn on the water supply yourself by pressing the button on the drive housing.
Installation and Installation
The photo above shows a version of a smart device circuit in a smart home.
Now about the installation of such products. I’ll say right away: it’s very simple and won’t cause you any trouble. To do this you need:
- clean the pipes from unnecessary chips;
- fix the faucet to your liking;
- make sure that before and after attaching the tap, the cross-section of the pipe remains the same;
- We connect the device according to the diagram in the box, the main thing is to follow the color marking of the wires;
- remember - first you need to check the readiness of the device for operation, and then supply water.
Above is a simple wiring diagram for installation.
