Muffler gasket: how and what to replace with
The muffler gasket or O-ring is used to isolate the gas junction formed between the rear muffler and the resonator (auxiliary muffler).
Installing a gasket between the exhaust manifold (“pants”) and the muffler is also necessary to ensure mutual movement of the muffler pipes.
Damage to the gasket can be detected as follows: under the very bottom, in the place where the sections are connected, there will be carbon deposits. In addition, if the gasket between the cylinder and the muffler is damaged, an unpleasant odor created by exhaust gases appears in the car interior. A damaged unit also makes itself known by a characteristic grinding noise that occurs during engine operation.
Current repair methods without welding
Welding means the use of a special welding machine, which is available to many motorists.
But working with such equipment requires certain skills, abilities and knowledge. Therefore, without experience, it is strongly not recommended to undertake such a procedure with your own hands.
You can go the other way and use non-welding methods, which have proven themselves to be effective in restoring the tightness of the muffler. Among the most relevant methods, it is worth highlighting repairs using:
Each presented technique has its own characteristics and nuances. To better understand all aspects, they should be considered separately. This will allow you to make the final decision by choosing one of the proposed methods for sealing a damaged muffler.
If the features and characteristics of these products do not satisfy you, there is always the opportunity to use alternative methods.
Cold welding
Since it has practically nothing to do with hot welding, motorists often ask questions about whether it is possible to repair a broken muffler using cold welding. In reality, this can be done, and sometimes even necessary.
It is cold welding that car enthusiasts often turn to when they are thinking about how best to repair their burnt-out muffler. If the classical welding method is not suitable for one reason or another, the plug can be restored using the cold welding method.
In fact, this method is not directly related to the very concept of welding. This is rather a popular name, which refers to the use of two-part glue. It is used to connect metal products. Moreover, the glue holds very firmly and with high quality.
Doubts regarding the cold welding method arise due to the fact that the muffler will subsequently be exposed to high temperatures. And under high temperature loads, destruction of the composition itself is possible. Don’t rush to look for other options to repair your burnt exhaust pipe. Cold welding, or rather the adhesive composition of this product, tolerates different temperature loads quite well.
Two-part adhesive can withstand high and low temperatures and can be used in various conditions without the risk of destruction of the adhesive composition. Therefore, cold welding is considered as one of the most effective methods for restoring a damaged exhaust pipe or muffler.
The procedure has some nuances. When carrying out repair and restoration work, it is recommended to adhere to the following rules:
After applying cold welding in compliance with all recommendations provided by the manufacturer, you can continue to operate the vehicle as normal. There are no restrictions on engine load. If everything was done correctly and efficiently, the restored muffler will begin to work no worse than a new one.
But there is one very important nuance. This is the temperature at which repair and restoration work is carried out using a two-part adhesive, called cold welding. It is recommended to work only in a heated or warm room. In winter, you won’t be able to do this procedure in an open garage.
It's all about the composition itself, which cannot react with metal surfaces if the ambient temperature is less than 5 degrees Celsius. In the warm season, there are no problems with providing appropriate conditions. But in winter you will have to think about organizing heating or finding a warm room where you can repair the exhaust pipe.
Ceramic tape
Ceramic tape is in fairly high demand for repairs. Therefore, this is another answer to the question of how you can repair the muffler if it burns out.
It is important to consider that the smaller the hole, the more effectively the tape will help restore your muffler. You won't be able to wrap a lot of damage with it. The material is designed to withstand relatively small defects.
There have been cases when a motorist wound several rolls of ceramic tape around the muffler and enjoyed the result for a long time. But you also need to be able to wind it correctly in order to avoid welding and achieve a good restorative effect.
When using ceramic tape, you must adhere to certain rules and the sequence of repair and restoration work. Namely:
You should not count on the same long-lasting effect as in the case of cold welding when using ceramic tape. It is called a means for temporarily restoring the performance of the exhaust system. But this does not mean at all that after a couple of tens of kilometers the tape will collapse and become unusable.
How quickly ceramic tape wears out depends on several factors. These include the operating activity of the machine, the general condition of the exhaust system and the temperature affecting the material. The less load, the longer the wrapped muffler can work normally.
The main advantage of the ceramic tape is that during its time on the muffler it allows you to fully restore the performance of the muffler. And if the tape burns out, you can always wind a new layer until you can fully repair the element or replace it with a new muffler.
Sealant
If you visit any store of automotive chemicals and other goods, consultants will offer you an extensive list of solutions to the question of how you can seal a hole in a hole without welding.
In this case, a special sealant will probably be offered. These are relatively inexpensive but effective products that are distinguished by their high-temperature characteristics, can withstand heavy loads and easily cope with the tasks.
If you take a responsible approach to the question of how best to cover up a hole in a car muffler, then you should turn to the help of sealants. This is especially true when it is not possible to carry out full welding work or even replace a worn muffler with a new part.
A distinctive feature of a special sealant is the presence of ceramic or cement additives in its composition. These components do not collapse or melt when exposed to high temperatures. The opposite effect occurs here. It is high-temperature loads that contribute to the hardening of the sealant and the creation of a durable layer on the surface. It prevents exhaust gases from escaping through the hole that appears, restores the functionality of the entire system, and allows you to do without repairing or replacing the muffler for quite a long time.
Be sure to read the manufacturer's instructions before use. But often the work is performed in the following sequence if special high-temperature sealants are used:
Modern high-quality sealants with special additives are a worthy alternative for hot and cold welding and especially ceramic tape.
Sealants should be considered as complete repair tools. When used correctly, they provide long-lasting results, which makes it possible to avoid the need to replace the muffler in the near future.
How to get rid of the problem
The muffler gasket is usually beyond repair. If the muffler gasket (ring) is damaged, it will have to be replaced with a new one. Replacing the gasket is fairly easy.
The gasket (ring) of a car muffler is replaced in a fairly simple way. However, when removing the old gasket, it is important to take special care, because the cermet ring has a fragile structure, which is why it can easily break.
It is necessary to replace it in the event of a breakdown, because otherwise the car interior will be filled with fumes. Also, if a malfunction occurs, carbon deposits will begin to form under the very bottom, which will be very difficult to eliminate.
It’s not just the muffler that burns out: what’s falling apart and how to repair it in the exhaust system
Many have probably encountered a situation when a car began to roar in Dzhigurda’s voice. At first she growled quietly, then she began to grumble louder, and then she simply screamed. Often this car's tendency to roar is explained simply - “the muffler has burned out.” But in fact, not only the muffler can burn out - the exhaust system itself is more complicated than it seems. Let's see what can grumble, growl and make other obscene sounds in it.
From “pants” to “cans”
The exhaust system is needed not only to remove exhaust gases. It has several functions, and reducing noise and exhaust emissions is not all.
Firstly, exhaust gases spin the turbine impeller (or turbines, if there are two of them) on supercharged engines. But we won’t talk about this, this is a slightly different topic. Secondly, lambda probes (oxygen sensors) installed at the exhaust are needed to prepare the fuel mixture. They transmit data on the amount of unburned oxygen, on the basis of which the ECU adjusts the composition of the mixture. Thirdly, yes: the exhaust system must reduce the toxicity of the exhaust, primarily the concentration of carbon compounds, nitrogen oxides and soot.
Despite the fact that the exhaust systems may differ slightly, the circuit diagram for any naturally aspirated engine is the same. It consists of several elements: the exhaust manifold (sometimes called the "spider" or "pants"), the clutch, the catalyst, the exhaust pipe, the resonator and the muffler (which is sometimes called the "can"). You can also add oxygen sensors and an exhaust suspension system here. The cause of extraneous sounds can be anything, except, perhaps, sensors. What are all these parts for?
The exhaust manifold is the first thing that stands in the way of exhaust gases (except for the gas distribution mechanism). Its task is to divert gases from each cylinder into one common exhaust pipe. And he needs to do this in a smart way: by ensuring high-quality purging and filling of the combustion chambers. It is known that the movement of gases occurs in waves, which often makes it difficult to release gases and fill the combustion chambers. Therefore, the design of a collector is almost always complex, and a lot of time is spent searching for the optimal shapes and cross-sections of pipes. Everyone, most likely, has heard about the desire of tuners of various types to install a 4-2-1 exhaust on their “chepyrka” - that is, a manifold in which first four pipes converge into two, and only after that – two pipes into one. Simpler manifolds have a 4-1 scheme, in which all four pipes (if we are talking about four-cylinder engines) immediately converge into one. Well, God bless him, the main thing is that there is a collector in the exhaust.
The next element is the resonator. It is also a front or pre-muffler. It does not affect the environment in any way, and its only task is to reduce noise levels. In fact, that’s why it’s called a resonator. Exhaust waves are reflected in it and standing waves are formed. That is, the sound after it should become smooth, and not rumble like a series of shots. But the noise finally disappears in the main (rear) muffler. Structurally, it is a little similar to a resonator: inside it also has perforated pipes and compartments, inside which gases walk, as if through a labyrinth, losing speed and temperature. The formulation is somewhat simplified, but clear.
Another detail is the pipes, at least the receiving and middle ones. Everything is simple here, they connect the rest of the release elements. And finally, the entire structure is not tightly screwed to the body or frame, but is secured by a suspension system with rubber shock absorbers (donuts or whatever you like). This is quite logical. Think for yourself what a shiver would go through the body if the exhaust were tightly attached to it. To reduce vibrations, suspension and corrugation are used.
We figured out the device in general terms. Now let's see what can go wrong here. Let's start from the very beginning - with the collector.
What's wrong?
The exhaust manifold operates under very harsh conditions. Most of all, of course, it suffers from temperature, which usually ranges from 700 to 1000 degrees. Sometimes it can be higher - up to 1300. Therefore, the collector itself is made of refractory materials. This is good, but it has one weak point - the gasket between it and the block. If the gasket burns out, a sound appears that is described as “the gasket is cutting.” This is often a whistling sound, the source of which is not difficult to find. The solution is obvious - replacing the gasket. In this case, you need to pay attention to the fastening of the collector itself: the gasket itself usually does not burn out. But if, for example, the pin that attracts it to the block breaks, it will burn out very quickly: it will be burned by the hot exhaust gases breaking through the leak. Therefore, if the gasket “cuts”, first of all you need to look at the manifold fasteners.
This exhaust sound is the easiest to find for at least one reason: you don’t have to crawl under the car to find it. To determine the source of another roar, you will have to either use a lift or crawl under the car (which is not always convenient, possible or safe).
Which gaskets are best to use?
Quite often, a muffler exhaust pipe flange gasket is used for replacement, which is responsible for sealing the connection between the exhaust pipe of a car exhaust system and the exhaust manifold. This gasket is usually used on cars that have a receiving pipe mounted at two points (Volga third series, GAZ-21).
However, you can make your own pant liner. It is recommended to use the following materials:
Also, many motorists advise using automotive sealant that can withstand high temperatures. The technology for using it is quite simple: a thin layer (about one millimeter thick) is applied to the muffler in the seat, and then left to dry for twelve hours.
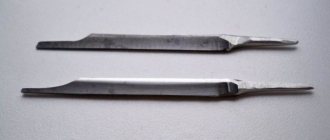
Most drivers prefer to use paronite to create a gasket. The creation process is as follows:
There is an easier way:
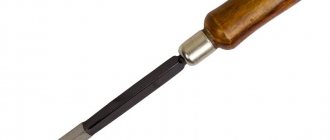
Ultimately, the finished gasket is modified using a round file and sandpaper, and then can be used for its intended purpose.
Source
Gasket replacement process
Design diagram of the intake and exhaust manifolds
Since the gasket is located on the manifold studs, to replace it the unit will have to be completely dismantled. Of course, this operation will take a lot of time and effort.
Before the car enthusiast proceeds directly to the replacement process, it is necessary to collect the tools that will be needed. So, the tools without which replacement is impossible: ratchet and sockets for 17, 19; screwdrivers with flat and Phillips tips; a set of keys and the gasket itself.
The tools are assembled, now you can go directly to performing all kinds of operations. Before removing the manifold, you need to spray the bolts with WD-40, which will remove corrosion and allow you to remove the part without any problems.
Step-by-step instructions for replacing the intake manifold gasket (with photo)
Let's look at step-by-step instructions for replacing the gasket:
- Remove the negative terminal from the battery.
- We remove the throttle cable.
- We are dismantling the fuel pipes. More precisely, they need to be disconnected and taken to the side.
- Disconnect the throttle position sensor connector.
- Disconnect the idle air control wire connector.
- Unscrew the crankcase ventilation pipes and brake booster.
- We are dismantling the receiver.
- Remove the wires of the injection control unit (injectors).
- We dismantle the fuel rail without dismantling the injectors.
- Remove the thermal shield from the manifold.
- Disconnect the exhaust pipe.
- Remove the exhaust manifold.
- After unscrewing the fastening nuts, remove the intake manifold.
- We are replacing the gasket.
- We carry out the assembly in the reverse order.
As you can see, the replacement of the intake and exhaust manifold gaskets takes place simultaneously and, by and large, is the same gasket material.
Part selection
21083-1008081 – original catalog number of the gasket for the intake and exhaust manifold. It consists of two parts or, on newer models, one. This part is produced at the AvtoVAZ plant. The average cost is 250 rubles per piece (if there are two of them) or 450 rubles (for a whole one).
In addition to the fact that there is an original part, you can also find a number of analogues that are recommended for installation. Let's consider which gaskets can be installed under the VAZ-2114 manifolds:
- Trialli GZ 102 0013 is a well-known Russian manufacturer that produces a wide range of analog parts for domestically produced cars. The cost of the gasket is 200 rubles per piece.
- AJUSA 13065200 is another domestic manufacturer that has won consumers over the quality of its products. The cost of the product is 450 rubles.
- Ukrainian also produces and supplies this gasket. But, if you look at it, the quality of the product leaves much to be desired, since the resource is designed for only 20,000 km.
Causes of malfunction
After we have considered the process of replacing and selecting a part, it is necessary to consider the main reasons for the failure of the spare part:
Wear
During operation, the car emits hot gases that destroy the surface of the gasket, as a result of which it can tear or delaminate. Since there is only one gasket for the intake and exhaust manifolds, gasoline entering through the first channel can get on the gasket, which also affects the integrity and structure of the material from which it is made.
The quality of the part is not always high, even original, so when choosing, you should pay special attention to this
What can a muffler gasket be made from?
Unfortunately, I don’t have Poronite at hand and I don’t see it in the near future. Something doesn’t work out very well with the sealant, it still poisons, and of course it could be your hands that are to blame. Are there any other options?
What's the problem with paronitis? Any normal auto store sells it. It costs pennies. Here on the forum someone wrote that you can use oiled thick paper or cardboard. But paronite is obviously better.
It’s not available in any auto store; I’ve been around three in the area.
Well, that means no luck. I found it literally in the first place I came across. On Timiryazevskaya, such a small shop. Leaf paronitis.
I never use gaskets. With them, the muffler tries to unscrew. Don't make it out of paper or thick cardboard. Vibration will cause the cardboard to compact and loosen the threads. The muffler will unscrew. Without a gasket, twist as much as you can. Do not use Loctite or Grover. Just the engine, muffler and propellers.
I will support Alexey! I’ll just add that all threads (internal and external) must be degreased! Then, firmly.
Alexey, everything is clear with Loctite, but why not Grover? I have a muffler mount that is outrage hyper rage for the 55 engine, it came standard with the grower.
If on topic, I still used a high-temperature auto sealant, which is for the jerker gaskets. It tolerates temperatures up to 340 degrees and is not afraid of oil and derivatives. And the technology is so thin (
1 mm) coated the seat on the plug with a layer and let it dry for 12 hours. Then I twisted everything together. So far nothing is snotty
The previous owner assembled a motor with Loctite and recommended it to me. What can you do now?
I don’t even know, you can’t get to the internal thread there. That was the topic. I think the easiest way is to try to take it apart and burn it out. I don’t know if the oven temperature is enough, for example.
It’s good that at least I didn’t smear it with red, it seems like blue should curl easily. In general, I won’t worry about it just yet; I’ll wash everything during preservation.
If the glushak is original to the TT39, then IMHO it’s better to throw it out right away and install it from the same Caliber3. The original plug at the junction with the engine has very thin side walls and no gasket or sealant should fit there normally. The only advantage, and a dubious one, is that by disassembling it into three parts, you can remove the engine without removing the muffler, but from these assemblies it also siphons completely.
And I coated the plug with automotive sealant and twisted it, now it is not dismountable and does not siphon
But I don’t want to change it, because... I'll change the engine in the summer
I don't force anything on anyone. I am sharing my personal experience.
I cut out all the gaskets from suitable automotive ones, preferably with metallization. It is better to secure the muffler with an elongated screw with a nut and a locknut. As the gasket tightens, tighten the nuts. Auto sealant is not for everyone, but it won’t hurt.
+ 100 I also suffered for a long time, about 2 years ago I also started a topic - since then I have been using auto sealant and the one that is red with a temperature of up to 350
I always cut from a photograph. As an option, “cook” at temperature in a heat-resistant sealant, having previously diluted it
No paronite papers. An aluminum gasket (TT and K&S have it), but you can do without it, and carefully degrease the screws and threads in the pear. For greater reliability, you can use longer screws and a lock nut with plastic. It will never unscrew.
I tried without a gasket I tried a sealant, as in the post above I tried a paronite gasket It still pisses at least a little at the joint. I decided to forget about these droplets, they are not critical
Then maybe this is not at the junction? Is it coming from somewhere above? I can’t believe that something could be leaking with paronitis. Well, only if the surfaces are completely curved.
Muffler gasket: what is it made of?
After the short summer season flew off, both gaskets for the silencer, which were included with the new ASP engine, came to look like scraps. We need something new to replace them. What can be used for
0.5mm gasket thickness? Cardboard? The “original” gaskets seemed to be cardboard. Is this some kind of special cardboard or regular thick cardboard?
We need such material to fulfill its functions and be easy to obtain.
Better paranitis. You can also use cardboard. If you put everything on a heat-resistant sealant, then it won’t “snot.” By the way, paranit is sold in auto parts stores; a piece measuring 50*50 cm costs 50 rubles.
1. I used it as a gasket material for a Zhigulya carb, I just selected it according to the size so that I could cut out the required piece.
2. and where is such a car shop?
I cut out spacers from punched cards from an ES computer. And I coat them with technical Vaseline. (probably not necessary
)
The gasket must be either metal (for example, aluminum), or the muffler must be installed without a gasket.
I have been flying without these gaskets for several years now and have come to the conclusion that installing a paper gasket increases the chances that your silencer will come loose in the air (after the gasket is destroyed).
similar, just screwed on the gaskets. It works fine without them.
Well, I'll try to find laminium first. It seems that somewhere on the balcony there was a cylinder block gasket from a Zaporozhian, if I find it I’ll try to make one out of it.
What is the maximum thickness of the gasket so that it does not affect the power and all that?
What is used to seal the gap? Or is the engine all covered in oil? Why not use thread sealant to tighten the muffler bolts?
There should be no gap on the exhaust window of a normal engine. OS doesn't even mention such gaskets in the list of spare parts for their motors. If a gap appears during operation, it means the crankcase material is crap and is caused by temperature, or the quality of the casting is poor.
Intelligible
But on ASP such gaskets are provided, and there are even two of them in the kit; without a gasket, the oil breaks through. The first one burned out after 1 hour of running-in, the second one was put on sealant, it seems to be ok so far.
I only use ASP, with the exception of the helicopter. So in all this time I haven’t installed a single gasket. Before, yes, I thought it was necessary, in fact, they are not needed. Nothing sticks there and it works fine. These gaskets are from the evil one. (tango, with lycra?
)
By the way, on a 4-stroke there is nowhere to put it, although the temperature of the plug is higher there, but no, it’s not installed
Hi all. Place it on sealant, without any gaskets. Cheap and no hemorrhoids! Works fine. Tested.
0.5mm gasket thickness? . We need such material to fulfill its functions and be easy to obtain.
Source
Petrovich35 › Blog › Exhaust system prevention. Part 2: Seals, suspension, painting.
Good afternoon, colleagues!
In this post I will continue the topic of preventing the exhaust system of a car. In the previous part we looked at the issues of preventing fasteners; here we will focus on the prevention of seals, suspension of the exhaust system and protection of its elements from corrosion.
The exhaust system consists of quite a large number of parts. For a typical modern gasoline engine, if you follow from the engine to the exhaust pipe, it consists of the following main elements: - engine exhaust manifold; - main catalytic converter (there may be several of them, depending on the engine design); - exhaust pipe; — additional catalytic converter; — resonator; — main muffler; - connecting pipes.
For ease of assembly and repair, the connections of the exhaust system elements are made detachable. In addition, to ensure mobility, some of the elements have a hinged connection. For this reason, a certain number of seals are used in the exhaust system.
For fixed joints, flat gaskets are used as seals; for movable joints, metal-graphite rings are used.
During operation, seals are exposed to high temperatures and humidity, and experience mechanical stress. This leads to gradual destruction of the seals and the connection becomes leaky. Therefore, it is advisable to periodically, once every two to three years, check the condition of the seals and replace damaged parts.
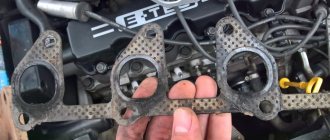
Photo 2 shows the damaged gasket. The metal O-ring began to deteriorate. This gasket will work for some time, but it is advisable to replace it with a new one.
On sale you can find a large number of gaskets for the exhaust system, both good in quality and bad. Photo 3 shows examples of gaskets of different quality. A sign of a high-quality gasket is a metal or metallized surface + a metal sealing ring, no burrs. Gaskets made from paronite sheets will not last long. Personally, I prefer all-metal seals made as a stack of thin sheet gaskets. Foil paronite gaskets with a metal O-ring are also quite suitable.
Photos 4 and 5 show examples of movable connections of exhaust system elements. As a rule, they use metal-graphite rings to ensure tightness. Either spring-loaded bolts or special clamps are used as fasteners in such connections. Prevention of connections consists of cleaning the connecting surfaces, lubricating them and replacing damaged parts.
Before assembling the connections, seals and fasteners, it is advisable to lubricate them with heat-resistant grease; this will facilitate subsequent disassembly and prevent corrosion at the point of contact of the parts (photo 6).
2. Exhaust system suspension.
The exhaust system is attached to the body using elastic hangers. This was done, firstly, to compensate for engine movements relative to the body, and secondly, to reduce the transmission of vibrations and exhaust sound to the car body.
Rubber cushions or rubber-metal brackets are used as suspension. Over time, the elastic bands stretch, lose elasticity and even break. This leads to sagging of the exhaust system parts, possible impacts of the parts on the body, and the connections experience increased mechanical stress (photo 7).
In order not to bring the exhaust system to the state shown in photo 8, it is advisable to inspect the suspension from time to time and replace damaged parts.
We remove the parts, clean them, and evaluate their condition (photo 9).
3. Painting the exhaust system.
Not all cars can boast an exhaust system made of stainless steel. Conventional carbon steel is much more often used. As noted in the previous entry, water, dirt, snow and chemicals get into the exhaust system from the road. All this provokes accelerated corrosion of metal parts (photo 10-12).
To extend the service life of exhaust system parts, it is advisable to coat them with protective enamel. This, of course, will not save you from internal corrosion, but at least the parts will resist external corrosion longer. It is better to paint on parts removed from the car, this will allow them to be better cleaned and painted on all sides. We remove the parts, clean them of dirt and large pockets of corrosion, degrease them and paint them (photos 13-16).
Since the exhaust system parts become very hot during operation, heat-resistant enamels should be used. You can also find special enamels for the exhaust system on sale, but household heat-resistant enamels for barbecues, fireplaces, etc. are also suitable (photo 17). I use the cheapest ones I can find on sale, since the consumption of enamel for painting is quite large.
What are the criteria for choosing a muffler sealant?
Despite all the variety of car muffler sealants available in stores, you shouldn’t buy the first one you see! First you need to carefully read its description, and only then make a purchasing decision. So, when choosing a sealant, you need to pay attention to the following factors.
Temperature operating range
This is one of the most important indicators. Theoretically, the higher the maximum permissible operating temperature, the better. This means that the sealant, even with prolonged use and high temperatures, will not lose its properties for a long time. However, in reality this is not entirely true. Many manufacturers deliberately mislead consumers by indicating the maximum permissible temperature that the sealant can cope with only for a short time. Naturally, this value will be higher. Therefore, you need to look not only at the maximum permissible temperature value, but also at the time that the sealant is designed at this temperature.
State of aggregation
In particular, heat-resistant muffler and exhaust pipe sealants are divided into silicone and ceramic.
silicone sealant remains slightly mobile, and does not lose its properties during vibration or small shifts of the processed parts. These are used on gaskets when connecting exhaust system elements.
Ceramic sealants (also called pastes or cements) become completely immobile (stone-like) after hardening. This is why it is used to cover up cracks or rusted holes. Accordingly, when vibrations occur, they can crack.
Problems with system tightness
Engine and muffler vibration is also a big problem. To compensate for engine vibration at different speeds and in different operating modes, the engine is mounted on rubber mounts, the gearbox is mounted on traverses, and the exhaust system is mounted on elastic suspensions along the entire length of the body.
By doing this, engineers ensure that vibration practically does not penetrate into the cabin. Only the issue with different frequency vibrations of the engine and the main part of the exhaust system is poorly resolved. For this purpose, corrugations are used, which are welded into different parts of the exhaust tract; the corrugations compensate for vibration and relieve the resonant load.
However, there are places for attaching exhaust system elements that require a sealed, but moderately movable connection. This is where muffler rings come to the rescue.
Repair in a garage
DoneDeal DD6785 is a high-temperature ceramic sealant reinforced with steel, which allows you to easily install a metal patch on the old muffler in the place of gas leakage, as well as better assemble a new exhaust system when replacing it. The process of installing a patch using the DD6785 requires some plumbing skills, but overall it is very simple - at least for those who did not skip labor classes at school.
As a rule, repairs with patches are practiced in case of burnouts in the muffler banks - directly in the muffler, resonator, flame arrester. A rectangle is cut out of a steel sheet 0.8–1 mm thick, the size of which is 30–50 percent larger than the size of the burnout. Holes are drilled around the perimeter of the patch for metal screws (every 2–3 centimeters), after which the patch with a layer of DoneDeal DD6785 applied is screwed using a screwdriver onto the surface of the muffler element cleaned with a steel brush.
What are rings and gaskets? Materials
They are used in cases where, when installing various elements of the exhaust system, it is necessary to adjust the position of one relative to the other. The muffler ring has a rounded profile along the outer radius, which allows you to accurately install one part relative to another. In this case, complete tightness of the connection is achieved.
Most often, rings are used when installing the exhaust pipe and attaching it to the exhaust manifold, but they can also be installed at other connection points. The downside of rings is that they don't last long. Depending on the material they are made of, they can last from three to five years, but if the quality of the material is poor, then even less.
The material for the rings can be either soft or hard metals, depending on the installation location. The only requirement for the material is heat resistance. Brass and copper alloys are used to make rings, alloys that contain asbestos substitutes (asbestos itself is no longer used due to toxicity). There are stamped rings that take the desired shape once installed, but these are only used once.
What is thermal tape for a muffler?
Nowadays, tuning tapes are produced mainly with interweaving of silica threads and other silicon-based inclusions. Other manufacturing companies say they make them using pulverized lava, which settles into the fibers and gives the fabrics extra strength and durability.
Regular tape designed to wrap the muffler is black. If you touch it with your hands, they will become the same shade. The width of the tape is about 5 cm, which is especially convenient.
Signs of faulty rings and gaskets
The most common reason for replacing exhaust gaskets and muffler rings is burnout due to high temperature. In some cases, the gasket burns out if the material was chosen incorrectly, and the flange may lose its geometry due to overheating or physical impact.
A faulty ring or gasket is quite easy to determine - a breakthrough of exhaust gases at the joints will be accompanied by an increased noise level, as well as the appearance of carbon deposits at the site where the gasket or ring is damaged. If the connection is located at the front of the exhaust system, exhaust gases may enter the passenger compartment.
Source
Repairing cracks in the manifold
The exhaust system begins with the exhaust manifold, and this part, most often made of heat-resistant cast iron, often cracks. Cracks can appear either on their own, due to a not very successful design and iron casting procedure, or be purely “man-made”, arising from driving through deep puddles or from washing a hot engine with a high-pressure gun. Cracks in the manifold are a serious problem because exhaust gas leaking through them fills the cabin with toxic smoke and causes extraneous noise in the engine sound. Repairing cracks in a cast iron manifold is not an easy and expensive task, often requiring removal of the manifold and not always leading to success, since cast iron is difficult to weld and repairs do not help for long.
Muffler Pants Gasket
The exhaust system consists of several parts, each of which plays an important role. These include the exhaust pipe, catalyst, resonator and the muffler itself. The main functions it performs are noise reduction and reduction in the emission of harmful gases. Also, there is often a corrugation on the receiving pipe, designed to reduce vibration. A malfunction of any part of the exhaust system can affect the condition of the entire car and many other parts in particular, so it is necessary to regularly diagnose this element of the car.
IMPORTANT! Exhaust gases entering the cabin are extremely dangerous to health, since they contain a huge amount of harmful substances. Therefore, before any long trip, it is necessary to visit a car service to inspect the exhaust system.
Rating of the best sealants for muffler
Despite all the variety of samples on sale, there are still seven of the best and most popular sealants, which are used not only by domestic but also foreign car enthusiasts. Below is detailed information about them. If you have used any other one, write about it in the comments below.
Liqui Moly
Exhaust system sealant Liqui Moly Auspuff-Reparatur-Paste
. Positioned as a paste for sealing damage. It contains no asbestos or solvents, and is resistant to high temperatures and mechanical stress. Using liquid moly paste, you can easily seal small holes and cracks in exhaust system elements. Heat resistance - +700°C, pH value - 10, odorless, color - dark gray. Liqui Moly Auspuff-Reparatur-Paste is sold in 200 ml tubes. The price of one package as of summer 2021 is about 420 Russian rubles.
Before using the paste to repair the muffler, the surface on which you plan to apply the product must be thoroughly cleaned of debris and rust. Apply the product to a warm surface
Liqui Moly Auspuff-Montage-Paste
. Designed for installation of exhaust pipes. The parts mounted by it do not stick and, if necessary, can be easily dismantled. Thermal resistance is +700°C. As a rule, the paste is used to process flange connections, clamps and similar elements.
Sold in a 150 ml bottle. The price of packaging for the above period is about 500 rubles.
Muffler repair kit LIQUI MOLY Auspuff-bandage gebreuchfertig
. This set of products is designed to eliminate large cracks and damage in the exhaust system of a car. Provides tightness.
The kit includes one meter of fiberglass reinforcing tape, as well as individual gloves for work. The bandage tape is applied to the damaged area with the aluminum side facing out. The inner layer is impregnated with a sealant, which hardens when heated, ensuring the tightness of the system.
Paste for assembling muffler LIQUI MOLY KERAMIK-PASTE
. Used for lubrication of highly loaded sliding surfaces, including those operating at high temperatures. The fasteners of the muffler elements, bolts, sections, pins, and spindles, are treated with the paste. Can be used to process elements of the car brake system. Temperature operating range - from –30°С to +1400°С.
Done Deal
The DoneDeal brand also produces several sealing compounds that can be used to repair an exhaust system component.
Ceramic sealant for repair and installation of exhaust systems DonDil
. It is high-temperature, withstands maximum temperatures up to +1400°C. Setting time is 5...10 minutes, hardening time is 1...3 hours, complete polymerization time is 24 hours. Using a sealant, you can treat cracks and damage on mufflers, pipes, manifolds, catalysts and other elements. Withstands mechanical loads and vibrations. Can be used with both steel and cast iron parts.
Reviews say that the sealant is easy to work with, it spreads and smears well. The surface on which it will be applied must be prepared in advance - cleaned and degreased.
One of the disadvantages is that the heat-resistant ceramic sealant DoneDeal dries very quickly, so you need to work with it quickly. In addition, it is quite harmful, so you need to work in a well-ventilated area and wear gloves on your hands.
The sealant is sold in a 170 gram jar. The packaging has the article number DD6785. Its price is about 230 rubles.
Heavy-duty repair sealant thermosteel DoneDeal
under the article DD6799 it is itself heat-resistant, can withstand temperatures up to +1400°C, it can be used to eliminate holes in steel and cast iron parts, including those operating under significant mechanical load and in conditions of vibration and stress.
Using sealant you can repair: exhaust manifolds, cast iron engine block heads, mufflers, catalytic afterburners, not only in automotive equipment, but also in everyday life.
The sealant must be applied to the prepared (cleaned) surface; after application, the sealant must be given about 3...4 hours to dry. After this, begin to warm up the part to ensure drying and normalization of its characteristics.
Sold in a package of 85 grams, the price of which is 250 rubles.
Ceramic Tape Done Deal
for muffler repair. Has article number DD6789. The bandage tape is made of fiberglass, which is impregnated with a solution of liquid sodium silicate and a complex of additives. Temperature limit - +650°C, pressure - up to 20 atmospheres. Tape size 101 × 5 cm.
The tape must be applied to the cleaned surface. When the temperature is provided at +25°C, the tape hardens within 30…40 minutes. This tape can be further processed - sanded and heat-resistant paints applied. The price of the package is 560 rubles.
Source
Exhaust system
One of the main systems of a car is the exhaust system, which is designed to remove waste products of combustion of the fuel mixture from the combustion chamber (combustion chamber). In addition, it performs several other functions, including reducing engine exhaust noise. Important attention is paid to the exhaust tract during tuning. At the same time, the correct exhaust has a significant impact on the sound of the car.
Car exhaust system design
Structurally, the vehicle exhaust system is based on an exhaust manifold, catalyst, resonator, muffler, connecting pipes, special corrugation and fasteners. In the exhaust systems of modern cars, an additional oxygen sensor (lamda probe) is installed, which provides control of oxygen in the exhaust gases.
An exhaust manifold
The exhaust manifold is mounted directly to the engine outlet using a flange. It is the beginning of any exhaust system. In the manifold, exhaust gases from each cylinder are combined into a common flow, which enters the connecting pipe.
At the exit from the combustion chamber, high gas pressure and high temperature are created. Therefore, to ensure the required tightness, special sealing gaskets made of refractory graphite material are used. As a rule, the seal is framed with copper rings, which guarantees the tightest possible connection between the manifold and the engine.
Due to the specific location, the collector constantly operates in extreme mode.
The temperature of the exhaust gas flow can reach +1000°C or more. After the engine is turned off, the temperature inside the manifold structure decreases sharply. In such a sharp temperature change, condensation forms, which leads to the formation of rust. The shape and dimensions of the exhaust manifold have a direct impact on the pulsation pattern of the exhaust flow.
In turn, this affects the power of the power unit. To protect engine components and exhaust tract elements from vibration and fluctuations, modern cars are equipped with a special vibration-isolating coupling (corrugation), made in the form of a flexible metal hose mounted in a steel casing.
Lambda probe
The efficiency of the catalyst is determined by the degree of oxygen concentration in the exhaust gases. The optimal ratio of oxygen in the fuel mixture is 14.7 to 1. That is, in order to have a minimum amount of harmful substances in the exhaust, it is necessary to mix 1 part of fuel and 14.7 parts of oxygen. Control of this ratio in the fuel mixture is realized by measuring the remaining oxygen in the exhaust. Therefore, the lambda probe is installed in front of the catalyst.
Exhaust system catalyst
The catalytic converter (catalyst) reduces the toxicity of exhaust products. This is realized by converting toxic gases into harmless ones as a result of the reduction of nitrogen oxides, during which oxygen appears. In turn, oxygen is used as a catalyst for the combustion of carbon monoxide and hydrocarbons. Depending on the principle of operation, neutralizers can be reducing or oxidizing. In both cases, the catalyst is a non-separable ceramic structure in the form of a honeycomb, protected by a special coating made of a fire-resistant platinum-iridium alloy.
Auspuff Reparatur by Liqui Moly
Autochemical compositions of this brand rightfully occupy leading positions in various categories. In this case, the company offers a comprehensive solution for protecting the exhaust pipe, eliminating the risk of the formation and development of existing cracks with small holes on the surfaces of the structure. The sealing paste is resistant to elevated temperatures, does not require complex installation operations such as welding, and does not contain harmful chemical ingredients. In particular, the applied coating retains its performance at 700 °C. Treatment with Liqui Moly car exhaust system sealant can be carried out in typical garage conditions without connecting special equipment, which is also an attractive advantage when choosing.
How often does a muffler need to be repaired?
As a rule, with careful operation of the vehicle and regular visits to the car service center, muffler repair work is performed extremely rarely, but for this it is necessary to contact the service center in a timely manner at the slightest suspicion of any malfunction in the operation of the exhaust system.
IMPORTANT! Do not forget that the operation of the muffler directly affects the operation of many other systems in the car, therefore any malfunction in the operation of this element can lead to additional, often more critical, malfunctions in other systems.
“No need to growl!” Tools for repairing the exhaust system without welding or replacement
The exhaust system never rots all at once, completely. Perforation corrosion is often pitted, while maintaining the thickness and strength of the metal next to the hole. In this case, it is absolutely not necessary to buy a new pipe or can - the fistula can be easily repaired with your own hands without welding, and the muffler will still serve for a year or two, or even longer!
Soviet car enthusiasts knew and practiced many relatively effective ways to repair the muffler - this expensive and scarce part at that time. A variety of metal clamps, seals made of cement and refractory oven clay, winding of fiberglass, preventive drilling of preventive holes for condensate drainage, exterior painting against corrosion with paint developed in secret research institutes for coating spaceships...
Today, mufflers and all their components are not in short supply, but their cost is high, and it’s a shame to throw money away because of one or two holes or cracks! Modern chemicals, a variety of which are designed for different types of small and medium damage, allow you to qualitatively and reliably repair burnouts in the exhaust system without replacement or welding.
When is sealant used?
A car enthusiast of any level can report a malfunction in the exhaust system. Signs of failure are:
Don't put off repairing your exhaust system. If all problems are not corrected in time, repair work will cost a much larger amount.
The main reasons for muffler failure are mechanical damage and corrosion, which destroys welds, fasteners, intermediate pipes, catalysts and muffler housings. This happens due to strong constant temperature changes, the entry of water, reagents and salt into the system, condensation inside the resonator and muffler, and active chemical compounds.
For minor damage to the system, you can use a heat-resistant sealant, which is a simple and affordable solution for solving such problems. It consists of synthetic, metal and ceramic components.
Sealants can be used only for minor damage - small cracks, burnouts of metal, gaskets, etc.
Sealants in the form of cement, glue and paste are suitable for repairing rounded elements of the exhaust system (pipes, catalysts, etc.). It should be remembered that such materials are used only on external surfaces. Repairing internal damage requires complete unpacking of the muffler, which, in addition to being complicated and expensive, has practically disappeared from the list of auto repair shop services. It is much cheaper to purchase a new system.
The use of sealant is a temporary measure. On average, the service life of a muffler restored in this way is no more than one and a half years. Therefore, it is impossible to avoid a complete replacement of the exhaust system.
Replacing the intake manifold gasket VAZ-2114 injector: video
Replacing the intake manifold gasket on a VAZ-2114 car, as well as replacing the exhaust manifold gasket, is a very complex procedure and requires certain knowledge and experience. Of course, you will have to do a colossal amount of work and spend a lot of time, but this will save 4-5 thousand rubles on replacement at a car service center.
Below he will talk about replacing the receiver and manifold. During the replacement process, the intake manifold gasket is also changed:
The material will tell you how to properly replace the intake manifold gasket, and will also tell you about some of the subtleties and nuances of the process.
Gasket replacement process
Design diagram of the intake and exhaust manifolds
Since the gasket is located on the manifold studs, to replace it the unit will have to be completely dismantled. Of course, this operation will take a lot of time and effort.
Before the car enthusiast proceeds directly to the replacement process, it is necessary to collect the tools that will be needed. So, the tools without which replacement is impossible: ratchet and sockets for 17, 19; screwdrivers with flat and Phillips tips; a set of keys and the gasket itself.
The tools are assembled, now you can go directly to performing all kinds of operations. Before removing the manifold, you need to spray the bolts with WD-40, which will remove corrosion and allow you to remove the part without any problems.
Step-by-step instructions for replacing the intake manifold gasket (with photo)
Let's look at step-by-step instructions for replacing the gasket:
- Remove the negative terminal from the battery.
- We remove the throttle cable.
- We are dismantling the fuel pipes. More precisely, they need to be disconnected and taken to the side. Remove the fuel pipes shown in the photo
- Disconnect the throttle position sensor connector.
- Disconnect the idle air control wire connector.
- Unscrew the crankcase ventilation pipes and brake booster. Unscrew the pipes shown in the photo
- We are dismantling the receiver.
- Remove the wires of the injection control unit (injectors).
- We dismantle the fuel rail without dismantling the injectors.
- Remove the thermal shield from the manifold.
- Disconnect the exhaust pipe. This is the quality of nuts installed at the factory. We dismantle the exhaust pipe.
- Remove the exhaust manifold. Unscrew the fastening nuts and remove the exhaust manifold Removing the exhaust manifold
- After unscrewing the fastening nuts, remove the intake manifold. Removing the intake manifold
- We are replacing the gasket. We are replacing the gasket
- We carry out the assembly in the reverse order.
As you can see, the replacement of the intake and exhaust manifold gaskets takes place simultaneously and, by and large, is the same gasket material.
Part selection
21083-1008081 – original catalog number of the gasket for the intake and exhaust manifold. It consists of two parts or, on newer models, one. This part is produced at the AvtoVAZ plant. The average cost is 250 rubles per piece (if there are two of them) or 450 rubles (for a whole one).
One-piece manifold gasket A gasket that consists of two parts A one-piece gasket and one that consists of two parts together
In addition to the fact that there is an original part, you can also find a number of analogues that are recommended for installation. Let's consider which gaskets can be installed under the VAZ-2114 manifolds:
- Trialli GZ 102 0013 is a well-known Russian manufacturer that produces a wide range of analog parts for domestically produced cars. The cost of the gasket is 200 rubles per piece.
- AJUSA 13065200 is another domestic manufacturer that has won consumers over the quality of its products. The cost of the product is 450 rubles.
- Ukrainian also produces and supplies this gasket. But, if you look at it, the quality of the product leaves much to be desired, since the resource is designed for only 20,000 km.
Causes of malfunction
After we have considered the process of replacing and selecting a part, it is necessary to consider the main reasons for the failure of the spare part:
Wear
During operation, the car emits hot gases that destroy the surface of the gasket, as a result of which it can tear or delaminate. Since there is only one gasket for the intake and exhaust manifolds, gasoline entering through the first channel can get on the gasket, which also affects the integrity and structure of the material from which it is made.
The quality of the part is not always high, even original, so when choosing, you should pay special attention to this. Bent valves due to irregular valve timing do not threaten the 8-valve valve
How to repair a muffler
If your car's muffler requires repair or complete replacement, it is not recommended to do this work yourself, since there is a high risk that you will only worsen the condition of the exhaust system, and possibly the entire vehicle as a whole. In order to prevent such a situation, contact only specialized car services. In our car service center, qualified specialists with the necessary competence in the field of working with exhaust systems will competently diagnose the exhaust system of your car, and, if necessary, repair or install a new muffler in the shortest possible time.
IMPORTANT! Do not delay repairs as this may worsen the condition of the entire exhaust system and incur additional costs.
If you encounter any malfunction in the exhaust system and you need to diagnose it, repair it or replace the muffler, then our salon specialists will be happy to help you with this, since we carry out all types of this work!
| Name | Price |
| Car diagnostics on a lift | For free |
| Repair of standard muffler | from 500 rubles |
| Resonator installation | from 600 rubles |
| Installing a flame arrester | from 1200 rubles |
| Replacing corrugations | from 1500 rubles |
| Replacing rings and gaskets | from 300 rubles |
| Exhaust manifold replacement | from 2,500 rubles |
| Replacing the lambda probe | from 500 rubles |
| Crack repair | from 500 rubles |
How to remove the eye on a VAZ 2110
In order to remove the eye it is necessary to carry out the following manipulations:
- Remove 3 nuts from the receiver bracket and remove it.
- Carefully remove the bushing from the intake manifold stud.
- Also remove the air intake tube and remove it from the studs.
- Unscrew the nut on top and loosen the bottom bar a little.
- These bars help hold the fuel pump in place, so they must be removed with care.
During work, antifreeze may leak a little into the valves; from there it is removed using a regular syringe. Unscrew the spark plugs, turn the starter a little, thereby the antifreeze will go away. Now it’s worth inspecting the collector itself; if there are grooves on it, then it’s better to replace it. All work carried out is carried out above the pit, since it is necessary to further remove the exhaust pipe.
After replacing the manifold, you must immediately check all the gaskets and it is best to replace them. A special wrench must be used to tighten all nuts, and the seal rings should also be replaced. All nuts and screws are tightened with a certain force.
Of course, all the necessary work should be done with your own hands, since the cost of such a replacement in the service will be many times more expensive.
Replacing the exhaust manifold of a VAZ 2110 8 valves is always carried out independently. In the same way, you can find instructions for replacing the exhaust manifold of a VAZ 2110 16 valves. On these cars you can easily learn how to replace not only these parts, but also many others.
In general, before you start replacing the VAZ 2110 manifold, you must carefully read the entire instructions for the car. And now there is a lot of information on repairs on the Internet.
Source
How does a car muffler work?
Car muffler device
Exhaust gases move through the exhaust system under high pressure, and their movement is accompanied by a sound wave that moves faster than the gases. The muffler consists of tubes of various diameters that are not connected to each other, and a steel mesh and sound-absorbing material are installed in the muffler body. Mostly fiberglass is used as such material. When moving, exhaust gases first pass through a resonator, in which their speed and, consequently, the noise level are reduced. Then they move to the main muffler, where they pass through a system of tubes in which the final reduction in speed and noise still occurs. Cars are equipped with a different number of mufflers: from 2 to 5.
Gasket between exhaust manifold and exhaust pipe
↳ Boxer 1, 2. Transmission
Selection, purchase, reviews
All of these symptoms indicate a damaged ring that needs to be replaced. This service takes a little time. Sequence of actions when replacing the muffler ring-gasket:
We unscrew the nuts; they usually come complete with a stud; they rarely come off, but if this happens, we are ready to replace them.
We have spare parts. On Renault Logan, we unscrew the nuts with a 10mm socket. When you remove the ring, you can see the shine at the joint and how the ring is flattened.
That is, the pipe hit the exhaust manifold and gradually flattened the ring. This type of ring can be replaced, but in order to remove it, sometimes you have to cut it.
If you do not change the muffler gasket in time, this will be followed by wiping the “Gander” part of the exhaust pipe. The gander is not sold separately, but comes complete with a muffler.
The gasket is changed approximately once at a mileage of 150 thousand km.
Diesel engine
Electrical and optics
Do-it-yourself muffler corrugation repair without welding
The muffler corrugation is designed to reduce vibration loads on welds and elements of the suspension system. However, such an element is exposed to high temperatures and mechanical damage. The corrugation is a small elastic element, which is covered with a metal protective mesh and installed in the exhaust pipeline. The corrugation is not repaired, but replaced entirely, especially since the price of the muffler corrugation is low. But if you don’t have a welding machine at hand or it’s impossible to get to a car service center, then it can still be repaired. The most common occurrence in which a muffler corrugation is repaired is a violation of the integrity of the weld. If you repair the corrugation yourself, you will need to purchase an exhaust system repair kit or cold welding, fiberglass and epoxy resin. You can apply a “tourniquet” in the seam area, but it is worth remembering that this operation is temporary, so the best option would be to buy a new corrugation and weld it into place. The procedure for applying the tourniquet is as follows:
- It is necessary to clean the desired place on the weld with coarse sandpaper;
- Degrease the repair area;
- Prepare the repair composition according to the instructions on the package;
- Apply the mixture liberally to the weld and allow it to dry.
- Impregnate fiberglass with epoxy resin and screw it tightly to the diameter of the weld;
- Apply another layer of cold welding on top of the fiberglass in a circle and allow to cool.
In this way, a broken weld can be temporarily repaired. Often, when repairing a muffler, the corrugation is also replaced.
Types of corrugation
Mitsubishi Lancer 2.0 Logbook Replacing handbrake pads
Corrugations come with two-layer and three-layer braids. The former are used in gasoline engine systems. The inner layer, thinner, is designed to protect against thermal influences from the inside. The outer layer is much tougher. It is needed to dampen vibrations and protect against compression.
Three-layer muffler corrugations are divided into two types:
- Innerbraid - the inner layer is made of metal braid.
- Interlock - the inner layer is made of metal plates that form a sleeve.
Interlock corrugation is stronger, more flexible, more durable, but much more expensive. Innerbraids are usually offered on the aftermarket. Also, corrugations may differ in purpose. In some cars, the muffler corrugation is installed vertically. In this case, it works on compression and straightening. When mounted vertically, a reinforced corrugation with an internal diameter of 65 mm and a length of no more than 150 mm is installed. The new part must exactly match the dimensions of the failed corrugation.
Horizontally installed vibration compensators work for bending and have a length of up to 40 cm. During installation, a slight discrepancy in length compared to the original is allowed.
Replacing the vibration compensator (corrugation)
The exhaust pipe, like the muffler as a whole, contrary to popular belief, does not fail very often. In most cases of device malfunction, the problem lies in the vibration compensator, in the breakdown of the corrugation. The consequences can only be eliminated by installing a new corrugation.
Replacing the vibration compensator (corrugation) is required much more often than repairing the exhaust pipe
There are two types of corrugations, differing in operating principles:
The corrugation is replaced in the following sequence:
It is customary to replace the receiving pipe if the device fails; the concept of a warranty period is not applicable to it due to the unpredictability of operating conditions.