Adjusting emoticons
The most difficult and problematic thing in adjusting the laser level is correcting the so-called smiles, when the laser line goes in an arc.
I want to say right away that if you have a level with a large number of planes, from 3 and above, and you find an arc, then do not try to fix it yourself, I give 99% that nothing good will come of it.
The fact is that without special equipment, it is almost impossible to find out on which plane the smiley is, so it turns out that you can twist the wrong thing and get completely confused and knock down the device.
Our Basic, fortunately or unfortunately, has only two planes, so if you find a smiley face on one of them, you can try to remove it yourself without contacting the service center.
And so, before editing, you need to turn on your imagination and understand in which direction the prism through which the laser beam passes is tilted, since the arc arises precisely because the prism is not strictly perpendicular to the beam.
In the figure, the ends of the laser line look down, this indicates that the prism cylinder is not level and has a deviation from the vertical position with a tilt back. If the tails looked up, then the prism, on the contrary, would be tilted forward.
As you understand, this correction is done with screws that fix the cylindrical prism itself. (see photo below)
By tightening these particular bolts, you need to set the prism strictly perpendicular to the laser beam, then the arc will disappear.
ATTENTION! You need to twist it very carefully and remember where and what you twisted!
How to use the level
First, the device must be configured so that it allows accurate marking.
Setting up the laser level
- Place the device on a level surface or secure it to a tripod.
- Perform horizontal leveling by rotating the screws of the bubble level. Some models have two or three levels built-in. But there are models with self-leveling. And if the level is uneven, a sound signal is given. Its absence indicates that the device is installed correctly. But this does not mean that the device can level itself. Here, too, you need to tighten the screws.
- If your level creates vertical and horizontal lines, then set it to emit both at the same time or turn off one of them.
- Some models have the ability to emit lines and dots, the shutdown of which is also regulated.
- Adjust the angle and rotation speed of the beam, if these functions are available.
- If the level can work with a laser beam receiver, then install it. Using a receiver allows you to double the range. If there is no such function, then buy a reflective plate. It increases the accuracy and range of measurements. It needs to be fixed to the object.
Disabling functions that are currently unnecessary allows you to increase the operating time of the device on batteries or on a single battery charge.
Working on the floor using a level
During construction, a laser level greatly facilitates the installation of floor joists at the same level.
- Turn on the device. The red line will show the zero level of the future floor.
- The laser level builds a line along the entire perimeter of the room. The result is a plane. Any size can be set aside from it.
- Install the logs along the laser lines.
- After installation, use a level to check the level. To do this, place the board with its side surface on the joist and direct the beam. Draw a line along it with a marker.
- Move the target to each lag. If they are installed horizontally, the laser beam will pass along the marker mark. If not, then the position of the log needs to be adjusted by raising and lowering it until the mark coincides with the laser line.
Video: Using a laser level for interior decoration
To check the evenness of poured concrete, place a pole anywhere in the room and mark on it the level that the red beam shows. Go through other points and compare the deviations of the marks.
Checking floor levelness with a laser level
Using a level, you can build straight and perpendicular lines on the floor to lay out the tiles evenly.
Laser level creates horizontal and perpendicular lines on the floor
- alignment of walls. This type of work demonstrates how outdated rulers and bubble levels are. Using a laser level, it is enough to direct the beam along the surface of the wall in any direction. Using a ruler, measure the deviation at different points of the beam;
- laying tiles. It is done similarly to work on the floor;
- construction of oblique lines. To do this, direct the beam at an angle. If this is not possible, tilt the level body. In laser levels with self-leveling mode, you need to block this function, otherwise it will interfere with work in an inclined position;
- posting decor in any room. Wallpaper and posters are aligned along the vertical beam. They make horizontal borders on the walls and hang decorative elements;
- installation of furniture, cornices, appliances. One crookedly hanging part of the interior spoils the overall impression of a beautiful room. Re-weighing using a ruler or angle takes much longer than using a laser level;
- redevelopment of premises. To install partitions, it is enough to point the beam at the installation site;
- use in measurements. You cannot measure distance with a level, but you can make the process easier. For example, if you need to find out the height of a room with non-vertical walls. You need to direct the beam upward and measure the distance between the floor and the ceiling.
Repair: practical recommendations
You should know that it is not only the displacement of the tendril that can cause the stated problem and repair. The cause may be a failure in the load settings. And you can solve it by following these steps:
Remove the sticker from the surface of the case. Opening the device will void the warranty in any case. Below you will find a plastic screw. When you open it, you will see a screw called “A”. This is the load. Carefully inspect the platform. You will immediately notice deviations. Rotate screw “A” to find the desired position. This can be achieved by hanging a plumb line on the wall. Check the position of the horizontal and vertical beams. They should be fine. Check frontal roll. Finally, to adjust the platform, you need to slightly loosen the screw located in the middle, and tighten those on the edges. This is to move it lower and tilt it forward. If you want to raise the platform, do the opposite. Loosen the outer screws, and tighten the one in the center
The process requires the utmost care.
To do this, purchase material. Then make a mark on its surface that will correspond to the shape of the damaged one. Glass should be purchased with a width of about 2.5 mm. Replace when finished.
Level with compensator
Correct operation of a level with a compensator is characterized by the horizontality of the sighting beam of the telescope to the level surface of the earth (angle i) within the range of action of the compensator.
The circular level is adjusted using the leveling screws, then the telescope is rotated 180° and, if necessary, the check and adjustment are repeated.
If the verification reveals a deviation of the mesh of threads, then adjusting the level with a compensator consists of loosening the screw fasteners of the mesh and bringing the plate with the mesh of threads into the correct position: the horizontal thread of the mesh should be perpendicular to the axis of rotation of the level, and the vertical thread should coincide with the plumb line. It is recommended to check the serviceability of the compensator each time before starting work.
Checking the inclination of the entire plane of the laser level relative to the horizon
For those who have just started using a laser level or are just planning to purchase one, we recommend that you familiarize yourself with the general errors found in laser levels.
We install the laser level exactly in the middle between two walls located approximately 5 meters from each other. Turn on the laser level and mark the point indicated by the laser cross on the wall. We rotate the laser plane builder 180 degrees and mark a point on the opposite wall, placing the point at the intersection of the vertical and horizontal planes.
Next, we move the laser level to one of the walls and install it at a distance of 0.6 - 0.7 meters from the wall, and make the same marks on the walls by analogy as described above.
We measure the distance between points a1 and a2, also between currents b1 and b2. We subtract the resulting distance from the other (a1 and a2) - (b1 and b2), compare the resulting value with the declared accuracy, if the resulting value does not exceed the stated accuracy in the instructions, then your laser level shows the horizontal plane correctly.
Example: When checking the accuracy of a laser plane plotter, the distance between the points was: (a1 and a2) = 4 mm, and (b1 and b2) = 6 mm. Thus, the resulting error of the laser level is: (b1 and b2) – (a1 and a2) = 6 – 4 = 2 mm. We compare the resulting error with the error declared by the manufacturer.
This applies to laser levels that do not have a 360 degree horizon.
To check the horizontal plane of levels with cone prisms, such as Hilda 3D, or levels with cylindrical prisms, but also having a horizon of 360 degrees, such as ADA 6D Servoliner, the easiest way is to pass all sides of the horizontal plane through a point at a distance of 5 - 10 meters. Here you should also remember how the error is calculated correctly.
Basic types of laser levels for setup
These devices use several prisms and diodes, so the manufacturers gave them the name multi-prism. There are also simpler devices where only one beam lights up. Its direction can be vertical or tend to horizontal. This is not enough. Typically there are two such beams in the device:
The classic laser level has a scanning angle of 120°.
- Vertical.
- Horizontal.
The result is a laser cross. Devices of complex design have several crosshairs at once. There are even devices that can turn into a plumb line. These devices can be configured so that the beam goes down or is directed up.
The classic laser level has a scanning angle of 120°. More powerful devices form an angle of 160°. Depending on the angle value, an increased number of additional crosses is achieved. Sometimes the rays connect into one plane, then the angle is 360°.
The laser level kit includes:
- level;
- case;
- glasses that allow you to see the laser beam;
- remote control;
- flat targets;
- tripod;
- Charger;
- magnets for attaching the device;
- geodetic rod;
- receiver that intercepts rays.
Using highly accurate zero-error tools, you can calibrate the laser level and adjust it to reduce the error to zero. When an apartment is being renovated, there will not be particularly long distances, so a laser beam is quite enough.
Do-it-yourself laser level repair
It is highly undesirable to try to repair a laser level yourself without having the appropriate qualifications. Only mechanical damage can be repaired. Electronics and optics are best left to specialists.
Video: laser level, its disassembly and calibration at home
A laser beam is a directed stream of light particles moving focused in one direction. Once on the retina, it can cause severe damage to the tissues and neural endings of the eyeball. Therefore, working with a laser level must necessarily be accompanied by compliance with personal safety measures.
Rating of laser builders
The rating is usually based on product characteristics. There are no exceptions with laser levels. What you need to pay attention to when choosing this device:
- in what temperature range can it work correctly;
- radiation range;
- accuracy;
- how many directions can he hit;
- type of fastener;
- functionality: self-leveling, self-switching and so on.
So, let's move on to the rating of laser levels.
How realistic is it to repair a laser level?
When a grinder or drill breaks down, the first thing the master does is rush to disassemble the tool himself and repair it. Few people think about taking such levels to specialized service centers. As soon as a level breaks, few people think about repairing it themselves. This is due to the fact that the device has a complex design (at first glance). If you understand the structure of the tool, then no problems with repairs will arise.
Most experts do not recommend repairing devices yourself. However, there is nothing wrong with trying to find the cause of the problem and fix it. In addition, most breakdowns can be eliminated even without disassembling the tool.
- The batteries or battery are low. If the level does not turn on, then the first thing you should do is make sure that the power supplies are working. If these are batteries, then they need to be replaced, and if they are a battery, then put them on charge
- Malfunction of contacts or their oxidation - if you do not use the device for a long time, and at the same time leave the batteries in it for a long time, they may “leak”. As a result, the design of the device will suffer. To prevent this kind of breakdown, it is necessary to remove the batteries from the instrument during storage. If these are lithium-ion batteries, then they must be stored exclusively in charged form.
- Failure of the charger - if the level is powered by a built-in battery, then the charging unit may fail. You can find out about such a breakdown by the absence of a charge indication when the plug is plugged into the socket.
- Horizontal or vertical projection does not work - in this case, it is necessary to disassemble the device body and perform diagnostics. Failures in the electrical circuit can only be determined by knowledgeable and experienced specialists. In addition, specialized equipment will be needed for testing. However, often the cause of projection inoperability is a loose wiring. Having a soldering iron, you should solder the wires in place in order to eventually restore the functionality of the laser projection meter
- Blurred or poorly visible laser projection - in this case, it is necessary to disassemble the housing and check the cleanliness of the glass. The glass usually gets clogged, so it needs to be cleaned. If the cause is not glass, then you need to change the LEDs or check the microcircuit
- The buttons do not work - if it jams, sticks or does not turn on at all, it must be replaced. To replace the button, there is also no need to take the device to a specialist. You should disassemble it, diagnose the breakdown, and, if possible, fix it.
- Malfunction of the pointer - the cause is a violation of the integrity of the weight. To fix the damage, you need to disassemble the tool and adjust the pointer
This is interesting!
If the level is still under warranty, then in this case it is better to take it to the store and have it repaired.
Such repairs will be free, and you will not need to interfere with the structure yourself. From the above, we can say that you can repair the level with your own hands, without the help of specialists
The main thing here is accuracy and caution. If after disassembly it is not possible to identify the cause of the breakdown, then you should assemble the level and take it for repair
There are specialized centers for this.
https://youtube.com/watch?v=nHN4rDnUaGg%3F
How to use a laser level, learning how to work
If you manage to install and check the accuracy of the tool, then using it to level the surface of the walls will not be difficult. How to operate this device correctly is indicated in the instructions. However, few people read the instructions, and refer to them only after discrepancies arise. Working with a laser level should be carried out in a calm environment, since this device is the foundation for subsequent actions. If possible, ask someone with experience to advise you, or better yet, show you how to use a laser level correctly. If this is not possible, then training is carried out independently.
Before using a laser level, you need to know that there are devices that have different functions. Almost all models are capable of building not only horizontal, but also vertical planes. There is also an option such as constructing two parallel vertical planes, however, the more additional functions, the more expensive the tool itself. In addition to the built-in options, additional devices will help expand the functionality and simplify the use of the tool, which are also useful to know about.
This is interesting! When using a laser level, it will be useful to know that the device has three modes - vertical and horizontal plane construction, as well as a plumb line. A plumb line allows you to project points in two directions - onto the floor and ceiling, which is very convenient when you have to build a partition.
Defects in laser levels and how to fix them yourself
When purchasing a measuring instrument, the question arises about which device to choose for repair. After all, in order to prevent level breakdowns, it is necessary to decide at the purchase stage which tool is suitable for performing certain jobs. If you buy a level for indoor work and use it outdoors, it will not last long. In addition, you should not choose cheap models if you have high hopes for the device. If Chinese cheap fakes are used frequently, they will quickly fail.
However, not only cheap levels break, but also expensive ones that require appropriate repairs. When you need to repair a level yourself, we will find out in detail:
- When, when the device is turned on, the laser beam is not rectilinear, but curved in the shape of an arc
- If the LED that creates vertical and horizontal projections does not light up
- If the control buttons are faulty
- In case of defects on the body caused by mechanical impact
- If the electric drive does not rotate when starting
- The laser beam becomes dim and barely noticeable
If the device has been dropped on the ground or damaged by heavy tools or building materials, even if it shows no signs of malfunction, it should still be diagnosed. The position adjustment system, and especially the self-adjusting mechanism, can also fail.
This is interesting!
The ability to repair a laser level depends on what specifically went wrong in the measuring instrument. If the breakdown is serious, and the device is expensive, then its repair can be entrusted to professionals from the service center. However, there is no need to rush, as you can try to fix the meter yourself.
How to work with a level
Laser levels can have different sets of functions. In the basic version, it is possible to obtain vertical and horizontal planes, as well as include them together and obtain an intersection. In some models it is possible to obtain a point at the zenith and below the device (plumb, point - nadir), there is also a function of constructing two parallel vertical planes. Additional features are useful, but their presence increases the cost as the system becomes more complex. Some manufacturers add tripods or platforms to the basic package that can be mounted on the wall with a screw or magnet.
The main functions of a household-grade level (plane builder)
The models also differ in the possible angle of the plane aligned in the horizontal surface (sweep angle). It can be from 110° to 360°. The easiest way to work is with the one that gives a complete plane, but it is a professional model and costs a lot. You can get a complete plane even with a small plane of luminescence. To do this, the device is rotated around its axis.
When using the device outdoors, the laser catcher may be useful. It is usually purchased separately. When purchasing, you need to check whether this model is compatible with your laser. Special glasses may be helpful. Firstly, they protect the eyes from accidental exposure to the laser, and secondly, they allow you to see the beam more clearly.
Use when working on the floor
It is convenient to use a laser level when leveling the floor. Place it approximately in the middle of the room and turn on the construction of a horizontal plane. A straight line is marked on the walls, along which it is convenient to make markings.
The laser beam is also displayed on any object that you place in its path. Using this property and a ruler (tape measure), you can find the most protruding and most “recessed” part of the floor. Using this data, you will determine at what minimum level you can screed the floor. Next, based on the found height, make marks on the walls and begin installing the beacons. They can also be placed along the beam. Having set the laser beam to the desired height, set the back of the lighthouse so that it is evenly illuminated by it.
Pendulum correction: two planes simultaneously
Often a situation arises in which all planes and the plumb line are shifted in one direction and at the same distance.
If you have just such a failure, then you are in luck, because it is very simple to repair.
In order to return the planes to their original position, you need to twist the large transverse adjustment screw.
The shift of the center of gravity in the pendulum should occur relative to where the planes are inclined, that is, if the planes are tilted to the left, then the screw must be unscrewed, and if they are tilted to the right, the screw must be tightened accordingly.
There is approximately the same screw on the back side of the pendulum; we touch it only if there is a “nod” of the horizontal plane up or down relative to the desired plane.
Again, regarding the basic, with such a horizon setting, you must first take into account the position of the plumb line; by definition, if the plane looks down, then the plumb line must have a deviation in the opposite direction.
Bubble level - setting.
| Setting up the bubble level is easy. Not all levels have adjustments at all. This is an unprofessional tool. Professional - customizable. I use this type of level. This is Vectron, it has adjustable windage and elevation and has the most sane adjustment system on the entire instrument market. |
| Here is one option: On the table in the workshop. You can just do it on a table, or on any flat surface, but to make everything very clear, I do this: I screw two screws into the board - the size of the level. So that they are at the edges. |
| I put a level on them and see what it shows. |
Read also: What slope is needed for sewer pipes
Main types of defects
It is possible to repair a laser level in some cases, but first you should make sure that the warranty period for the device has expired. Warranty cases include:
- If, during the operation of the tool, irregularities appear on the laser line when projecting horizontal marks.
- In case of violations in the suspension system of prisms, which leads to the disappearance of sections of light lines.
- When violations of vertical rays occur, which leads to a difference between the level readings and the true readings.
- If during operation any element of the control board fails. Violation of any element of the board will certainly lead to a malfunction of the entire device.
- If a phenomenon such as sticking of buttons and switches occurs. This makes it impossible to turn the device on or off, or to switch between different functions.
- If a luminous beam does not appear when the level is turned on.
While the tool is new, it is handled with care, but over time, during active use, the device may fall or various types of aggressive substances may come into contact with it.
How to check a laser level yourself?
Checking a laser level may be necessary when doubts arise about its correct readings. To check the device, you need to place it in any corner of any room. Using a marker, you should put mark No. 1 in the corner with the device, then you need to direct a horizontal beam to the opposite wall diagonally from the device, and put mark No. 2 there. As soon as this procedure is completed, the device must be moved to the opposite corner and installed there.
Now you need to combine the beam with the nearest mark No. 2, and direct it to mark No. 1. If the beam coincides with it, then the device can be considered serviceable, but if not, then it will need to be repaired or adjusted.
Is it possible to fix it?
It is almost impossible to repair laser levels yourself. The device is a complex mechanism consisting of not only mechanical but also electronic elements. To repair the laser level, it is recommended to contact specialized workshops.
Numerous experience of level owners shows that only such a unit as the sight can be repaired. In this case, you will need to disassemble the tool body. Inside, there is a tendril on the movable element, which should be moved into a special hole on a metal base. In other cases, it is recommended to entrust laser level repairs exclusively to specialists. After all, the device is a fairly expensive device, which is very easy to damage if you try to carry out repairs yourself.
It is impossible to avoid breakdowns of the level, like any other instrument, but you can extend its service life by careful handling and proper care of it. Features of instrument care are described in the instructions that come with each product.
Misconception 1. You can work in any conditions
Undoubtedly, the scope of application of laser levels is different; they are used both in apartments and on open construction sites. But this does not mean at all that you can work everywhere with one device. After all, for each device the manufacturer sets special requirements for the operating temperature range .
If the instructions indicate that the level can only be used at above-zero temperatures, then the possibility of working outside in winter is immediately eliminated. Professional levels have a working temperature range ranging from -10 to +40 °C, therefore they are suitable for use in the cold season, but with strict adherence to the lower temperature limit. In addition, the scope of use of a laser level depends on the laser projection range and its visibility. For indoor work, a beam up to 10-15 m long will be sufficient, but outdoors, when projecting markings over long distances, you need a device with a radiation range of several tens of meters.
How to check a laser level for accuracy
Despite the fact that laser technology is very reliable, there are times when devices need repair and adjustment (adjustment).
- The appearance of bends at the ends of horizontal lines up or down (builders call this a grim smile). The line changes from a straight line to an arcuate one.
- Curvature of a vertical line. The appearance of bends at the ends of lines.
- Jamming of the pendulum suspension system. The behavior of the rays becomes uncontrollable, they freeze in different positions.
- Electronic board malfunction. This type of malfunction sometimes occurs in levels with electronic leveling. As a result, the measurement results are significantly distorted. The device begins to “lie” if the microcircuit that controls the servomotors is damaged.
- Disruption of normal operation of laser control buttons. They jam or become stuck.
- Mechanical damage to the laser level body. This usually happens after the instrument falls on the floor. The seal of the casing is broken, allowing dust and moisture to get inside. As a result, the tool very soon becomes unusable.
To clarify the diagnosis, the laser level is checked on previously prepared reference surfaces. The easiest way is to check the accuracy of the reading using a bubble level (spirit level). It is best if the length of the level is about 2 m, then the error will be clearly visible. You can use a shorter level, but in conjunction with the construction rule. With their help, you can draw a straight, long line on the wall. A laser beam is aimed at this line and the degree of its compliance is analyzed.
What is a rotating laser level and what does it mean?
If previously a fishing line with a weight at the end was used for measurement, today a specialized device is used to measure the difference in heights of several points. This meter, which is also called a laser plane builder, is used not only before the start of construction and repair work, but also after its completion. Quality control of the work performed can be identified in a matter of seconds and without the need for manual measurements.
Structurally, the tool is a compact device that is used in conjunction with a stand - a tripod. To construct planes in the design of the tool, a light indicator is used - a laser beam. Before you learn the details of the operating principle of this tool, it should be noted that plane meters are classified into three types:
- Optical are the simplest and first levels to appear. Their advantage is their affordable price, but there is also a drawback - you need to know how to use them, since measurements are made manually through a lens system
- Electronic - devices that differ from optical ones by the presence of an option for storing data when taking measurements
- Laser - compared to optical and electronic, where measurement accuracy depends on the human factor, laser levels are highly accurate and reliable, which is why rotary levels are in particular demand among builders of various fields
Laser levels include a rotary level. By using laser levels, you can construct planes at a distance of up to 100 meters, while optical and electronic levels allow you to measure at a distance of up to 20 meters. The use of additional optical equipment makes it possible to measure with a laser instrument at a distance of up to 400 meters and even up to 1 km.
This is interesting!
Rotational means rotating, through which a plane is built.
Instructions on how to repair a laser level with a step-by-step description
If you are faced with a situation where the laser level has stopped working, then you need to immediately begin repairing it. First, we assess the extent of the breakdown, and only if it turns out that the cause is internal, then we proceed to disassemble the case. All levels are dismountable, for which you need to unscrew a certain number of screws to remove the cover. If the projection stops working at the level, the repair will look like this:
- To repair a laser level you need to remove the housing
- Now you can diagnose the problem. If one of the projections does not work, then you need to look at the serviceability of the contacts. In the example, a malfunction of one contact was detected, due to which one plane does not work
- You can fix the damage by soldering the wires in their place. If it breaks off, then you need to find a similar wire (without insulation) and with the appropriate cross-section, and solder it in place of the damaged one
- In the end, all that remains is to assemble the tool and check its functionality. When assembling, you need to be careful not to snag the wires and again not break their integrity.
After assembly, it is necessary to install the power supplies in place and check the functionality of the tool.
The tool works properly. As you can see, the repair does not take much time, effort, and does not require special knowledge. If the laser level breaks down, then you must first identify the cause of the breakdown, and only then restore the functionality of the device. Only in exceptional cases is it recommended to seek the help of specialists, and in 60% of cases you can repair it yourself. Below is a detailed video description of the process of repairing a laser level with your own hands.
https://youtube.com/watch?v=4IwOGdVjCz0%3F
As a result, it should be noted that a good specialist in a service center is not one who has exorbitant prices for repairs. A good technician will handle the repair quickly, and his services will not cost as much as a new level.
Publications on the topic
Types of construction angles - purpose, application and selection
Learn how to use bubble building levels correctly
Torque screwdrivers and their purpose
Types of goniometers and instructions for their use
Method No. 2
Another method of making a laser level involves using a regular laser pointer, which can be obtained at any children's toy store. You also need to prepare:
- bubble level;
- wooden peg 1-1.3 meters with a diameter of 5-6 cm;
- a piece of rubber;
- a sheet of board or plywood along the length of the bubble level;
- clamps;
- self-tapping screws
Assembling a laser level
Prepare the pointer: to increase the brightness of the beam, break the glass in the nozzle, having previously sealed the tip with cardboard. Using clamps, the pointer is secured to the bubble level, and to make it easier to adjust the direction of the beam, a piece of rubber is placed under the pointer.
Next we make the stand:
- One end of the peg or bar is sharpened for ease of fastening in the ground.
- Screw a sheet of plywood to the second end of the block with self-tapping screws, positioning it strictly perpendicular (this will help maintain the accuracy of the measurements).
- If you plan to place the level on hard surfaces (for example, concrete), a sheet of plywood is also screwed to the second end of the peg.
Before using the level, the stand is driven in or placed on the ground, its position is leveled with a bubble level (the bubble is positioned strictly in the center). The pointer is turned on, and the point that appears on the wall is marked with a pencil.
The stand is carefully rotated along the axis in a horizontal plane until the next mark, after which the two points are connected to each other. This level is most convenient to use for smooth installation of electrical wiring.
How to fix stuck buttons
If the laser level's buttons stick or stop switching, it is because they have been pressed too hard during regular use. You can carry out the repair yourself. You need to disassemble the device and solder the detached contact using a special device - a soldering iron.
Advice! To ensure that the solder does not fall off during further use, the work is performed using special solder. The main constituent substance is flux.
The laser level requires very careful handling. Therefore, if during use you find defects, you should immediately try to eliminate them. You can do minor work yourself. But in case of serious damage, contact a specialist. If you don't understand anything about this kind of repair, it will be better. Otherwise, you will not only not repair the product, but also worsen it. And buying a new one will cost much more than repairing it at a service center. In any case, it's up to you to decide. Good luck!
All plane builders have a certain error within the tolerance. Usually for cheap models it is 0.5mm/1m. For a 3-4 meter wall there is a 2-3mm run-up. And if you lay tiles in the bathroom, then at this level the discrepancy along the 4 walls will lead to a 5-6mm mismatch in the seams. More expensive models from 7-8 thousand. rubles have a smaller error, from 0.2 to 0.05mm/1m. Of course, they give a more uniform beam and a wider angle. But even a cheap level needs to be adjusted and this is very easy to do. Let’s look at the adjustment using the example of the cheapest Chinese level from Leroy, which did not even fall within the tolerance of 0.5mm/1m. There are adjustment screws at all levels. By tightening or unscrewing the screws, we change the position of the center of gravity of the pendulum and change the level setting.
It is very easy to disassemble. Unscrew the screws of the lower base. Remove the retaining ring using pliers. Can be stretched with threads. Unscrew the bottom and unscrew the body. For convenience, I screwed the bottom to one half and adjusted it that way. First of all, you need to check the level of the horizontal line. Place the device on a base or tripod. On the right side of the beam we make a level mark on the wall. Turn the device to the right so that the left edge of the beam hits this mark. If it diverges, then you need to adjust the horizon level using the side screw. After several iterations, the left and right edges of the ray should hit the same mark. The horizon is set. The second step is to adjust the plane of the beam. We take a large room, maybe a long corridor. From one wall we direct a horizontal beam to another wall. We put mark No. 1, turn the beam to the near wall and also put mark No. 2. Then we move the tripod to the opposite wall, set the height of the tripod to hit mark No. 1, then turn the device and look where the beam hits. The plane of the horizontal beam is adjusted by the front screw. After each adjustment, the marks are drawn again. The first marks are placed crookedly. Therefore, each time we make new marks and compare. We adjust until the beam hits both marks, from any wall. This way we have a guarantee that the tiles laid on opposite walls will be at the same height. The third step is to check the vertical beam. For me it was blocked and not perpendicular to the horizontal. We unscrew the screws securing the vertical sensor, loosen the glue and rotate the sensor in the desired direction. We tighten it and check it against the plumb line of the rope. It's more difficult to get here. It is difficult to turn hundredths of an angle by hand. But with some attempt you will be able to get there.
We tighten the screws and check the horizon again. I set mine with an accuracy of horizon 0.5mm/10m=0.05mm/1m, vertical 0.5mm/2.5m=0.2mm/1meter. The result was accuracy at the level of expensive devices.
How to bring the laser level into working position
This is important - the quality of the marking directly depends on how correctly the laser level is positioned. Therefore, you need to find a suitable place for it and install it properly. There are a number of requirements necessary for full operation of the device:
Step 1. There should be no obstacles in the path of the laser beams. Otherwise, the refraction effect will cause the projected line to be interrupted.
Step 2. The laser level should be positioned at the optimal distance to the object. The permissible maximum is indicated in the instructions and should not be exceeded. Reducing the distance reduces the likelihood of error, so if possible, try to place the device closer. The permissible maximum can be increased by using a special beam receiver. This option is used when the object is at a great distance.
Step 3. During operation, the level should be on a flat surface (a table surface will do), a tripod or a special holder. It should be securely fixed, since complete immobility of the device is a guarantee of obtaining accurate data. No shaking or movement is allowed.
Step 4. Before starting measurements, level the level with the horizon. To do this, we use the bubble level built into the device. Some models have a self-leveling function. It works like this: until the device stands level, a signal is given. There is no signal - that means everything is fine and the device is installed level.
Step 5. First you need to warn people nearby about the upcoming work. Animals should also be removed or removed. After all, accidental contact with a laser in the eyes can injure them.
Step 6. That, in fact, is all the recommendations. When they are met, you can turn on the level and carry out the necessary work.
Where to repair a laser level
Having understood the question of whether it is possible to repair the level yourself, we can conclude that if it is not possible to restore the functionality of the instrument, then there is no need to rush to buy a new one. A failed laser level can be restored by contacting specialized centers. Such centers are located not only in large cities of Russia, but also in smaller ones. There are specialized centers for repairing laser levels in the following Russian cities:
- Moscow
- Ekaterinburg
- Novosibirsk
- Rostov
- Nizhny Novgorod
- Ufa
- Samara
- Krasnodar
- Chelyabinsk
- Falcon
- Voronezh
- Irkutsk
- Krasnoyarsk
No matter what big city you live in, in order to repair a laser level, you must first try to find the breakdown yourself, and only then look for the addresses of service centers. These centers perform not only repairs, but also adjustment and verification of the measuring device. How much repairs cost at a service center depends on many factors:
- Location - the remoteness of the settlement from the city indicates the need for costs for shipping parts and components, which is an additional expense
- Laser level model - repairing cheap models is correspondingly inexpensive, but to repair levels from brands such as Bosch, DeWalt, Hitachi and others, you will need the appropriate components
- Type of fault - if it is a minor breakdown, then the cost of such repairs will be insignificant
To avoid being deceived, you should choose only specialized service centers and workshops. It’s not difficult to find out about these, since there are many reviews about these or other workshops on the Internet. If you know the addresses of good level repair shops in Russia, Ukraine and Belarus, then you can share the addresses directly on the site.
https://youtube.com/watch?v=iUMOv2_XrNs%3F
Method No. 4
Making a cross level will require a more responsible approach. You will need:
- two laser pointers;
- video camera tripod;
- CDs;
- rotating electric drive (for example, from an unnecessary player).
The level of complexity of creating this device is higher, but it is ideal for construction and renovation, furnishing premises, especially for assembling kitchen cabinets.
The work progress will be as follows:
- The two CDs are glued together to increase their overall thickness and prevent the pointer from catching when rotating.
- Both laser pointers are attached to the disks with electrical tape or tape.
- The player is placed on a tripod, which should rise freely vertically and horizontally.
- Discs with pointers are placed in the player and rotated along an axis.
- The lines that appear on the wall are marked with a block and a pencil.
What to do before starting work
Before you start using the device, you must clearly understand what type of laser levels you will be working with. Although if you bought this device yourself, then you should have known about it at the stage of choosing a laser level.
All laser levels can be divided into:
Static line builders (other names: crossliner or multiprism builder).
Rotary line builders (other names: multi-prism line builder, level).
Static axis builders (other names: pointer, point laser).
In principle, most manufacturers write in the instructions (usually included in the kit) how to prepare the device for operation. As a rule, no special “dancing with a tambourine” is required - everything is simple and clear.
- If the level model is a battery type, then before using it you need to charge the battery.
- If the device runs on batteries, then insert them into the power compartment.
- We check the functionality of the level by turning it on. If a laser beam appears, then everything is in order. You can begin installing the device.
Video description
The video shows how to use a laser level to level a floor:
Room layout
Today, more and more often, during construction of private houses, designers do not immediately decide on the filling of the internal space. And if the box is already ready, then redrawing this space will not be difficult, since new construction technologies and materials make this possible quickly and easily.
Typically, partitions are installed for this purpose. In the same way, these structures are used when a building is being renovated, and there is a need to change something inside, making the house more modern.
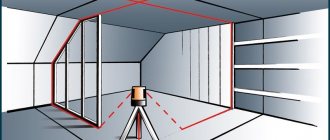
Previously, at the places where partitions were installed, craftsmen crawled on the floor, drawing lines. Then, having installed stepladders, they drew lines on the ceiling and walls using a rule, plumb lines and other tools. Today everything has become much simpler. By installing a laser level, you can draw a continuous line along the perimeter of the room with one beam, thereby visually forming a future partition. Simple, fast and easy.
If there is a need to divide one large room into four small ones, then this can also be done with one level, turning on two beams at once.
Formation of inclined planes
Note that in private houses inclined planes are not uncommon. And if the task is to level them, or the designer simply decided to experiment with such designs, then a laser level is more useful than ever.
It should be noted that different brands of tools have different approaches to solving this problem. Therefore, my advice is to carefully read the instructions, where the manufacturer describes in detail how to do it correctly.
Let's just add that some models have an automatic leveling system. To work with inclined planes, this function must be disabled or blocked. Some models have a function installed - changing the angle of inclination.
Measuring distances
It is impossible to determine the distance with a laser level, in terms of accurately determining this parameter in meters. But this tool can make the task easier. For example, if you need to measure the height of a wall, then you just need to set a vertical line on its surface using a beam.
After that, a regular tape measure is used to measure the length from the floor to the ceiling.
Additional devices that make working with the level easier
Laser beam receiver – increasing the range of the laser beam
A laser receiver can be a big help if you work outdoors. With it you will see a clear projection of the beam even in blinding sunlight. Moreover, the distance that the laser “reaches” will double. Just buy both the laser level and the receiver from the same manufacturer, otherwise there may be cases of incompatibility between devices from different brands.
If your level is not designed to work with a receiver, then in this case you can find a way out. There is a very simple device - a reflective plate. By attaching it to an object, you can get a slight increase in the beam range.
Target - we hit the target exactly
The target is a simple accessory that is included with almost all laser levels. The plastic plate with concentric circles drawn on it looks exactly like the paper shooting targets provided at the shooting range. After all, both of these targets have the same goal – to hit the bull’s eye. Well, you can shoot not only bullets, but a laser beam.
This thing is very useful when the distance between the level and the object is quite large. For example, you need to make a hole in the wall a few centimeters higher than in the opposite one, while the distance between the walls is 40-50 meters. Try to see traces of a pencil or marker at this distance! If you attach a target instead, then aiming the beam at it will not be difficult. Even if the shooter is not particularly accurate.
Some levels include another device that improves the accuracy of the laser “shot”. This is a kind of optical sight located on the body of the device. It is called an optical sight, and with its help you can easily “reach” a target even at a hundred-meter distance.
Rake - drawing perfectly straight lines
A rod is useful when you need to draw several parallel lines on the surface of an object, the distance between them being the same. They also use a staff to change the height of the level mounted on a tripod. Then it can be returned to its original position.

