Manual mills for grinding grain at home are modern household designs that make it possible to obtain flour from different types of cereals without much effort.
When developing a device such as a grain mill, professional engineers use the latest technologies, thanks to which work in the kitchen becomes pleasant and easy. These are relatively new units, but they have managed to gain wide popularity in the kitchen appliances market.
There are also industrial grain mills. But they are used in large flour mills and farms. Their prices are quite high.
The stores offer a wide range of devices such as a grain mill. But making such a device yourself is not so difficult, but it will require a fair amount of skill and the ability to work with turning and drilling devices. A home grain mill will produce flour of different grinds depending on the setting. At the same time, you will spend a minimum of money.
This article will tell you how to make a grain mill with your own hands.
Mill "Malyutka"
The most common model is the Malyutka grain mill. It was invented in Udmurtia by two engineers. Using this device, you can not only grind grain to the required size, but also produce feed and obtain flour from corn, buckwheat and other grains. Such an electric grain mill will become simply indispensable for a family that lives in its own home and has pets.
The dimensions of this machine are small, but the level of performance can surprise any user. A full bucket of corn can be processed in five minutes, and a bucket of wheat can easily be ground in just three minutes.
Technical parameters of the device:
- body size, not including hopper and pipe, is 320 x 160 x 170 mm;
- the device is capable of producing two types of grinding: fine and coarse;
- low engine power - 180 W;
- high level of productivity with low energy consumption;
- the presence of a reversible rotary engine;
- The weight of the device is 15 kg.
The most important task that increases the efficiency and durability of a unit such as a grain mill is the assembly of the rotor and stator.
Hand mill overview characteristics
The first thing you need to know about mills is that they must be made of solid stone. I studied several hand mills, mostly foreign ones, since at the beginning of my interest, no one in our country was engaged in the production of mills. What did you find out? And the fact that the bourgeoisie use composite materials and chips of stones of various types. Using the sintering method, they form blanks of the required diameter and, under the slogan of natural stone, sell this game to us.
I was only lucky in that I once received a grain supply (10 bags) from a peasant who grows his own wheat, without chemicals. From him I learned about people who create hand mills from Romanov quartzite in our country. I was happy that I found guys who care about their health and the health of their children.
As it turned out, the manufacturer of my first mill was a stonemason company. I paid 30 thousand rubles for a domestic miracle, which was damn expensive for my pocket. In general, they sent me a mill from Rostov-on-Don to St. Petersburg through the transport company Keith. The shipping price was only 500 rubles. I brought home the mill, weighing 24 kg, put it on the table and began to look like a ram at the gate, like, what next?
And then, while waiting for grain, I went to buy jars for flour, I was sure that there would be a lot of flour and it should be stored either in glass or in linen bags. You can see which cans I bought here. By the way, there were no instructions for the mill, like once you buy it, you know everything, figure it out yourself. For those who buy goods on Aliexpress, you can look at the Chinese hand mill. Shipping is always charged for this type of product; it is really heavy. I couldn’t find a cheaper one in the Russian Federation at the time of writing. Let's continue the conversation.
You may ask: 'What can you do there?' The fact of the matter is that there are nuances when rotating the top stone. You can throw in grains and spin them reactively, then you will get grains at the output and you will eat only porridge. Because for bread you need to have a fine grind so as not to feel grain particles in your hands when you check the flour with your fingers.
After some time, grain arrived from Yaroslavl by business lines, brought everything home and immediately began to try to turn the mill.
Hand mill review and impressions
How did I feel after the first couple of kilograms of flour? Slight fatigue and shock when I considered the time spent. A video of testing a hand mill can be viewed here. After a lot of time, I clearly realized that in a city with two children, this option for producing flour is in no way suitable. Although when I just started, everything seemed more than real and optimism flowed over the edge.
Out of ten bags I handled only three by hand. Either our ancestors had a lot of free time, or they forced their children to turn the mill (previously, 12 people in a family was the norm)
Time passed. The speed of flour production, bread baking and the time spent on all this tired me. There was catastrophically no time for family, I was tired like a slave on the Chinese wall. As a result, I decided to sell the hand mill, I’ll explain why. The fact is that the stonemason company did not install bearings on its first mills. This small modification could make it easier to take into account the torque.
In addition, I came across another master on the Internet who not only installed bearings, but also came up with a grinding adjustment system. That is, at a stonemason’s mill, I had to adjust the grinding by the amount of grain poured into the grain receiver, while another master had the grinding adjusted using nuts. A video review of another mill is here.
In short, I sold the first mill on Avito and immediately paid the money to another master. The price at that time was the same. I was convinced that with the bearing and grind adjustment, my life would be filled with happiness. The production of the mill took more than two months. The master had problems with mining the stone, but that’s not all, new disappointments awaited me ahead. The hand mill “Zhiva” is wonderful in everything, it’s easy to operate, the flour turned out so fine that there was no need to sift it, but the time spent on production by hand was still a pity.
The grinding process has accelerated significantly, compared to the mason's mill, you just need to get used to it (watch the video on the mills here). But if you grind flour for bread a week in advance, then when you count the time spent, you realize that I don’t have that much free time. Living in a metropolis, lack of time is a common thing, and I’m also experimenting with flour and bread here for my money.
In general, over a period of time I ground a couple more bags, so there are five left in total. What to do? There were plans to move to the village, but the crisis in 2014 delayed the dream by 15 years. The dollar has risen, the prices of food and gasoline today are sky high, so I decided to sell this mill along with the grain.
Device diagram
Many people are interested in how to make a grain mill with their own hands?
Before you start assembling the device, experts advise stocking up on all the necessary parts:
- electric motor (you can use a washing machine motor, since the required power is small);
- engine mounting points (requires 12 M6 bolts with washers equipped with springs);
- engine support (two steel corners measuring 45 x 45 mm);
- the base of the device (frame) is made of sheet steel, the thickness of which is 6-8 mm;
- studs with nuts that provide tightening;
- receiving box based on roofing metal;
- rotor;
- bearing cover;
- stator;
- pipe branch;
- cover made of sheet iron 3 mm thick;
- four M6 screws securing the cover;
- spacer ring;
- fastening the receiving box;
- two bearings No. 203;
- three screws connecting the bearing covers;
- M6 screws equipped with nuts (for installation);
- loading box;
- axle (M6 stud and two nuts);
- wooden handle;
- pipe attachment points.
Required inventory
To convert a washer into a washer with your own hands, you should stock up on the following things:
- top loading washing machine;
- auxiliary motor;
- electric drill and set of drills;
- chisel, hammer, set of keys;
- fasteners;
- steel plates measuring 0.32*0.05*0.0015 m and 0.42*0.05*0.0015 m;
- corner 30*30 mm;
- 3 liter tin can – 3 pcs.;
- lock – frog – 3 pcs.
Drawing and design features
There is no point in describing the details, dimensions and drawings of the grain crusher with your own hands, since everything depends on the model of the washing machine. Let's take the Oka machine.
Note!
Do-it-yourself winch: classification, manufacturing materials, description of work stages + instructions for DIY constructionDo-it-yourself clamp - step-by-step production and description of options for using a clamp
DIY knife | A step-by-step description of how and from what materials to make a homemade knife
No dismantling work is required here. You just need to disconnect the plastic part of the activator from the device. Instead of the unscrewed element, an auxiliary motor and a set of double-edged knives should be installed.
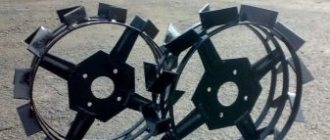
Rotor manufacturing process
A manual grain mill with your own hands has a unified design, so the assembly can be classified as easy. If it seems impossible to prepare parts manually, you can order them from a lathe. You need a stator, a rotor, and a bearing cover.
If you decide to resort to making a rotor on your own, then you should take into account a number of important technical nuances:
- The part must be equipped with a shaft with a variable cross-section. It is made from forging M 45 with a length of 9 cm and a diameter of 12 cm or round steel.
- The whole process should proceed in stages: preparation of metal parts (holes with a radius of 5 cm are drilled in a circle with a diameter of 105 mm at the same distance).
- The outer layer of the circle should be removed in such a way that the size of the groove is reduced to 104.5 mm. The working teeth must be open. After this, the rotor is hardened.
How to choose a home mill?
All three options for grain crushers for home are easy to choose due to the simplicity of the design: the electric motor itself, the millstones and the grain tank. But for each case there are some nuances:
- Choosing a spice grinder. The power of the electric motor and the efficiency of the millstone system should be taken into account; it is best to personally check how the grinder works; without checking, you may remain dissatisfied. Don’t buy a cheap mill, it won’t last long, it’s better to pay extra and buy a high-quality device that can handle any spice grains and will work without interruption, otherwise it’s better to buy a manual version. Rechargeable batteries are preferable to AAA batteries.
- Choosing a coffee grinder. If you are going to grind coffee a lot and often, then look for models with good power and an increased volume of the bean tank. And if not, then a standard cheap coffee grinder of low power for a couple of cups of drink or a little powdered sugar will become a completely normal purchase. It is better to purchase branded European equipment of high quality.
- Choosing a household electric mill. It’s hard to make a mistake in this case, because not everyone can buy a grain mill. The device, which processes up to 1 kilogram of grains at a time, is sold at a price of no less than 25,000 rubles. Here, in fact, very good power and reliable stone millstones are implemented, which are durable and grind any grains efficiently.
Rotor processing
The rotor must be hardened in a certain sequence: the temperature in the furnace is raised to 800 ºС, after which the part is lowered into an oil container. In this case, it is highly not recommended to cool the metal with water, as cracks may appear. Then tempering is carried out: the rotor is subjected to secondary heating, but to a temperature of 400 ºС. You need to let it cool at room temperature. As a result, you will receive a very durable and solid part that will last for decades. To check the level of quality of the work performed, you should run a file along the cutting side of the tooth. If sliding is noted and no trace remains, then this means that everything was done correctly.
In a device such as a homemade grain mill, the rotor will rotate using two radial bearings. This increases the rigidity of the unit and the strength of the device. A 0.5 mm spacer ring is made between the bearings in the shaft. It serves to displace the bearings and create the tension necessary to adapt the assembly to the stress in the mechanism.
Homemade grain mill: simple assembly diagram
Many housewives believe that high-quality food can only be prepared from natural ingredients. Today, even grinding flour yourself is becoming fashionable. There are household grain mills for this. You can buy the unit or make it yourself.
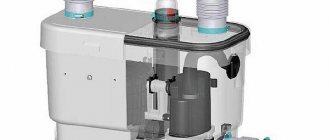
Operating principle and structure
A grain mill will allow you to obtain a product from raw materials, the quality of which is guaranteed by your own choice. The row machine grinds wheat, oats, corn, barley and other grain crops. The output, at the owner’s request, is flour of any type of grinding, flakes, cereals of different fractions, and mixed feed. The household mill is small in size and easily fits on the kitchen table. At the same time, its productivity allows it to cover the needs of the household. The simplest model with a low-power electric drive processes half a bucket of wheat per minute.
The grain mill operates on the basis of a rotary mechanism. It consists of:
- rotor;
- stator;
- electric motor.
The operating principle of such a mill is simple. The grain enters the mechanism through the receiving cup. Inside it is ground with the help of a rotor and stator. The finished flour or other product is poured through the outlet pipe into the prepared container.
Homemade grain mills come in two types:
- Mechanical. Grinding is carried out by rotating the handle using your hands or a simple electric drive. They have low productivity. But assembling the mill is very simple and low-cost. You will experience the pleasant process of turning grains into flour. It is similar to grinding coffee beans in a manual coffee grinder.
- Electrical. Aimed at processing increased volumes of grain. These mills are a great option for regular use at home. Models with a powerful motor can even grind mushrooms or dried fruits.
Attention! In order for the “filling” of the mill to work reliably, it is placed in a body made of hard wood such as pine, linden or beech. Wood will add pleasant notes to the aroma of flour.
Preparing to assemble a simple mechanism
The proposed model of a household mill is the author’s. It was developed by Udmurt masters. The length of the case does not exceed 32 cm. The height and width are even less. The mass of the assembled crusher is 15 kg. The mill needs a motor with low power, up to 180 W. A motor from an old washing machine or similar household appliance will do. Basic productivity - 1 bucket of corn or 2 buckets of wheat in 10 minutes. The author's assembly diagram for this mill is shown in the photo. In addition to the electric motor, you will need:
- 12 screws and the same number of spring washers for fixation;
- a pair of steel corners measuring 45x45 mm (for motor support);
- steel sheet about 8 mm thick (for the frame);
- and another one, about 3 mm thick, as well as fastenings - 4 bolts;
- studs with nuts;
- a small iron box for the roof (reception cup) and 2 screws for it;
- rotor;
- stator;
- protective cover for bearings;
- coupling;
- metal pipe;
- spacer ring 0.5 mm;
- pair of bearings No. 203 plus 3 bolts;
- steel handle brackets 0.2 cm thick;
- wooden handle.
Attention! In this mill design, bolts of the basic type - M6 - are used everywhere.
Crusher assembly: rotor manufacturing
To manufacture the rotor along with the shaft, stator and cover for the bearing compartment, you will need the ability to use a drilling and lathe. Before working on the mill, it is important to know the subtleties of the process:
- The shaft is machined from round steel or M45 forging.
- The basic diameter of the rotor is 105 mm with subsequent turning to 104.5 mm.
The finished part should be hardened:
- heat in oven to 800 °C;
- cool in oil container;
- heat to 400 °C;
- Set aside to cool at room temperature.
Attention! Quenching cannot be carried out using water; it will negatively affect the strength of the mill.
You can check the quality of the procedure with a file. It should not leave marks on the cutting edge of the tooth.
In the proposed scheme, the rotor rotates on a pair of radial bearings. A spacer ring is attached to the shaft between them. This will allow the bearings to move and adjust to the voltage inside the device. The mechanism will become more reliable and last longer.
Stator and other elements
Making the stator yourself is even more difficult. When turning on the machine, leave a minimum allowance in the workpiece:
- make an opening in the center - 70 mm;
- mark the workpiece based on a diameter of 10.5 cm, mark the locations of future openings, contours
- holes at the bottom and top;
- drill blind holes 2.6 cm deep;
- eliminate the allowance on the wall and cut out a space for the rotor (10.5 cm);
- on the reverse side, cut out a seating groove for the bearings;
- think over and prepare a ring for the seal.
Advice. The stator also needs to be hardened.
Working on the machines is the most difficult stage of assembling a mill. Therefore, you can entrust it to professionals by ordering parts from them. The stator position is manually adjusted using clamp bolts. The quality of grinding depends on accuracy. The electrical circuit of the mill, in addition to the motor, includes a capacitor (3.8 kmF), a fuse and a switch. All contacts should be closed from direct access.
After a successful trial run, all that remains is to make the frame, secure the apparatus, and attach containers to it for receiving and exiting raw materials. The simplest grain mill is ready.
Have you tried making such a mill yourself?
Making a stator
Making a stator is a little more difficult because it requires precision. The work is being done in stages. First of all, the workpiece is turned on a lathe, and then a small technological allowance is left. For this purpose, an opening of up to 70 mm is drilled in the center. A circle with a diameter of 105 mm is marked on the workpiece, and the central points of future openings are marked. Subsequently, they will become the working plane for the stator. The markings are applied strictly according to the drawing.
The contours of the holes are marked at the top and bottom, and then blind “windows” are drilled to a depth of approximately 26 mm. On the machine, the allowance left earlier is removed, and the space for the working chamber (105 mm) is bored. The resulting workpiece is turned over and a landing recess is made for inserting bearings. You will also need to make a groove for the sealing parts. The mill can function without this component.
When the stator is ready, you can begin to create threaded holes for the bearing caps, stator, pipe and loading box. The stator, like the rotor, is subjected to thermal treatment using a similar technology.
To ensure smooth operation of the unit, the stator coordinates should be set correctly. In this case, bolts are used. When operating, the rotor should move slowly and easily, without jerking or stopping. Only after checking the functionality of all parts can you begin a trial run of the device. For this purpose, the mill (flour grinding apparatus) is fixed on a stool or table so that it does not fall during vibration.
Installation of the unit
To bring all parts into working condition, a certain amount of current is required. Before you start cutting out all the parts of the device, prepare the necessary electrical equipment. Such a unified design does not require expensive elements.
You will need an electric motor, a capacitor with a capacity of 3.8 µF, a fuse and a toggle switch. The motor is mounted on a dielectric plate, and other components are attached there. To make the rotor turn in the opposite direction, they resort to switching the capacitor.
The crushing and motor shafts are located along the axis. A rigid coupling is used to transmit rotation. Holes are drilled in the mounting angles to guide the parts to adjust the position. Holes are also made in the frame. They are needed to move.
Cereals are loaded into the receiving box, a container for flour is placed under the outlet pipe, and the first grinding process is carried out at home.
The article covers the question of how to make a grain mill with your own hands. Making such a practical device is not particularly difficult. A manual machine will cost you much less than buying a factory made one.
Order of steps
Experts recommend following the following instructions “how to make a grain crusher with your own hands”:
- Install the pre-made blades using a flange onto a 6cm thick pulley.
- Convert the drain to drain crushed feed. To do this, use a chisel to increase the size of the drain hole to 15 cm, insert the pipe and move it to the side.
- Stepping back a little from the largest point of the radius of movement of the knives, install the grill at a certain angle so that it is attached from one wall of the tank to the other.
- Seal the cracks with car sealant. The crusher is ready!
The most important point is to turn on the unit for the first time and evaluate its operation. First, you need to set the highest rotation speed of the activator, only then can you start the equipment. For the next 5 minutes, you need to monitor noise, vibration, and also the heating temperature of the auxiliary motor.