The design and principle of operation of a homemade snow scooter
A snowmobile consists of several elements:
- steering wheel;
- back;
- brake lever;
- seat;
- reflector;
- splash guard;
- roller with caterpillar;
- ski;
- shock absorber and leaf spring;
- lighting element;
- cabin;
- windshield;
- air intake.
The operating principle of the device is as follows. A power unit mounted at the rear or under the operator's seat (the engine from a chainsaw, trimmer, or other device) causes one or a pair of wheels to rotate.
They push the structure forward, and it glides over the snow thanks to a pair of skis, which reduces friction and evenly distributes the load on the snow mass. The operator sits on the seat and selects the direction of movement using the steering wheel, which also ends with a single ski.
The basis of a snow scooter with a motor is a power plant - an engine from a trimmer
General rules of constructions
Homemade products for driving on snow are varied in appearance, size, layout, power, and even the principle of movement. But in each variety there are components that provide the properties necessary for snowmobiles, namely:
- Don't fall into the snow.
- Move along the surface with minimal friction and in the desired direction.
Obviously, the probability of sinking into the snow and the friction force depend on the weight of the unit, the contact area, and the shape of the surface of contact with the snow. Of course, the condition of the snow has its influence, but this must be taken into account.
To fulfill its main purpose, the following components are always present in the design of a snowmobile:
- supports in the form of runners, wheels or tracks to support the weight of the structure with passengers on the snow surface,
- engine with gearbox, transmission device and fuel tank,
- propellers pushing the structure along the snow surface,
- steering device that changes the vector of interaction with snow to turn,
- frame on which all components are mounted.
Making homemade products is simplified by the availability of parts from specialized equipment. Often spare parts are taken from Buran snowmobiles or any tools and vehicles with motors: scooters, motorcycles, walk-behind tractors. The scope for creativity when creating each node is huge. There are many varied and proven solutions for every detail.
snow blower
A snow blower is a machine that scoops up snow and throws it to the sides. It works on screw and rotary principles.
Screw mechanisms carry out a 1-stage intake of snow mass. The device is located in the front part of the unit, covered with a lid on the sides and top. In the process of rotating around its own axis, the auger captures, grinds snow and ice, crushes them into small fractions, transfers them inside the equipment to the throwing shovel, then to the outlet pipe. For freshly fallen snow, mechanisms with a smooth edge are suitable, for stale snow - with a serrated edge.
In a rotary type unit, the snow cover is cleared by a rotor. The nozzle is attached to the drive shaft and works like a vacuum cleaner. The blades protrude forward, making it much easier to grip snow. In a homemade snow blower from a trimmer, they are made of high-quality metal or durable plastic. The rotor creates increased centrifugal force. Snow is thrown away, passing through the pipe, at a distance of up to 12 m.
Both electric and fuel motors are suitable for snow blowers.
If the operating range of the mechanism is within the house, install an electric motor from the trimmer, taking into account the waterproofing of the unit. When carrying out work in summer cottages, it is better to install a low-power gasoline engine.
At the preparatory stage for a do-it-yourself snow blower from a trimmer, drawings of parts and assemblies are developed according to a well-thought-out plan, technology and based on the availability of material and equipment. For assembly, use the diagram of a lawn mower.
Necessary equipment for making a homemade machine:
- Petrol trimmer with straight rod and gearbox.
- Steel sheet 1.5 mm thick or metal barrel.
- Milling cutter with teeth.
- Set of tools:
- drill;
- drill;
- spanners.
- Bulgarian.
- Welding machine.
First they make the rotor:
- 4 rectangles 25x10 cm are cut out of a sheet of steel.
- One of the corners of the long side of the part is turned into a blade shape.
The deflector is made from metal strips 30x15 cm, bent, sides 10 cm high are welded. For the blade, take a blank 30x40 cm, bend the edges to a height of 2 cm.
In order to make a snow blower with your own hands from a trimmer, perform the following algorithm of actions:
- the bottom of the barrel is 15 cm, cut in a circle;
- at the bottom of the structure, a hole is drilled for the gearbox protrusion and 3 additional ones are drilled for attaching the shield;
- on the side they make a square with a side of 10 cm for unloading the snow mass;
- 1/3 of the front part of the structure is covered with a metal sheet so that the square hole is located in the center of the damper;
- the finished rotor blades are welded in a cross pattern to the gas trimmer disk;
- a deflector is installed to the unit body at the point of snow emission and welded;
- a spatula is attached from below;
- install the gearbox, securing it with bolts;
- insert the rotor.
During work they use a welding machine. Welding on thin metal is a complex technological process that only a professional can handle. Therefore, it is better to use the services of an experienced welder when manufacturing some parts.
On caterpillar tracks
Track supports are used more often than others, simultaneously performing the function of propulsion. The reason is high efficiency and reliability. This design allows you to reach high speeds while maintaining stability and maneuverability. There are several options for how to make tracks for a snowmobile with your own hands:
- from a conveyor belt,
- from truck tires,
- from driving V-belts.
Plastic or PVC tubes no larger than an inch in diameter, sawn along the axis, must be bolted across the conveyor belt.
Even a child can handle such a lightweight device.
Old truck tires with winter tread can also be used as tracks if you cut off the sidewalls. They don’t need crossbars, but you will have to sweep the edges with fishing line in centimeter increments, otherwise the tire will quickly become frayed.
Drive belts, just like the conveyor belt, must be equipped with lugs. Several parallel belts, 2 or more, are connected to each other by transverse strong lugs, attaching them to the belts with rivets or with screws. The distance between adjacent hooks should be equal to the pitch of the drive sprocket.
Tracks made from conveyor belts or belts are often reinforced with a chain , which increases the reliability and durability of the propulsion unit.
These snowmobiles combine lightness with a reliable drive.
One of the varieties of tracked snowmobiles is a motorized dog, which was named after its resemblance to a sled dog. At the expense of maneuverability, the design was lightened, and the traction force also increased. But this is the most effective towing mechanism in the snow.
To change direction, you need to make significant efforts to shift the center of gravity of the motorized dog.
The basic dimensions for assembling a two-seater snowmobile, indicated in the drawing, will help make the ride comfortable. Other sizes will depend on the availability of spare parts and assembly diagram.
When driving, discomfort from headwinds is alleviated by installing motorcycle glass and mudguards for the feet. But it is impossible to completely protect yourself from the cold wind on such transport. For comfort, you need a completely enclosed cabin, which means the weight will increase and a more powerful engine will be required.
A snowmobile with a car engine is designed for long trips over long distances. With heat-insulating body material, the ride is comparable to the comfort of a passenger car.
And the easiest way to achieve comfort is to simply place a rear-wheel drive vehicle on wide supports such as skis, tracks or pneumatic wheel tubes, and also drive the standard wheels to the snowmobile propulsors and attach the front ski to the steering bipod.
During manufacturing, it would be useful to provide a replaceable scheme for replacing wheels with skis and back, if you use spare parts for the conversion.
Cultivator attachment
The cultivator attachment on a petrol trimmer is used to loosen the soil in small areas, such as a flower bed, greenhouse or around bushes and trees. The tool can be:
- Toothed, it has cutters located on both sides of the drive shaft.
- Disc, when cutting discs are used instead of a cutter.
The difference in these two units is only in their design and names; the essence of the work they perform is the same - loosen the ground.
Important! Toothed models are lighter in weight, therefore, it is best to process light soils with them, unlike disc ones.
This attachment is powered by a motor using a special rod (sold separately). There are slots on the rod, there can be from 7 to 9 of them. That is, you need to know exactly which attachment to buy, since it may not fit from one model to another.
When the cutters and discs are fixed with splines, the cutting elements will move freely, and you can loosen the soil to a width of 20-25 centimeters.
Note! Long beds are more convenient to process than short ones. In the first case, you need to make fewer turns.
When choosing an attachment, you need to take into account the power of the trimmer. If the power of the device is no more than 1500 W, then you can only process already loosened soil. For example, you can only hill potatoes.
The disadvantages of the design include the fact that it will not be possible to deeply loosen the soil. Only the top layer can be processed, and only if it has been plowed recently. On hard soil, such a cultivator attachment will simply “jump”; it will not loosen the soil. And you won’t be able to press it more tightly to the ground either; the rod will spring and bend, which will lead to the trimmer breaking.
Attachments for trimmer cultivator
But still, sometimes it makes sense to purchase such an attachment. Considering its sometimes quite high price, many craftsmen decide to make a cultivator for a lawn mower themselves.
Running wheels
Compatible with additional attachments, including a blower. Designed for easy movement of the trimmer around the territory. The running wheels are especially convenient when using a roller or sweeping brush. The large diameter of the wheels ensures movement even on loose soil without slowing down the tool. The attachment reduces wear on the trimmer.
Bicycle with engine from trimmer
A homemade bicycle with a trimmer motor is a high-tech vehicle that differs from simple analogues in its high riding speed, practicality and reduced cost due to the use of cheap equipment.
To assemble a motorbike, the following equipment is required:
- the bike is in working order;
- trimmer motor;
- chain;
- tensioner;
- star;
- clamp;
- cable;
- fuse;
- controller;
- exhaust pipe;
- bushing, bolts, washers.
Converting a bicycle to a bike:
- 2 rubber spacers are attached to the rear wheel: the first - between the spokes, the second - behind them.
- The sprocket must fit the trimmer motor. It is inserted into the bushing, which is located on the outer part of the wheel. A crescent moon is attached to the inside.
- The engine is mounted on the trunk or behind the seat using a clamp purchased or made from a steel plate with your own hands.
- Install the chain on the sprocket and power unit and adjust it with a tensioner. It is not recommended to use belts instead of a chain. Under the influence of friction, they often become unusable and their service life is minimal.
- The throttle handle and the engine are connected by a cable.
- Attach the fuel tank and carburetor.
- The exhaust pipe is welded with a weld seam.
Some craftsmen create a braking system and replace standard wheel tires with non-slip ones. After assembling all the components, be sure to check the operation of the bicycle. The functionality of the mechanism and its own safety will depend on this.
Simple children's snowmobiles
The easiest way to make a support is to install wide skis under the frame. The option of creating a motor sleigh is especially attractive because it is assembled using a children's snow scooter and a tool with a low-power motor, such as a screwdriver, a hand-held lawn mower-trimmer, or a 2-horsepower chainsaw.
A children's snowmobile is assembled from a chainsaw without strengthening its frame, but to transport adults in winter clothes, it is worth adding strength to the structure.
Ice screw
An ice drill made from a trimmer is a low-power unit for winter fishing enthusiasts, characterized by its low weight and easy transportation. In order to save money on the purchase of new equipment and the effort required when manually drilling ice, fishermen make them from old trimmers. For this you need:
- petrol mower;
- factory or homemade drill;
- improvised materials.
It is difficult to make an ice screw at home. The parts to pay attention to are the screws and the blade base.
To create augers you need:
- Calculate the sizes of product segments.
- Prepare metal blanks, mark, cut out a sector, weld the segments together. The result is a steel spring welded on one side.
- Stretch the spring by a given step on a special machine in order to weld the segments on the other side.
- Grab the flange and weld it to the pipe.
- Boil the screw connections and paint.
- When choosing auger rotation, take into account the direction of rotation of the gas-powered tool.
Converting a trimmer into a gas auger is suitable for units with a folding boom. The connection adapter is the easiest to prepare.
If it is necessary to increase the rigidity and stability of the mechanism, a durable frame is made to mount the gearbox and motor.
Motorized drills are units for making holes for installing wooden piles, laying foundations, and drilling wells. The operating principle and manufacturing method are similar.
Cultivator
For motorized tillage, make a cultivator from a trimmer with your own hands. The motor power must be at least 2 liters. With. When using an electric trimmer, you need to stock up on an extension cord so that the production process occurs throughout the entire area.
The main part of a motor cultivator is the nozzle. The rods of garden forks 10-15 cm long are suitable for this purpose.
The production of the part proceeds as follows:
- First you need to flatten the teeth to a width of 1 cm;
- sharpen the cutting blades for the cutters on an emery wheel;
- cut a ring with a diameter of 10 cm from a metal sheet using a jigsaw;
- grind the workpiece;
- Weld 3 cutters to a steel circle at an equal distance from each other.
If there is a reverse thread, the nozzle is screwed on after welding the pipe with the nut.
Motohoe
And also, in addition to a homemade attachment for cultivation, which, when paired with a lawn mower, can easily replace a light walk-behind tractor; You can turn the trimmer into a motorized hoe for weeding.
- To make the nozzle, you will need a thick sheet of stainless steel from which a circle is cut.
- In the center of the circle we make a hole for connecting it to the trimmer, and it is also necessary to drill small holes (selected according to the diameter of the bolts that will be needed later) along the entire plane of the circle.
- We secure the bolts into the holes with nuts.
Such a simple “hedgehog” will help any gardener in the fight against weeds.
Assembly diagram
Assembly diagram
Description of the mini snowmobile assembly diagram:
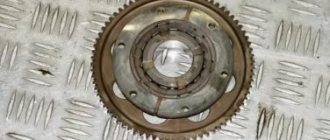
1 – steering wheel; 2 – fuel tank (from the Druzhba chainsaw; 3 – power unit (from the Ural chainsaw); 4 – steering ski stand bushing (pipe with a diameter of 30-2 pcs.); 5 – steering ski (2 pcs.); 6 – caterpillar drive gear (nylon, sheet s15, 2 pcs.); 7 – caterpillar (from the Buran snowmobile, shortened); 8 – frame; 9 – support roller (from potato sorting, 18 pcs.); 10 – strut backrest limiter (pipe ½); 11 – caterpillar tensioner (2 pcs.); 12 – caterpillar tension gear (nylon, sheet s15, 2 pcs.); 13 – bearing No. 80204 in the housing (4 pcs.); 14 – trunk box, bottom plywood s4, sides board s20); 15 – seat (cover-plywood s4, foam rubber, leatherette); 16 – 1st stage of chain transmission; 17 – 2nd stage of chain transmission; 18 – seat backrest limiter (½ inch pipe); 19 – driven sprocket of the 1st chain drive (large sprocket of the creeper, intermediate shaft); z=38; 20 – drive sprocket of the 2nd stage of the chain drive (small creeper sprocket), z10; 21 – driven sprocket of the 2nd degree of chain transmission (drive sprocket of the track drive shaft), z18; 22 – drive sprocket of the 1st stage of the chain drive (gearbox output shaft sprocket), z12; 23 – steering knuckle lever; 24 – steering rod (2 pcs.); 25 – steering shaft with bipod; 26 – front axle beam (pipe with a diameter of 30); 27 – caterpillar drive shaft; 28 – tension axis of the caterpillar.
If the homemade product is planned for children, then you can use ordinary skis as the front control, and if you plan to transport more than 60 kg, then use the tracks from the Buran all-terrain vehicle.
Rack
Stand
We recommend reading: Cup holder and organizer for a baby stroller - a universal, convenient option
Steering ski : 1 – runner (nylon, sheet s20, from a children's snow scooter); 2 – spring (normally stretched, from the rear shock absorber of the moped); 3 – spring support; 4 – undercut (duralumin corner 20x20); 5 – spring cover (angle 35x35); 6 – fastening the spring to the cover (M8 bolt with washer); 7 – support lever (pipe 30x30); 8 – spring for fastening the rack-fork to the ski lever (steel, sheet s2); 9 – spring for attaching the support lever to the ski (steel, sheet s2); 10 – axles (M8 bolt, 2 pcs.); 11 – steering knuckle stand (bicycle steering stand with crown and part of the fork); 12 – steering bipod (steel, sheet s4); 13 – fastening of the steering bipod (type M16); 14 – fastening the spring bearing and the lever spring to the ski (M5 bolt with a countersunk head, 7 pcs.); 15 – lever bushing (steel pipe with a diameter of 30 mm); 16 – plain bearing (nylon bushing, 2 pcs.); 17 – stand bushing (steel pipe with a diameter of 30 mm). In the top view, parts 11, 12, 13 of the steering knuckle are not shown.
For the rack, take several 3x3 cm corners and connect them to each other using metal fasteners. To create a platform, you need to attach a sheet of metal to the connected racks. This will be the place to install the gearbox and chain drive shaft.
Don't forget about the seat support. To do this, you need to take a steel module and weld it to the main frame. The module does not have to be large.
Using a beam, connect the front of the frame and the front axle. For these purposes, you can adapt a standard water pipe, which has a radius of at least 1.5 cm. It is clear that this should not be a metal-plastic pipe, but a metal one. Weld the steering wheel bushing at the end, and attach the stand in the middle. This stand will play the role of a subframe for the engine.
Be sure to attach small stiffening ribs in the form of gussets in the places where the racks are attached. This is necessary to strengthen the structure and provide it with a longer service life.
Caterpillar
Caterpillar
Description of caterpillar drawing:
Snowmobile frame with tracked block : 1 – rear part of the spar (steel sheet s2, with flanges, 2 pcs.); 2 – tension device (4 pcs.); 3 – rear portal (corner 30x30); 4 – middle part of the spar (angle 50x63, 2 pcs.); 5 – bracket-fork for installing the axis of the road wheels (steel sheet s2, 10 pcs.); 6 – middle portal (corner 30x30); 7 – platform for mounting the power unit gearbox and the intermediate speed reducer shaft (steel sheet s2); 8 – scarves (steel sheet s2, 4 pcs.); 9 – front portal (corner 30x30); 10 – front component of the spar (steel sheet s2 with flanges); 11 – axis of tension gears; 12 – caterpillar tension gear (2 pcs.); 13 – axis of road wheels (steel, circle 10, 5 pcs.); 14 – axle fastening (M10 nut and spring washer, 20 pcs.); 15 – spacer bushing (duralumin pipe); 16 – roller (18 pcs.); 17 – bearing unit (4 pcs.); 18 – caterpillar drive gear (2 pcs.); 19 – caterpillar drive shaft; 20 – drive sprocket of the drive shaft (driven sprocket of the 2nd degree of chain transmission), z=18; 21 – steering knuckle bushing (pipe with a diameter of 30 mm, 2 pcs.); 22 – front axle beam (pipe with a diameter of 30 mm); 23 – scarves, 4 pcs.; 24 – engine stand (pipe with a diameter of 30 mm); 25 – roller tire (rubber ring, 18 pcs.).
It is best to take a ready-made caterpillar from the Buran all-terrain vehicle, having first shortened it.
Drive shaft
Drive shaft
Track drive shaft (tension shaft is the same, only position 4, replaced by position 1) : 1 – left (along the way) tip (steel, cylinder 22); 2 – shaft (steel pipe 0.28x20; 3 – flange for fastening the gear to the shaft (steel sheet s4, 2 pcs.); 4 – right (along the way) shaft tip (steel, cylinder 29); 5 – track drive gear (2 pcs.); 6 – frame spar, 2 pcs.); 7 – bearing housing cover (steel, 2 pcs.); 8 – bearing 80204 (2 pcs.); 9 – bearing housing (steel, 2 pcs.); 10 – drive shaft sprocket; 11 – fastening the sprocket to the shaft (M12 nut with wide and spring washers); 12 – key (steel 20); 13 – seal (felt, 2 pcs.); 14 – fastening the bearing housing to the spar (M6 bolt, with 4 sets of screwdriver); 15 – fastening the bearing housing to the spar (M6 bolt with spring washer, 4 sets).
A pipe with a radius of 1.4 cm is used as a drive shaft. A flange with prepared holes for the teeth of the drive wheels is attached to it. At the end of the drive you need to weld trunnion tips.
Brush and roller
The nozzle is indispensable for quickly collecting debris on the lawn. It sweeps it away without damaging the surface. Thanks to the high rotation speed of the working tool, cleaning efficiency increases. The nozzle is suitable for removing fallen leaves from the lawn, and special bristles can sweep away even small twigs and small debris.
Tips for using a homemade snow blower
Before starting work, warm up the engine and use seasonal lubricant.
Also follow some guidelines.
- Operate the snow blower at full capacity.
- Avoid unnecessary and frequent pressing of the gas, as this can damage the engine.
- Do not drive over hard obstacles or try to break up the ice.
Once all work is completed, the snow blower is cleaned and stored in a dry place. This will prevent it from breaking.
How to make a snowmobile from a snowmobile with your own hands?
A snowmobile is simply a necessary form of transport in some areas of our country. But either for financial reasons or because of special requests, many people cannot buy a suitable ready-made model. Therefore, it is very important to know how to make a snowmobile yourself according to all the rules on the basis of other equipment you have for personal use, including from a snow scooter.
Recommendations for use
First of all, you need to take care of safety. All structural elements must be securely connected by welding or fasteners.
It is advisable to inspect the device after each trip. Periodically, you need to carry out independent maintenance, taking into account the following recommendations:
- Treating the bumper and suspension with silicone spray.
- Checking the integrity of all elements.
- Shaking off snow after a trip.
- Storage in a garage, shed or other utility room under a thick cover.
- Before storing for the warm season, the technical product must be washed with a regular cleaning agent, covering the engine with film.
Tools and materials
The variety of materials and components for creating a snowmobile is small. Many people use waste materials. However, the most demanding riders will prefer products where the main components are manufactured at the factory. The segment of “stick insects”, which are collected using plywood and water pipes, is also somewhat popular.
Lightening snowmobiles is achieved through the use of large drive sprockets.
It is often recommended to use:
tracks 5 cm long;
frame pipe with a diameter of 25 mm;
aluminum, plywood, plastic or fiberglass for sheathing;
shafts made of high-quality steel (no worse than grade 45).
The suspension and other parts are chosen taking into account the capabilities of the engine. The total mass of the product must also correspond to it. Of the main components it is worth mentioning:
Since the main parts of snowmobiles are made of metal, you will have to use a welding machine and electrodes. You will also need an angle grinder, files, and a pipe bender. Detachable connections are made using screwdrivers and wrenches. It is also necessary to provide a tool for working with hinges. Other devices are used much less frequently.