Tired of the wave on your board? We will tell you how to properly set the teeth of a band saw. Part 2.
Any timber merchant planning to purchase a sawmill naturally hopes to make a profit. But you need to remember that for stable operation of a sawmill it is necessary to prepare saws with high quality. Moreover, this will have to be done almost daily. In previous articles, we talked about setting up the sawing process, about a new method of sharpening band saws, and also started talking about one of the most difficult processes when preparing saws for work - the process of setting the teeth. In this post we will talk more about this process.
Band saw design
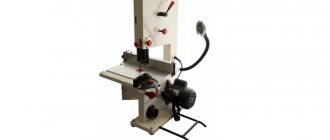
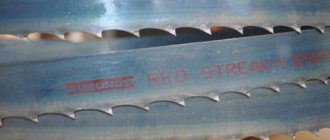
The band saw belongs to the category of cutting tools and is an integral part of specialized wood processing equipment. It is a closed belt with teeth on the outer edge.
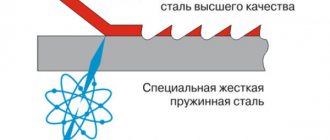
For production, special grades of steel are used - 9ХФ, Б2Ф or С75. During the production process, teeth are treated with high-frequency currents. This increases their hardness. It is this fact that affects the spread of cutting edges and maintainability. Often several types of steel are used in manufacturing. The main belt is made of spring, and the cutting part is made of steel with a high content of tungsten or cobalt.
Features of using band saws for wood:
- wood requirements. The harder it is, the faster the blade will become dull;
- installation conditions. The tension indicator must be observed. If it is less than required, sagging will occur. With strong tension, the likelihood of fabric breakage will increase;
- periodic sharpening. This will require a special machine.
Completing the last point will increase the service life of the strip structure. However, sharpening it yourself is problematic - you need to choose the right layout and maintain the angle of the blades.
When buying a used saw, you need to pay attention to the presence of repair welds on the blade. They indicate frequent tool breakdowns.
II. Manual improved method of setting teeth (press type)
To avoid a “swing” effect when setting, it is necessary to fix the body of the band saw before pressing the pusher on the tooth so that it is not able to move. This can only be done by firmly clamping the body with a plate under the tooth being set. This can be done most simply by separating the functions of clamping the saw body and pressing the pusher on the tooth. These machines are for sale. However, it is very inconvenient to separate with two movements in turn, although in principle it is possible. But the main thing is that, although the manufacturers have solved the “swing” problem, the machine itself is made very poorly, and also without some basic components, which still does not allow the band saw to be adjusted well with such adjustable arms. The machine, which with one click sequentially first rigidly clamps the saw body with a plate, and then presses the pusher on the tooth, is made very well and with all the necessary components, only IRN could make it. We were one of the first, about ten years ago, to purchase such an adjustable device from them. It is still used to set saws, and we are very pleased with it. When we started selling our sharpening machines with a profile disk three years ago, we recommended an IRN adjusting machine to go along with it. But in the last year and a half, problems have begun to arise with these divorced ones. The price for them has doubled - from 12 thousand to 25 thousand rubles, and most importantly, the quality of workmanship has deteriorated. At least, many of those who took this adjustable tool as part of our sharpening machine first had to bring it to us for modification, after which they no longer had problems with adjusting their band saws. To ensure that users no longer have such problems, we have developed and are now beginning to mass-produce an adjustable machine under the symbol PC30/60.
III. Setting two teeth at once
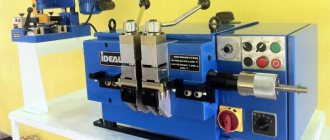
Machines that set two teeth at once are manufactured in the following types: • together with a sharpening machine; • separately only the adjustable machine, powered by an engine; • separately only an adjustable machine with manual feed in the form of a wheel (photo 1) or lever. Photo 1. Adjustable machine with manual feed in the form of a wheel
Machines for this option are most strongly advertised by sellers, because they supposedly should make the work of the sharpener easier by setting two teeth at once on both sides of the band saw. This is a very good advertising “noodle” for the ears of those who have never set up band saws themselves. Those who have at least once prepared a saw for work know very well that each tooth on the saw is set individually. The tooth is always retracted by the pusher by an amount greater than the required setback. When the pusher is pulled back, the tooth always springs back a certain amount. Moreover, even for one saw, the springing back of each specific tooth can fluctuate between 5 and 25 indicator units. Therefore, the sharpener almost always has to make two or three presses, often to different indicator values each (that is, with different force), to obtain the required setting value. There are also teeth that spring worse than others and even with one or two clicks before the indicator reads, as on well-spring teeth, they remain at values greater than the required set, and they have to be specially bent back. Now it should be clear to you that it is simply impossible to separate two teeth well at once with one click. But the machines sell well, and some are even happy with the results. When setting the saw on such a machine, you should always know: you will never get a guaranteed good setting of the band saw. Divorce will always be unpredictable. With small feeds of the carriage, a random batch of saws with more or less equally spring-backed teeth, sometimes it is possible to saw normally with a new clean mechanism. But problems inevitably arise later. But they begin to look for the cause of these problems anywhere, but not in the divorce, believing that it is very good. Manufacturers don’t even put indicators on almost all of these adjustable ones. Explaining this by saying that you install everything once, and then just move it apart: the hammers always hit the same way and there is no need to check. And you check and see for yourself how big the spread in the meaning of divorce actually is. In addition, the accuracy of the resulting alignment in these machines is strongly influenced by the same reasons as in classical ones: dirt getting into the mechanism, risks on the pusher stop and support plates. The height of the part of the tooth being set has a particularly strong effect.
Teeth and sharpening angles
Band saws have different tooth geometries due to the different types and properties of the material being processed.
If we consider wood, then the teeth are divided into:
- - carpentry;
- - divisive;
- - for sawing logs.
As for sharpening angles, the manufacturer determines this parameter. Basically, it is accepted that the harder the material, the smaller the rake angle.
For metal band saws, the teeth are usually shaped either standard or with a positive rake angle. Let me clarify this point a little: the standard tooth shape is used for sawing thin-walled material, and the shape with a positive rake angle, as you might guess, is used for cutting thick-walled material.
I suggest looking at a small picture that can explain what profiles a tooth may have and where they, these same profiles, are applicable.
In addition, the pitch of the teeth is important. So, for example, for a thin-walled material you should use a tool with a small number of teeth, and for thick-walled material, on the contrary, with a large number of teeth per inch.
Now let's take a look at the picture, in which we can clearly see how saws with variable tooth pitch differ from saws with a constant tooth pitch.
Often, saws are made with variable pitch in order to eliminate the resonance effect.
Next, I propose to find out what types of band saw layouts there are.
IV. Auto
The only truly automatic adjusting machine is made by Wood-Mizer. Each tooth is set on one side of the saw using a pneumatic pusher with several force-adjustable blows with constant monitoring of the actually obtained set by an electronic micrometer. The next tooth for setting by the pusher will be automatically fed only after the indicator shows the set value. After finishing one side, the machine stops. Then the saw is removed from the machine, turned out, reinstalled on the machine, and the saw is set on the other side. The machine would be very good if not for its price. Today it is approximately 350 thousand rubles, which is unjustified even for service centers, not to mention a simple sawmill. And although representatives of the Wood-Mizer company claim that they sell these adjustable machines, I personally have never seen them in use and have only seen them at exhibitions.
Band saw design
Band saws are a special continuous design, which is characterized by the presence of cutting elements on one side. This is a cutting element with which woodwork is performed. The most common uses of band saws are in a variety of band saw blades. With their help, cutting of various parts is carried out. With the help of these blades, a fairly high quality of cut is ensured. All this is ensured only if the saw has a good alignment. The tool also needs to be serviced promptly.
Band saws are made from heavy-duty metal, which ensures not only high quality cuts, but also long service life of the saw. The teeth have a universal angle, which allows for the highest quality cutting of material.
Recommendations for preparing the adjustable machine for work
Indicator
• Before sharpening, it is necessary to remove any burrs formed after sharpening with a wooden block, otherwise the indicator will give incorrect readings. • If your indicator measures in inches, it is better to immediately replace it with an indicator that measures in millimeters, since one division of the indicator in inches corresponds to approximately two and a half divisions of the indicator in millimeters. Thus, when a sharpener makes a tolerance of two divisions in inches, this corresponds to five divisions in millimeters, which is a lot, and conversely, a tolerance of two divisions in millimeters corresponds to only half a division in inches. The layout, when the indicator is calibrated in millimeters, becomes more accurate. The saw cuts evenly, without jerking. • The indicator head should move smoothly, without jamming or getting stuck. • In order for the tip of the tooth to necessarily rest against the plane of the end of the indicator, it must have a diameter of 7 - 10 mm. • Every day or at least once a week, you must check the zero of the indicator. To do this, take a glass (it’s easier to make) or metal plate with a thickness of at least 2 mm, a length of 100 - 150 mm (so that it rests on the support points) and a width of 40 - 50 mm. The plate is placed in place of the saw, fixed with spring-loaded stops or a stop plate, which should press the saw body against the stationary plate, and zero is set. Since the glass is almost perfectly flat, the zero is set very accurately, the main thing here is not to overpress, otherwise the glass will simply break. Rice. 1. Types of pusher end
Many people try to do this on the body of a band saw. But the body is very thin and easily bends by 0.1 - 0.2 mm, which is practically invisible to the eye, and the indicator error when setting the zero up or down in this way can reach 10 or more divisions, which is unacceptable, especially if there is a real divorce beyond acceptable limits. With a real small gap (less than 0.45 mm), the saw will begin to clamp in the cut, it loses stability with the formation of a wave. If the real set is too large (more than 0.75 mm), the teeth will engage too deeply in the wood, and with a sharp change in the density on the knots, the saw will begin to ripple faster, since even with a slight dullness it will be pulled to the side. • The vertical angle of the indicator is adjusted using the same plate. After clamping the plate with stops, the end of the indicator should fit tightly and without gaps to the plate (Fig. 1).
Fixed and movable plates
• The planes of the plates must be rectangular, without bends, wear and dirt. The end of the fixed plate, to which the tooth is pressed, must be straight, without wear. • Before each wiring, the plate must be cleaned, otherwise the dirt stuck to it will definitely disrupt the wiring and make it uneven.
Anchor points
• As work progresses, the support points wear out and develop indentations into which the back of the band saw can occasionally get caught, causing the teeth to move apart at different heights. The saw will cut jerkily. Worn supports must be replaced.
Spring-loaded stops • Make sure that when pressing on the tooth for setting, the body of the band saw is not pressed away from the stationary plate, that is, the springs of the stops have enough strength to hold it. If the body still moves away, try tightening the spring with special screws. • It is also necessary to monitor the wear of the ends of these stops. They should press the body with the entire plane. If you miss this, you will get a swing.
Try to force the sharpener to allow no more than two or three divisions when cutting. Then the saw will cut for a long time and with high quality. But, as practice shows, a tolerance of five to ten divisions is usually made.
In this case, even the best bandsaw can start to worry after the first log.
Inexpensive indicators are sold separately to check wiring. If you want your sharpener to be more responsible about wiring, buy this device and use it at least sometimes.
It is very important to set the initial position of the saw in the adjustable device (Fig. 2). Many people place the lower level along the cavity of the tooth. It is not right. The tooth is set in an arc from the root. This is a very large lever, so even with a slight dullness, and on knots, most likely, the saw will immediately become agitated. The lower limit must be set depending on the type of saw, taking into account that the lower it is, the more stable the saw will be in the cut. But you must always remember: the stronger the hardened tooth is fixed in the body of the saw, the greater the distance should be. Otherwise, during a divorce, you will simply break teeth. • Constant hardness - 3 mm. • Flex back - Hard Edge, Hard Back with weak tooth fixation - 3.5 mm. • Flex back - Hard Edge, Hard Back with medium and strong tooth fixation - 4 mm. But even with the correct height setting, with the supporting plane of the stationary plate crumpled, you will still get the radius (Fig. 2a) and the corresponding cutting quality. It is necessary that the planes of the fixed plate be smooth, then the end of the tooth will bend along a broken line and thereby acquire maximum resistance to loads (Fig. 2b).
Tooth pusher
The pusher stop should be approximately 2 mm below the top of the tooth, then the setting will be carried out normally.
Attention. The teeth should be moved apart not with one strong pressure, but with two or three not very strong ones. Then you will always space the teeth correctly and won’t break a single one.
If you have bent a hardened tooth, bending it back, you need to grab it, so that it does not break, not by the cutting edge, but a little lower, by the back.
Even a good sharpener, for the reasons described above, never knows whether he has positioned the band saw correctly. It is necessary that the sharpener, after the set has been carried out in one direction, quickly looks again at the set of 7 - 15 teeth. If the divorce corresponds to the values that it should be, then everything is in order and you can move on. If he sees other numbers, he urgently needs to put the machine in order, otherwise a vicious circle will result. The saw cuts poorly, ripples, experiences strong stress, quickly returns to the sharpener, and the volume of work increases. Instead of three to five band saws a day, he needs to do 10 - 15. The saws cut little and break quickly. As a result, because of one incorrect operation, everyone is at a loss: the owner loses money on saws, the sharpener cannot cope with the volume of work, the framer cannot work normally.
Now you know how to properly prepare a band saw for work. It is important to remember that the sawmill is purchased for profit. Therefore, for any sawmill it is necessary to prepare saws with high quality every day. Sawing lumber with band saws can really give you a very good income if done correctly. The following articles will be devoted to the settings of the sawmill itself and how to instill in your workers the skill of producing only high-quality lumber with maximum output.
Band saw routing
Before forming the cutting edge, the teeth must be set correctly. During the entire period of operation, due to constant loads, their location may change. Therefore, the geometry is adjusted first, and then sharpening occurs.
The setting is a bend of the teeth relative to the plane of the main blade. This procedure is performed only on a special machine. In case of large discrepancies along the entire length of the belt, premature damage or breakage of the web may occur. Therefore, before this you should decide on the type of wiring.
The angle of inclination must correspond to the original one. The type of wiring is also taken into account, which can be as follows:
- classical. Alternate bending of the teeth relative to the blade to the right and left sides;
- cleaning The first and second teeth deviate to the right and left, but the third remains unchanged. This technique is used for saws that are intended for processing hard rocks;
- wavy. The setting angle for each tooth is individual. As a result, they form a cutting edge that resembles a wave. The most complex type of wiring.
During bending, not the entire tooth is subject to deformation, but only part of it. Often the deviation occurs by 2/3 of the total height.
The average divorce value is limited to values from 0.3 to 0.7 mm. This applies to standard wood band saw models.
