Advantages of an LED night light
A decorative LED lamp Moon
Night light from LEDs is quite simple to make. The scheme does not cause difficulties even for inexperienced people. The advantages of an LED light source include:
- low power consumption;
- long service life;
- availability;
- variety of application schemes;
- quality of light;
- good lighting;
- no heating;
- safety.
A homemade night light made from LEDs can be used for illumination, allowing you to navigate in the dark. The device can be installed in any convenient place.
What is acrylic
This is an artificial material that looks like ordinary glass, but is not so heavy and fragile. If dropped, the plexiglass sheet will not break into sharp fragments. Widely used in design, including the design of ceilings (usually luminous).
The advantages of the material include:
- resistance to water (can be used in damp areas);
- ease of care (just wash with household cleaning products);
- reliability and impact resistance;
- long service life (tens of years);
- ease of processing (acrylic is sawed, cut, drilled);
- the ability to quickly access the ceiling space after repair;
- environmental friendliness (does not emit harmful substances);
- variety of design;
- UV resistance (colored plexiglass does not fade in the sun).
But such a ceiling also has disadvantages:
- the material melts at low temperatures, so you need to carefully select lighting;
- like any suspended structure, it takes away the height of the room;
- It's not cheap.
Plexiglas is used for light ceilings and inserts of unusual design. The material is combined with luxury finishes (wood, stone, etc.). Suitable for niches that need easy access.
Types of lamps
Autonomous LED lamps
All LED night lamps can be divided into two groups according to the method of power supply. These include:
- Autonomous. Powered by battery or battery.
- Stationary. Plugs into an outlet.
Autonomous products can be moved and placed in any convenient place. The disadvantages include the expense of batteries, which need to be changed periodically. A model that receives electricity from an outlet can only be installed near a power point. There is no need to buy consumables for such a lamp.
Night lights with motion sensor
Wooden lamp
Devices can be equipped with various sensors that make their use easier. They do not need to be turned on; they activate independently. It is not recommended to place such night lights in the room, as they can detect any arbitrary movement and turn on. They are usually installed in closets, garages, and hallways. The sensitivity of the sensor can be adjusted to avoid false alarms on pets. The range of action is 3-5 meters.
Night light made of wood
This type of night light is completely safe. The wood is processed in such a way that there is no release of harmful substances when heated. Wooden LED night lights are even installed in children's rooms, as they are durable, environmentally friendly and difficult to break.
Built-in models can be placed in interior items or furniture. Used for decoration. The disadvantages include the fact that over time, the backlight in one place can become boring, and it is difficult to remove the built-in light source.
Necessary materials
LED matrix
To create a night light, you need to purchase LEDs or a matrix of diodes. The quantity is selected depending on personal preference. It is better to buy bright multi-colored LEDs. The current strength of each component should not exceed 20 mA.
You will also need to buy resistors. To create a circuit with a series connection, you need 1 current-limiting resistor. If the circuit is in series, all diodes must be of the same value. When wiring a parallel connection, each LED is assigned its own resistor.
You will also need a semiconductor diode and a plug to connect to the network. The case can be an old disk, a bottle, or other objects made of different materials. You can assemble the case yourself.
The tools required are a plastic plate, screwdrivers, a knife, heat-shrinkable tubing, a soldering iron, and pliers.
The simplest scheme
Night light circuit
When creating a LED night light with your own hands, you will need a powerful 1 W white LED. The circuit is transformerless, stable and does not overheat. To ensure normal operation, you need to select a 250-630 capacitor with a capacity of 1 µF. The LED is soldered through a current-limiting resistor. A diode bridge is assembled from 4 rectifier diodes. The recommended current for each component is 1 A, the reverse voltage is at least 1000 V. An example of such diodes is 1N4007.
The entire circuit is attached to the housing using hot-melt adhesive.
Assembly algorithm
LED night light - fan
First of all, you need to solder a circuit of LEDs, resistors and other components. After soldering, the contact points must be insulated using heat shrink.
Next, the body of the future lamp is assembled. There should be a diagram inside. The body can be made from any available materials. For example, transparent plastic elements from CD boxes are suitable. They are glued together with strong glue, and a disk is placed on the bottom so that the light is reflected from it. The entire structure must be degreased with alcohol. If desired, you can glue the legs to the assembled lamp.
A lamp on a fan is perfect for the bedroom. You need to buy a large fan and attach a soldered circuit to it.
Near the bed you can place an LED night light, made with your own hands in the form of a rug. To make it, you don’t even need to solder - just buy a matrix of LEDs and weave it into the carpet.
Night light starry sky"
Night light “Starry Sky”
This night light imitates the night sky with constellations. To make it you will need a glass jar with a lid, foil, an awl, scissors, an LED flashlight and a tray.
On the foil you need to draw a sky with stars in any order that the master wants. Place the sheet on a flat surface and use an awl to make holes for the stars. The foil is cut to fit the height of the jar. The paper is rolled into a tube and placed in a jar. A flashlight is placed at the bottom of the can. When you turn it on, you can see the glow from the night light on the walls and ceiling.
In the same way, you can make a night light with your own hands from LEDs and a tin can. It needs to be painted, all stickers removed and holes made. A candle, lantern or garland is placed inside.
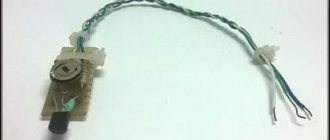
Night light in the shape of the Moon
You will need an LED strip and 2 transistors. They will regulate the device and turn the board on/off.
To make a night light from plywood with moon-shaped LEDs, you will need a sheet of plywood that is cut into a circle. You need to glue a printed image of the Moon on top. Then you need to drill 2 holes for fastening and pulling wires. The base of the lamp is glued to the plywood. After drying, the LED strip is glued around the perimeter.
1
2
3
4
5
6
Night light from an electric plug or fumigator
A night light made from an LED strip and a power supply.
You will need LEDs, 2 resistors, 2 capacitors, a zener diode, and a heat-shrinkable tube.
The grounding pins are removed from the plug. You also need to remove the clamp and grind off the rim on the LED using a file.
A night light is made from fumigator in a similar way. It must be disassembled, the heating element removed and the LED placed in the free space. The voltage passes through the capacitor. A rectifier bridge is installed at the output, which smoothes out ripples and equalizes the voltage.
You can put a lampshade on the fork, which you can make yourself or purchase in a store.
Do-it-yourself plexiglass illumination with LEDs – Metals, equipment, instructions
Engineering thought that solves exclusively pragmatic problems sometimes leads to unique results in the aesthetics of our everyday life. One such solution is acrylic edge lighting. Initially, this technology was used to create optical fiber, then in the advertising field, and now it is actively used in home interiors.
New technologies in home interiors
The basis of the edge lighting method is the property of light rays to be refracted, or the effect of total internal reflection. The flow of light, entering the end part of the plexiglass, is scattered and illuminates its front surface. Photos of light panels in the interior of a house clearly demonstrate what acrylic end lighting looks like.
Lighting for home comfort
Why is acrylic edge lighting convenient, and why is this technology used in interior solutions? Firstly, it is beautiful, as it creates a diffused stream of light that is pleasing to the eye. Secondly, it is practical.
The use of solutions with this technology allows you to arrange lighting with minimal energy consumption.
And thirdly, often only the edge lighting method allows one to achieve the desired decorative and practical effect.
Illumination of acrylic panels is used in home interiors in the following cases:
- for illuminating ceiling panels;
- to create a false window with backlight;
- for illuminating kitchen apron panels;
- for illuminating organic glass shelves;
- for illuminating staircase handrails made of acrylic;
- for creating framelights as decoration elements.
Framelight is a light panel where you can insert posters with images. Posters can depict a painting in any style, landscape or photograph.
Its beauty is that the printed image can be replaced, and this is quite easy to do.
If such a light panel is placed in a dimly lit area of an apartment or house, then, in addition to its aesthetic value, it also carries a very practical load, creating additional lighting.
Let's consider one of the options for an interior solution: acrylic end lighting when creating a false window. Sometimes in rooms without windows or where there are not enough of them, designers practice creating false windows.
If previously photo wallpapers were used for these purposes, now ready-made light boxes - framelights - can be used as an imitation. They are supplied fully equipped, all that remains is to supply a poster with a suitable image.
This can be an imitation of the view from a window with a drawn window profile or a landscape you like. For complete realism, the framelight can be supplemented with an overhead imitation of window sashes.
The ability to replace the poster without much difficulty allows you to change the “outside” picture from time to time. For example, change the view of a summer street to an autumn landscape. This is achieved by the fact that framelights are equipped with a click profile.
It allows you to snap off the top panel of the profile and easily remove the protective module. There is another option: acrylic edge lighting, Magnetic profile.
The peculiarity of this profile is that the upper part is attached to the lower part using a system of magnets.
Materials for self-assembly of the light panel
DIY acrylic edge lighting can be a fun project if you like to DIY at home. To install the light panel you will need:
- acrylic canvas;
- aluminum profile;
- LED line or strip;
- compact power supply (adapter) for 12V.
LED strip is a flexible printed circuit board on which LEDs are fixed on one side and an adhesive layer is applied on the other for attachment to an aluminum profile.
If you intend to install an imitation window in a bathroom or other rooms with high humidity, then you should buy a special moisture-resistant tape. If you are using a false window as a light source, you must purchase a heavy-duty LED strip.
You can calculate the power of the adapter using the formula: the power of the block is equal to the power of the LED strip multiplied by its length in meters.
Choose a one-sided profile for the light panel. Pay attention to the following characteristics: profile thickness and lighting system.
Profiles can be designed for fluorescent lighting or for mounting LED strips. Since the thickness of the panel is important for a false window, LED lighting is considered.
For edge lighting, the most important thing is the type and characteristics of the material, so we will consider its choice separately.
Acrylic for edge lighting: description and application
The panel should be illuminated evenly. This requires a certain acrylic for edge lighting, the processing of which was carried out according to all the rules.
A uniform bright glow is provided by colorless diffuse particles that appear in acrylic sheets during special preparation of the sheet.
At home, it is impossible to achieve such a degree of uniformity and intensity of glow, so it is necessary to purchase plexiglass of the required thickness and suitable in other respects. The thickness is selected based on the size of the light panel.
| Panel widthLighting on one side | Panel widthIlluminated on two to four sides | Sheet thickness, mm |
| up to 150 mm | up to 300 mm | 4 |
| 150—300 mm | 300—600 mm | 4,6,8,10 |
| 300—600 mm | 600—1200 mm | 4,6,8,10 |
| 600—1200 mm | 1200—2000 mm | 8,10 |
As can be seen from the table, for a light panel imitating a window, an acrylic sheet with a thickness of at least 8 mm is suitable. You will find on the manufacturers’ websites not only the acrylic itself for edge lighting. The description and application of each type are given in detail, so it will not be difficult for you to navigate the thickness of the sheet and its parameters.
Separately, it should be clarified that the ends that will be illuminated must be well polished. The same sides where the LED strip will not be installed should be covered with reflective tape.
If the acrylic sheet was cut using laser cutting, then additional polishing is not needed. Another important note is that any damage to the acrylic will lead to a redistribution of the light flux, which is why the sheets are covered with a protective film.
It only needs to be removed immediately before installation in the profile.
Assembling the profile and connecting the backlight
Purchased whips (pieces of aluminum profile) are cut to the required sizes at an angle of 45º. After this, they are connected to each other using corners. When the three sides are assembled, you need to install an LED strip around the perimeter of the inner one.
First, wires are connected to the tape with which it will be connected to the power supply. There is an important point here: one 12V power supply is designed for no more than five meters of tape.
If there is more, you need to connect two power supplies. Each tape is connected separately; there is no need to connect them together.
There is another option - take a 24V adapter, then acrylic edge lighting is possible by connecting two LED strips in series.
Light panel installation
After the three sides of the profile have been assembled and the LED strip has been installed, you can proceed to the direct installation of the light panel. To do this, add the following to your profile:
- A reflector is a sheet that will reflect light.
- Cast acrylic sheet.
- Film with a printed image.
- Protective sheet.
The installation procedure is clearly visible in the figure. The acrylic sheet must be installed so that it is located above the LED strip, because it is the main light-diffusing element. After installing all the components, the last side of the profile is fixed.
The role of a reflector can be performed by a special reflective sheet. It can be purchased together with light-diffusing acrylic. Companies that sell plexiglass (acrylic) for edge lighting will offer both a reflector and a protective coating. But any reflective fabric can act as a reflector.
For the protective fabric, you can use thin transparent acrylic or dense light-transmitting film. There are certain requirements for the poster. It must be printed on a special film with backlite coating.
To make the structure rigid, you can insert a backdrop into the profile, but you just need to remember to take this into account when purchasing the profile - its thickness should be sufficient for all layers of the panel.
The final stage
When assembling an aluminum profile, it is necessary to screw fasteners (hangers), at least 4 pieces, to its upper part. Once the lightbar is fully assembled, it's time to install it on the wall. To do this, hooks are attached to the wall using dowels. After this, all that remains is to hang the false window and power the power supply.
Thus, using technological innovations, you can independently create an ultra-modern design. Acrylic edge lighting is a bright representative of such technologies; with its help you can create many interesting interior solutions.
How to choose a purchased night light
Night lamp for a child's room
If it is not possible to make a lamp for your home yourself, you can buy it in a store. The range of products offered is wide, but you need to be able to understand the characteristics.
You should not take too cheap models. They are made from low-quality materials and may be unsafe. Also, you should not take too bright devices with neon colors. They are usually made from harmful materials.
For a children's room, a lamp in the form of a toy, sun, star, fairy-tale character or other original shape is suitable. It is better to take a device made of high-quality plastic and wood. A durable night light made of plexiglass and LEDs is also suitable.
You need to decide in advance where the lamp will be placed. It should fit into the interior and complement it. It is desirable that its design be similar to the style of the rest of the lighting fixtures in the room.
In terms of color, it is better to take a white night light. It will not tire your eyes, and it will fit well into any interior. It can be installed both in the nursery and in the bathroom.
Acrylic ceilings in the interior
Plexiglass is used in different ways, alone or in combination with other materials. They create “light windows” in a niche made of plasterboard or make ceilings only from acrylic. They can be plain or with combinations of shades. Profiles are selected to match the color or contrast, this gives a different effect.
A plexiglass ceiling with lighting is appropriate in any room. It will add volume to a small kitchen or bathroom. A living room decorated with stained glass looks more luxurious. Uniform and fairly intense lighting in the bedroom or hallway allows you to apply makeup or check if everything is in order with your clothes.
A plexiglass ceiling with built-in lighting is a beautiful and practical solution for any room. The variety of designs allows you to fit the finish into interiors of different styles. And the properties of acrylic ensure durability.