Advantages of a built-in tank
- Hygiene.
The toilet tank is the main dust collector in the bathroom. When using a built-in model, behind the wall are exactly those parts on which dust most often accumulates: a hidden tank, sewer outlet, connections, etc. - Silence.
The hidden tank, located behind the false wall, fills almost silently. - Ergonomics and design.
With the help of installation systems, the built-in cistern of a traditional toilet can be installed anywhere in the bathroom, even in a corner. And a room with a hidden tank looks stylish and more spacious. - Reliability.
Through the hole that the flush button closes, you can pull out the flush system, repair it and put it back in place. The built-in tank is protected from overflow by a special outlet through which the water goes directly into the sewer.
Photo
Round toilet
Black toilet
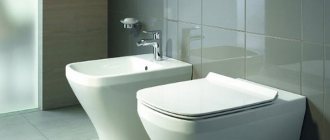
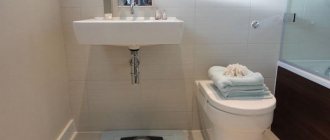
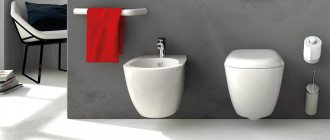
Wall-hung toilet with installation
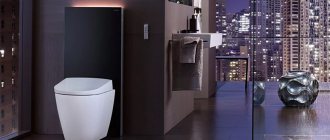
Attached toilet with built-in hidden cistern
When is a built-in tank needed?
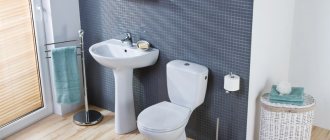
Attached toilet (floor-mounted, wall-mounted).
There are two types of such toilets: a monoblock, that is, a solid product consisting of a bowl and a flush tank (in this case, the tank is “built-in” into the design of the toilet itself, and is not discussed in this article), and a “traditional” set: a bowl toilet + flush cistern. Often these two devices are sold as a set from the same manufacturer, and this is where a hidden tank is provided. Another option is that you buy the bowl of the attached toilet separately, and from the options “traditional tank (usually hanging from the top)” or “hidden tank”, choose the latter option.
Wall-hung toilet.
Always installed using installation systems, the tank is always built-in.
There are four common flush systems (keys) for built-in cisterns. • Easy flush.
An ordinary button, when pressed, the entire volume of water pours out.
• Dual-mode model.
When you press one button, one amount of water is released, the second - another;
exactly what volume of water can be adjusted. The maximum volume of water is equal to the full capacity of the tank or slightly less (to allow additional flushing if necessary). • Flush-stop system.
Ordinary rocker button.
The volume of drained water is determined arbitrarily by the user. • “Advanced” options.
Touch flush buttons, panels with an infrared sensor, triggered when a hand approaches.
In the photo: Twinline flush plate from Geberit.
Installation of a suspended model
In any case, such installation work should be performed by professionals, but it won’t hurt you to know how this happens:
- First, they think about the location of the toilet, tank and installation system. Determine the optimal height for all family members. Most often, the height of the device relative to the floor level is 40 cm.
- Install the installation system following the manufacturer's detailed instructions. This type of work depends on the type of system - floor or suspended (built-in).
- Then the toilet is attached to special pins located on the frame.
- A plastic water tank is connected using clamps, which can also be found on the frame.
- The installation is most often sheathed with plasterboard and lined in accordance with the finishing raw materials that are used to renovate the bathroom.
Important! In this difficult task, the most important thing is to correctly select all the components, which must fit perfectly together in order to ensure a simple sewer or water supply connection.
Built-in cistern for wall-hung toilet
How is it installed?
Depending on the installation system, which, in turn, depends on which wall the toilet will be placed against.
- Frame installation system (all load is transferred to the floor).
It is used if instead of a wall there is a light partition that cannot withstand the heavy structure of a toilet + hidden cistern. The window for the flush key is located on the top of the cistern. Here are the fastenings for the panel or a special mounting box. Since the thickness of the finish is different, the panels can be “planted” at different depths, the fasteners can be adjusted to size, and the frame can be cut so that it does not protrude outward. - Block installation system.
It is used if the plumbing system is installed near a main wall. The built-in tank is attached to the wall using “wet” installation and covered with a false panel. For a stronger connection with the solution, use a mounting mesh.
How to install a toilet with a hidden cistern with your own hands
List of required tools
- Hammer and drills (drills) for concrete;
- Marking and measuring tools: level, tape measure, plumb line, marker;
- Open-end wrenches of different sizes.
Installation of wall-hung toilets with block installation
First you need to make markings. Using a tape measure and level, we measure the height of the structure and find points for fastening. Using a hammer drill, we make holes and secure the dowels. We install the hidden tank, twist the drain hole (since this procedure can be carried out differently by different manufacturers, be sure to pay attention to the instructions). Be sure to check that all gaskets are present. After this, the hidden tank can be connected via water.
In the holes already made we attach pins that will hold the toilet (usually these are already included with it). We install the bowl, and at the end we fix the drain hose with clamps if necessary.
How to install a toilet with a hidden cistern with frame installation
This procedure is somewhat more complicated. First you need to assemble the entire frame on which the hidden tank is attached. In this case, pre-adjust the dimensions of the frame.
The installation of a hidden toilet cistern must adhere to the following principles:
- The drain button should be located a meter from the floor;
- The height of the toilet bowl should be 40-45 cm;
- The sewer outlet should be at a level of 22-25 cm;
- The distance between the bowl mounts is determined by the location of its lugs.
The assembled structure is installed strictly vertically and horizontally. First, do not forget to check the slope of the wall using a plumb line; if there is one, you should definitely take it into account.
We attach the installation frame to the wall and mark the points where it is necessary to drill holes for fasteners. We install the frame, preferably attaching it to both the wall and the floor. Don't forget to check the correct installation using a level.
We supply water. This can be done either from the side or from above. Modern installation models allow you to choose the connection location. Please note that it is not advisable to use a standard flexible hose, since it is unreliable, and to replace it you will have to disassemble the entire structure. Plastic pipes are used for water supply.
The hidden tank itself must be lined with insulating material (usually this is already included in the kit) to prevent the formation of condensation.
Next, we connect the toilet outlet to the sewer; a corrugated pipe is useful for this. Don't forget to check the tightness of the connections.
Afterwards, you can begin assembling the decorative plasterboard structure. You must first close all the holes with special plugs to prevent construction debris from getting into them, and install the pins on which the toilet bowl will be attached. To assemble the decorative structure, moisture-resistant plasterboard with a thickness of at least 1 millimeter is used.
If the plasterboard structure was finished with ceramic tiles, at least ten days must pass before the bowl is installed! After this, we adjust the outlet of the bowl to the sewer hole. The places where the bowl will come into contact with the ceramic tiles are treated with silicone-based sealant. We hang the bowl on the pins and tighten the nuts. After this, you can conduct a test drain of water.
Types and shapes of bowls
To ensure that the use of the bathroom is comfortable and installation is not complicated, it is important to choose the correct bowl shape. Built-in toilets can be:
Traditional shapes are preferred in terms of style and design and are versatile. Squares and rectangles look best in modern trends - high-tech, minimalism.
Also, a built-in toilet can have a bowl:
- dish-shaped - with a platform inside, it prevents water from splashing, but is not very hygienic;
- funnel-shaped - with a drain in the center, considered very convenient;
- visor - where the drain with a bend is located to the side, is considered the best option, as it combines all the advantages of the previous two.
When choosing a bowl shape, be sure to take into account the characteristics and needs of all household members.
Features of frame installations
This is an assembled steel frame that allows you to attach it in a variety of ways. Installation of this design can be performed in any type of premises. Most often you can find models on sale that are installed on four fulcrum points. It is advisable to attach them to a load-bearing wall. That’s why it’s called a frame with wall fasteners. There are models that are fixed to the floor using special elements.
These frames have become very popular recently. For them, overall dimensions and installation location are not so important. The frame can be fixed exactly where the owner needs it. Since the wall does not always have the necessary strength, the presence of floor fasteners will help.
In compact bathrooms, many people install corner built-in toilets - as a result, you can gain a lot of free space.
Wall mounted toilet
Mounted plumbing equipment began to appear and be introduced in our country in the 90s. At first it was exotic, although it has been widely used in the Western world for a long time. This type of equipment consists of two parts - the toilet, which is mounted on the toilet wall with bolts or studs, and the installation.
Toilet mounted on the wall
The installation is a specialized mounting frame on which you can hang and secure various plumbing equipment, such as a sink, handrails for the elderly, including a cistern. Pipes supplying water and discharging waste into the sewer system are also fixed here. The English word “installation” itself is used here not entirely legally, since in the original it means an action (installation process), but in the Russian translation it means an object, device, mounting frame. But experts have already adopted this term.
The installation is installed next to the toilet - either in a niche in the wall, if there is one, or behind the toilet against the wall - and covered with a special box. Utilities are hidden in the box or behind false panels. Through the inspection hatch, access to shut-off valves, water meters, and heated floor fittings is provided.
Mounting frame – installation
