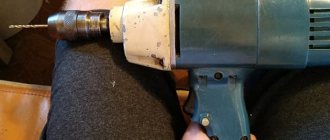
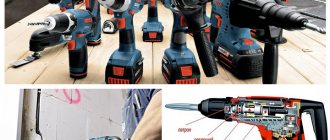
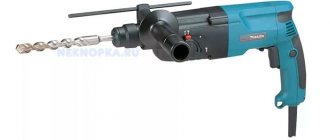
Construction work now requires the use of various tools, one of which is a hammer drill. Using this device, workers make holes of various diameters, and also dismantle various reinforced concrete or stone structures.
Situations often occur when it is very difficult, if not impossible, to remove the nozzle from the device socket. In this regard, the question arises of how to remove the drill from the hammer drill without damaging the device. To do this, you first need to figure out why such troubles arise.
Return to content
Types and causes of drill jamming in a hammer drill
There are two most common variants of this problem:
- the drill jams in the drill chuck or in the buffer element, which is used to install an ordinary attachment in a hammer drill;
- the product gets stuck in the clamp of the hammer drill itself.
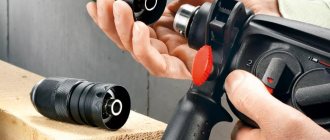
In the first case, the problem appears due to the fact that solving the problems requires a drill, which is used for a conventional drill. There is a special product for its installation - an adapter chuck, the same as in a conventional electric drill. It is inserted into the clamping element of the hammer drill, after which you can begin work.
Diagram of a standard hammer drill
After they are completed, in some cases it is not possible to simply remove the drill, since the lips of the clamping device hold it tightly. This problem is quite easy to solve, since its root lies in the incorrect use of the clamping mechanism. Some craftsmen simply forget to lubricate it regularly, which is why the tool jams.
To open the lips of this device, you should treat them with special compounds, for example, WD-40. If such a substance is not at hand, and the hardware store is far away, then kerosene can be used as a working fluid. Then you should wait about a few minutes for the composition to take effect. After this, you should tap the surface of the clamp with a hammer, while simultaneously loosening the product. After such manipulations, the lips of the device will give in and the drill can be removed. Finally, you need to dismantle the cartridge, clean it and lubricate it.
To remove the drill bit from the hammer drill, you can use WD-40 fluid
In the second case, the drill got stuck in the hammer drill. This trouble appears for completely different reasons than getting stuck in a transition node. The nozzle in an electric drill moves around its axis, in some cases making weak reciprocating movements. This is due to the transfer of energy into the tool body through the jaws of the clamping mechanism and the bottom of the chuck.
The hammer drill uses a different technology for transmitting energy, and accordingly, the nozzle in the clamp moves differently. Since the hammer drill provides rotational-impact and simply impact vectors of tool movement. Energy is transmitted to it through a special striker, which is driven by a power unit powered by electricity. This striker exerts a mechanical effect on the shanks of tools installed in the chuck, such as a drill, a drill, a crown or a chisel.
Sometimes a vice is used to remove the drill from the hammer drill.
These elements are equipped with special grooves, with the help of which they are securely fixed in the clamping device. These grooves also serve to provide the tool with energy to perform rotation. Low quality tools are made from soft alloys that are not heat treated. The shanks of such products cannot withstand high and prolonged mechanical loads, and therefore become unusable. In this case, before removing the drill from the hammer drill, you may have to disassemble the tool.
Return to content
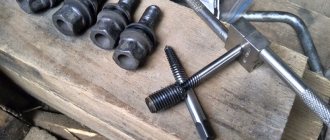
How to save a key jaw chuck
If the reason is only mild corrosion or a deformed drill, you will need a gas wrench, a chisel or screwdriver and a 700 g hammer:
- Spray rust converter, lubricant or machine/any mineral oil into the cartridge.
- Let stand for 5-20 minutes.
- Using a gas or plumbing wrench, clamp the chuck so that the drill is on the left hand.
- Secure the structure with a vice, a clamp, or simply with your feet.
- Place the screwdriver on the clamping ring, in the groove between the teeth, tilting it away from you.
- Use a hammer to hit the handle of the screwdriver in a calculated manner, causing the ring to rotate.
If you have two gas keys, you can try turning both rings in different directions at the same time.
how to remove a drill bit from a hammer drill
Ways to get a drill out of a hammer drill
As soon as the drill jams in a concrete wall, floor or any other similar structure, you must immediately turn off the rotation mode, if enabled, and leave only the impact. After this, you need to pull the tool towards you, while tugging it in the other direction from the surface in which it is stuck. These movements will cause the drill to break part of the concrete layer holding it, after which it should simply and effortlessly come out. This method will help both when the drill gets jammed in a wall structure due to a large fraction, and in case the product gets into the reinforcement.
Another easy way to remove the drill bit from the surface is to use the reverse rotation function. This function is not available on all instruments; in addition, its use leads to the licking of the drum assembly of the mechanism. If the device has a warranty, then you can try to remove the drill using this method.
By clicking on the link, you will learn how to make your own concrete vibrator from a hammer drill. Read about how to choose the right hammer drill in this article. You may also be wondering what types of crowns are available for drilling concrete.
There is also a rather extravagant way of extracting the drill. To do this you will need a gas key. It must be screwed onto the nozzle, and then unscrewed in the opposite direction. This method works because the gas wrench has a fairly long lever that can be used to apply a lot of force. But if this method still doesn’t work, you can try knocking on the handle of the key with a hammer. At the same time, the hammer drill should be loosened from side to side. The combination of these movements will cause the drill to come out fairly quickly.
In some cases, before removing the drill from the hammer drill, you will have to make several additional holes with another tool. As a result, a large hole should form around the drill, the diameter of which should be about 10 centimeters. The drill will come out along with a fragment of the wall; the resulting hole can later be repaired. This method is suitable in cases where it is impossible to either close the drill in the wall or cut it off.
If none of the above methods work, then the nozzle will simply have to be cut off with a grinder, beaten with a sledgehammer, or covered with something.
Now let's talk about what to do if the drill gets stuck in the hammer drill. Most often this occurs due to the fact that the shank material cannot withstand the loads and is deformed. To remove the tool, it must be firmly clamped in a vice. After this, you need to turn on the reverse on the instrument, it is advisable to set it to maximum power. The start button must be pressed with some breaks, since prolonged operation in this mode will lead to damage to the power unit of the device.
After the product is wedged, the hammer drill should be sharply pulled out of the vice. They will contain a drill that is no longer suitable for use. If there are no vices nearby, you can limit yourself to a thick wooden board. The hammer drill must be configured for drilling, but at the same time turn on reverse. You need to drill until the tool “bites”.
Return to content
Paths
First of all, you should try to hold the drill bit in a vice.
READ How to make a hole in a wall without a hammer drill
Then the blow is applied in the opposite direction, making oscillatory movements.
The cartridge itself must be open when performing these steps.
If the drill doesn't harden too tightly, this will quickly solve the problem.
The second method also involves the use of pressure. After clamping the drill, run reverse on the device with the highest possible power. However, you cannot hold the device all the time, you need to press the start key in short intervals. Otherwise, the shock may stop due to prolonged operation in this mode.
After driving the tool, you should try to sharply pull the strike out of the vice. Then they will only have an exercise that is useless for further use. You can use a thick wooden board instead of a vice. Then the drilling mode with reverse is turned on on the hammer drill. Drill until the tool bites.
Otherwise, try the third method. To do this, keep the hammer drill in the defect. Be especially careful not to damage the body of the tool during operation. You can make a kind of gasket: lay out a hammer with rubber or similar material. After this, you need to take a gas key (if it is missing, other small defects will occur). The instrument itself is clamped by it. Now press the key with a copper hammer in the opposite direction of the chuck
The fourth method also involves the use of pressure. After clamping the tool, you need to run the reverse at the highest possible power. At the same time, you cannot always turn on the device; you need to press the start button with short breaks. Otherwise, due to long-term operation with a broken shank, the shock may break.
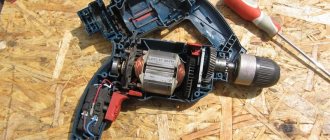
There is no single scheme for disassembling a hammer drill, since each model is made according to an individual scheme. If a person has experience disassembling tools, he can try to do it himself. First, the top rubber covering on the cartridge is dismantled, and then the support ring, which is located under it, is removed. If you are concerned that the tool will be damaged during disassembly, contact a service center for assistance.
How to remove a broken drill
Not only can the drill bit get stuck in the tool holder, in some cases it will break. Then you only need to remove the nozzle shank from the device. Pliers will help in this situation. Regular pliers will not do the job because they cannot be opened inside the cartridge.
Thin-nosed pliers should fit into the impact drill without much effort. Then you need to open them slightly, grab the part of the broken drill and pull it out. You can remove the rubber from the tool first to make it lighter.
If the device does not plug the shank, the cartridge is dragged and the crushing mode is activated. The hammer drill is located upside down. Due to vibration, a piece of the auger will fall out on its own. If none of the methods work, you will have to disassemble the strike.
The drill is stuck in the wall: how to get it out?
In some cases, the drill may become permanently stuck in a wall or any other surface of reinforced concrete structures. In most cases, such a nuisance occurs if a hole is drilled at a slight angle of 6 centimeters. There are several ways to remove the tool.
Instructions
The first step is to check whether the hammer drill has a reverse rotation function. If there is one, you need to turn it on and, swinging the instrument from side to side, remove it from the wall.
In addition, you can arm yourself with a drill and make another hole not far from the existing one, and by loosening the hammer drill, remove it from the structure.
If the above steps do not help, you will have to use a gas wrench. If its size is too large, you can use a steel plate as a spacer. The key should be screwed onto the drill and hit its handle with a hammer from the wall. These movements are not the most convenient, but the method is quite effective.
To remove the drill, you can also use a reverse hammer, which is easy to find in any auto repair shop. If this tool is not available, you can connect the hammer drill to the SDS connector of the attachment and pull it away from the surface being processed. This method is effective when the drill is stuck at a depth of no more than 10 centimeters.
If the drill gets stuck in the wall while drilling through and there is very little left until the end of the process, you can break through the stuck tool using sledgehammers. It is necessary to hit in the direction of drilling. It is important to remember that you cannot strike the nozzle itself - you must use a board or any other spacer to soften the impact on the drill.
To avoid these problems, it is enough to remove the drill and the hole being drilled as often as possible and clean it of dust, concrete fragments and other contaminants. In addition, a drill or other accessory can jam in the surface if too much pressure is applied to it, so the tool must be held lightly. If the structure is reinforced concrete, that is, it has metal reinforcement, then there is a risk that the drill will get stuck in it. Therefore, before starting this work, you should check the location of these metal elements with a special device.
In some cases, it happens that the hammer drill jams. Typically, this is due to the use of cheap, low quality tools. In such products, the fastenings cannot withstand the load and become deformed. In some cases, it is enough to hold the tool in a vice and try to unscrew it. In the most difficult cases, you will have to disassemble the cartridge. To do this, the first step is to dismantle the upper rubber product, as well as the retaining ring located under it.
Return to content
How to save a key jaw chuck
If the reason is only mild corrosion or a deformed drill, you will need a gas wrench, a chisel or screwdriver and a 700 g hammer:
- Spray rust converter, lubricant or machine/any mineral oil into the cartridge.
- Let stand for 5-20 minutes.
- Using a gas or plumbing wrench, clamp the chuck so that the drill is on the left hand.
- Secure the structure with a vice, a clamp, or simply with your feet.
- Place the screwdriver on the clamping ring, in the groove between the teeth, tilting it away from you.
- Use a hammer to hit the handle of the screwdriver in a calculated manner, causing the ring to rotate.
If you have two gas keys, you can try turning both rings in different directions at the same time.
Advice Be sure to inspect the cartridge to see if there are any grooves, dents or other defects left on it or inside. If yes, it is better to change the nozzle. Open the chuck as much as possible and unscrew the screw at the “bottom” to remove the nozzle.
Recommendations for preventing such cases
In most cases, the use of drills that are made by well-known manufacturers is a reinforced concrete guarantee that the tool will not get stuck in the hammer drill. Unfortunately, the modern market is flooded with low-quality products, so you should check the purchased product immediately. To do this, you just need to make several holes in the concrete product.
If after these operations the drill can pass through the shank without any extra effort, then this tool is truly of high quality. If deformation has begun, then at this stage the product will simply be removed from the clamping mechanism. It is important not to miss the moment when these changes begin in order to prevent serious jamming of the drill in the hammer drill.
A similar problem can also arise from the decision to use fairly powerful equipment for solid objects, but leave the drills as usual. Even the highest quality products that are not designed to process any material will quickly fail and become deformed. Therefore, special attachments should be used for each type of material.
It is important to remember that it is not always possible to remove the attachment from the hammer drill yourself. Therefore, you simply cannot do without visiting a service center, which will lead to loss of warranty. The fact is that using low-quality or inappropriate equipment is a user error.
Return to content