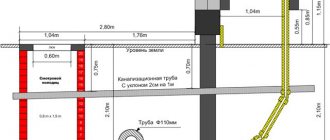
With a centralized water supply to a populated area, the problem with drinking water for residents is solved by connecting it to the main line. Not only technical issues are important, but also issues related to obtaining documents. It is necessary to know the subtleties and nuances of how to bring water into the house so that the procedure goes quickly and without misunderstandings.
If a locality has a centralized water supply, then residents only need to make a connection to the main line.
Rules for connecting a house to the central water supply
The procedure for connecting a house to the central water supply is regulated by federal legislation and government regulations. The right to insert into the main line arises after the signing of a standard agreement between the water supply company and the owner of private housing. In the territorial authority, the future subscriber will learn about the service that is responsible for the water supply at the address of the private house.
The customer turns to her with a request to issue technical conditions for the use of the central highway and presents the necessary documents. 3 working days are allotted for checking papers and technical connection capabilities. If there are not enough documents or errors are found, the customer is notified about this. Within 20 days he must provide the missing information.
When the documentation is not brought into proper condition within the allotted time, the application is canceled, which is notified to the customer within 3 days. If all requirements are met, the contractor sends the client technical conditions, a connection agreement and calculations for payment of services within 20 days.
The legislation provides that the water supply system does not have the right to refuse the applicant when there are no objective obstacles to the connection. If technical reasons do not allow this, it is possible to draw up an individual project that provides for other methods of performing the work.
Features of hot water supply for a private house
In order to organize hot water supply for a private home, electric boilers, gas water heaters, and solid or liquid fuel boilers are used. Each of these options has its own characteristics, pros and cons. Recently, solid fuel boilers using pellets, husks, sawdust and other waste from woodworking or paper production have become increasingly popular.
See also: Catalog of companies that specialize in water supply and sewerage
Boilers allow you to organize heating of a private home and hot water supply - at the same time, double-circuit models cope better with this. They are characterized by high efficiency, ease of maintenance, efficiency, inexpensive fuel and durability. One of the most optimal options for organizing hot water supply is the use of buffer tanks (heat accumulators).
What documents need to be collected and prepared?
Required documentation.
First, the owner of the house contacts the geodetic service of the area to make a topographic plan of the site, on which all underground communications and external objects are marked. Specialists will request documents confirming land ownership and will complete the work within 2 weeks.
The applicant may have a plan, but there are important points to consider. The document must reflect the situation when no more than a year has passed since its production and no work has been carried out on the site. The required plan scale is 1:500.
The next step is to obtain technical conditions for connecting to the central water supply. The company that will supply water is provided with a package of documents:
- photocopies of passport or identity certificate;
- papers on property rights to a house, land;
- situational plan - 7 copies;
- building permit - 2 copies;
- conclusion of the SES on the possibility of connecting to the central water supply.
The subscriber writes an application for the issuance of technical conditions, where he indicates his data and information about the connected object. You are required to fill out a questionnaire. It indicates the number of permanent residents and what plumbing equipment will be installed. Based on these data, experts will calculate water consumption standards.
How to supply water to a private house?
Since most owners choose independence from the centralized system, it is the second option that needs to be considered in more detail. In this case, the water supply scheme includes quite a few components. This:
- water source (well, borehole), sewer system;
- water heating equipment for hot water supply, plumbing fixtures;
- pipe system, pump, accumulator, pressure switch, filters, fittings.
The first preparatory stage is the correct determination of the location of the water intake. In this case, it is necessary to ensure its distance from power lines, septic tanks (septic tanks, cesspools), from outbuildings, from trees, whose root system will not only complicate the work, but may also threaten the condition of the water source and the route in the future. The main factor remains the distance from the aquifer to the surface of the earth.
How to build a well?
Setting up a regular well is the simplest option to achieve the goal. Its serious advantages over wells are the relative simplicity of construction, low costs of work and materials, and the absence of the need to draw up documents permitting the use of a water source. Typically, wells are constructed to extract water from upper aquifers.
Before starting work, they decide one question: what material to choose for the walls of the structure? Reinforced concrete rings remain the simplest and most common option, but there are other candidates: these include stone, brick, and well-protected wood. To determine how many rings will need to be installed, test drilling is carried out. But the exact answer can only be obtained while digging the mine.
Digging a pit
More often, the pit is dug in the traditional way - by hand. This option remains optimal due to the fact that in this case its walls are less damaged. They retain their density, so it is possible to achieve the required depth without an emergency. To determine the dimensions of the shaft, 300 mm is added to the diameter of the concrete ring. The depth of the pit for the first element should be 100 mm less than the height of the ring.
After digging a hole for the first ring, an element is installed in it, 4 tunnels are made under its walls at an equal distance, where reliable supports are installed - brick or wooden. Since the first ring determines the position of the entire structure, checking verticality with a level or plumb during this stage is mandatory.
After installing the element, soil excavation continues. Thus, the ring will gradually go deeper into the ground. After reaching the required depth, the next one is installed on top, gradually increasing the structure. The verticality is constantly checked, the joints of the elements are sealed with tow, then covered with sealant, covered with cement mortar.
Soil excavation continues until intensive flow of water into the pit begins. After this, work is suspended for a day. If during this period of time the liquid level has increased significantly (by more than a meter), then further work is stopped.
Backfilling the bottom filter
Once the aquifer has been reached, it is determined whether a bottom filter is necessary. Such protection is mandatory in several cases:
- if there is fine sand at the bottom: symptom - slow seepage of water into the mine;
- when the well bottom is soft clay: its sign is muddy water in the bottom part;
- if the bottom of the well “hits” quicksand: in this case, a large amount of sand appears in the water.
The range of materials that are suitable for the role of a bottom filter is quite wide. A simple protective layer is made of coarse quartz sand. To remove various contaminants, it is thoroughly washed under running water, or pre-soaked, changing the water several times.
To guarantee maximum protection, a more complex option is used - a filter system consisting of several materials, three are optimal. The layer of each must be at least 300 mm. First, clean sand is poured, then river pebbles. The last “bastion” is large stones. You can use gravel, crushed stone, and shungite for shallow wells. Backfilling can be direct or reverse.
To protect the bottom of the well from quicksand, another option is used. A shield is assembled from the boards, in which holes with a diameter of 10 mm are drilled. Then it is wrapped in geotextiles and placed on the bottom, pressed with a layer of stones. A layer of small pebbles is poured on top of such protection - 100-150 mm.
Decoration of the upper part of the structure
Soil or crushed stone is poured into the space between the walls of the well and the pit, then a clay castle is made that will protect the structure from runoff and rainwater entering it. To do this, a trench is dug around the structure. Its width is 400 mm, depth - up to 500 mm. Wet clay is placed in it, which is thoroughly compacted.
The clay castle is tiled, covered with bricks laid in one row, or with a concrete blind area. To protect the well from precipitation, dust and debris, use a cover in which a hatch is made. Some recommend additionally protecting the structure with a lock.
How to organize delivery to the house?
Building a well is half the battle, since hardly anyone will be excited by the prospect of carrying water in buckets. For this trivial reason, after installing the rings and adding a bottom filter, there is no rush to fill the remaining gaps, since it is better to supply water to a private house immediately after completing these main stages. To do this, you need to select materials, optimal equipment, and prepare all the tools. The next step will be digging a trench, installing a water supply, connecting it to a source, etc.
Preparatory stage
It always starts with a drawing of the future water supply system. There must be a place in it for all materials and equipment that it is decided to use: a pump, a hydraulic accumulator, etc. The first issue that requires a solution is the choice of the main unit - submersible or surface.
The power of the device should be enough to provide a pressure of at least 15 atmospheres in any part of the system. The performance of the unit should be 25% higher than the maximum water flow. The choice is influenced by the flow rate of the source, since air cannot be allowed to enter the pump when the resource is exhausted. If the water in the well is at a level of 7-10 m, then the best option would be a pumping station, which includes surface equipment.
As for pipes, convenient and lightweight plastic (polyethylene, or HDPE) products have now become the most popular option. The most optimal running diameter is 32 mm. You will have to calculate and purchase bends, adapters, tees, etc. You can simplify the work: if this is a task, then it is better to buy compression fittings, which are reliable, but do not require welding equipment.
Digging trenches for pipes
This is one of the most time-consuming parts of the operation. In order not to be faced with the need to correct errors, before starting it you need to learn about the rules for installing communications.
The depth of the trenches depends entirely on the depth of soil freezing. Owners can find out information relevant to a specific area by calling the nearest construction company. The second possible option is to use a map that shows frost boundaries for all Russian regions.
A trench for the water supply is dug to a depth exceeding the freezing limit by 300-500 mm. A sand and gravel cushion must be installed at the bottom. Its minimum thickness is 100 mm. More is better. It is necessary to ensure a slope from the well towards the house: a small height difference per meter is enough - about 100 mm.
Connecting the pipeline to the well
For this stage there are several conditions that need to be guaranteed.
- The input unit is not located at the junction of concrete rings.
- The hole must be at the same level as the pipeline.
A hole is drilled in the wall of the well for installing a squeegee (diameter - 1 inch). From the outside, a HDPE pipe is attached to it using a fitting. On the inside there is also a vertical pipe for water intake. In this case, it is recommended to add a tee to which you can connect a drain valve. It may be needed if you plan to drain water from the system.
The hole in the concrete ring is sealed with waterproofing mastic - one that contains reinforcing fibers. Rubber gaskets are placed on it, then the squeegee is clamped into the wall with nuts equipped with washers. After this stage is completed, the gaps between the soil and the well are filled and compacted.
How to install a pipeline?
The first thing to do is the intake pipe. When calculating its length, be sure to take into account that the fence is made in an area located in the middle part of the well. To avoid the appearance of air pockets, this element is equipped with a check valve. You can equip the pipe yourself, but it is easier to buy an element that already includes this device. The second necessary element is a filter that protects the pump from large particles.
To anticipate any potential problems, it is recommended to ensure that you have insurance in case of unforeseen situations. The complex includes several points.
- Protection from mechanical influences. In this case, polyethylene or corrugated pipes of larger diameter are used.
- Insulation of water supply: for example, laying expanded polystyrene slabs on pipes. The optimal solution is pipes with insulation, because they solve two problems at once.
Another “potentially possible” operation is laying a backup water pipeline next to the main, working route. Forethought will not hurt: since the price of the products is not so high, it makes sense to simplify the work as much as possible in case an accident occurs in any area.
How to supply water to a private house?
The main working unit of the system is the pumping station, which makes it possible to guarantee the rational use of the resources of the main, most expensive device - the pump. This condition is provided by a capacity - a hydraulic accumulator, which collects and then releases water into the system when it is needed. The check valve is installed on the inlet pipe of the pump. The pressure switch controls the operation of the system. The pressure gauge allows you to monitor the operation of the equipment.
To install the equipment, it is necessary to allocate a heat-insulated room. More often it becomes one of the rooms in the house (basement). The minimum temperature in it should not fall below 5°, so it is equally important to pay attention to the area where the water supply system exits to the surface and where it enters the house - in the foundation, basement or basement.
In this case, either high-quality thermal insulation materials are used or electric heating is installed. One option is to lay the section in a sleeve consisting of a sewer pipe and foamed polyethylene insulation. Such material will not only protect against frost, but will also act as a damper, preventing potential fracture.
Selection of internal water supply wiring
This topic may also relate to the question of how to supply water to a private house. There are two main schemes designed for organizing hot and cold water supply. A reasonable “compromise” is called mixed - a system in which both types of wiring are used for hot water supply and hot water supply.
Tee
Its second name is serial wiring. In this case, the owners are guaranteed significant savings on materials, because water supply systems are available in only one copy. Branches created using tees go to each consumer device. The biggest disadvantage of this solution is the reduction in pressure in the system if several water intake points are used simultaneously.
Collector
Another name is parallel circuit. In this case, either one or two collectors are organized (for hot water supply and hot water supply). Lines are connected to them, which then diverge directly to each water intake point. This option involves installing more pipes, so costs will increase significantly. The second disadvantage is the need to mask the lines. But the risk of pressure drops will be minimal.
The choice depends on the intensity of water use, on the number of residents, and on their stay in the house - temporary or permanent. Tee wiring can be considered suitable for small families, for houses where they live periodically. Collector units will allow you to forget about unstable water pressure, so this option is better if there are many residents and household appliances in the house, where water is used frequently.
The answer to the question of how to supply water to a private house is not so simple, because there are quite a lot of steps that the owners have to complete. Therefore, it wouldn’t hurt to get to know the most responsible ones better. Perhaps the following video will be of some assistance with this:
We draw up project documentation
The project is ordered from a water supply service or an accredited company. The customer will be required to:
- technical specifications;
- situational plan;
- housing drawings - all floors, basement, sectional images;
- list of used plumbing fixtures.
Project documentation.
The design organization must develop and provide the customer with a document containing:
- site plan with water supply diagram;
- internal wiring in the house;
- specification of pipes and shut-off and control valves;
- the need for metering devices and a pump to increase pressure.
The finished project will have to be agreed upon with the gas service and electricity supplier, whose communications run through the site. It is registered with the SES, which issued permission to use the centralized water supply. The document is finally approved by the architectural committee.
Main points of the contract and necessary acts
A document is drawn up stating that the water utility carries out preparatory work and connecting the house, and the customer pays for it. The contract contains information about the procedure for providing services by the organization, these are:
- volume and quality of water, pressure, consumption accounting, their control;
- filing hours and short-term suspension conditions;
- procedure for payment for water supply;
- rights and obligations of the parties, liability for violations and dispute resolution.
When the contractor installs the water supply system, an acceptance certificate is drawn up by the customer, who signs it. This is the main document. In addition to this, they often fill out a form about hidden work. The Sanitary and Epidemiological Service flushes pipes and checks water quality. An act on this is also drawn up.
How to connect to a water supply and cut in a pipe
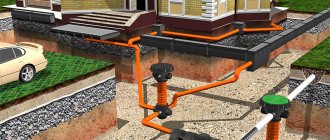
A high-quality central water supply system has special reinforced concrete wells, the nearest of which is provided for by the design documentation. It may be missing or located too far away. If the main highway runs through an individual site, it is more practical to build your own structure.
Connection to water supply.
To connect additional users, bends are provided on the steel pipes. It may turn out that they are missing. Then the insertion is carried out using clamps, or threaded adapters are welded.
Installation is carried out in such a way that there is room for inspection and maintenance by specialists from the organization operating the water supply system. To insert into a plastic main, you will need a special clamp, a shut-off valve and pipes.
Connection diagram to the central water supply line
In any water supply scheme there is an external part that connects the city network with consumers in the house. This is a pipeline in which the pressure is maintained by the technical characteristics of the central line. No additional devices other than a tap in the well are required.
The internal system includes elements, the number and list of which is determined by conditions. Are used:
- pipes and hoses of various diameters;
- counter;
- water heating devices;
- shut-off and control valves, mixers;
- plumbing equipment.
Draw up a diagram of the external and internal structure of the water supply system. It helps to choose the best option for pipe routing, connecting devices, and material consumption.
What pipes should be used to bring water into the house?
Pipes with a diameter of 32 mm HDPE (low-density polyethylene) - according to GOST, are marked with a blue stripe and this means that they are for use under water, excellent for small country houses. For large cottages we use pipes with a diameter of 40 mm. However, if central water supply is used, the administration may impose its own restrictions on the diameter of the pipes, for example up to 25 mm.
To connect pipes, we most often use compression brass fittings for HDPE pipes Tiemme or Itap: they look more aesthetically pleasing and are more reliable than plastic ones. Unlike, for example, electric welded fittings, these fittings can be installed manually, with minimal use of tools. They can also be used indoors or in summer water supply. Plastic fittings are not suitable for heavy loads. Using them to secure pipes that are buried to great depths—and especially a pump—is out of the question.
Connecting a private house to the central water supply: sequence of work
According to the rules, cutting into the central pipe, which is located outside the site, is carried out by organizations with the appropriate license. Their privileged position allows them to set high prices for services. Many private owners break the rules and connect themselves - the fine is less than the cost of the work performed by the organization. The main thing is to adhere to the technical conditions and the project, not to damage any communications.
Connecting a private house to the central water supply.
Determined by the method of connection to the water supply. A simple DIY option is to use overhead clamps, which are used for steel and plastic pipes. Insertion into an existing water supply system under pressure is carried out with special devices. An electric drill is not suitable - it will flood with water.
To insert, perform several simple steps:
- install the clamp;
- a pipe is drilled through a hole in it;
- screw on the open valve, then close it.
It is preferable to first install the ball valve on the clamp, then you can drill through the hole in it.
A hole is made in the foundation, which is 15 cm larger than the diameter of the water pipe. This will prevent its destruction if the house settles. Many people prefer to make an entrance under the foundation.
If there is no well at the insertion point, dig up the main line and install it yourself. A cheap and accessible option is to use red brick and make a hatch with a cover. It must withstand the weight of the vehicle if it is on the roadway. A hole is dug near the house where the pipe enters. Now it needs to be connected to the well on the central highway. They dig a pit at a depth below the freezing point of the soil.
All sharp objects that could damage the pipe are removed from the trench. The bottom is covered with crushed stone and sand, which form a shock-absorbing cushion. Soil water is also drained through it, and the highway is not subject to icing. Now you need to connect a pipe to the tap in the well and lead the other end into the house.
Particular attention is paid to the place where water is supplied to the house.
Sometimes it is impossible to dig a trench of the required depth. Then use various options for protecting the water main from freezing:
- heating with a special electric cable;
- winding with heat-insulating materials;
- filling with expanded clay.
Particular attention is paid to the place of entry into the house if the hole is in the foundation. Then the pipe is located above the freezing depth - careful insulation will be required.
The trench is not immediately filled up: first, internal installation is done, then it is checked for leaks.
Introducing water supply into a house under the foundation
It is necessary to think in advance, at the design stage, about the location of technical holes in the foundation. Typically, such holes are needed for the following:
- water supply
- sewerage
- for electricity
- backup
Sooner or later you will need a reserve hole to provide household amenities: for example, the outlet of a water supply pipe for a newly built bathhouse or garage, for the outlet of an external lighting cable. An additional hole will slightly increase the cost of the entire job, but will significantly save time and effort in the future.
If you do not take into account the location of technical openings for communications in advance, then the builders will do this at their own discretion. As a result of this, the node may be located not near the wall, but, for example, in the middle of the room. Not only is this inconvenient, but in the future it will require additional financial and physical costs to redo everything.
To prevent this from happening, it is necessary to mark the location of technical holes at the design stage, taking into account the width of the walls, including the interior decoration.
Rules for laying pipes in a home
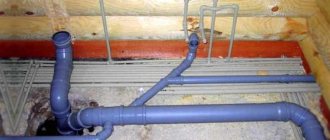
There are 2 main methods used for wiring in the house - serial and parallel. The first has advantages in saving materials. Each plumbing fixture is connected to the main pipe using tees. The disadvantage of this method is the pressure drop at each subsequent consumer. This is most noticeable when several devices that consume a lot of water are turned on at the same time.
The parallel method does not have this drawback, but the pipe consumption is greater and the circuit is more complex. A distribution unit is used - a collector. A separate branch is laid from it to each device. The use of a mixed method balances the disadvantages and advantages of the main methods of wiring in its pure form. Several nearby consumers are connected in series to one branch of the collector line.
There are rules that must be followed for any type of internal wiring:
- strictly horizontal or vertical arrangement of pipes without intersections;
- accessibility to shut-off valves and fittings;
- a tap is installed at the beginning of each branch;
- It is mandatory to have a coarse filter at the entrance to the housing main;
- For branches from the main line, pipes of a smaller cross-section are used - pressure is maintained.
Pipe installation in a private house.
Experts recommend wiring with the smallest number of right corner connections, which greatly reduce the pressure in the system.
If possible, avoid joints - the most likely places of leakage.
How much does it cost to connect to water supply?
The final cost of installation and connection of water supply in a private house is influenced by the following factors:
- route length;
- material used;
- depth of location;
- area of the house;
- pricing policy of the organization carrying out installation work.
On average across the country, a comprehensive service for drawing up a project, installing pipes and connecting the system will cost the owner 40–60 thousand rubles.
We recommend : Connecting a private house to the central sewer system.
