How to properly tin a copper tip on a soldering iron
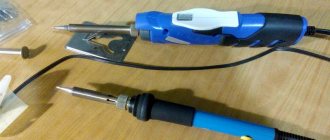
Tools with nichrome heating elements have a copper round rod, which is given a shape convenient for soldering. Mechanical processing of the rod is carried out with a file, followed by finishing on sandpaper or a finely notched needle file. Then it is useful to lightly beat off the sting using a cold method on an anvil. This will compact the top layer of copper, increase mechanical strength and reduce the rate at which the molten solder dissolves the material. It would be a good idea to polish it to reduce the rate of oxidation. All work is performed on the tip removed from the socket, including the part that is hidden inside the heating element.
Tinning a soldering iron tip means covering the working area of the rod with a thin layer of alloy. The boiling flux dissolves the oxide layer on the copper core, and the melt coats the surface.
Since it is not difficult to tin a soldering iron with a copper tip, you can do it yourself as follows:
- Insert the cleaned rod into the soldering iron and turn on the power.
- When it warms up to the melting temperature of rosin, completely dip the tip into rosin.
There is no need to overheat the soldering iron, since immersing the rod in the flux causes the release of clouds of smoke with splashing and the formation of slag from burnt rosin. When heated normally, the resin melts and produces a small amount of smoke.
- Using a solder rod, rub the work surface covered with a layer of molten flux, which must be renewed periodically.
- The process is complete when a uniform thin layer of poluda is formed. Excess should be removed with a wet cotton cloth.
Soldering iron tinning.
The process of preparing a copper tip
The coating process is straightforward. Molten solder fits well on hot copper, but with one condition - it must be clean. This can only be achieved at low temperatures. Oxidation accelerates with increasing temperature and adhesion disappears. Cold solder cannot be stuck to the tip because it does not melt. It turns out to be a vicious circle.
Slag, rosin and plastic residues, scale and other debris can be removed using a cold tool. The rod is pulled out before this operation so as not to damage the heater. The tip inside the heater also oxidizes, which impairs heat transfer. Electricity due to scale overcomes excess resistance and is wasted.
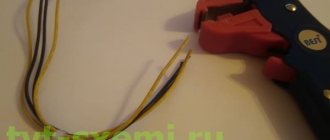
Before tinning a soldering iron with a copper tip, it must be cleaned of dirt. This is done with a file or sandpaper. The material should be sharpened to a clean finish to ensure it looks like new. It's easier to do this with sandpaper. The surface is polished to a smooth state - this way oxidation occurs more slowly.
The rate of oxidation can be reduced by shackling the tip. This is done with a hammer on an anvil. Using gentle blows, the surface is strengthened and the copper rod is shaped. Next they move on to the tinning process until it is covered with slag.
Methods for tinning a copper tip:
- Rosin. The method is smoky, so it is difficult and dangerous to health to carry out in a residential area. It's better to use the balcony. The cleaned base is immersed in a jar of rosin and a little solder is placed there. It will instantly cover the sting and prevent it from oxidizing. After the procedure, the tip of the sting is wiped with thick natural cloth, but carefully so as not to burn your fingers. The solder will rub into the copper. The procedure is performed after long-term storage of the soldering iron.
- A method of rubbing a surface with tin. The clean base is slightly warmed up and dipped in rosin. Then the surface is rubbed with tin. The procedure is repeated several times. The protective layer is secured by rubbing against cloth. The result can be obtained without smoke in any room.
Proper preparation will allow you not to be nervous at the initial stage of work. After a while, the process needs to be redone because the copper begins to oxidize.
How to tin a modern soldering iron tip
Core manufacturers claim that their products do not need to be tinned. This is partially true for those rods that are used by feeding solder with wire or paste into the working area. The tip heats the connection with flux applied to it, melts a drop of alloy from the wire, which, spreading over the hot one, forms a strong connection.
Nickel also oxidizes in air, although at a slower rate than copper. The oxide layer impairs heat transfer, reducing the efficiency of soldering heating, so it is better to tin the working side. This must be done without damaging the coating. To do this, use a wet cotton rag, a jar of solid rosin and POS. Rules for how to tin a new soldering iron:
- The working surface is degreased.
- The power is turned on.
- The heated core is cleaned with a wet rag and immediately stuck into rosin.
- A piece of solder added to the jar is ground without removing the rod from the flux.
- After a short time, the tip will be covered with an even layer of tin.
It will be interesting➡ How to solder aluminum at home
Most often, a conical shape is used for the sting. It is enough to tin the tip of the cone 3-5 mm.
How to tin a modern soldering iron tip
How to tin a soldering iron tip while working
If you carefully clean and tin the tip, then after half an hour of work, or even earlier, tin will no longer accumulate on it. The copper slowly began to burn, and slag residues accumulated on it. There is no point in pressing the soldering iron harder, stop for tinning. There are a number of techniques for tinning the tip.
Using a wooden block
A rough wooden block (spruce or pine, they contain natural resin, similar in composition to rosin). Pour a small amount of flux composition onto the block and put a small piece of solder. If you notice dross, you can strip and tin the tip again with little interruption.
In a metal sponge
This quick tin tip method will require some preparation. Place a household wire dish sponge in a metal cup. The lower part of the sponge should be coated with a thick flux, such as soldering lard. By slightly immersing the tip in the sponge, it can be cleaned of slag and scale. And if you pick up a drop of tin and immerse it deeper into the sponge, it will turn out to be tinned.
Tinning the tip with a metal sponge
This method can be used to clean and tin both a classic copper tip and modern ones made of nickel or ceramic.
In rosin
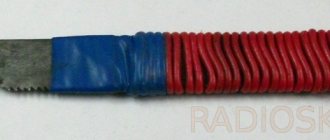
This traditional method of tinning requires a certain amount of dexterity and speed of movement. Copper oxidizes very quickly, and you may not have time to bring the tip from the point of mechanical cleaning to the container with flux. Therefore, they clean directly under flux, placing a file under the tip. You need to rub the tip over the file until the flux melts, after which you can tin it by holding a tin rod.
Tin the classic way
Another traditional method of tinning involves the use of refractory solder. The refractoriness of the solder allows it to evaporate more slowly from the surface of a tinned soldering iron and will remain on the copper longer. It will require:
- file with frequent notches;
- rough board made of coniferous wood;
- rosin;
- a piece of refractory solder.
The sequence of actions is as follows:
- put solder on the board;
- clean one side;
- dip deeply into rosin;
- quickly clean it on a board, running it over the solder;
- repeat for the second side.
Next, you should tin the round surface between the edges.
Features of tinning a modern soldering iron tip
Nowadays the rods are made of copper coated with a thin layer of nickel, which protects them from burning or ceramics. Mechanical processing is not allowed, it cannot even be scratched. To remove excess POS or flux burnout products, you can wipe it with a piece of wet, non-synthetic cloth, if you do not have a special sponge or cleaner made from brass shavings.
How to tin a soldering iron tip while working
When soldering, due to heating, the surface of the tip oxidizes, the solder stops sticking, and burnt flux slag accumulates, deteriorating the quality of soldering. We have to restore the tinned coating. It is best to use a dry cleaning device consisting of a metal coil in a container. By modifying the device by adding a thick acid-free flux, such as stearin or soldering lard, to the bottom, you can solve two problems:
- clean the surface of the rod from carbon deposits by rubbing it on the chips;
- By grabbing a drop of POS on the tip of the hot tip and drowning it in the flux, we get cleaning and tinning at the same time.
The procedure is suitable for thin copper, nickel-plated and ceramic cores. It is carried out when the oxide begins to interfere with work.
How to tin a fireproof tip
The tip is easily tinned if it is hot and thoroughly wiped with a damp cloth without synthetics and immediately dipped into the flux. Then use an alloy stick to rub the work surface until half-painted, wipe the rod with a rag and start working.
How to tin a soldering iron tip with a wooden block
If there is a significant layer of oxide on the surface, and it cannot be removed mechanically with abrasives or files, a block or plank of coniferous wood helps well when tinning.
- Place the beam so that the wood fibers are oriented perpendicular to the movement when rubbing.
- The power is turned on, small pieces of rosin and POS are laid out on the board.
- The heated rod is placed in a piece of rosin, which forms a melted puddle.
- The tip covers the tin. After melting, the tip begins to move across the fibers without leaving the rosin.
The oxide layer is dissolved by hot rosin, and the alloy is rubbed into the surface.
Clean soldering iron tip.
How to tin a sting in rosin
A slightly oxidized surface can easily be tinned in a jar of rosin with a piece of POS placed there. Using a wiped tip, melt the alloy in a container with rosin. Such work is accompanied by the release of large amounts of resinous smoke and should be performed in fresh air or in a well-ventilated area.
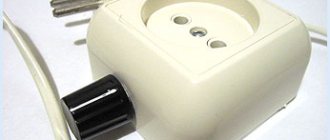
The durability of the coating or half-tip is determined by the temperature regime. It is harmful to use a soldering iron at maximum power unless necessary. Where it is impossible to regularly change the heating temperature, use adapted power regulators and homemade voltage limiters during soldering pauses.
Replacing a burnt tip on an EPSN 40 W soldering iron
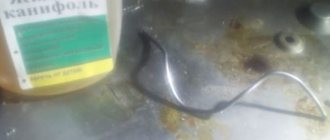
I decided to spend a little time on my old and beloved Soviet EPSN soldering iron with a power of 40 W. Since his sting is so burnt that it bends almost under its own weight Previously, it was possible to work with a soldering iron as a burner, that is, to burn patterned holes in some kind of plastic. Now, you can’t really press a soldering iron on any copper wire or other piece of hardware when you’re trying to tin them. As a matter of principle, I didn’t buy a ready-made tip, because I knew that I had several tips lying around in the box with this soldering iron. It’s just that their diameter is slightly larger than required, so I delayed repairing the soldering iron almost until the last minute.
 Actually, from the photo below you can clearly see how the copper tip near the soldering iron body burned out and bent. I think this happened mostly due to the fact that I used the soldering iron as a burner. Well, at the same time I burned the insulation of the wires right in this place.
Those same spare tips (photo below), which God knows where they came from, because the soldering iron is very old and these tips were almost always lying with it. I probably found them somewhere a long time ago or compromised them, since I had previously dabbled in amateur radio. The top one is 8 mm, the two bottom ones are 6 mm. In a soldering iron, a tip normally fits no thicker than 5 mm. If you pull out the wedge (a semicircular plate that is inserted along with the tip) from the body of the heating element, then you can push in a tip with a diameter of ~ 5.5-5.8 mm. In general, I decided to select and grind the middle tip to 5 mm in order to subsequently install it together with the wedge. Although it would be easier to grind off a couple of tenths of a mm and install it without this plate. But in this case, over time, when the tip gradually burns and becomes overgrown with scale inside the soldering iron, there is a high probability that the tip will completely stick to the metal body of the heating element because the tip will be installed quite tightly.
Carefully twist the old and burnt tip with pliers and remove it. In my case, it came out quite easily, since I don’t let it get stuck (that is, I pull the tip out once or twice a year), and besides, I don’t use the soldering iron very often. If you are unable to remove the sting, you may have to soak it in kerosene, diesel fuel or other chemicals. Partial disassembly of the soldering iron body can also help; here, of course, everything depends on the design of a particular soldering iron.
The same sealing plate (wedge).
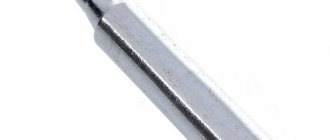
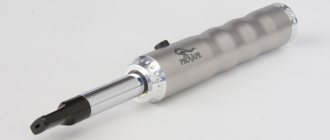
I clamped the new copper tip into a screwdriver so that it was ground more or less evenly and used a flat file to grind off 1 mm from it.
At the end, I lightly smoothed out the remaining rough notches from the file with a zero to make it easier to push the tip into the soldering iron.
After which, by lightly tapping the end of the copper tip, we push it into place. If the tip goes in tightly, then take it out and sharpen it a little more with a file.
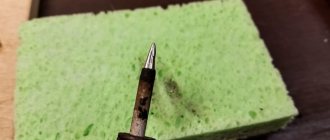
In theory, the tip of the tip is sharpened to about 45 degrees, but since initially it was already sharpened like a screwdriver. Then he decided not to touch the shape of the chamfers, but only lightly clean them and then tin them. I will give the chisel a blunter shape over time, when the tip itself will burn with use.
We prepare solder, rosin (in my case, fat) and heat up the soldering iron. After the stripped tip has become hot and has acquired an orange tint, we tin the tip to the extent of its deterioration. For me, the chamfers are already ready and quite large, so I only tinned them by half because most often only the tip of the tip is involved in the work. We dip the tip in rosin and immediately melt a drop of tin (solder) on it, after which we rub all the edges of the tip with this cocktail on a piece of paper or a piece of wood. If necessary (if the tip becomes dry), add rosin. Ideally, the tin should spread in an even layer over all the stripped copper edges of the tip (photo below), without any bald spots in the form of untinned copper.
In general, changing a copper soldering iron tip with your own hands is not so difficult, especially if it is easily removed from the body. But before buying a new tip, be sure to remove the old one from the soldering iron and measure the diameter of the tip shank with a caliper or a regular ruler, so as not to sharpen or undercut anything in the future. I was adjusting what I had in my stash for the soldering iron, so I had to wave the file around a little.
Write a message to the author Author: Nikolay Golovin — — — — — — — — 09/01/2015
Other site pages
When copying materials from the site, an active backlink to the site is required. Author: Nikolay Golovin / My hosting provider BeGet.ru 04/12/2012
Soldering iron care
Like any other tool, a soldering iron requires care. From time to time, the tip of the soldering iron burns out, and potholes and irregularities appear on it. Burnout is eliminated by sharpening the tip and tinning it. You should also pay attention to the fact that with prolonged use, the rod becomes covered with scale, which prevents rapid heating.
Cleaning the soldering iron from carbon deposits.
Why does the soldering iron tip burn out? The fact is that when heated, copper partially dissolves in the solder, and the edge of the tip itself is subjected to, albeit a small, mechanical effect. It is also worth understanding that when the soldering iron is not in use, the tip becomes very hot and this contributes to the oxidation of copper. Therefore, when idle, it is recommended to either turn off the soldering iron or reduce the temperature. A conventional electric soldering iron of the EPSN type does not have temperature control, so it is better to turn it off when idle.
It will be interesting➡ How to solder aluminum at home
Use pliers to remove the copper rod from the soldering iron. Remove scale from the rod using fine-grained sandpaper. You can coat the lead with a small layer of graphite by rubbing it on the lead of a regular pencil. This will prevent rapid scale formation in the future. By lightly tapping the heating element of the soldering iron, remove scale from the heating element where the copper rod was installed. Install the copper rod in its original place.
Interesting read! What is a varistor and where is it used?
The insulation condition of the electric soldering iron should be checked from time to time. To do this, measure the resistance between the soldering iron's power plug and the soldering tip. I have already talked about how to measure resistance. The ohmmeter should be set to the megaohm measurement limit (1 - 10 MΩ). Remember that you cannot touch the metal probes of the multimeter with your hands when measuring resistance. Otherwise, the device will show the total resistance of your body and the measured circuit.
The device should show infinitely high resistance. This will be evidence of good insulation between the soldering iron tip and the electrical network. For those who have already acquired a soldering station, replaceable 900 M copper tips are suitable. They also require preparation before operation.
Soldering process.
Tips for tinning
To facilitate the process of soldering metal parts, you need to adhere to some rules and follow the advice of the craftsmen. The main thing is the workplace: it must be provided with a safe outlet. The necessary materials must be arranged in such a way that it is convenient to carry out all the actions. You should also take care of proper lighting. Half of the success of soldering depends on how to tin the tip, so this action should be given enough attention. Tin is mainly used as a solder for soldering.
But this process can be significantly accelerated and facilitated by using solder paste or another chemical composition (flux), which can be purchased in specialized or construction stores. Using these products, you can work not only with soft metals, but also with iron, steel or zinc. If the soldering iron is used regularly, then, in order to ensure that the tip is always in working condition, you can, after removing it, gently tap it with a hammer.
To do this, the sting must be removable. This makes the soldering process more convenient and accurate.
Basic information about the tinning process
Tinning is divided into initial, carried out on a new or long-stored soldering iron, and working, performed immediately before soldering. How to tin a soldering iron tip? First, the tip is mechanically cleaned of scale, oxide film, slag and other contaminants, then a thin layer of molten solder, most often tin-based, is applied to the prepared surface.
For mechanical cleaning the following are used:
- abrasive stone;
- sandpaper;
- another soldering iron.
For inexperienced soldering workers, craftsmen recommend starting with a file. As the solder strengthens his skills, he selects the most convenient stripping methods for himself.
Soldering iron tip.
How to tin a sting in rosin?
A slightly oxidized surface can easily be tinned in a jar of rosin with a piece of POS placed there. Using a wiped tip, melt the alloy in a container with rosin. Such work is accompanied by the release of large amounts of resinous smoke and should be performed in fresh air or in a well-ventilated area.
The durability of the coating or half-tip is determined by the temperature regime. It is harmful to use a soldering iron at maximum power unless necessary. Where it is impossible to regularly change the heating temperature, use adapted power regulators and homemade voltage limiters during soldering pauses.
Soldering iron sharpening
- The soldering iron tip is sharpened with a file at an angle of 30-40 degrees.
- The edge is left 1 mm wide and slightly blunt.
- On a new soldering iron, you only need to sand the tip with fine sandpaper to remove the patina. Patina is a greenish copper oxide.
- If store-bought sharpening is not satisfactory, then you need to remove the tip and forge it yourself, giving it the shape of a concave blade. This method has one more advantage - the metal will become less susceptible to corrosion.
- To give the sting a finished look, all that remains is to process it with a finely cut file.
Interesting on the topic: How the fuse works
Preparation and Maintenance
The more intense the work, the sooner the soldering iron tip burns out and becomes overgrown with scale scales. During prolonged heating to high temperatures, the copper from which the tip is made partially transforms into molten tin, and partially abrades on the soldered surfaces and contacts.
Physical and chemical erosion of the substance occurs. In addition, under the influence of heat, an oxidative reaction of copper with atmospheric oxygen occurs. On models that allow you to regulate the temperature, it is recommended to reduce it when there are breaks in soldering, or simply turn off the soldering iron during this time.
Sequence of operations to remove scale:
- Carefully remove the sting.
- Clean off the scale layer with fine-grained abrasive paper.
- Apply a graphite protective layer to the tip by rubbing it with a pencil lead. This will slow down the reappearance of the scale layer.
- Lightly tap the body of the electric heater and turn it to remove scale from the recess for the copper rod.
- Insert the tip back into the mount.
It will be interesting➡ How to solder aluminum at home
To ensure electrical safety, each time before starting work, you should inspect the insulation of the network cable for the absence of mechanical damage and melting. From time to time it is also useful to measure the insulation resistance value. The measurement is taken between the plug contacts and the tip. The value must be greater than 10 mOhm.
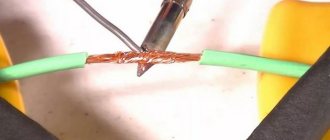
Soldering two wires
Why tin and sharpen
Tinning the tip before soldering significantly simplifies all operations with a soldering iron, which consist of transferring molten solder to the contact area. This procedure can only be avoided if the purchased soldering device has a tip covered with a protective film of silver. The silver-based coating holds solder well without compromising the thermal conductivity of the copper base.
Processing the soldering iron with rosin.
However, products with such a coating cost a lot of money; In addition, the silver film comes off over time and exposes the copper base (they say that it dissolves in the solder). So in this case, after some time, the sting will have to be tinned, one way or another. It is necessary to sharpen the tip with a file not only before tinning, but also in cases where it is necessary to give the tip a shape convenient for work. Some users prefer the tip to be sharpened to a cone. Others try to sharpen its side parts in such a way as to obtain a flat, pointed shape.
Features of coatings
Simple type soldering irons traditionally have a copper tip. The material is still used since the invention of the tool due to its high heat-conducting properties. But there is a drawback - the ability to undergo high wear. The copper burns out or dissolves in the solder. The deficiency needed to be eliminated, and manufacturers began to apply additional nickel or silver coating.
Nickel is highly durable and does not wear out. Long service life is an advantage of nickel plating. Disadvantage: poor adhesion. This tip does not hold solder well. Soldering can only be done by applying solder directly to the work area. The working area is heated with a tip, then a small amount of solder or solder paste is placed. Setting occurs due to heat.
Silver has good adhesion, but conducts heat poorly. In addition, the material is expensive. Over time, the silver wears away and exposes the copper base. This occurs because the silver coating dissolves into the solder.
The characteristics of spraying complicate operation and maintenance. Therefore, radio amateurs, especially the older generation, prefer copper soldering irons. But the copper tip has a drawback - hot copper instantly oxidizes. Interaction with air occurs only on a thin layer, but this is enough for zero adhesion. Heat is also transferred worse. The way out of this situation is to always cover the tip with a thin layer of solder .
Tin cannot be applied before soldering, as the copper underneath will begin to burn out. At the site of burnout, slag appears, due to which there is no adhesion. The master begins to be distracted from work.
Abrasive materials wear down the coating. Nickel or ceramics are applied in a thin layer to the tip - that is why they cannot be ground off. The expensive tip will turn into a copper rod.