Causes of soot
Some beginners or those who are used to working with copper tips make a fatal mistake. They clean the soldering iron tip with sandpaper, files or blades from a stationery knife. This is only true for uncoated copper tips. This method is unacceptable in principle for “eternal” stings.
There is a high risk of damaging the outer layer of the tip (a thin metal alloy), which can lead to cracks and further destruction. In addition, despite its appearance, the soot layer itself does not exceed some microns. So how to clean a soldering iron from such deposits? There are several ways.
Problem #2: Solder won't stick to the tip.
This no longer applies to new devices, but to equipment that has already been tested in operation. At some point the soldering iron stops gripping the solder. Or it does it much worse than before. Which, in turn, seriously complicates the soldering process and drives the craftsman out of patience.
Solution
The soldering iron tip loses its properties due to carbon deposits. To troubleshoot a problem, you need to know what material it is made of.
There are two options here:
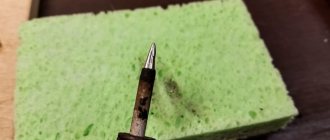
- The tip is copper. In this case, it is necessary to clean the surface of the part with a file or sandpaper. Then turn on the soldering iron, heat it up and lower it into the rosin. This method helps remove the oxide film and prepare the equipment for use. After the rosin begins to evaporate, you need to apply solder to the tip and remove the excess with a cellulose sponge or thick cotton cloth. To consolidate the effect, the operation can be repeated 2-3 times in a row;
- The sting is fireproof. That is, equipped with a special protective layer that protects the inside of the rod. Any mechanical cleaning will inevitably destroy this coating, so it is best to simply buy a new tip. But, if for some reason you do not have this opportunity, you can try to tin it with solder and rosin and continue working.
In the future, to avoid problems with the unburnt tip, always leave a little solder on its surface. This will extend the life of the part and preserve the outer protective layer from damage.
Problem #3: The soldering iron does not heat up
Do you have to wait 10-15 minutes for your soldering iron to heat up before you start working? Or maybe the tool is not at all capable of reaching the temperature required for soldering? A trivial situation familiar to every experienced radio amateur.
Solution
Most likely the heating element has failed. If the soldering iron is modern, you can simply buy a new part and replace it. Ceramic heating elements are sold in all specialized power tool stores, so you shouldn’t expect much difficulty in finding suitable spare parts.
If the soldering iron is Soviet, the situation is a little different. Old instruments were heated by the heat of a nichrome thread wound around a copper rod. Therefore, in order to restore the equipment’s power, you will have to update the winding. Please note that the shorter the thread, the lower the resistance. This means a weaker soldering iron.
Sometimes heating problems occur due to poor contact between the tip and the heating element. To restore the tool to its former power, simply check how tightly all parts of the structure fit together. And, if necessary, tighten the bolts on the body.
Problem No. 4: The soldering iron does not turn on
Sometimes the device not only does not heat up, but refuses to turn on at all. And neither switching the regulators nor checking the tip contacts helps fix this.
Solution
The first thing to do is check the voltage in the network. And then inspect and, if necessary, ring the soldering iron wire to find breaks. Most often, cables become kinked near the plug or body of the instrument, so start your inspection there.
It would also be a good idea to check the serviceability of the heating element. It may well be that it is out of order. And because of this trouble, the soldering iron temporarily stopped showing signs of life and performing its direct functions. If this is the case, replace the heater or renew the winding.
An even more affordable recovery option
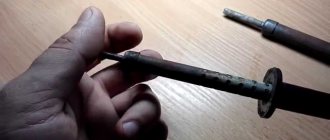
By soldering you can remove a layer of carbon deposits. We make a small bath of solder. You will need a solder rod and flux. Preferably activated (for example, LTI - 120). You can even use regular alcohol rosin. This is in the case of “light” soot, of small size.
Now we divide the solder bar into small pieces and pour a little rosin or flux (even if you have solder containing rosin, this is not enough for this case).
And we begin to bathe the tip in solder. If the solder does not melt, then you need to increase the temperature.
We coat the tip in solder from side to side, without pulling it out, so that the tip is completely enveloped. In a couple of minutes, a small amount of carbon deposits will evaporate, and it will be possible to take a little more fresh solder onto the tip after “bathing”. We leave the soldering iron heated with a drop of water for 10 - 15 minutes.
When doing this work, thoroughly ventilate the room! If the carbon deposits are still difficult to clean off after several attempts, then now you need to use soldering acid. The procedure is the same.
How to avoid blackening of the tip when soldering?
Finding out the causes of blackening is very important in order to prevent the situation from occurring in the future. Sometimes this is very difficult to avoid, as it may be related to consumables, but you should know a few basic rules:
- It is necessary to control the heating of the soldering iron so that it does not overheat. The hot tip can be seriously damaged, so you will have to replace it completely. It is better not to leave a switched-on soldering iron unattended, as there is a possibility of forgetting about it. Even overexposure for a few minutes can lead to negative results.
- Use of tools with temperature control and automatic shut-off. All technical innovations of this kind help to keep the tip in working condition for as long as possible.
- Constantly cleaning the surface after use keeps the soldering iron tip in good working shape and prevents the accumulation of substances that will lead to carbon deposits.
Cleaning the soldering iron tip
- You should mainly use consumables that do not create deposits and films, which then turn black when heated. If you cannot do without them, then after use you must clean the surface with solvents.
How to remove blackening?
Having figured out why, when soldering with rosin, the soldering iron turns black and does not take solder, it is worth understanding how to deal with this phenomenon. The main way is to clean the carbon deposits. If foreign substances and consumables are burnt on the surface, a regular sponge with a solvent or a metal equivalent for abrasive cleaning can help. Using simple movements, wipe off the carbon deposits to a shiny metal surface.
If the tip is overheated, ordinary sponges may not be able to cope. You will need to remove the top layer of metal using special tools. Drills and milling cutters will help remove the blackness, but do not overdo it so as not to damage the tip even more.
Tinning the eternal soldering iron tip
Why doesn't solder stick to the soldering iron?
The main and main reason for this problem is very strong carbon deposits on the soldering iron tip. The fact is that if there is no solder or flux residue on the soldering iron for a long time when it is turned on, then a dense layer of soot forms on the surface of the tip due to oxidation, which can no longer be cleaned off with a desoldering sponge. This is why solder rolls off the soldering iron tip.
Possible reasons
Joining metals by soldering in some cases replaces spot welding and helps ensure that parts are firmly attached to each other. But the process does not always go smoothly. When solder does not stick to the soldering iron, the cause of the problem should almost always be sought not in the material being worked with, but in a violation of the work technology. Poor care of the device leads to the fact that the tip turns black, becomes covered with oxidation products and does not melt the tin.
In addition, the working conditions may be violated - in the wind, in the open air, the material is not soldered much more often than in an equipped home workshop.
It is worth talking in more detail about what reasons lead to the fact that tin does not stick to the wire, and it is impossible to fix the connection on the board. For example, if the solder does not stick to the tip when in contact with it, the problem may be the low power of the soldering iron or its insufficient heating. Tin also does not sting for more prosaic reasons: when contamination gets into the contact zone. Its source could even be rosin - it’s worth checking all the materials if suddenly solder does not stick to the soldering iron.
Other common and common sources of such problems include the following.
- A metal alloy that is difficult to solder. Such products have to be tinned before applying solder.
- The working part of the soldering iron is heated to too high a temperature. This prevents her from heating the tin properly.
- Poor quality solder . Also, contrary to popular belief, it occurs quite often.
- Refusal to use flux . In this capacity there are substances that remove traces of oxidation from surfaces. On many alloys, solder simply will not hold without flux. However, when using it, you can also simply take an insufficient additional component.
- The soldering iron is not powerful enough . He simply cannot heat the metal to the desired state.
- Unsuitable or poor quality materials are used
- The metal is not heated. When working with electrical steels of increased hardness, this quite expectedly leads to problems.
- Accidental sticking of polymer materials to the tip. If work is carried out in inappropriate conditions, this may well happen.
- Formation of carbon deposits or a film on the metal surface resulting from oxidation. They prevent tin retention.
- Low flux concentration. When preparing the composition yourself, this happens quite often.
Source: https://stroy-podskazka.ru/pripoj/ne-lipnet/
In case of nickel plating
Soldering irons with a so-called “eternal tip” coated with a thin layer of nickel are often used for soldering. For some reason it is believed that it does not tin. In fact, who would think of sanding off a nickel coating?
However, the time comes and it becomes noticeable that the solder does not hold! At best, it sticks in small drops. So what should we do? The answer is the same - cheat!
Read also: How to properly sharpen a hand plane knife
The reason is often that the sting is dirty. First, you should still make sure that the nickel plating is not damaged.
After this you need to remove the deposits. This can be done on a slightly heated soldering iron with a damp cloth folded in several layers.
Next steps are:
- immediately after removing carbon deposits, the tip must be lowered into a jar of rosin, in which a piece of solder was previously placed;
- with a soldering iron you need to melt the rosin around the solder so that it sinks;
- under a layer of liquid hot rosin, touch the solder. It will immediately cover the entire working surface of the tip.
The best way to avoid solder not sticking is to avoid overheating the tip.
Prevention has always been the most effective remedy. If it is not possible to purchase a tool with temperature control, you can purchase a dimmable voltage regulator or make one yourself. If you monitor the heating temperature, you will have to tin the soldering iron much less often.
Is the tin not sticking to the board or is it curling into a circle? In short, if without rosin, the tin does not stick, and if with rosin, it curls into a circle and you cannot make a path.
It follows from the question that there are no tracks on the board, there are only holes for the pins of circuit elements. Probably, the author of the question has seen tin-coated tracks on printed circuit boards, but these tracks are copper or brass, they are glued to the board material and coated with tin to protect them from oxidation and make them easier to solder. But tin cannot be “sticked” to the board material. If there are no tracks on the board, then you should use tin-coated copper wire to connect the pins. You can make a printed circuit board by etching yourself, but this process is long and requires skills, materials and the ability to handle chemicals.