Tools for planar marking
Work should be performed on a flat and comfortable surface. For this purpose, marking tables are used:
- wooden;
- metal.
Basic requirements for the quality and design of tables:
- Strength and stability. To ensure strength, the table legs are connected by horizontal bars. It is recommended to install large-scale marking plates on jacks.
- Sufficient working surface area. Standard tables have dimensions: length 2000–3000 mm; width 4000–5000 mm; height 700–1000 mm. The surface area of the table must correspond to the size of sheets, tapes, strips of material.
- Convenience. Tables are equipped with various devices:
- weights for fixing sheets of light material;
prisms for installing pipes;
- clamps for securing metal sheets;
- rectangular and wedge-shaped gaskets for installing profiles and other parts.
The workplace must be provided with all the tools necessary for planar marking. The table provides a list of necessary tools and some recommendations for working with them.
| Tool | Function | Design requirements | Recommendations for use |
| Scriber | drawing marking lines on workpieces | · thin steel rod; · one end is sharpened at 45 degrees, the other is bent into a ring; · the sharp end is hardened | · to obtain thin marks, the tip must be hard and sharp; · when working, the scriber is deflected from the ruler in the direction of its movement; it must be constantly pressed against the ruler with its tip |
| Outline | drawing contours parallel to the edges of the sheet | · material: copper or steel; presence of a graphite pencil in the working part | Before applying marking marks, the evenness and accuracy of the edges along which the tool will move is checked |
| Reismus | · checking the location of workpieces; · carrying out parallel risks | · stand with scriber fixed at the required height; · fixation height is measured with a square | |
| Kerner | · construction of centers of circles or holes; · drawing holes on the marking lines | · material - hard steel; · dimensions: diameter 8-13 mm, length 90-150 mm; · the end is sharpened at 60 degrees; · there are manual and automatic (set marks of the same size) | The automatic center punch does not require a hammer to operate |
| Locksmith's hammer | percussion tool for punching | use hammers weighing 50 - 200 g | the work is performed with light movements conveyed by bending the hand “from the shoulder” |
| Squares | · construction and control of angles; restoration of perpendiculars | preferred material - metal | · it is advisable to have squares with angles of 30, 45, 60 degrees; · a square with a shelf is used to check the correct placement of parts on the plate |
| Protractor with protractor | marking corners and checking mark alignment | preferred material - metal | The position can be fixed with a hinge screw |
| Compass | · construction of circles, arcs; Transfer of dimensions from ruler to workpieces | It is recommended to harden the legs of the compass | the tip of the compass is installed strictly in the punched hole |
| Marking plate | Serves as a working surface; · used for equipment storage | · located horizontally; · must be clean and dry | placed on cabinets, stands with drawers, tables |
| Templates, stencils | simplification and acceleration of marking of similar parts | durable steel templates | ensure a tight fit of the template to the workpiece |
| Vise | tool for securing small parts | ensuring smooth tightening efforts | For fine work, a small step is recommended; for coarse clamping, a wide step is recommended. |
Marking. Purpose and types of markings.
Marking is the operation of applying lines and dots to a workpiece intended for processing. Lines and dots indicate processing boundaries.
There are two types of markings : flat and spatial.
Marking is called flat when lines and points are applied to a plane, spatial - when marking lines and points are applied to a geometric body of any configuration.
Spatial markings can be made on a marking plate using a marking box, prisms and squares. When marking in space, prisms are used to rotate the workpiece being marked.
For flat and spatial marking, a drawing of the part and a workpiece for it, a marking plate, a marking tool and universal marking devices, a measuring tool and auxiliary materials are required.
Marking tools include: scriber (with one point, with a ring, double-sided with a curved end), marker (several types), marking compass, punches (regular, automatic for stencil, for circle), calipers with a conical mandrel, hammer, center compass , rectangle, marker with prism.
Marking devices include: a marking plate, a marking box, marking squares and bars, a stand, a thicknesser with a scriber, a thicknesser with a moving scale, a centering device, a dividing head and a universal marking grip, a rotating magnetic plate, double clamps, adjustable wedges, prisms , screw supports.
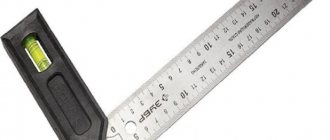
Measuring tools for marking are: a ruler with divisions, a thickness gauge, a thickness gauge with a moving scale, a caliper, a square, a protractor, a caliper, a level, a control ruler for surfaces, a feeler gauge and standard tiles.
Auxiliary materials for marking include: chalk, white paint (a mixture of chalk diluted in water with linseed oil and the addition of a composition that prevents the oil from drying out), red paint (a mixture of shellac with alcohol with the addition of dye), lubricant, washing and etching materials, wooden blocks and slats, a small tin container for paints and a brush.
Simple marking and measuring tools used in plumbing work are: a hammer, a scriber, a marker, an ordinary center punch, a square, a compass, a marking plate, a graduated ruler, a caliper and a caliper.
Planar or spatial marking of the part is carried out on the basis of the drawing.
Before marking, the workpiece must undergo mandatory preparation, which includes the following operations: cleaning the part from dirt and corrosion (do not do it on a marking plate); degreasing the part (do not do it on a marking plate); inspection of the part in order to detect defects (cracks, cavities, bends); checking overall dimensions and processing allowances; determination of the marking base; covering with white paint the surfaces to be marked and lines and dots applied to them; determination of the axis of symmetry.
If a hole is taken as a marking base, then a wooden plug should be inserted into it.
A marking base is a specific point, axis of symmetry or plane from which, as a rule, all dimensions on a part are measured.
Penciling is the operation of applying small dots-indentations on the surface of a part. They define the centerlines and hole centers required for machining, certain straight or curved lines on the product. The purpose of marking is to mark persistent and noticeable marks on the part that define the base, processing boundaries or drilling location. The punching operation is performed using a scriber, a center punch and a hammer.
Marking using a template is used in the manufacture of a significant number of identical parts. A template made of tin 0.5–2 mm thick (sometimes stiffened with a corner or wooden strip) is placed on the flat surface of the part and traced along the contour with a scriber.
The accuracy of the applied contour on the part depends on the degree of accuracy of the template, the symmetry of the scriber's tip, as well as on the method of advancing the scriber's tip (the tip must move perpendicular to the surface of the part). The template is a mirror image of the configuration of parts, lines and points that must be applied to the surface of the part.
The accuracy of marking (the accuracy of transferring dimensions from the drawing to the part) depends on the degree of accuracy of the marking plate, auxiliary devices (squares and marking boxes), measuring instruments, the tool used to transfer dimensions, on the degree of accuracy of the marking method, as well as on the qualifications of the marker. The marking accuracy is usually from 0.5 to 0.08 mm; when using standard tiles - from 0.05 to 0.02 mm.
When marking, you should handle sharp scribers with care. To protect the worker’s hands before marking, it is necessary to put a cork, wooden or plastic cover on the tip of the scriber.
To install heavy parts on the marking plate, you should use hoists, hoists or cranes.
Spilled oil or other liquid on the floor or marker board may cause an accident.
Purpose and types of markings.
The main purpose of marking is to indicate the boundaries to which the workpiece must be processed. Depending on the shape of the blanks to be marked for parts, markings are divided into planar and spatial (volumetric).
Planar marking is carried out on the surface of flat parts, on the surface of flat parts on strip or table material and consists of applying contour and parallel perpendicular lines, circles, arcs, geometric figures according to zonal dimensions or contours of various holes to the workpiece.
To mark individual spatial parts located at different angles to each other in different planes, the markings of these individual surfaces are linked to each other. Devices for planar marking are marking plates, pads, rotating devices, jacks. Tools for spatial marking: scriber, farmers, compasses, marking rod - compass, ruler, squares.
Before marking, you need to do the following: clean the workpiece from dirt, traces of corrosion, carefully inspect the workpiece to identify holes and cracks. Study the drawing and mentally place the marking plan, determine the bases (surface) of the workpiece from which dimensions should be set aside, prepare the surfaces for painting. For painting, various compositions of chalk diluted in water, a solution of copper sulfate (CuSO4), alcohol varnish, and quick-drying varnishes and paints are used. To save time, simple workpieces are often processed without preliminary marking.
For example, in order for a toolmaker to make an ordinary key with flat ends, it is enough to cut off a piece of square steel from a bar of a certain size, and then saw it to the dimensions indicated on the drawing.
Blanks are received for processing in the form of castings (produced from metal poured into pre-prepared molds - earthen, metal, etc.), forgings (produced by forging or stamping), or in the form of rolled material - sheets, rods, etc. (obtained by passing metal between rollers rotating in different directions, having a profile corresponding to the resulting rolled product),
Planar marking – Plumbing
Planar marking can be done by direct drawing, using a template (which consists of placing a template on the part to be marked and drawing on it, followed by marking the contours of the lines) and using a template that is used as a template.
Example 1. Marking the lock washer for the adapter sleeves for ball bearings.
2. Clean one of the planes and seal the marking areas.
3. Draw two center lines at right angles to one another. Mark the center.
4. From the center, using a compass solution, draw three circles with radii 15.5 onto the given circles; 19.5 and 25 mm.
5. Construct central angles.
6. Mark the external splines.
7. Mark the internal slot.
8. Mark the contours of the washer.
Example 2. Marking a keyway on a shaft.
1. Clean the marked areas on the roller.
2. Paint the end of the roller and the part of the side surface on which the marks will be made with vitriol.
3. Find the center at the end using a center finder.
4. Place the roller on the prism and check its horizontalness.
5. Apply a horizontal line passing through the center at the end of the roller using a thickness gauge.
6. Turn the roller 90° and check the verticality of the drawn line against the square.
7. Draw a horizontal line on the end of the roller using a thickness gauge.
8. Draw a line on the side surface of the roller with a thickness gauge.
9. Draw two lines on the side surface corresponding to the width of the keyway, and on the end - approximately to the depth of the groove.
10. Turn the shaft with the key marks upward and draw a line for the depth of the keyway at the end.
11. Mark the contours of the keyway.
§ 14. Preparation for marking
Before marking
you need to do the following:
clean the workpiece from dust, dirt, scale, traces of corrosion with a steel brush and DR-;
carefully inspect the workpiece, if any holes, bubbles, cracks, etc. are found, measure them accurately and, drawing up a marking plan, take measures to remove these defects during further processing (if possible). All dimensions of the workpiece must be carefully calculated so that after processing there are no defects left on the surface;
study the drawing of the part to be marked, find out the features and dimensions of the part, its purpose; mentally outline the marking plan (installation of the part on the plate, method and order of marking), pay special attention to processing allowances. Allowances for processing, depending on the material and size of the part, its shape, and method of installation during processing, are taken from reference books; determine the surfaces (bases) of the workpiece from which dimensions should be taken during the marking process
For planar marking, the bases can be the processed edges of the workpiece or the center lines, which are applied first. It is also convenient to take tides, bosses, and plates as bases;
determine the surfaces (bases) of the workpiece from which dimensions should be taken during the marking process. For planar marking, the bases can be the processed edges of the workpiece or the center lines, which are applied first. It is also convenient to take tides, bosses, and plates as bases;
prepare surfaces for painting.
Rice. 44. Applying paint to the workpiece
Surface painting
. Various compositions are used for painting.
Chalk diluted in water. For 8 liters of water take 1 kg of chalk. The composition is brought to a boil, then to protect the paint layer from abrasion, liquid wood glue is added to it at the rate of 50 g per 1 kg of chalk. After adding glue, the composition is boiled again. To avoid damage to the composition (especially in the summer), add a little linseed oil and a drier to the solution, which speeds up the drying of the paint. Black untreated workpieces are coated with this paint. Painting is done with paint brushes, but this method is not very productive. Therefore, when possible, especially with large parts or a large batch of them, painting is performed using sprayers, which, in addition to speeding up the work, provide uniform and durable painting.
Ordinary dry chalk. They rub the marked surfaces with it. The coloring is less durable. This method is used to paint the untreated surfaces of small non-critical workpieces.
Copper sulfate solution. For one glass of water, take three full teaspoons of vitriol and dissolve it. The surface, cleared of dust, dirt and oil, is covered with a solution of vitriol with a brush or lump copper sulfate is rubbed on the surface moistened with water to be marked. The markings are done after the vitriol has dried.
A thin layer of copper is deposited on the surface of the workpiece, onto which marking marks are well applied. This method is used to paint only steel and cast iron workpieces with surfaces pre-treated for marking.
Alcohol varnish. Fuchsin is added to a solution of shellac in alcohol. This painting method is used only for precise marking of the treated surfaces of small products.
Quick-drying varnishes and paints are used to coat the surfaces of large machined steel and cast iron castings. Non-ferrous metals, hot-rolled sheets and profile steel materials are not painted with varnishes or paints.
When applying paint (Fig. 44), the workpiece is held in the left hand in an inclined position. A thin and uniform layer of paint is applied to the surface with cross vertical and horizontal brush movements. To avoid drips, apply the solution only with the end of the brush in a small amount.
Planar marking presentation for the lesson
Slide 1
Developed by: Gurushkin V.V. St. Petersburg State Educational Institution “COLLEGE OF SHIPBUILDING AND APPLIED TECHNOLOGIES” Specialization: “Shipfitter” Presentation for an open lesson on the topic “MARKING”
Slide 2
The purpose of this lesson The purpose of this lesson is: - Educational - to teach techniques for planar marking using marking and measuring tools and devices; — Developmental – to develop competent technical speech, independence and a sense of responsibility, self-control and mutual control, imagination, logical memory and attentiveness in students; - Educational - to cultivate the professional qualities of the future mechanic, careful attitude to tools and equipment, accuracy, independence, clarity in work, love in the chosen specialty, a sense of responsibility, the desire to work productively, to do the job efficiently. © Gurushkin V.V., Korovkin V.N. St. Petersburg State Pedagogical University KS and PT December 2021 1
Slide 3
Marking and types of marking Marking is a metalworking operation in which lines (marks) are applied to the workpiece, defining the contours of the future part. Marking is divided into planar and spatial. Planar marking is a marking that is performed on the surface of a workpiece lying in the same plane. Spatial marking is the marking of workpiece surfaces located in different planes at different angles to each other. © Gurushkin V.V., Korovkin V.N. St. Petersburg GBPOU KS and PT December 2021 2
Slide 4
Specialized marking tools Specialized marking tools include: scribers, center punches, marking compasses, rulers, squares, calipers. © Gurushkin V.V., Korovkin V.N. St. Petersburg GBPOU KS and PT December 2021 3
Slide 5
Scribler A scriber is a tool with which lines (marks) are applied to the marked surface of the workpiece using a ruler, square or template. © Gurushkin V.V., Korovkin V.N. St. Petersburg GBPOU KS and PT December 2021 4
Slide 6
Punch punch A puncher is a metalworking tool used for making recesses (cores) on pre-marked lines. © Gurushkin V.V., Korovkin V.N. St. Petersburg GBPOU KS and PT December 2021 5
Slide 7
Marking compasses Compasses - used for marking circles and arcs, for dividing segments, circles and geometric constructions. Compasses are also used to transfer dimensions from measuring rulers to a part. Compasses of various designs © Gurushkin V.V., Korovkin V.N. St. Petersburg GBPOU KS and PT December 2021 6
Slide 8
Marking caliper © Gurushkin V.V., Korovkin V.N. St. Petersburg GBPOU KS and PT December 2021 7 Marking calipers - designed for precise marking of straight lines and centers and used for marking circles of large diameters.
Slide 9
Square A square is a tool necessary for drawing lines, constructing angles and adjusting and checking them. © Gurushkin V.V., Korovkin V.N. St. Petersburg GBPOU KS and PT December 2021 8
Slide 10
Organization of a mechanic's workplace © Gurushkin V.V., Korovkin V.N. St. Petersburg State Budgetary Educational Institution KS and PT December 2021 9 Properly put on and put in order work clothes, tuck them in so that there are no hanging ends, tuck hair under the headdress and prepare personal protective equipment (gloves, safety glasses); 2. Organize your workplace so that, if necessary, all tools and devices are nearby, check that there is sufficient lighting in the workplace; 3. Prepare the necessary working tools. Devices that meet the following requirements: a) the hammer must have a slightly convex surface of the striker, unbroken, without burrs, hardening, gouges, dents and must be secured to wooden handles; b) the handles of the hammers must be made of dry wood of different species (oak, beech, ash). Straight, oval in cross-section with a slight thickening towards the free end. Have no cracks. c) files should be tightly placed on smoothly cleaned handles, secured with metal rings.
Slide 11
Safety precautions during work © Gurushkin V.V., Korovkin V.N. SPb GBPOU KS and PT December 2021 10 Use only serviceable tools and devices, keep the workplace in proper order. Place blanks, tools, products in separate places for them. Avoid cluttering the workplace and space; 2. Clean the surfaces of parts to be reworked, as well as remove chips with a broom or rag; 3. The workpieces are securely secured in a vice and tools; 4. A tool with a sharpened blade or point should be passed to another person forward with the handle or blunt end.
Slide 12
Safety precautions in emergency situations and upon completion of work © Gurushkin V.V., Korovkin V.N. SPb GBPOU KS and PT December 2021 11 In emergency situations: if a malfunction of a tool or equipment is detected, you must immediately stop work and notify the foreman; If you receive an injury, you must immediately inform the foreman and go to the medical center of the educational institution. At the end of the work: check the availability of the tool, put it in the locker or hand it over to the master; remove the workpiece parts from the workbench and place them in the place designated for them; remove metal shavings and dust into a special container. Lubricate the rubbing parts of the vice and clean with a brush; clean the workshop premises and remove production waste; report all comments and malfunctions to the technician; wash your hands with warm water and soap.
Slide 13
Flange © Gurushkin V.V., Korovkin V.N. St. Petersburg GBPOU KS and PT December 2019 A flange is a flat piece of square, round, or other shape with holes for bolts and studs, used for a strong (joints of long building structures, for example, trusses, beams, etc.) and hermetically sealed connection of pipes and pipeline fittings , connecting pipes to each other, to machines, apparatus and containers, to connect shafts and other rotating parts (flange connection). 12
Slide 14
Preparing the workpiece for marking © Gurushkin V.V., Korovkin V.N. St. Petersburg GBPOU KS and PT December 2021 Preparing the metal surface for marking: Before marking, you must do the following: Clean the workpiece from dust, dirt, scale, traces of corrosion with a steel brush or sandpaper; Carefully inspect the workpiece and remove (if necessary) visual defects on it. Study the drawing of the part to be marked; Select the base surfaces from which you will have to set aside dimensions for applying marking marks (lines). For planar marking, the bases can be the processed edges of the workpiece or the center lines, which are applied first. 13
Slide 15
© Gurushkin V.V., Korovkin V.N. St. Petersburg GBPOU KS and PT December 2021 The figure shows the specification of the flange and its linear dimensions 14 Specification of the required flange
Slide 16
© Gurushkin V.V., Korovkin V.N. St. Petersburg GBPOU KS and PT December 2019 Stages of applying a solution of copper sulfate to a metal workpiece: It is necessary to carry out a visual inspection of the workpiece; Clean the workpiece from dust, dirt, scale and corrosion; Using a brush, apply a uniformly thin, even layer of copper sulfate solution to the workpiece; Coloring is performed in the following sequence: the workpiece is taken in the left hand and held obliquely. With the other hand, dip the end of the brush and a small amount of dye, then apply it to the surface in an even thin layer using cross (vertical and horizontal) movements. The painted surface is dried until completely dry. 15 Applying a solution of copper sulfate to the workpiece
Slide 17
Marking the flange blank © Gurushkin V.V., Korovkin V.N. St. Petersburg GBPOU KS and PT December 2021 Stages of marking the flange blank: On a rectangular or square metal blank, it is necessary to find the geometric center by intersecting the diagonals from the corners of the sheet. To perform this operation you will need a metal ruler and scriber; Using a center punch, a notch is made at the intersection of the diagonals to mark the geometric center. To perform the current operation, you will need a hammer and a center punch; Next, on the compass, you need to set the radius of the desired outer (r=60 mm) and inner circles (r=10 mm) of the workpiece. To find the radius value, a measuring ruler is used; On the edge of the outer circle, vertically or horizontally at an angle of 90 degrees, using a scriber and a ruler, we make reference notches in two places; On the compass we leave the radius of the outer circle (r=60 mm) and from the reference point we make a notch on the side of the outer circle to the left and to the right. Next, we perform this operation sequentially, dividing the circle into six equal parts; Then we apply a measuring ruler so that the geometric center of the outer circle and one of the marks on its edge are connected in a straight line. At a distance of 44 mm from the center we make a notch (do this operation 6 times); Using a ruler on a compass, set the radius of the holes (r= 6 mm) and mark them on the workpiece in 6 places. 16
Slide 18
© Gurushkin V.V., Korovkin V.N. St. Petersburg State Pedagogical University KS and PT December 2019 Errors in size. This error is the result of an inattentive reading of the drawing by a marker who did not understand the linear dimensions shown in the drawing. The marker, if he does not understand it himself, must turn to the master for clarification; Inaccuracy in setting dimensions using a scale ruler. Here the fault may be either the negligence of the marker, or his lack of sufficient skills in using marking and measuring tools; Incorrect size setting, i.e. using as a bang the wrong surfaces from which markings should have been made. 17 Types of defects and ways to eliminate them
Slide 19
© Gurushkin V.V., Korovkin V.N. St. Petersburg GBPOU KS and PT December 2021 18 Ensuring order in the workplace When performing a task at your workplace, you must maintain order: the measuring tool must be placed separately from the worker on a tablet; More frequently used tools should be placed closer to you, less frequently used tools should be placed further away; you need to differentiate between the tool used by the right and left hand and also place it on the workspace; you need to train yourself to pick up an instrument without looking or searching for it first. To do this, it is necessary to place each item in the same place; When performing work, it is necessary to put the parts in a certain place and in the appropriate order.
Slide 20
Thank you for attention! Developed by: Gurushkin V.V., Korovkin V.N.
Marriage during marking
Defects in the application of planar markings have a negative impact on further processing operations of the workpiece and the quality of the resulting parts. If errors are identified early, they can be eliminated. Otherwise, the entire workpiece is rejected and becomes a production waste.
Common types of defects and the reasons for their occurrence are given in the table.
| Marriage | Cause of occurrence |
| Errors in transferring dimensions | · incorrect reading of the drawing or distortion of dimensions on it; · non-compliance with the sequence of operations; · improper use of tools; · carelessness of the marker |
| Error in setting dimensions when using a scale bar | carelessness or lack of skill on the part of the marker |
| Incorrect dimensions on the workpiece | · incorrect definition of databases; · inaccuracy of the measuring instrument |
| Distortions | · careless fixation of workpieces, leading to their displacement; · wear of the marking plate |
| Inaccurate placement of fixtures on the workpiece surface | · carelessness of the marker; · poor quality of surface preparation |
Thus, planar marking is an important stage in the production of metal products. The quality of the resulting product depends on its accuracy.
If you find an error, please select a piece of text and press Ctrl+Enter.
Marking – Plumbing
Marking lines (marks) are applied with a scriber. The marks should be as thin as possible, this increases the accuracy of the markings. When drawing a marking line, the scriber must have a double inclination: one towards the ruler, the other in the direction of its movement. In both cases, the angle of inclination is 75-80°. The marking line should be carried out clearly, in one go. To preserve traces of markings during machining, marking lines are punched, that is, small conical depressions are made along the marks using a center punch. To do this, take the center punch with three fingers of the left hand and, tilting away from you, press it tightly to a point on the marking line so that the tip of the punch coincides with the middle of the mark. Then quickly turn the punch to a vertical (plumb) position and apply a light blow with a hammer weighing 100 g.
Before you begin marking, you should determine or apply the base lines (bases).
Such lines for planar marking can be center lines, as well as the edges of strip or sheet metal.
After finding the bases, the following order of drawing marking lines is recommended: first, all circles, arcs, inclined and curved lines are drawn, then horizontal lines, then vertical lines (depending on the specific marking conditions, this rule may be violated in some cases).
To mark circles in parts with the center located in the hole, a lead or wooden strip is inserted there (into the hole).
The center of the circle is located and marked on this plate, and a circle is drawn from the center with a given radius using a compass.
When marking holes, two circles are usually drawn, the second of them, the so-called control circle, is outlined in a slightly larger size. The main circle is cored quite densely, and on the control circle they place cores only at the points of intersection with the axes or do not place them at all. After making a hole, its concentricity with respect to the reference circle determines the correctness of boring (or drilling).
Applying marks
The standard regulates the procedure for drawing marking lines:
- horizontal;
- vertical;
- inclined;
- curvilinear.
Applying curved elements after straight ones provides another opportunity to check their accuracy. The arcs must close the straight lines, the interface must be smooth.
Tools for marking
Direct marks are carried out with a well-sharpened scriber, without tearing off, in one step. At the same time, the scriber is tilted away from the ruler or square so as not to introduce distortions.
Parallel lines are drawn using a square and moving it along the reference ruler to the required distance.
If the workpiece already has holes, then a special tool, a center finder, is used to attach marking lines to them.
Center finder
In order to mark inclined lines, use a marking protractor with a hinged ruler fixed at its zero point.
Marking protractor
For particularly precise markings in plumbing, calipers are used. They allow you to measure distances and scratch marks with an accuracy of hundredths of a millimeter.
Characteristics of flat markings
The purpose of different types of markings is to correctly, correctly and without flaws transfer to the workpiece the dimensions required during the manufacture of the part. The error allowed when performing this is 0.2–0.5 mm.
The main feature of planar marking is its complexity. Therefore, this operation is best used in small-scale and individual production. In mass production, dimensions are transferred using stencils, templates, and jigs.
In this case, it is important to coordinate all the lines with each other in space. This marking is also called “volumetric”
Markings are applied using marking marks. They are lines with special recesses made using the punching method.
Devices for planar marking
To carry out markings, marking plates, pads, rotating devices, jacks, etc. are used.
The parts to be marked are installed on the marking plate and all fixtures and tools are placed. The marking plate is cast from fine-grained gray cast iron.
The size of the slab is chosen so that its width and length are 500 mm greater than the corresponding dimensions of the workpiece to be marked. The surface of the stove must always be dry and clean. After work, the slab is swept with a brush, thoroughly wiped with a rag, greased with oil to protect against corrosion and covered with a wooden shield.
Spatial marking
For spatial marking of cylindrical workpieces, a special prism has been developed, in which the arc of the clamp does not protrude beyond the edges of the prism. This makes it possible to periodically rotate the prism with the workpiece and simultaneously mark horizontal and vertical marks or check cylindrical and square surfaces.
There are planar and spatial markings. The permissible deviations from the perpendicularity of the side surfaces are also standardized.
There are flat and spatial markings.
In spatial marking, horizontal lines are conventionally called marks (for example, a and b) formed by the intersection of planes a and P, parallel to the marking plate, when the part is first installed.
When marking in space, treated surfaces are taken as bases, and if they are absent, the surface that will not be processed is taken as bases.
When marking spatially, work begins with drawing the main center and axial lines, and from them all other lines are drawn in accordance with the dimensions indicated on the drawing. First, all the horizontal lines are drawn, then all the vertical ones, after which the inclined lines are drawn and, finally, circles and roundings. In this case, the dimensions must be taken according to the scale ruler in accordance with the dimensional numbers in the drawing. You cannot take the size directly from the drawing, since the image of the part in the drawing can be made to scale.
| Vertical measuring ruler. |
For spatial marking, a surface planer is widely used. They apply horizontal marks, and after re-edging the parts, vertical marks are applied, and the correct installation of the part on the slab is checked with a thicknesser.
When marking spatially, the correct relative position of the surfaces must be ensured.
When marking in space, treated surfaces are taken as bases, and if they are absent, the surface that will not be processed is taken as bases.
| Marking the hole. |
When spatially marking workpieces, it is necessary to apply horizontal, vertical and inclined marks. These mark names are retained even when the workpiece is rotated during the marking process. If, for example, the marks in the initial position of the workpiece were drawn horizontally, then, although they became vertical when the workpiece was turned by 90, so as to avoid confusion, they continue to be called horizontal.
When spatially marking workpieces, it is necessary to apply horizontal, vertical and inclined marks. These mark names are retained even after the workpiece is rotated during the marking process. If, for example, the marks were drawn horizontally when the workpiece was initially laid out, then although they became vertical after turning the workpiece by 90 degrees, so as to avoid confusion, they continue to be called horizontal.
For precise spatial markings, the method of rotating the part and installing it in several positions is often used. To be sure that the rotation of the part by 90 will be done correctly, the two mutually perpendicular sides of the marked part are carefully processed and adjusted to precise markings using a straight edge and a square. These two sides further serve as the basis for precise marking and all further processing. Designers designing a part select such surfaces in advance and set all dimensions (coordinates) from them. These surfaces must be treated especially carefully.
When marking spatially, parts are usually marked in several positions, and they are installed on the marking plate not in an arbitrary position, but so that most of the marks that need to be marked on the part, and, in particular, one of the main axes of symmetry of the part (if any) ), was parallel to the plane of the marking plate.