The modern process of washing things does not require much effort and time. The laundry is simply placed in the drum of the washing machine, powder is added, the required operating mode is set, and the machine takes over the rest of the work. The unit works efficiently, but in order to extend its service life, you must follow all the rules for using the equipment. These include the issue of connecting to communication lines, for which you need to know what adapters are used for the washing machine to sewer and water.
Regular ¾ adapter
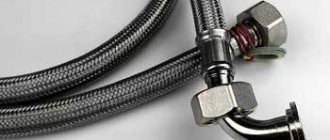
We can talk a lot about the different types of adapters used to connect a washing machine. But let's start with simple connecting elements that allow you to connect drain and water intake hoses with pipelines, mixing devices and other hoses. Note that the thread diameter may differ on each side. Let's look at several options:
- adapter for the machine connecting a pair of cold water hoses. Why is this necessary? First of all, this element is necessary in a situation where there are two short hoses for the machine that do not reach the collection point. In such a situation, it is more profitable to purchase an adapter for connecting hoses than to purchase a new hose that is suitable in length. By the way, such an adapter is not used for drain hoses;
- adapter connecting the water intake hose and the liquid supply point. The element is simple, with internal and external threads, called “male” and “male”. One of them is used when connecting a hose, the other is necessary to screw into a branch prepared in advance with a ready-made thread;
- adapter for SMA for drainage or water intake with internal threading of ¾ turns. For its manufacture, nickel-plated brass is used;
- adapter element saddle ¾ for washing device for connection. With its help, a quick insertion into a pipe is performed, which does not require alterations or dismantling. Using a saddle, you can connect the water intake hose to any point, which is very convenient. The saddle is fastened to the pipe with bolts; the rubber sealing element included in the adapter kit is inserted at the insertion point;
- the simplest ¾ device with a water filter. It is recommended to install such an adapter on the filling hose of the machine to connect it to the pipe. It has two threads - external and internal. The peculiarity of this adapter is that the filter located inside performs rough cleaning of the water entering the washing equipment. This transition element is not used for the connection at the drain point.
Connecting a washing machine to water supply and sewerage: useful tips
Before buying a washing machine, many people wonder how to properly connect it to communications. There are two options for the development of events: call a professional craftsman or do all the work yourself. Self-installation is a responsible undertaking; you will need to observe all the details, correctly connect the inlet hose to the water supply, and drain the drain into the sewer. It is important to choose a place for installation and correctly supply the device with power. Instructions and useful tips will help you avoid getting confused during all stages of installation.
Complex adapter ¾
This name refers to transition elements for three or more outlet holes with the same number of threads. At the same time, complex devices are often equipped with valves, filters, flaps and other devices that allow additional tasks to be performed during connection:
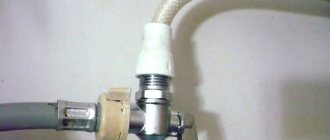
- Tee through passage with valve for washing device. The most popular option, used quite often by specialists. With its help, the water intake hose is connected to the water through the existing mixer;
- corner type adapter with water tap. They are used to connect washing equipment in places where the hose should only be positioned at an angle. This adapter is not used for sewer drainage, but it is used to make a reliable and aesthetic connection of the filling hose to the water supply;
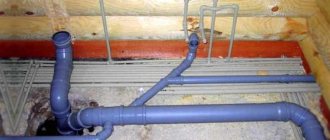
- triple adapter made of plastic material for the drain hose of the washing unit. The element is quite unusual; it is used to ensure the drainage of liquid into the sewer system. A drain hose is connected through one of its outputs, the second is connected to a siphon, and another (thin) one is designed to drain condensate that accumulates when drying things (if the washing machine has such a function);
- The branching adapter is designed to simultaneously connect a pair of water intake hoses. The peculiarity is that two water consumers are connected to one pipe at once. This adapter option is not used for draining water from the washing machine.
Adapters for washing machine to sewer and water
Has the equipment been purchased and delivered to your home?
Great, but now there is a need for installation and connection. A correctly selected adapter for a washing machine will help you easily connect the device to the water and drain. Situations vary, as does the distance from the washing machine to the nearest utilities. Therefore, to connect the machine to the water supply, an adapter with a shut-off valve and a 1/2 or 3/4 thread may be useful. The connector will serve as an extension cord, which will allow communications to be connected to the sewer. What types of adapters are there for a washing machine?
Water connection
If you use a standard hose, you will have to extend the outlet from the water pipe with a ¾ thread, at least five turns, without a restrictive collar. The threads must be smooth and thick enough, since the joint will be sealed with a gasket.
There are several ways to connect to a pipe:
- outlet for the tank. Typically performed in old houses. To connect, just purchase a three-wire tap for a washing machine. It is best if it is a ball model, which does not require additional maintenance and has a long service life. The handle should be long for ease of use. It is necessary to close the cold water supply, unscrew the connection to the drain tank, wind up the threaded connection and screw on the outlet with the internal thread of the faucet itself. We connect the flexible connection of the tank to the valve, connect it to the inlet hose of the machine, open the tap and check the connections for leaks;
- connection in front of the mixer. This connection scheme involves extending the mixing element relative to the wall by seven to eight centimeters. This connection method is performed when washing equipment is installed in place of a dismantled washbasin. You should turn off the water, unscrew the mixer and the eccentrics. The external threads of the tap and extension element are wound up. The valve is screwed into the corner, socket or pipe coupling, and the extension cord is connected to the hot supply. The faucet and extension are screwed into the internal threads, alignment is performed, after which the mixer is mounted;
- installation under the kitchen sink. The tap is installed between the inlet and the mixer hose. Having turned off the water, unscrew the nut on the flexible connection, wind up the connection, and screw it onto the tee tap. All that remains is to connect the liner using the valve thread;
- connecting the washing machine at the entrance to the room. Close the water supply tap, tighten the locknut, clearing the threads of paint. We remove the old winding, drive the coupling, and unscrew the valve strip. Having twisted the coupling on the squeegee, we screw the tee into the free space, then the squeegee, winding up a short section of the thread intended for the valve. Having wound the thread from the side of the room, we drive the tee, turning it with a side outlet parallel to the wall. Tighten the locknut, install the faucet and the transition element;
- saddle. With this simple connection, it is possible to insert into any section of a cold pipeline, even if it is under pressure. The insertion point is cleaned of paint and corrosion, the saddle is positioned, and its fastenings are tightened. The tap thread is wound up and screwed into the saddle. All that remains is to open the tap, place a container underneath and drill the liner, passing the drill through the tap and the saddle adapter. If work is carried out without shutting off the water supply, a hand drill should be used. When water appears under pressure, remove the drill, close the tap, screw in the adapter ¾.
Unpacking the machine
Manufacturers take great care in transporting their goods. The washing machine is carefully packaged. They do this in order to prevent damage during transportation.
The machine must be freed from its original packaging and the transport bolts that secure the device tank must be removed. They are easily unscrewed, and plugs are attached instead.
Attention! Do not operate the washing machine with transport bolts, as this may cause damage. The warranty does not cover such a problem.
Connecting the drain
There are also several ways to do this:
- on the edge of the bathtub or sink. A simple option is to fix the hose in a suspended position above the bathtub or sink. There is one drawback - you cannot use plumbing points during the washing process. There is also a positive point - draining dirty water containing detergents perfectly flushes the sewer, eliminating blockages;
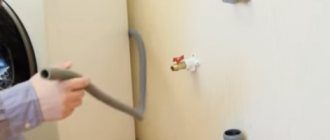
- installation of a tee under the siphon. The drain hose is directed into a tee mounted in the sewer socket. The peculiarities are that the tap and tee are connected hermetically to prevent odors from the sewer system from entering the room. An oblique type tee should be used, having a side outlet turned upward;
- installing a tee in the comb. It is best to install a separate element by cutting it into the comb of the sewer system. For this option, a straight tee is suitable, the upper outlet of which should be raised by fifty centimeters. To prevent water from leaving the washing machine by gravity.
Choosing a location for installation
In a standard apartment there are several places where you can place a washing machine - a bath, toilet or kitchen. Narrow appliances with horizontal loading of laundry are usually placed in the toilet. In exceptional cases, the machine is installed in the corridor or pantry, if opportunities permit.
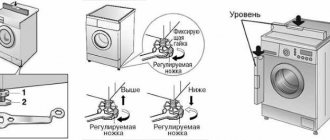
The main condition for choosing a place for a washing machine is a perfectly flat floor surface.
Advice. It is best to install the machine on a concrete floor. In this way, vibrations during operation can be reduced. And the twist-out legs will help ensure the correct position of the device.
Electrical network for washing machine
The work on connecting the machine seems to be completed, but one important detail remains - the power supply.
Advice. Preferably use a three-wire outlet. Protect yourself and ground the distribution board.
If you need an extension cord, only use one that is grounded.
A good option would be to connect the device with a separate wire from the electric meter. It has automatic protection installed. If such a wire has not been laid, then a portable RCD can be used.
Connecting a washing machine to communications is not a difficult task, but requires attention. Of course, it is better to leave it to professionals who will take care of all the aspects in order to further ensure the safe operation of the device. Do-it-yourself installation comes with many risks, but if you are prepared for them, then get to work.
Installation and connection of the washing machine: video
Required Tools
Connecting a washing machine will require you not only to study the instructions or your own knowledge, but also to have some tools. So, prepare:
- adjustable and gas wrench;
- ball valve;
- fitting, tee or ferrule (depending on the type of pipe);
- threaded adapter;
- withdrawal - as necessary;
- flexible hose.
We install a tee in the water supply
Such devices are convenient to use if you have plastic pipes at home. In the case of metal pipes, installing a faucet without special tools will be much more difficult.
Regular tees do not require plumbing fixtures, just a water pipe. But, unlike straight-through valves, they require a larger set of tools.
Tools and spare parts
To install the tee you will need:
- an adjustable wrench - you can’t go anywhere without it, you need to tighten the nuts with something;
- a double hose is only needed if one is not included with the washing machine;
It happens that “original” hoses are supplied of dubious quality. In order not to flood yourself and your neighbors, it is better to buy a good reinforced hose with a double wall , and leave the first one in reserve.
- calibrator for plastic pipes - necessary for correctly connecting the tee to the pipeline;
You can do without a calibrator, but if the pipes are cut crookedly and the tap begins to leak, you will have to change the entire piece of the pipeline.
- consumable spare parts - o-rings, windings, nuts to make all connections more reliable;
- flow filter – used for water purification.
Whether or not to use the latter is your choice. On the one hand, it will have to be periodically changed or cleaned, on the other hand, your device may last longer, since the quality of water in the domestic water supply leaves much to be desired.
Tee installation
Once you have acquired all the necessary spare parts and tools, you can proceed to installing the device:
- First of all, turn off the water to this section of the pipeline (or to the entire apartment, if there is only one tap).
- Next, you need to mark the required section of pipe for cutting. To do this, measure the length of the tee, but do not forget that you do not need to count the threaded connections, since they must overlap both ends of the pipe.
- Cut a measured section of pipe.
- First, remove the mounting nuts from the valve and then place them on the ends of the pipe.
Here you will need a calibrator. They need to widen and align the holes in the pipes, and then install the faucet.
- Install the tee and tighten the nuts.
After this, you can connect the hose to the tee, having previously wound the FUM tape onto its thread.
